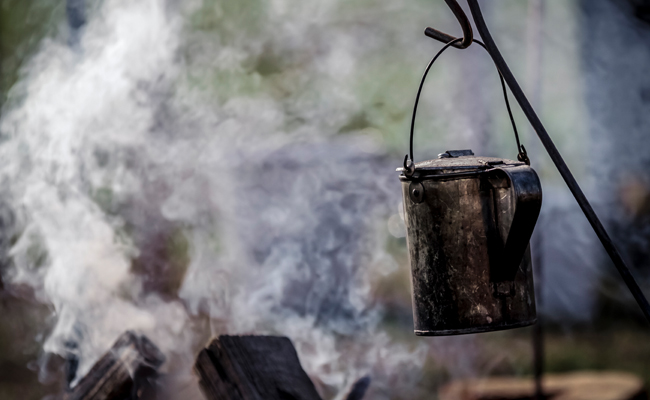
“Little campfires, rapidly increasing to hundreds in number, would shoot up along the hills and plains and, as if by magic, acres of territory would be luminous with them. Soon they would be surrounded by the soldiers, who made it an almost invariable rule to cook their coffee first, after which a large number, tired out with the toils of the day, would make their supper of hardtack and coffee, and roll up in their blankets for the night. If a march was ordered at midnight…it must be preceded by a pot of coffee…It was coffee at meals and between meals; and men going on guard or coming off guard drank it all hours of the night.” ~John Billings, 1887, writing of the Civil War in Hardtack and Coffee
Brain juice. Battery acid. Bean juice. Brew. Cuppa. Cuppa joe. Daily grind. Java. Jet fuel. Mud. Murk. Go juice. Wake-up call. Perk. Roast. Jamoke.
There are as many nicknames for coffee as there are ways to make it. It’s the fourth-most consumed beverage in the world, behind water, tea, and beer. And as you can see from the quote above, it also played a prominent role in the culture of early America. There are many volumes about coffee and its origins (I suggest Uncommon Grounds), but today I’d like to focus on the roasting aspect, and more importantly, show you one way to roast coffee beans at home.
The Coffee Bean

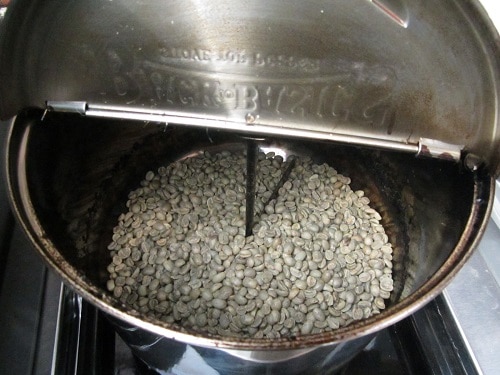
Unroasted, green coffee beans.
Before you can begin roasting, you have to know a little bit about the coffee bean itself. First off, it’s not actually a bean. It’s the seed of the coffee plant (called coffea). There are many species of the tree-like coffee plant, all of them native to tropical climates. So, right off the bat, I’m extinguishing any hope our American readers may have of growing the coffee plant in your backyard unless you live in Hawaii.
On these plants grow red or purple cherries. Within the cherries you will find just one or two of these green coffee “beans,” and believe it or not, most coffee cherries are still harvested by hand. It’s a fickle plant, so you can have ripe and unripe cherries right next to each other. It takes about 2,000 coffee cherries to produce just a single pound of coffee beans. Pretty mind-boggling, isn’t it?
It is when these beans are roasted that they attain their brown/black color, and are consumed in the form of liquid coffee to the tune of well over 2 billion cups per day around the world. That’s a lot of coffee.
The Roasting Process
“To have it very good, it should be roasted immediately before it is made, doing no more than the quantity you want at that time.” ~Eliza Leslie, 1837, Directions for Cookery
Many things in life are much better when done by hand in small quantities. Roasting coffee at home one or two pounds at a time produces just about the best coffee you’ll ever have. Most chains (Starbucks, notoriously) will actually over-roast so that every cup of coffee tastes the same, day in and day out. They take all the unique character out of the coffee. Roasting at home will give you a variety of flavors that you never even knew existed in coffee.
There are many ways roast at home; in fact, you could just buy a roasting machine that does it all for you, but that takes the fun out of it. I prefer to use an old-school popcorn popper with my gas grill. Technically, you could do it inside on the stove, but it’s a rather stinky process.
Supplies
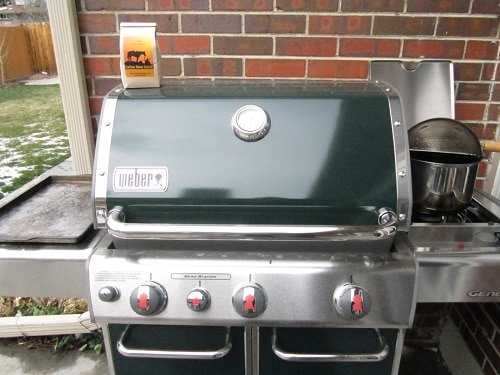
You won’t need much to roast coffee beans at home, but what you do need is rather specific. You’ll need a gas grill, as charcoal is very hard to get hot enough for roasting. It also has to be a grill that has a side burner. You need the direct heat, like a stovetop, but outdoors so your abode doesn’t stink to high heaven. You can use a full-size grill, or just a propane-powered camping stove.
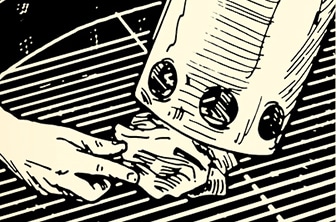
You’ll also need a stainless steel popcorn popper (on the right in the photo above). This is the one that I use. It’s also ideal if the lid is stainless, as plastic can warp and melt. Grab an old baking sheet as well – this will be for cooling the beans. Make sure it’s one you don’t need to use for anything other than coffee, ever again. The smell will infiltrate it for the rest of its life. I’ve dedicated both this popcorn popper and the baking sheet to my coffee roasting.
The final ingredient is your green coffee beans.

There are a few places online you can buy green coffee beans, and be sure to check locally as well. I generally get mine from Coffee Bean Corral (it helps that their logo is awesome). Since our household goes through about a pound a week, I order 12-15 pounds at a time so I only have to order every few months. Green coffee beans can last many years if stored in a dark, cool place, so you don’t have to worry about having them around too long. Look to spend, on average, $6-$8 per pound. It ends up being a little less than high-end store-bought coffee. You can also buy the holy grails of coffee — Kona and Jamaican Blue Mountain — at around $25 per pound.
How to Roast
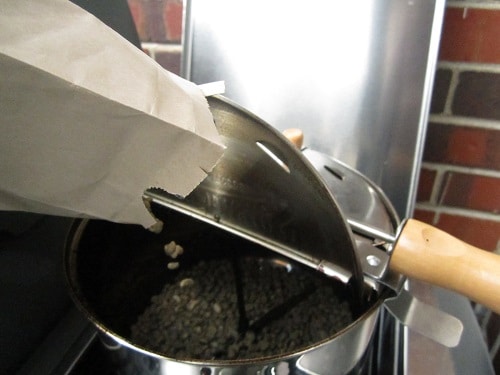
Preheat your side burner for about 10 minutes before throwing the beans on. It takes a lot of heat, so the hotter you can start, the better. A lot of folks will actually even use a thermometer through the whole process, but I’m not that specific. I go by sound, and a little bit by color, as I’ll describe later. Once the burner is preheated, get the beans in the popper.
Begin stirring them with the hand-crank right away. You’ll want to continuously be cranking through the whole 10-15 minute process. I do about one rotation every 2-3 seconds. I also leave half of the lid open so I can see the color of the beans as I go.
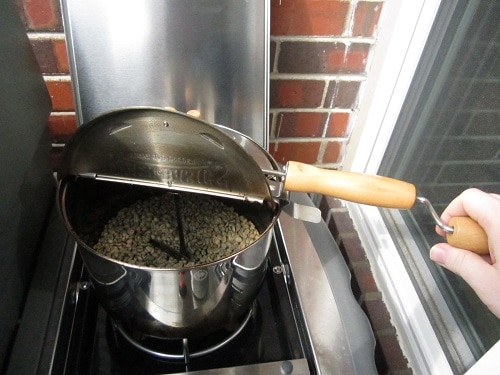
After a few minutes, they’ll start to turn yellow. They’ll also get “smokey,” although it’s actually steam. Water is being released from the beans, and they’ll get a little bigger. The beans, at this point, will also start to smell grassy and earthy.

Here is where it gets a little tricky and you have to pay attention. There are two temperature thresholds that are most commonly used to determine when coffee beans are adequately roasted. Instead of using a thermometer, however, many home-roasters go by sound. When the beans start to go from yellow-ish to brown (as in the picture above), you’ll start hearing a set of cracks or pops. This is the first of two sets of cracks. This first one sounds almost like popcorn, actually. It will start with one or two, then end up in a symphony of cracking beans.
At this point, it’s really up to you as to when you remove the beans from heat. There are different classifications of roasts that I don’t need to get into here, but they essentially go from light to dark. To stop right at this first set of cracks/pops would create a very smooth, almost tea-like coffee. It’s very good, but probably very different from what you’re used to.
I usually go a few minutes past this first set of cracks, at which point you’ll hear a second set of cracks/pops. This one is much more subtle, though. It’s a very light sound, almost like bubbles popping in the air. The color will also start to get more evenly brown. To remove the beans from heat when you first start hearing this second set of cracks would give you a “normal” roast. Most of the time, I go for 20-30 seconds after I start to hear this second set of cracks. You won’t want to go more than a couple minutes past, however, as you’ll burn the beans. If they start smoking heavily and smelling awfully, you’ll know you’ve gone too far. I’ve done that, and it’s a burnt coffee smell that sticks in your clothes. Not a pleasant experience. You just have to practice and find what you like. Again, experts will say you need to measure temperature to get it perfect, but I’m just aiming for “tastes good,” so I go by sound and color.
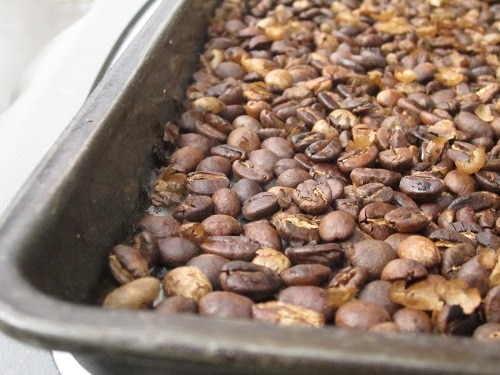
Once removed from heat, you’ll need to cool the beans.
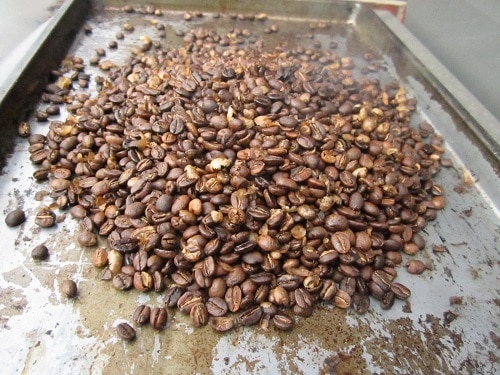
Drop them onto a cookie sheet. The beans have expanded, so you’ll be surprised, at first, how it seems like you’ve ended up with much more than you started with.

Create an even layer, and let it cool outside for at least 30 minutes. Some folks will even tell you to let them cool for up to 12 hours. I’m not real picky. There will be a lot of chaff (the loose flake of the outer bean — if you look closely in the picture above you can see some of the chaff), so after cooling, just blow on the beans to get rid of it.
Now you’re ready to store the beans in an air-tight container and grind them up the next morning for your wake-up call, which has been perfectly made by French press. Grinding freshly roasted coffee beans creates one of the best, manliest smells out there. As I said in the intro, this really is the best coffee you’ll drink. What’s great about this home-roasted stuff is that its flavor changes almost daily. You’re never really drinking the same coffee twice. Another bonus is that a pound of freshly roasted coffee makes a great gift for birthdays or holidays. It’s inexpensive, hand-made, and delicious! Doesn’t get better than that.