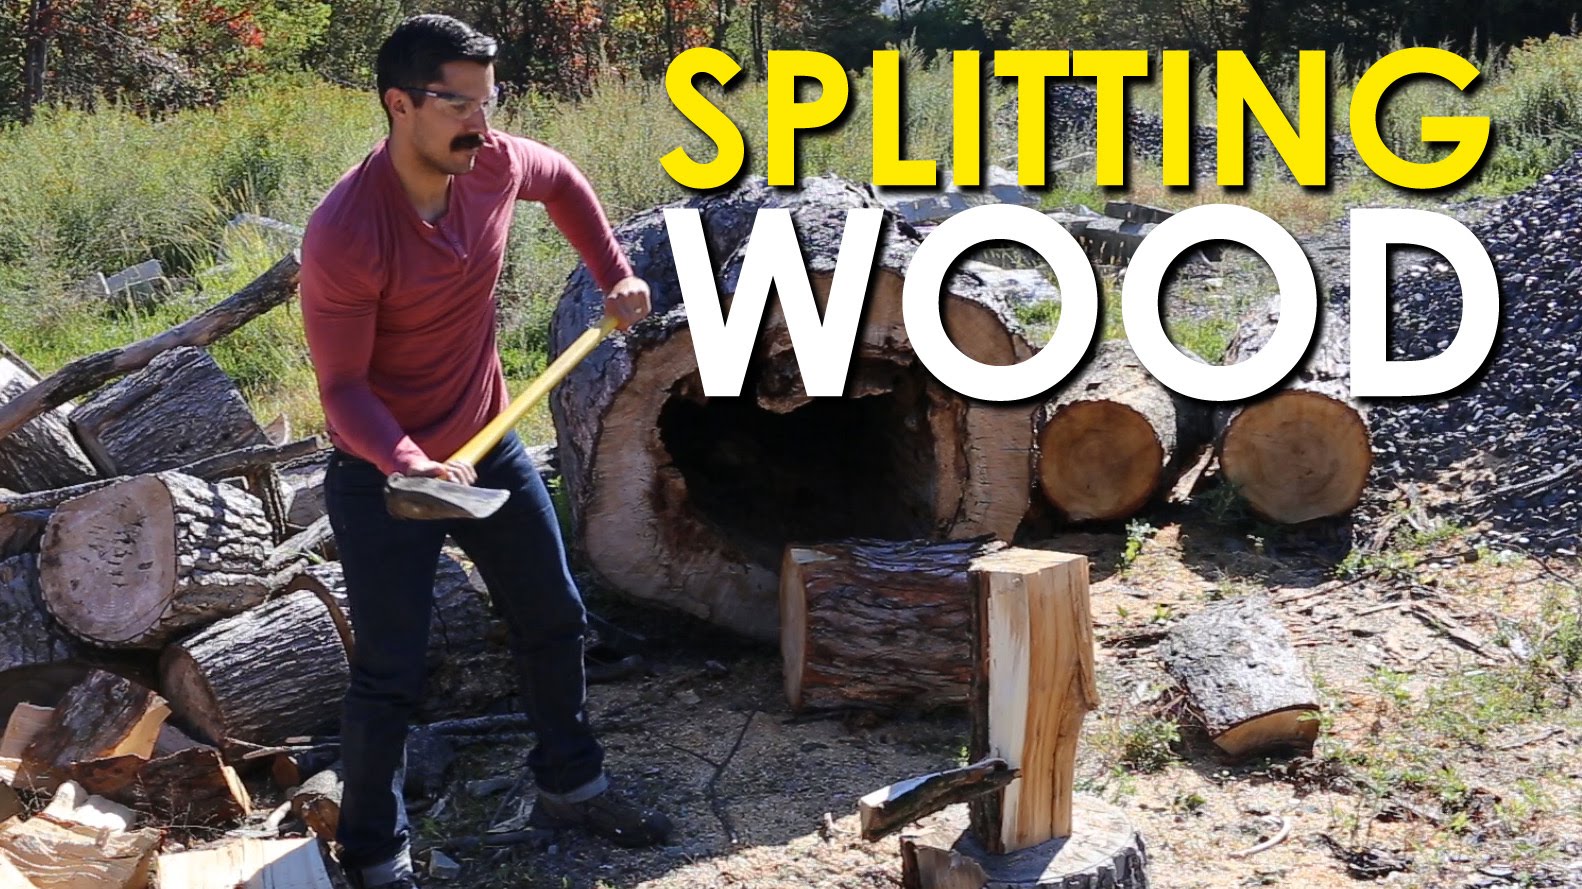
As Henry Ford famously said, “Chop your own wood and it will warm you twice.” With all due respect to Mr. Ford, though, you don’t chop logs, you split them.
While you can buy pre-split wood at grocery and hardware stores, your roaring fire will feel more satisfying (and save you some scratch) when the wood has been split by your own hand. You’ll need a maul (more on that below), some wood to split, and just a bit of technique that will make for a smooth and enjoyable process that doubles as a nice workout.
To best enjoy a double dose of warmth, read through the text and illustrations below and watch the video to learn everything you need to split your wood, then study up on how to stack it right.
1. What You Need
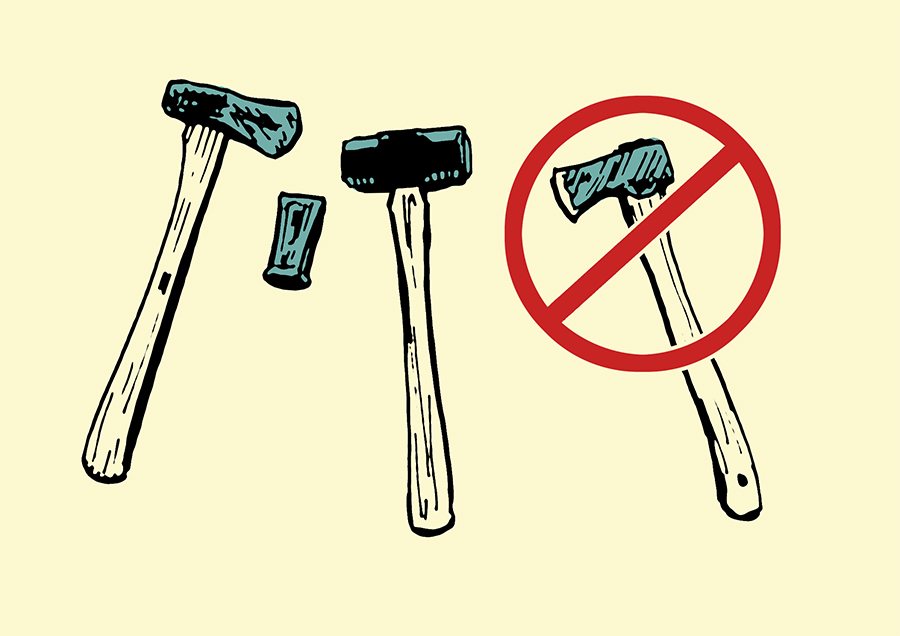
A maul has a heavier head, and usually has a longer handle than a traditional ax. You can also use a sledgehammer and splitting wedge.
A maul. A maul is heavier and has a wider head than an ax, which makes it advantageous to splitting wood. The key isn’t sharpness; remember, you’re not cutting wood or even chopping it; you’re splitting wood. But, an ax can work for smaller wood splitting jobs.
Wood. Straight-grained wood is your best bet; that is, avoid knots and curves if you can. And if the wood has nails in it, forget it. It’s not worth the risk of damaging your ax, or for that matter your eye when that nail goes flying.
Seasoned wood will split easier, but green wood will season faster after being split. So take your pick!
Where do you get this wood? Either by felling a tree (on your property, of course, or that of a friend/family member), or by asking/looking around town. A Craigslist search will often yield results for folks looking to get rid of large amounts of un-split wood for free or on the cheap.
2. Preparing to Split
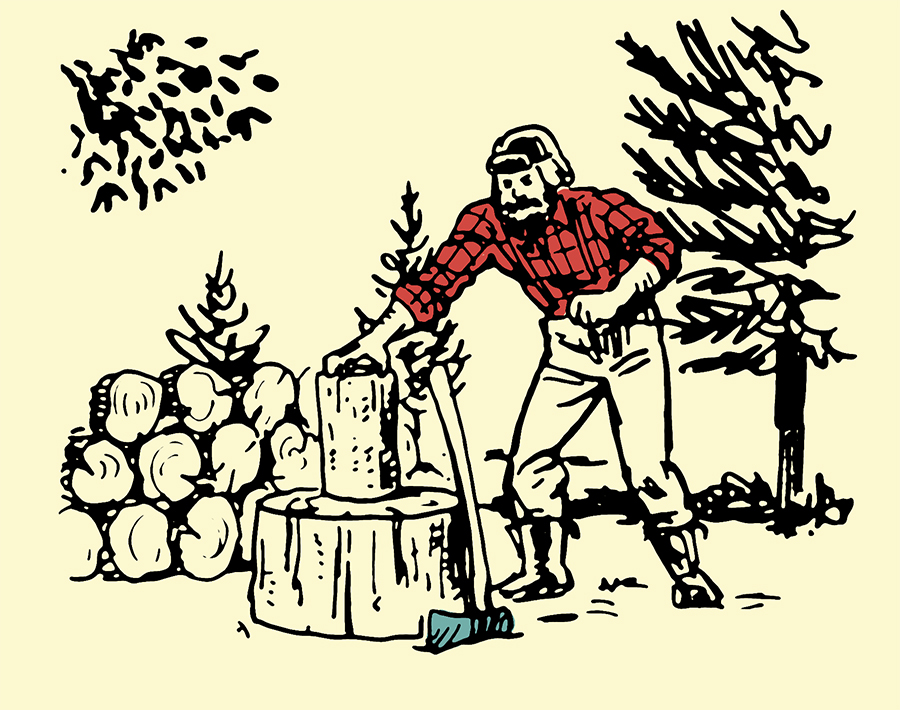
Put the log you’d like to split on a stump, or other large piece of wood.
Put the piece on its end, on some sort of chopping block if possible — stumps or larger pieces of wood work great. If not, just put it on the ground, propping it as needed to keep it standing. Just know it won’t keep the wood as stable as it being on a solid surface. Note that driving the ax into rocky soil can dull the blade. And, of course, avoid splitting wood on pavement or other similarly hard surfaces. Should you split the wood all the way through, you’ll both dull the blade very quickly and send painful shivers up your arm.
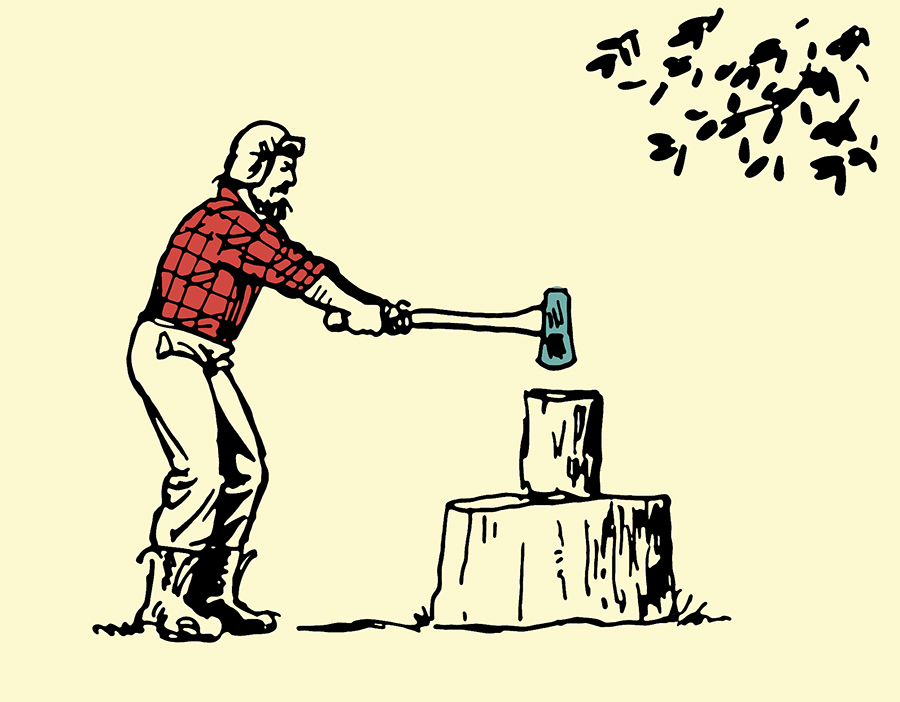
Now place yourself such that with your arms extended straight, the blade will hit the wood right in the center. Err on the side of being too close. Here’s why: if you miss on the side close to you, the blade goes into the ground, or nicks the wood/stump. But if you miss on the far side, the ax handle hits the wood. Too much of that and you’ll be buying a new handle.
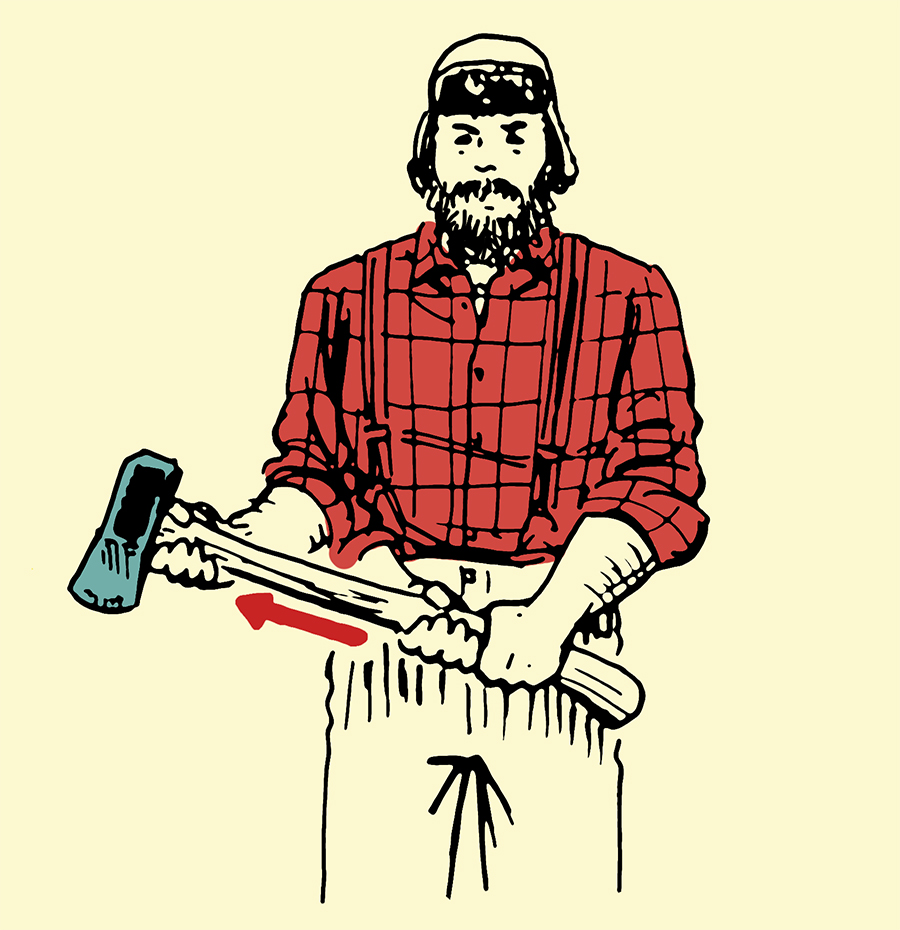
Grip the maul like a baseball bat, then slide your hands apart so that your right hand is up near the head.
3. Swinging and Splitting
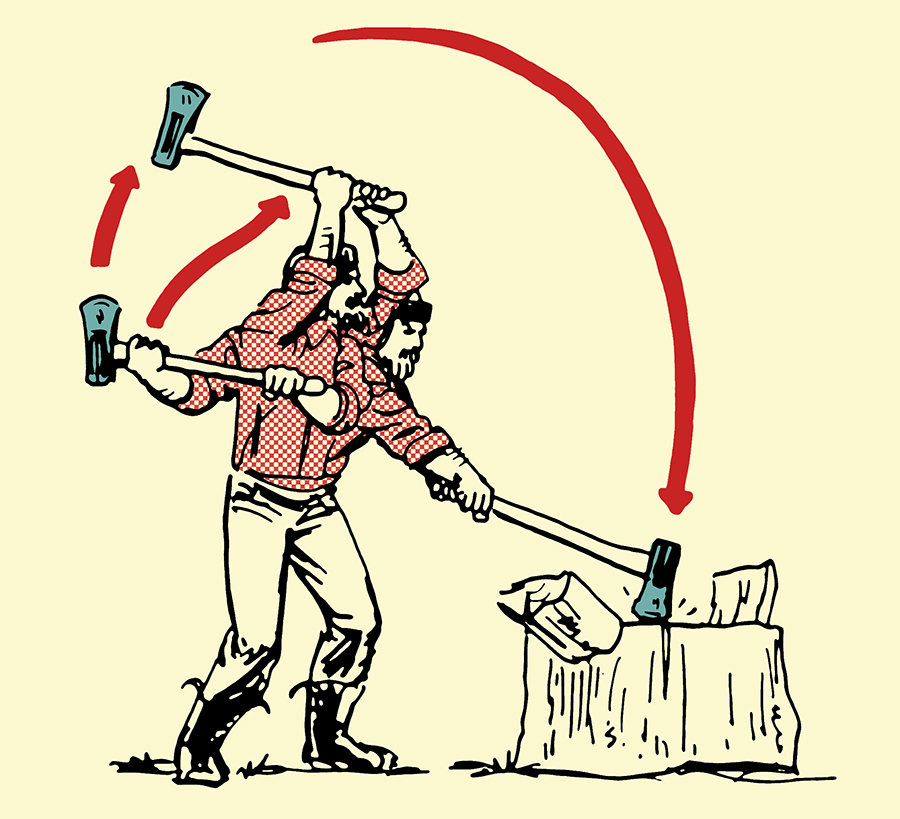
Making sure there’s no one nearby (to be hit by flying wood or an errant blade), stand with your legs apart a little, pull the maul straight back over your head with your arms apart, and as you swing it forward bring your upper arm down the handle to meet your lower arm. Let the momentum and weight of the maul do the work rather than your brute strength.
Repeat as necessary until the log is split, trying to hit the same place every time. Eventually it will split, and if you’re lucky, with a nice crack! A little manual separating will generally be required near the end.
If the piece of wood you’re trying to split is rather large, it might be easier to split pieces off the sides until you have something more manageable.
You’ll probably have plenty of small pieces and chips around that will make for great fire starters and kindling material!
Watch the Video
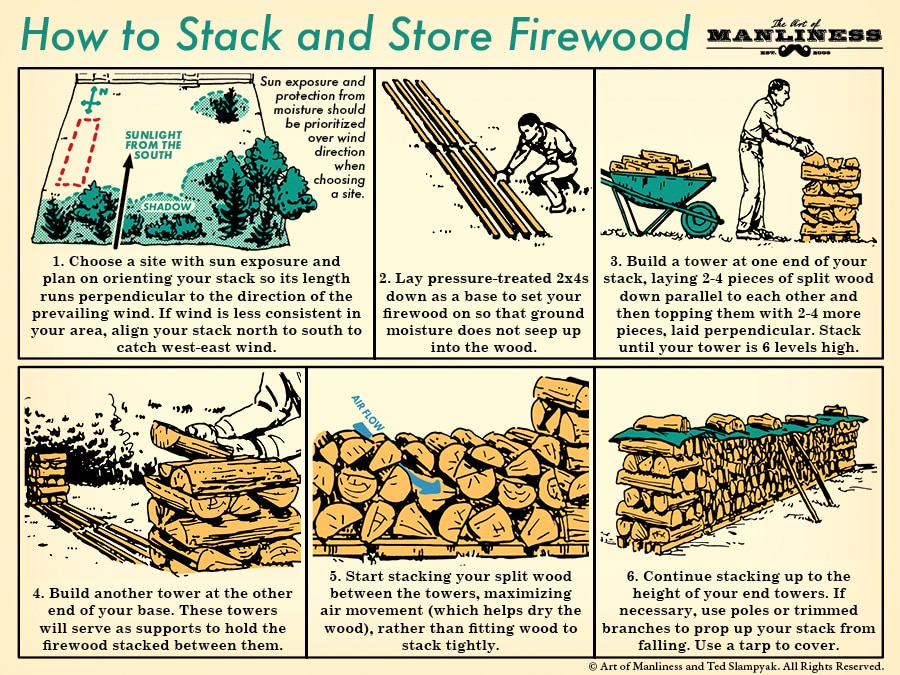
4. Stacking and Storing
After you split firewood, you want to stack it up and store it to begin the seasoning process and prepare it for burning. Firewood should be stored for a minimum of 6 months, and during that time you want to ensure it loses as much moisture as possible by exposing it to ample sunlight and air circulation. As noted above, while both elements are important, sun exposure should be prioritized over wind direction. If your backyard or property has inconsistent wind patterns, the stack should be aligned so that it catches the west-to-east winds which are common in North America.
You’ll know when your wood is ready for stove or fireplace by sight and sound: check the ends of your firewood for hairline cracks that spiderweb across the grain, and bang the wood together; a low thud sound means you’re good to go, but a sharp clap means it still needs time.
If you’ve waited six months and your wood still doesn’t seem ready, your stack may be out of whack; check the guidelines below for tips on how it might be improved:
Click the image, or this link, to see a full-size version.