Welcome back to the Art of Manliness Land Navigation Manual. In Part I, we covered how to properly use a compass, how to shoot your bearings, and the best map for navigating: the topo map. Before we can start actually navigating, which we’ll get to in Part III of this series, we still need to learn where we are in relation to our map — how to orient ourselves. So in this installment, we’ll go over the skills you need to do just that.
Adjusting Your Compass For Declination
Remember declination from Part I? Now that we’re putting compass to map, we need to adjust for it so that we can accurately orient and navigate.
Before we do that, let’s dig a bit deeper into declination. It will make it easier to understand why we adjust for declination in the first place.
As mentioned in Part I, true north and magnetic north aren’t the same. True north is at the very top of the earth, while magnetic north is currently off the coast of Greenland. The angle between true north and magnetic north is declination. But here’s where things get tricky: the angle of declination changes depending where you are on the earth.
Look at this map below:

See the line labeled the “agonic line”? When you’re on this line and are facing true north, magnetic north lines up perfectly, too. No declination exists and you don’t have to adjust your compass.
But let’s say you’re in the Muir Woods near San Francisco and you’re facing true north. Magnetic north would be slightly to your right, or east, by about 14°. If you point your compass towards true north, your compass needle is going to point a little to the east. Its declination would be written as 14E.
Let’s move to the opposite coast of the U.S. Let’s say you’re in the Adirondacks of New York. When you face true north, magnetic north is going to be left, or west, of you by about 14°. When you point your compass towards true north, your compass needle is going to point a little to the west. So its declination would be 14W.
Basically, in areas west of the agonic line, the compass needle will point somewhere to the east of true north; in areas east of the agonic line, the compass needle will point somewhere west of true north.
What happens if you don’t adjust your compass for declination? Let’s go back to our Muir Woods example. If we didn’t adjust for declination and we’re getting bearings for our destination from our map, we’ll find ourselves off by 14° or more when we start walking. That can make a huge difference!
To avoid that problem, let’s adjust our compass to take declination into account.
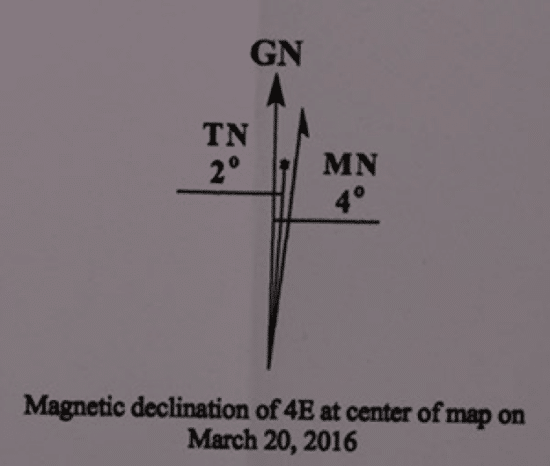
1. Look at your map, or use a website to see your local area’s declination. You can also use this website to get up to date declinations. As we can see, the area I’m in has a declination of 4E.
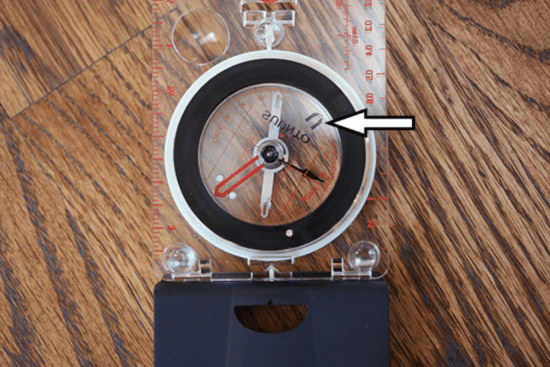
2. Flip your compass upside down. See that little black outline of an arrow? We’re going to move that to take into account declination on our compass.
3. My magnetic declination is 4E, so I’ll be moving the black arrow outline towards the red hash marks that are going towards “E DECL.”

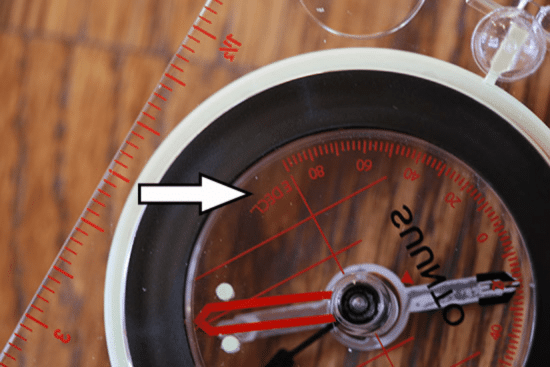
4. Turn the little screw using a small screwdriver or the little metal piece that comes with your compass’ lanyard. You’ll want to turn it until that black arrow outline is lined up with the 4E hash mark.

5. Boom. Compass adjusted for declination.
What if you don’t have a compass that allows you to adjust for declination? Well, you’re going to have to do some math with all your bearings to make sure you get a true bearing.
If your local declination is east of the agonic line, you’ll need to add the declination to the bearing on your compass; if your local declination is west of the agonic line, you’ll subtract the declination from the bearing on your compass.
So, if you’re in Muir Woods and your compass has a bearing of 180°, you’ll want to subtract 14°. So your true bearing would be 166°.
If you’re in the Adirondacks, you’ll want to add 14° so your true bearing would be 194°.
Another trick for declination when your compass can’t adjust for it is to create your own declination arrow out of masking tape and tape it beneath your compass under the correct declination degree hash (This will only work if your compass has a clear base). You’ll line up your needle with the tape arrow instead of the arrow on your compass.
Orienting Your Map to True North
With our compass adjusted for local declination, we’re now ready to start orienting ourselves. The first step of orienting with our map and compass is to make sure north on the map lines up with north in our terrain. Remember, maps are drafted with north at the top. If you’re facing south, but are holding the map right side up, everything on your map is going to be ass-backwards.
Luckily, orienting your map is easy.
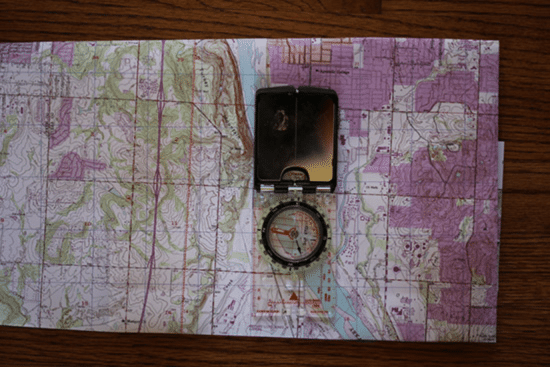
Put your compass on your map. Look at which way the red needle is pointing.
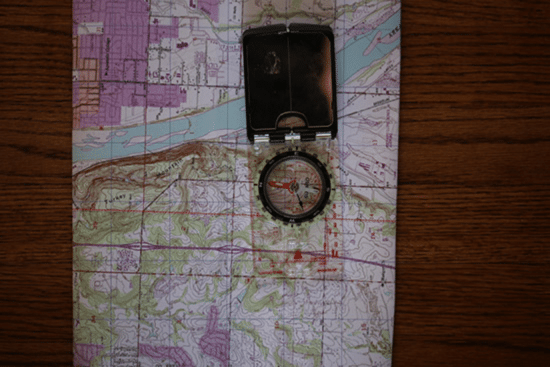
Turn your map so that north on the map, points in the same direction as the needle.
Taking a Bearing From a Map
Let’s say you’re planning a short hike from one point to another. You can’t see the end point in your terrain, so you can’t shoot a bearing on it. You can, however, see the two points on your map. Well, we can use our compass as a protractor to take a bearing from our map. With that bearing, we can use our compass to start traveling in the direction we need to go in order to get to our endpoint.
Here’s how to do it:
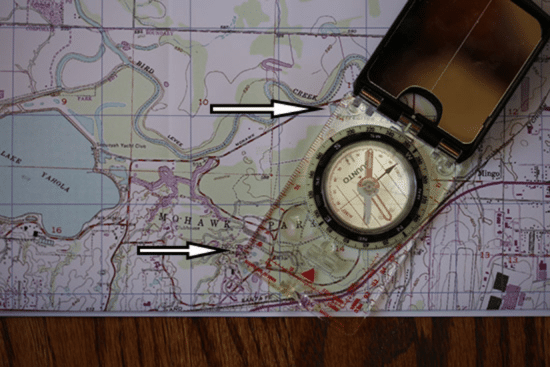
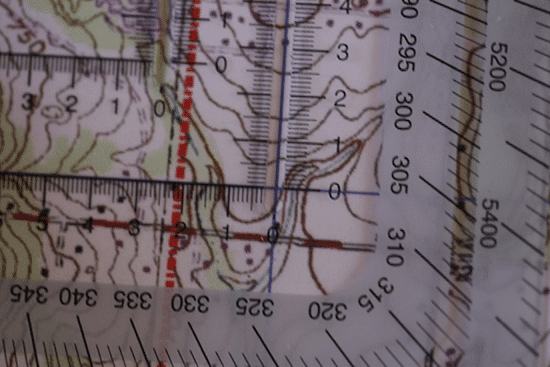
1. Place the compass on the map with one long edge of the baseplate running between the two points of interest. Make sure the direction of travel arrow is pointing to the spot that you’re trying to get to. (Note: Ignore the magnetic compass needle. We’re not using it at all during this entire process.)
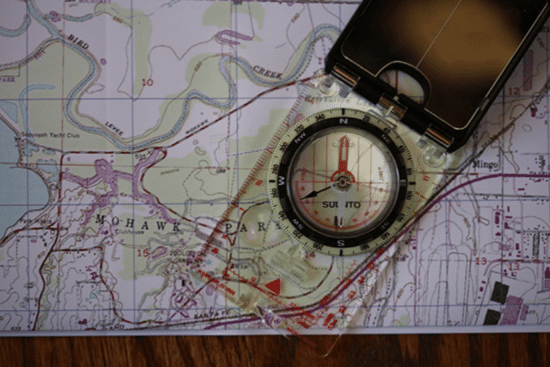
2. Turn the bezel on your compass so that north on the compass points to north on the map. The housing lines should be parallel with the map’s vertical grid lines.
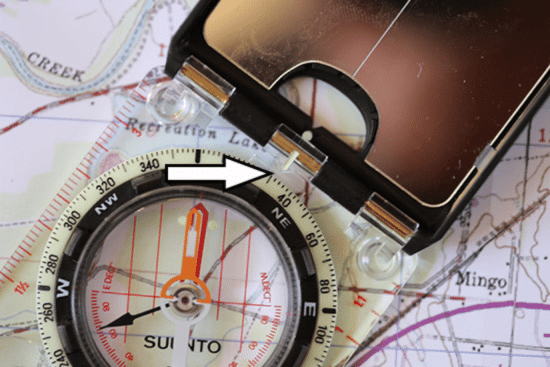
3. Read the number at the index line. That’s your bearing from point A to point B.
Transferring a Bearing Taken From Your Compass to Your Map
1. Take a bearing to a visible landmark using your compass.
2. Identify where you are on the map and place the compass edge over this location.
3. Using your location as a pivot, rotate the compass until north on the bezel is pointing to the top of the map and the compass housing orienting lines are parallel with the map’s vertical grid lines. The edge of the compass baseplate is now pointing in the direction of the visible landmark from which you took your bearing.
Figuring Out Your Location on a Map Using Point, Line, and Area Position
Let’s say you’re out hiking. You’ve got your trusty compass and a map of the area, but you don’t know exactly where you are in relation to the map. With a little bit of compass work, you can figure this out.
Point position. When you do know exactly where you are in relation to your map, you have your “point position.”
When we know our point position, we can identify any landmark that we see in our terrain by using the map. Let’s say you’ve hiked the peak of Camel’s Hump in Vermont. You look out into the distance and you see another mountain peak, but you don’t know the name of it. All you have to do is shoot a bearing towards the unidentified peak. You discover that it has a bearing of 176°. Take that bearing and plot it on the map using the technique explained above.
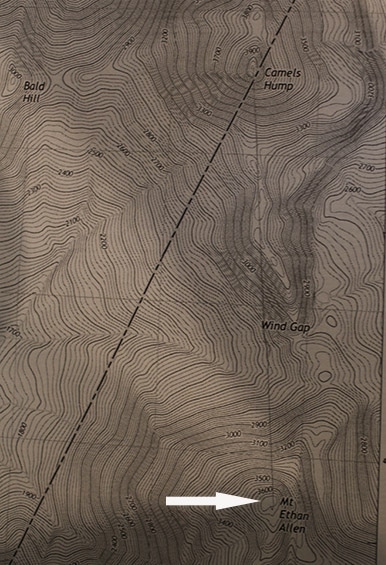
The plotted line cuts through Mt. Ethan Allan — that’s the peak you saw. Huzzah!
When we don’t have our point position, we have to use less exact forms of orientation based on line or area position to find it:
Line Position. When you have a line position, you know that you’re on some identifiable line on the map (trail, ridge line, etc.), you just don’t know exactly where. You don’t have your point position. Not a problem. You just need one more piece of information to figure out exactly where you are on the map.
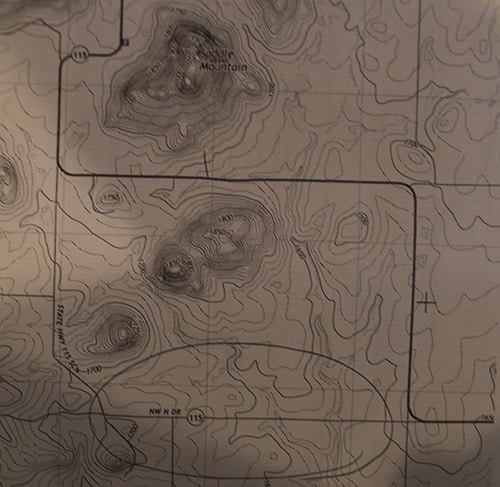
For this example, we’re going to go to the Wichita Mountains Wildlife Refuge in Oklahoma. We know we’re somewhere along HW 115 and south of Saddle Mountain. We just don’t know where exactly. We can find out easily enough, though.
Shoot a bearing with your compass at the peak of Saddle Mountain. You see that the mountain is 24° in relation to you.

Go to your map. Orient your map so that it’s lined up with magnetic north (see above). On your map, shoot the back bearing that you just took with your compass from the top of Saddle Mountain. In this case, it would be 204° (24+180).
Using the side of your compass, draw a line towards the highway that you’re on. Where the line intersects with the highway is where you are on the map.
Area Position. What if you’re not on a trail, but you just know the general area you’re in? How can you get your point position then?
Easy.
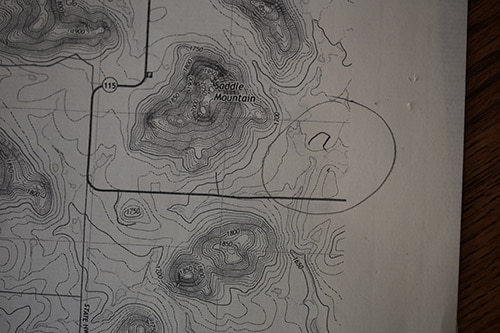
Let’s say you know you’re southeast of Saddle Mountain and northeast of some smaller mountains.
First, use your compass to get a bearing on a peak of Saddle Mountain. You see that it’s 310° in relation to you. We’re going to use the back bearing of that to plot a line from Saddle Mountain towards our general direction on the map. That would be 130°.
Plot a line on the map from Saddle Mountain at 130°. You’re somewhere on that line, so you know have a line position. Now we’re going to find out where exactly we are on that line.
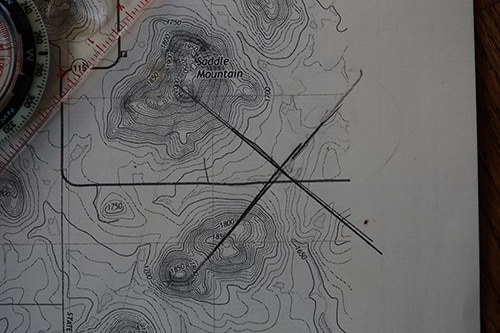
Take a bearing on the mountain that’s southwest from you. You see that it’s 230° in relation to your location. The back bearing is 50°. Plot a line on the map using the back bearing from that mountain. Where the second line intersects with the first is where you’re at on the map, more or less.
There you go. The basics of orienting yourself with a map and compass. Check back next month for our final briefing on how to navigate using MGRS coordinates, just like they do in the military.
____________
Sources and Further Reading
Map Reading and Land Navigation: FM 3-25.26
The Ultimate Navigation Manual