When I went to the ITS Tactical Muster a few years ago, one of my favorite skills that I learned was land navigation (land nav, for short). With nothing but a compass, map, and protractor, I could pinpoint spots and find out exactly where I was on a map. It was pretty amazing to learn.
Since my time at the Muster, I’ve done plenty more research and field practice to hone my land nav skills. If GPS ever stops working, I now feel confident I could find my way through any stretch of wilderness.
The skill of land navigation is used by soldiers and outdoorsmen as a back-up to modern navigation technology, and by hobbyists who enjoy orienteering without gadgets. It’s a skill that’s both practical and just plain fun to know — figuring out your location or plotting points using coordinates is a puzzle that requires you to use math and good old fashioned observation.
If you’ve ever wanted to learn how to find your way without technology, or if you’ve had the itch to dust off the land nav skills you picked up in Boy Scouts, and go even deeper now that you’re a grown man, I’ve put together the ultimate guide to land navigation. I’m confident this is the most comprehensive primer on land nav you’ll find on the internet, and I’ll thus be breaking it up into three monthly “briefings.”
In part one, I’ll go over the basics of how to use a compass, as well as cover the type of map you’ll want to use for land navigation.
In part two, I’ll discuss how to orient yourself with a map and compass and how to navigate to a point within 10 meters of accuracy using nothing but a compass, map, and military protractor.
And in part three, we’ll cover a method of land nav which uses MGRS (Military Grid Reference System) coordinates.
Once you’re done with this series, you should have a working knowledge that will allow you to never get lost again (provided you have a map of the area and a compass), as well as have some fun with your buds navigating the great outdoors in a classic and challenging way.
Let’s get started.
How to Use a Compass
We’ve written previously about the different kinds of compasses out there and how to hold them, so I won’t re-hash that. What we’ll do here is get into a bit more detail on the compass skills you need to know and understand in order to navigate with a compass and map.
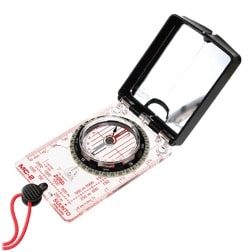
For recreational land navigation, I recommend going with a compass with a clear baseplate, the ability to adjust for declination (more on that in a bit), and a mirror. You’ll spend more money, but this type of compass is much easier to use than some other varieties and will save you some headaches. My personal recommendation is the Suunto MC-2G.
Always Know Where You’re Going: Shooting a Bearing
A foundational skill for land navigation is knowing how to get a bearing with a compass. It’s really easy and you can learn how to do it in five minutes.
A bearing is the direction from one place (or object/natural feature) to another, measured in degrees of angle with respect to north.* So your bearing is going to be one of the degree marks that surrounds your compass’ bezel. Once you know an object’s bearing and have it locked in on your compass, even if you lose sight of it, you’ll still know what direction it is in relation to you.
*There’s More Than One North
Something that’s hard for folks to grasp who are just starting out with land navigation is the concept that there are multiple norths. But to accurately navigate, you need to understand what they are and how they relate to each other.
True north. Also known as geographic north. If you were looking at a globe, true north would be at the very top. It’s where Santa’s house would be. All longitude lines converge at true north.
Grid north. To make finding locations on a map easier, grids are often superimposed on top of them. The vertical grid lines on a map point towards grid north. This is different from true north, because it transforms the earth’s spherical surface to a flat surface on the map.
Magnetic north. Here’s where things get a bit confusing. Your compass needle points towards magnetic north, but magnetic north isn’t the same as geographic north. In fact, magnetic north is constantly shifting. Right now, it’s off the western coast of Greenland.
On your map, you’ll see a little chart that looks like this that shows the difference between the different norths. The difference in angle between true north and magnetic north, or grid north and magnetic north, is called declination. When we start navigating with a map and compass, knowing and taking account of an area’s declination could be a necessary step for accurate navigation. More on that in a bit.
It’s easier to understand shooting a bearing with an example.
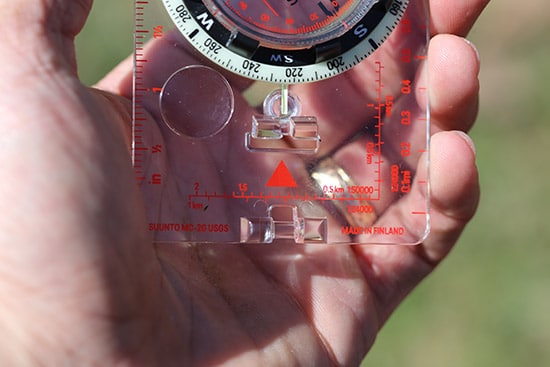
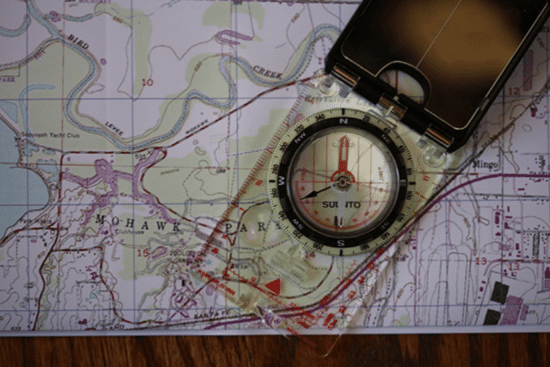
1. Point the direction-of-travel line on your compass at the object whose bearing you want to find. If you’ve got a lensatic compass, use it. Makes getting a bearing much easier. See here for how to do it.
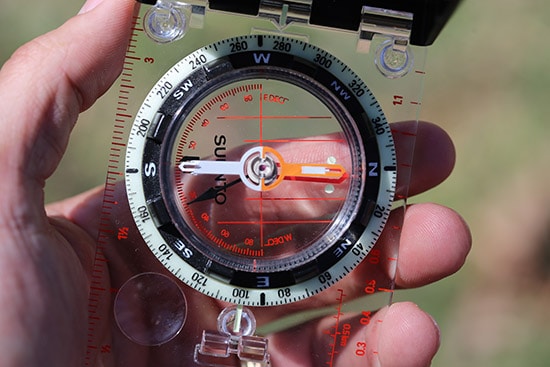
2. Rotate the compass housing or bezel until the pointed end of the orienting arrow is aligned with the north-seeking (usually red) end of the magnetic needle. This process is sometimes referred to as boxing the needle or “getting the dog in the doghouse,” or “red in the shed.” As you can see on mine, the needle isn’t aligned perfectly. I moved the compass when I snapped the pic.
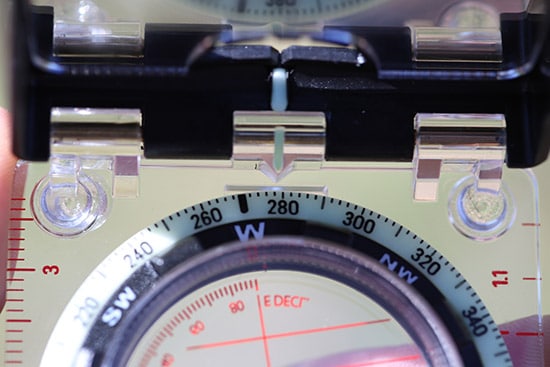
3. Read the bearing at the index line. Remember, each little hash represents 2°. So the bearing of the object in relation to me is 278°.
There. You know how to get a bearing of an object. One thing to keep in mind: once you have your bearing locked in on your compass, anytime your needle comes out of the box, to get it back in the box, move your body and not the compass. If you just move the compass, you’ll lead yourself off track from the correct bearing.
A Quick Note on Semantics
Technically, what we’re doing is getting an azimuth, not a bearing. A bearing is traditionally described from north or south, and what angle to the east or west. So we could say we are 75° West of North. You’d write that down as W 75 N. With bearings, your degree number will always be less than 90°.
An azimuth is an angle measured from clockwise from north, from zero to 360°. A bearing of W 75 N would be 285° as an azimuth.
While we’re technically getting an azimuth with our compass, compass manufacturers and even seasoned land navigators will often use the terms interchangeably. In this series, I will too. Knowing the difference, though, will score you bonus land nav points.
Know How to Get Back From Where You Came: Back Bearings
A back bearing (AKA a reciprocal bearing) is the opposite direction of your original bearing. Knowing your back bearing has a few uses. First, it makes getting back to your starting point easy — just follow the back bearing of your original bearing.
Back bearings are also useful for verifying that you’re still on your original bearing line. Let’s say you can’t see your destination object, but you can see your starting point. If you know your back bearing, you can check that you’re still on your bearing line by checking your starting point with your compass.
Back bearings will also come in handy when we’re trying to figure out where we are on a topographic map. More on that in our next article.
Figuring out your back bearing is easy:
- If your original bearing is between 000° and 180°, add 180° to calculate back bearing.
- If your bearing is between 181° and 359°, subtract 180°.
An easier way to get a back bearing is to just look at your compass. There’s an index line at the bottom of it. The line is pointing to the degree mark that’s the back bearing of the one you just shot.
The Ideal Map for Land Navigation

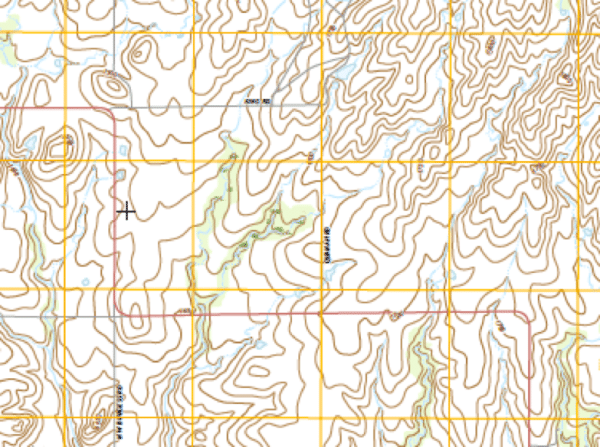
Besides our compass, our map is our next essential item for land navigation. There are a lot of different kinds of maps out there, but for land navigation out in the wilderness we want a specific kind of map: a topographic map with a UTM grid that has a scale of 1:24,000. Let’s talk about each of these components separately.
Topographic. A topographic map has contour lines, coloring, and shading in order to help you locate landmarks in your area. When you have your map properly oriented, you’ll be able to identify the mountains and ridges you see in your terrain, allowing you to navigate with ease.
Topographic maps are easy to get your hands on. If you live in the United States, you can order (or download for free) detailed topographic maps for any area in the U.S. from the U.S. Geological Survey. You can also visit MyTopo.com to create custom maps based off of the maps from the USGS. This is where I’ve gotten mine.
We’ve published an article from the fine folks at ITS Tactical on the ins and outs of how to read and use a topographic map. For a refresher, read that article.
Map with MGRS lines.
Military Grid Reference System. A topographic map will allow you to identify features in your terrain on your map. But how do we figure out exactly where we are in relation to the map?
Enter the Military Grid Reference System, or MGRS for short.
Traditionally, maps have used latitude and longitude lines as the reference system. You can use latitude and longitude lines on a map to figure out where you are, but it’s a little unwieldy because as you move north or south, the distance between longitude lines shortens.
To make plotting much more straightforward, militaries around the world have developed a universal system that divides the earth into a series of square grids. The one that’s most commonly used is the Universal Transverse Mercator System, or UTM. The MGRS was developed by the U.S. military and is pretty much the same thing as the UTM, it just uses a different labeling system. We’ll be using MGRS when we do our navigating.
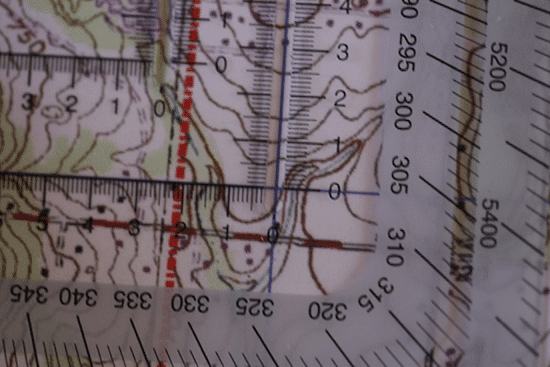
When your map has MGRS lines on it, plotting points on the map is super easy. Depending on the precision of the coordinate you have, you can plot a point on a map within a precision level of 1 meter. We’re not going to get that precise with our land nav work, but we’ll be able to get you within 10 meters of precision. We’ll go into detail on how to do that later in the series.
A topographic map with yellow UTM grid.
When you purchase a topographic map, make sure that it has either UTM or MGRS grid lines printed on it. Maps from the USGS have UTM grids lines on them. You can also get topographic maps with UTM lines at MyTopo.com.
1:24,000 Scale. Maps come in different scales. The map’s scale indicates the relationship of distance measured on a map and the corresponding distance on the ground. For example, on a 1:100,000 scale map, 1cm on the map equals 1km on the ground.
Map scales are a bit counterintuitive because the smaller the map scale, the larger area on the map is represented, and the larger the scale, the smaller the area that’s shown on the map.

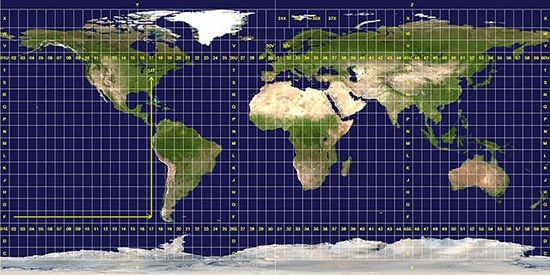
For example, the above map is a 1:1,000,000 scale map. It’s a smaller scale than a 1:24,000 scale map, but shows a large amount of territory with less detail.

Contrast that with a 1:24,000 scale map. It’s a larger scale than a 1:1,000,000 scale map, but shows less territory with more detail. For more information on understanding map scales, visit this site.
For land navigation purposes, go with a map that has a 1:50,000 to 1:24,000 scale. 1:24,000 scale maps are the USGS standard, and it’s what I learned how to do land navigation with, so that’s my preference.
Important Map Marginalia
In the margins of your map you’ll find some important information so you can get the most out of it. Here are the things to pay particular attention to for land navigation purposes.

Scale and scale bars. Your map will clearly show what scale it’s using. As you can see, I’m using the USGS standard 1:24,000 scale map.
You’ll also find scale bars fit for your map scale. These will allow you to figure out distances between destinations on your map. One thing to take into consideration is that the scale bars provide an estimate of distance. It only shows the “as the crow flies” distance, meaning the distance in a straight line. It doesn’t take into consideration how changes in elevation will affect distance.
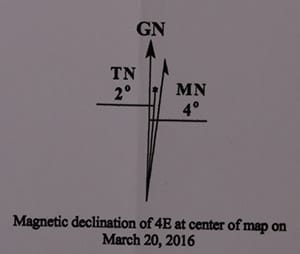
Magnetic Declination. As already explained above, there are three different norths. In order to accurately navigate, we need to adjust our compass to compensate for the difference between magnetic north and grid north. Your map should have a declination diagram that tells you the difference between magnetic north and grid north.
MN stands for magnetic north, TN stands for true north, and GN stands for grid north.
On my map, magnetic north is 4° E of grid north, so I’ll need to make an adjustment on my compass of 4E so that I can get a true bearing. I’ll show you how to do that later on in this series.
The diagram should also have a date when the declination was measured. Be sure that the date is fairly recent; declination can change from year to year.
Alrighty. You know the basics of how a topographic/navigation map works and how to get our bearings with a compass. Next it’s time to combine the two and orient yourself using a map and compass. This is where the magic happens, and we’ll dig in to that subject next month.
____________
Sources
Map Reading and Land Navigation: FM 3-25.26
The Ultimate Navigation Manual