With our archives now 3,500+ articles deep, we’ve decided to republish a classic piece each Friday to help our newer readers discover some of the best, evergreen gems from the past. This article was originally published in March 2011.
Editor’s Note: This is a guest post from wilderness survival expert and instructor Creek Stewart.
The term “bugging out” refers to the decision to abandon your home due to an unexpected emergency situation — whether a large-scale disaster caused by nature or by man. A “bug out bag” is a pre-prepared survival kit designed to sustain you through the journey to your destination once you’ve decided to bug out in the event of an unexpected evacuation. It can also be a source of vital supplies if you need to shelter-in-place. Typically, the bug out bag (BOB) is a self-contained kit designed to get you through at least 72 hours. This kit is also referred to as a 72-hour bag, a get out of dodge bag (GOOD bag), an evac bag, and a battle box.
The thought of having to evacuate your home due to a sudden and imminent threat is not unrealistic. The reality is that sudden and uncontrollable events of nature and man do happen. Natural disasters such as hurricanes, storms, wildfires, earthquakes, floods, and volcanic explosions can strike fast and hard — wreaking havoc on homes, vehicles, roads, medical facilities, and resource supply chains such as food, water, fuel, and electricity. When Hurricane Katrina struck the Gulf Coast in 2005, tens of thousands of people had to evacuate their homes with little warning; this has been an all-too-common reoccurrence in the years since. Unprepared and with no emergency plan, many of these people were completely dependent on scavenging and hand-outs while living in make-shift shelters — fending for themselves in a time of complete chaos and disorder. A 72-hour emergency kit packed with survival essentials would have been an invaluable and priceless resource.
In a world where volatility exists in our political and economic structures, we would be foolish to think there is also no chance of a foreign or domestic terrorist or military attack or a scenario of severe civil unrest that could possibly force us to evacuate our own home. Acts of violence and conflict are not the only threat from man. Dams burst, power plants go down, pipelines explode, oil spills occur, and other man-made structures and facilities can fail, resulting in disaster. And of course, as we’re all too aware of, disease and pandemic can also warrant an evacuation.
We cannot control when, where, or how disasters strike. But we can control how prepared we are to deal with a disaster. There is a fine line between order and chaos and sometimes that line can be measured in seconds. When every second counts, having a plan and the tools to see that plan through are crucial to survival. The bug out bag is your #1 resource in your overall bug out plan and may very well be your key to survival one day.
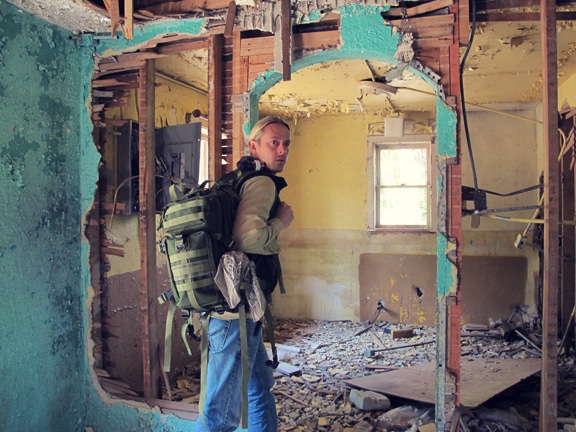
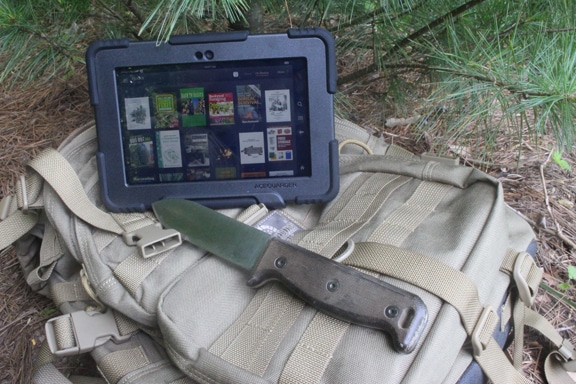
There are 10 supply categories that need to be considered when assembling your bug out bag. Before we dig into each of these categories, it is important that I discuss the bag (or pack, rather) itself. Your bug out bag needs to be a backpack. It needs to be large enough and sturdy enough to contain the gear necessary to get you through 72 hours of independent survival. You need to be comfortable carrying it for extended periods of time. And, in my opinion, you don’t want to appear to be prepared and stocked with gear. A tricked-out pack can make you a target for people who want the supplies that you have. Try not to let your pack send the message that you are stocked to the brim with all kinds of survival necessities. Keep it basic. I personally use a SnugPak Rocket Pack as my bag.

Once you have chosen your pack, below are the 10 supply categories that need to be considered when assembling the contents of your bug out bag.
Category #1: Water

You will need at least 1 liter of water per day for proper hydration — preferably more, especially considering hygiene concerns and certain weather conditions. Since this is a 72-hour survival kit, that means it needs to contain 3 liters of fresh drinking water, minimum. This water should be stored in 2-3 durable containers with at least one of them being collapsible to reduce bulk as the water is used. A metal army canteen is another good choice because it can be used to boil drinking water that’s collected in the field if your immediate supply runs dry. I carry a collapsible Platypus water bottle, a 32 oz. Nalgene water bottle, and a metal US Army issue canteen.

Because water is so critical to survival, I highly recommended also packing at least two water purification options. Boiling water for 10 minutes is an option but is not always the most convenient. I suggest packing one water filtration system and also water purification tablets. I personally pack a Katadyn Hiker Pro Filtration System, an Aquamira Survival Straw (as a backup), and sodium chlorite water purification tablets. The three options of boiling, filtering, and chemical treatment will give you more flexibility in securing one of your most basic survival needs.
Category #2: Food

Don’t worry about planning for three well-balanced meals per day — this is survival, not vacation. I’ve gone on many survival trips where I haven’t eaten for a few days; you can live without any food at all for 72 hours. However, it isn’t pleasant. You should pack simple and easy-to-prepare meals. Canned meats, soups/stews, and beans are great options. If the weight of your bug out bag is an issue, dehydrated camping meals are excellent choices. Remember, though, they require hot water to prepare — so that means a stove or fire and valuable time (if you are traveling). Military MREs are also good options: They have a long shelf-life, contain their own heating systems, and are very packable. They can be expensive, though. I would also suggest tossing in a few energy bars and candy bars. These are packed with calories and carbs, both of which are extremely important.

When we discuss food, we also need to discuss preparing it. A very simple cooking kit is all you should need. It should contain at least one small metal pot, a spork, a metal cup, and maybe a metal pan or plate. Anything more than this is overkill. In many instances, preparing food requires heat. A fire will always work but may not be practical in every situation. I would suggest packing a lightweight backpack stove with 1-3 fuel canisters. I’d rather have it and not need it than need it and not have it. I personally carry a self-igniting MSR Ultra light stove in my BOB with one fuel can.
Category #3: Shelter/Clothing

I include clothing in this category. Regardless of climate, I recommend packing the following (some of these items can be on your body when you leave):
- 2 pairs of wool hiking socks
- 2 changes of underwear
- 1 extra pair of pants (not blue jeans and preferably not 100% cotton)
- 1 base layer thermal underwear
- 1 warm fleece hat
- 2 extra shirts (1 long sleeve, 1 short sleeve)
- 1 mid-weight fleece
- 1 warm rain jacket
- 1 heavy duty military poncho (can be found at any Army/Navy Surplus)
- 1 pair of comfortable waterproof hiking boots
What to pack for an actual shelter is a heavily debated topic within the survival community. I like having options and I like redundancy — especially when it comes to shelter. Protecting yourself from the elements, whether rain, cold, or heat, is incredibly important.
Your first emergency shelter option is the military poncho listed above. These are designed with grommets in the corners to be used as a makeshift emergency tarp-tent and are actually quite effective. I’ve spent many nights in the woods during all kinds of weather conditions with nothing more than a wool blanket and a military poncho, and have been fairly comfortable. Practicing the set-up is the key. Know how to use it before you need to.
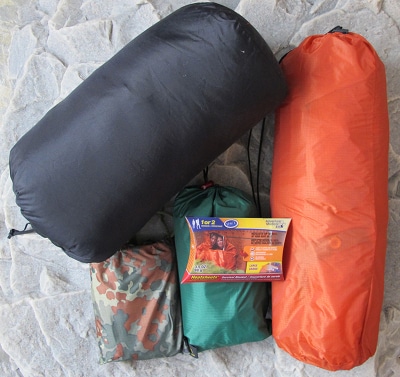
A second emergency shelter option is a simple reflective emergency survival blanket. There are many different kinds and brands of these on the market. I prefer one from Adventure Medical Products called the Heatsheet. Not only can it be used as an emergency survival sleeping bag, but it can also be used as a ground tarp or as a tarp-tent shelter. These are lightweight and cheap.
Besides the poncho and the heatsheet, I also carry a 6′ X 10′ waterproof ripstop nylon tarp. I use this style of tarp as a year-round camping shelter, so I know it works. It’s lightweight and really effective if you practice setting it up. You can also bring a lightweight camping tent. These can be pricey, but they are really nice.
Lastly, you will want to include a very packable sleeping bag. If I had to give a general degree rating I would say a safe bet is a 30-40 degree bag. This pretty much covers all of your bases. Sure, you’d be cold at 20 degrees, but you would live. If you have the room, a nice wool blanket is a great addition. Wool maintains 80% of its warming properties even when soaking wet and is a very durable survival fabric with incredible insulating properties.
Listen to my podcast with Creek about all things bugging out:
Category #4: Fire

Knowing how to make fire is one of your most important survival skills. You need a minimum of three ways to make fire. Because you are preparing this bug out bag in advance, you can toss in a few of the easy options like lighters and waterproof matches. You will also want to include a fire steel which can generate sparks in any weather condition. Besides these items, you will need to pack some tinder for fueling your initial flame. You can buy tinder from any outdoor store, but cotton balls soaked in petroleum jelly is the best I’ve ever seen.
Category #5: First Aid

Whether you build your own kit from scratch or buy a premade kit, make sure it includes the following items at a minimum: 1″ x 3″ adhesive bandages (12), 2″ x 4.5″ adhesive bandages (2), adhesive knuckle bandages (3), butterfly closure bandages (2), gauze dressing.
My personal gear for this category includes: Adventure Medical Kit’s First Aid Kit 1.0, to which I’ve added 3 suture kits, more alcohol pads, 2 rolls of 2″ gauze, CARMEX Lip Balm, and some larger butterfly bandages.
Category #6: Tools

The first and most important tool in your bug out bag is a knife. Choosing your survival knife is a very personal decision, and besides your knowledge, it will undoubtedly be your most useful survival tool. I suggest carrying a full-tang, fixed-blade knife. It should be large enough to use for chopping, splitting, and self-defense but also small enough to use for more delicate camp chore tasks such as carving feather sticks and preparing food. In my opinion, the overall length needs to around 10″ — not too much over. Any larger than this and the knife becomes more difficult to use as an effective tool and starts to get bulky. I’ve made the decision to carry two knives in my bug out bag. I carry a KA-BAR US Army Military Fighting Knife and also a Mora 840 MG Clipper Knife which I use as a smaller all-around camp knife. Mora knives are very reliable all-around camp knives and tend to come in at under $15.
Besides a knife, one other item you will want to consider is a good multi-tool. A multi-tool comes in handy for all types of projects, from cutting wire to complex mechanical chores. Your multi-tool should have a screwdriver (both Phillips and flat-head), pliers, a knife blade, and wire cutters at a minimum. Leatherman makes all kinds of great multi-tools which can be purchased at almost any sporting goods store. I personally carry a Leatherman MUT Military Multi-tool.
Category #7: Lighting

You need to pack at least two light sources. I would suggest having one flashlight that will throw light some distance, like a mini mag light or a mini LED flashlight. The second can be a smaller one to use around camp or while fixing meals, etc. Mini keychain LED lights are lightweight, cheap, and last a long time. Other ideas are glow-sticks, candles, and LED headlamps. I personally carry the following light sources: Gerber Firecracker Flashlight, a lanyard multi-function tool with small LED light, one glow-stick and one package of 9-hour candles. Again, I like options.
Category #8: Communications

A fully charged cell phone is at the top of this list. In an emergency, cell phone service will likely be unavailable. However, text messages typically still go through, so having a cell phone is a necessity. You should also have either a fully charged extra cell phone battery or a means of charging your cell phone. There are several options for charging your phone in the field without electricity. Some include solar charging units, hand crank chargers, and aftermarket battery boosters. You need to research and determine which solution is best for your current phone make/model.
In addition to a cell phone, you should also pack a small battery-powered or crank-powered AM/FM radio. This could be an important source of information and for the price and weight, you can’t go wrong. I personally carry a hand-crank FR-300 Emergency Radio. The hand-crank also has a cell phone charging feature.
Under this category I will also include important documents. In the case of an emergency evacuation, you should carry with you certain important documents. Among these should be your driver’s license, passport, social security card, medical information, important phone numbers and account numbers (bank, insurance, credit cards, etc.), and your gun carry permit.
The last item in this category is to pack a detailed map of your surrounding area, your state, and any area between your location and your bug out location (your predetermined destination in case you have to bug out). You would be foolish to depend on GPS in an evacuation emergency. Pack maps!
I personally carry all of these documents in a sealable waterproof map case.
Category #9: Protection and Self-Defense

You can almost certainly guarantee that in an evacuation emergency there will be chaos and disorder. Events of this magnitude inevitably overwhelm normal police and public safety measures — at least for a short time. History tells us that rioting, looting, and violent crimes will occur. You need to be prepared to protect and defend yourself and your resources, especially if you have a family. You would be naive not to take this category seriously. The best measure of self-defense is a gun, period. Besides the intimidation factor, a gun has reach and stopping power. A gun can also be used for hunting if necessary. What kind of gun to pack is a lengthy topic all by itself. Some like shotguns, some prefer rifles, and others choose handguns. I have chosen to pack a 357 Ruger Revolver. I chose a handgun because it is easy to conceal and is fairly lightweight. I chose a 357 because of the stopping power, and I chose a revolver because I know beyond the shadow of a doubt that every time I pull the trigger a bullet will fire. I’ve had automatic pistols jam on me enough times to know I don’t want my life to depend on one.
Other formidable weapons of self-defense can be your survival knife, a machete, or even a walking stick. I, though, would hate for anything except a gun to be the only thing between me and a gang of marauders.
Category #10: Miscellaneous Gear

Just in case you have to bug out on foot, the weight of your pack should always be a consideration. You should be comfortable carrying your pack for up to 3 days. Because of this, everyone’s pack load will vary depending on their comfort level. Below are some additional items that I have packed in my bug out bag that you will also want to consider when building your own:
- Cash: $1000 minimum (because cash talks)
- Toilet paper
- 200 feet of paracord (building shelter)
- Duct tape (hundreds of uses)
- 100 feet of trip wire (misc. projects, snares)
- Pad of paper and pencil (leave notes or record information)
- Small Bible
- 2 bandanas (because they are so dang multi-useful)
- Leather work gloves
- Small knife sharpener
- Machete (clearing brush, chopping wood, self-defense)
- 4 spare AA batteries for my Gerber Firecracker
- 2 dust masks (can double as crude filters)
- Bar of soap and small bottle of hand sanitizer (hygiene)
- Travel toothbrush w/toothpaste
- 36″ length of rubber tubing (siphon, tourniquet)
- Small sewing kit
- 2 heavy duty 30-gallon garbage gags (water storage, shelter, poncho)
- P38 can opener
- Binoculars (which you should know how to properly adjust)
- Small fishing kit
- Stakes
- Sunglasses (can double as safety glasses)
- Whistle
- Insect repellent
- Earplugs
- Compass
At the end of the day, there is no perfect bug out bag. Even my own BOB changes and evolves with my needs, thoughts, wants, and tastes. An incomplete and imperfect bug out bag is better than nothing at all in an emergency. For me, the peace of mind in knowing it’s there on the shelf to grab if I need it is reason enough to have taken the time, effort, and money to build it.
_______________
Creek Stewart is a Wilderness Survival Instructor, author, and television host. Sign up here to take Creek’s free, 5-day bug out bag course, or learn more about him and the training he offers by visiting www.creekstewart.com.