Last year when I added an Art of Manliness ball cap to our shop, a bunch of guys said, “Hey! What’s with the flat-billed hat? Those aren’t manly!” At first these comments had me confused, since it wasn’t a flat-billed cap, but simply a traditional baseball hat that hadn’t been broken in yet.
When I asked for clarification, I was admittedly flabbergasted. The guys who ragged on our hat admitted that they thought all ball caps either came with a flat bill or one that had already been curved. They had no idea that baseball hats could (and should!) be broken in, and that you could curve the bill yourself.
It seems what was once essential man knowledge has been lost over time. So today I’d like to revive this classic bit of know-how, and offer a tutorial on how to break in a baseball hat.
How to Make a Fitted Baseball Hat Conform to Your Unique Cranium
To achieve a fitted ball cap that conforms to your unique cranium, you’ll first want to buy a hat that’s a bit bigger than your head. Wool and cotton shrink with heat and moisture, and your head will amply produce these elements while you wear your hat. So give your new ball cap a little wiggle room to shrink down to fit the contours of your splendid dome. If your hat is made out of polyester (like many of the newer ball caps are), then you don’t have to worry too much about it shrinking, though the tips below can still help create a better fit.
Before you get started: remove any stickers. Such is the sad state of baseball capology that I even have to articulate this step.
Just wear it. As just mentioned, heat and moisture are the key ingredients in getting a ball cap to sit properly on your head, so just wear it all the time and let nature do its work. Over time, the hat will gradually conform to your brain canister.
If you’re impatient, there are a couple things you can do to speed the process along:
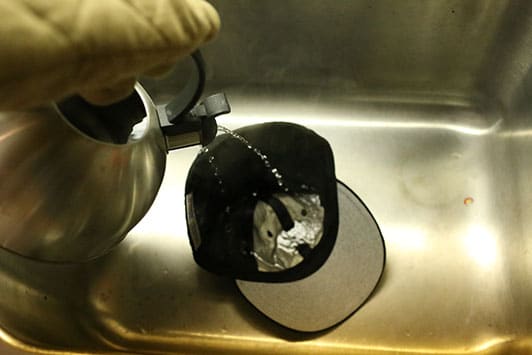
Soak the crown of the ball cap in hot water and then wear it until it dries. This only works on wool or cotton hats. It won’t do anything for the polyester variety. Make sure to let the hat cool off a bit before you put it on.
Take a hot shower in your ball cap and wear it until it dries. In lieu of the hot water soak, I’ve known guys to wear their baseball hat in a hot shower (heat and moisture!) and then just keep on wearing it until it dries. The only drawback to this method is that getting the bill wet may damage it, making it harder to curve (see below).
How to Make a Fitted Baseball Hat That’s Too Small Fit Your Giant Noggin
If you get a fitted baseball hat as a gift, but it happens to be a bit too small for your giant noggin, there’s still a chance you can make that hat fit comfortably.
This happened to me a few years ago. Kate got me a vintage Tulsa Oilers baseball hat from Ebbets Field Flannels for my birthday, but it was about a half size too small. They were of out of stock in a larger size, so I took to the internet to figure out ways to stretch a fitted hat and make it a tad bigger. Here’s what worked for me:
Your hat can’t be too small for your head. The techniques below won’t work if your hat is an entire size too small. I think at most, you can get away with stretching a hat that’s half a size shy of fitting.
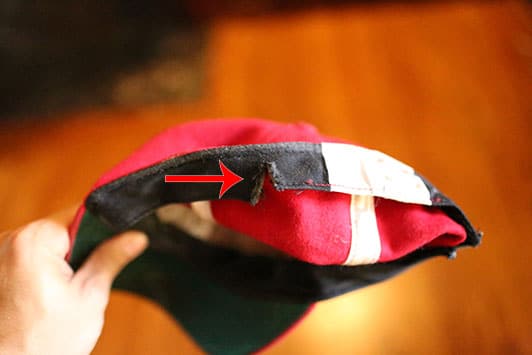
If your hat is too small, make two vertical cuts in the sweatband. Make sure to not make the cut all the way through.
Strategically cut parts of the sweatband. Make two cuts in the sweatband near the back of the hat. That should loosen things up a bit. Make sure not to cut the hat itself. You could do that if you wanted to loosen things up even more – but it just doesn’t look purty.
Simultaneously (and slowly) pull the bill with your hands and push out with your knee until you hear a loud “POP!” That “pop” is the sound of stitching coming apart in your hat.
Stretch the hat until you hear a “pop.” If making two cuts in the sweatband doesn’t work, this technique will. Place your hat on your knee with the bill facing you. Grab the bill with both hands. Simultaneously (and slowly) pull the bill with your hands and push out with your knee until you hear a loud “POP!” That “pop” is the sound of stitching coming apart in your hat.
Make sure to do this slowly and in a controlled manner. If you yank too hard too fast, you could rip the bill off of the hat. As soon as you hear that popping sound, stop stretching.
Undoing that bit of stitching really adds some room in your hat. After I did this with my Oilers cap, it fit like a glove. Don’t worry, your hat won’t fall apart. Mine is still going strong three years after I popped it.
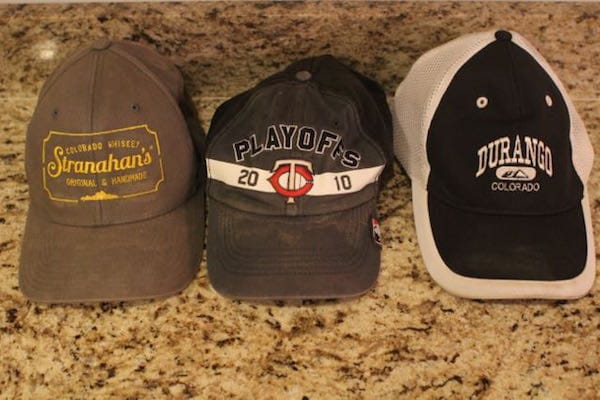
No Flat Bills: How to Shape a Baseball Cap Bill
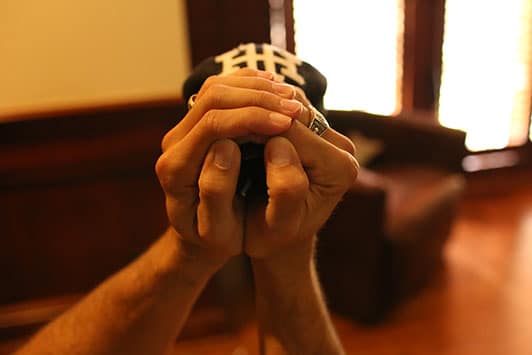
I know the whippersnappers out there like to keep the bills of their hats flat, but trends be damned. Perhaps I’m just a fist-shaking curmudgeon stuck in my ways, but I’ve always thought the flat bill thing looked goofy. It has a tendency to make the crown appear bigger, which consequently makes the wearer look like a boy sporting his dad’s ball cap. Baseball hats are already an accessory associated with the younger set; wedded to a flat bill, they make a guy look about twelve. Which I guess is okay if you’re actually 12, but after that you should wear a cap like a grown man – bill curved.
So as a public service to you youngsters and an exercise in nostalgia for us old-timers, below I show you various ways to create the perfect curve in the bill of your ball cap:
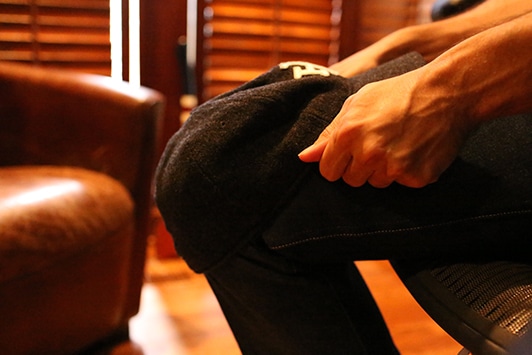
Shape it with your hands. The simplest way to do it. There’s definitely a “feel” you have to have to get the perfect curve. It’s almost like shaping clay. Getting your bill to stay in its curved position will require frequent manipulation for a few days.
While a symmetrical curve looks nice, some of the pros have always ignored this rule in favor of rocking an off-kilter bill that’s all their own.
There are a few risks with the hands-on method. One is that instead of giving the bill a nice gentle curve, you create a sharp bend; you want a kind of upside-down “U” rather than an upside-down “V” shape. You also want to make sure the curve is symmetrical — that the trough of the “U” sits right in the middle of the bill.
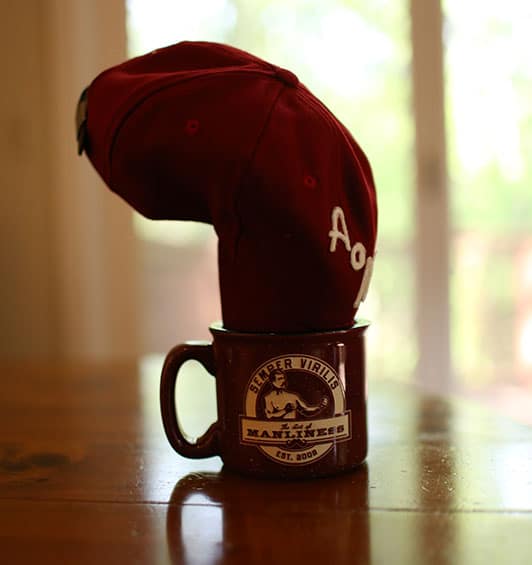
Shameless self-promotion: Hat and mug available in the AoM Store.
Stick the bill in a coffee mug overnight. No hassle and leaves a long-lasting, well-formed curve in your bill. This is my preferred method.
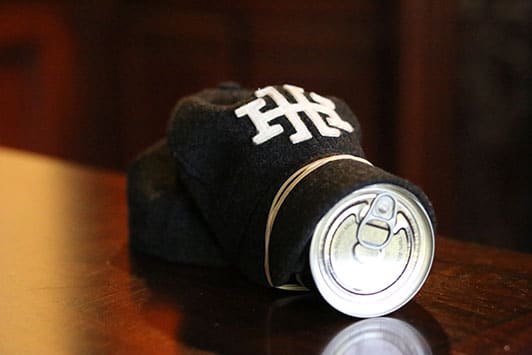
Wrap the bill around a softball or soup can. Just bend the bill around a softball or soup can and secure it in place with a rubber band. Leave overnight. This method lends the bill a subtle curve.

Curve the bill, fold it back into the hat, and leave overnight. Curve your bill and then fold it back into the hat so that it stays in place. Leave overnight. This is an okay method, but in my experience, the bill doesn’t stay curved all that well while it’s tucked into the back of your hat, so you don’t end up with much of a bend.
How do you break in your baseball hats? Share your methods with us in the comments!