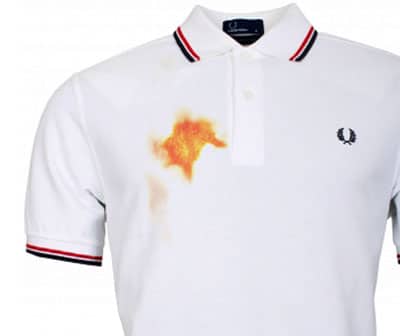
Plop.
That’s the sound of BBQ sauce landing on your brand new blazer coat as you’re chowing down on some mouthwatering ribs.
Dadgummit. You need to wear that jacket to a business presentation at the end of the week. What to do?
From sliding into first base to finding a leaky pen in your pocket, everybody stains their clothing from time to time. But stains aren’t just common annoyances; if you can’t get them out, they can cut short the life of otherwise perfectly nice (and sometimes expensive) duds.
The key to preventing yourself from throwing money out the window along with your stained clothes is to learn how to tackle stains as soon as possible and in the right way. Today we’re going to show you how to treat and remove common stains so you can get as much mileage out of your wardrobe as possible.
Key Steps to Prevent Setting
The most important thing, no matter what kind of stain you’re dealing with, is to prevent it from setting. “Setting” is an informal term that refers to the staining material forming a chemical bond with the fabric. At that point it is effectively permanent. Removing the discoloration will require removing the discolored fabric itself. Sometimes you can remove a set stain by scrubbing until the stained fibers are worn off, leaving unstained ones visible; other times the stain will remain in the fabric unless you physically cut the stained fabric out and put a patch in its place. To prevent having to throw away a garment with a permanent stain, follow these general guidelines:
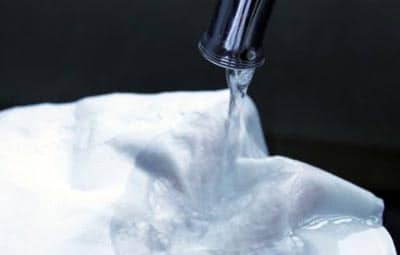
- Treat any stain immediately with water, or with the proper solvent if it is available (different types of solvents are discussed below, but water is always better than nothing).
- Avoid direct heat. Heat will speed most types of stains’ bonding. Do not place stained clothing near radiant heat sources, and try to only use room temperature or lukewarm solvents.
- Avoid pressure. Apply solvents gently, dabbing them onto the stain and letting them soak in rather than scrubbing forcefully.
If the stain occurs at home, you can go straight to treating it. If you’re out and about, get to a restroom and gently dab water onto the stained area with tissue paper or paper towels until the stain is thoroughly saturated. Yes, it may be more visible with water dabbed on it, but it will prevent the stain from becoming permanent, saving you garment repair or replacement in the long run.
Detailed Stain Removal
Acting at once to prevent the stain from setting is necessary, but not sufficient. Most common stains won’t be removed completely just by dabbing some water on them and going about your business.
There are three basic steps toward effective stain removal, regardless of the nature of the stain:
- Select the appropriate solvent.
- Use the appropriate application method.
- Seek necessary after-care.
For most household stains this doesn’t require too much research or investment. Common commercial products (and even some basic food supplies) will treat a large percentage of stains. It’s simply a matter of knowing which product to put on the stain, and how to put it there without damaging the cloth.
Selecting the Appropriate Solvent
Picking the right solvent requires you to know two things: 1) what will dissolve the stain in question, 2) and what is safe to use on the cloth you’re working with.
What Each Fabric Requires
Use the wrong product and you can end up damaging your cloth worse than the original stain. Most clothes are made from fairly sturdy materials, but they all have their strengths and weaknesses.
Always check the label. It’s your best guide in most cases. If it doesn’t provide any specific instructions, go by fabric type:
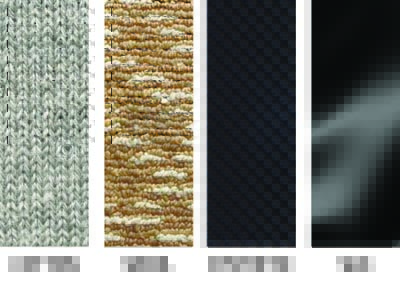
Cotton: can endure soaking, drying, and heat (though you want to avoid the latter for most stains — warm water is fine, but dry heat just sets the stain). It’s easy to bleach white cotton, but very hard on the fabric, so use chlorine bleaches as a last resort, and dilute them well. The best stain treatments for cotton are detergents and light acids (lemon juice, vinegar, etc.).
Wool: is much more heat-sensitive than cotton, and needs to be treated gently. You can soak it, but you have to lay it flat as it dries to prevent distortion. Use only wool-safe detergents and lukewarm (not hot) water — bleaches and acidic treatments will damage the wool permanently. Treat with water or a wool detergent as soon as possible, and then get the garment to the dry cleaner at the first opportunity.
Synthetics: vary depending on the material. Rayon and polyester can be washed and scrubbed more harshly than cotton, but will be destroyed by oxidizing bleaches like hydrogen peroxide. It’s usually best to clean them with a standard laundry detergent, or with dish soap for grease-heavy stains.
Silk: is exceedingly temperamental. You can treat stains on silk with water, but rather than letting the wet spot dry on its own, rinse the whole garment thoroughly — otherwise you’ll get water spotting, nearly as bad as the original stain. Glycerin stain remover is also effective and neutral.
No matter what you’re using, test the stain remover on an inside patch of the cloth or an unobtrusive seam before applying it to the stain to make sure it doesn’t do anything damaging to the fabric. Water is the only thing you can automatically apply — and even then make sure it’s the right temperature.
Types of Solvents (And the Stains They Remove)
Here are the major families of stain removers and solvents, and the kinds of stains they’re most effective at cleaning:
Water: Universal, safe to use on basically everything, and cheap. Effective as an immediate treatment to prevent stain setting. Needs prolonged soaking to have much effect on grease/oil stains, but reduces the effect of dyes (lipstick, hair dye, bleed from other clothes, etc.) considerably. Usually not a 100% effective treatment all on its own.
Salt: Cheap and almost everyone has it. Can be applied on top of a wetted stain to give the chemicals something to leech into. Effective on sweat/deodorant armpit stains, red wine, and blood stains.
Vinegar/Lemon Juice: Mild acids are great against coffee and tea, grass stains, and sticky residues like tape and glue. Vinegar is also effective against mildew — perfect for laundry that sat wet too long. Remember, though, don’t use on wool.
Detergent: Laundry and dish detergents are similar enough to use interchangeably in most situations. Dish detergent is usually harsher, and may make very delicate fabrics worse if you don’t wash it out thoroughly. Both are particularly effective against grease stains, so use them on everything from gravy and burger juice to chocolate smears.
Oxidizing Bleaches: Hydrogen peroxide is the most common example here. They’re effective at removing color, making them ideal for makeup stains, grass stains, and other pigment-based damage. They’re less effective against grease, and can damage delicate fabrics. Dilute as needed for a milder treatment.
Glycerin: A neutral, commercially available treatment that helps to draw stains out of fabrics. Good on ink and dye stains. Many commercial “stain sticks” are glycerin, or a combination of glycerin and detergent.
Mineral Spirits: An intense treatment for very stubborn greases (asphalt/tar stains, etc.). Too strong for delicate fabrics. Wash the clothing thoroughly after treatment and air-dry.
Digestants/Enzyme Cleaners: Commercial products sold under a variety of names. Highly effective on organic stains, and on stains with an odor (egg yolk, pet urine, blood, sweat, etc.). Cannot be used on wool or silk — the cleaner feeds on proteins, and both wool and silk are made from proteins.
Dry Cleaning Solvents: These are sold in a diluted form for home treatment of stains. Use them with caution — you’re rarely better off using commercially sold dry cleaning solution than you are taking the clothes to a professional cleaner.
Chlorine Bleaches: A harsh, last-ditch remedy. Use with caution. Can damage fabric and discolor non-white cloth. Always test a small, hidden area first, and only if the tag does not say “No Bleach” or “Chlorine Free” on it.
Not all stains are going to give way easily to one kind of treatment. Some will require multiple treatments for multiple problems: many lipsticks, for example, have both an oil component and a dye component.
In general, treat dyes before oils — chocolate, for example, is best treated with a lukewarm water soak and then with a bit of detergent applied directly to the stain.
Getting Rid of the Stain
The right product applied the wrong way can make the stain set worse.
Most of the time this boils down to a very simple concept: never apply direct force.
Dab gently or soak indirectly, rather than scrubbing with a cloth or your fingers.
That said, you can get better results if you use a series of steps designed specifically to draw the stain out of the fabric and into something else:
- Soak the stain with water immediately while you are still wearing it. We’ve said it before, but it bears repeating. Always dab some room temperature water onto the stain with a bit of toilet paper or tissue as soon as possible. Make sure the whole stain gets soaked, and that the water soaks all the way through the fabric rather than just sitting on the surface.
- When you remove the garment, re-wet the stain and apply an absorbent. Salt is the most common and cheapest, but some people use cornstarch or talcum powder for a similar effect. This works best on smooth fabrics like cotton knits — applying salt to a wool, tweed jacket is just going to be a pain to scrape off later. Let the absorbent sit for ten or fifteen minutes, then scrape the bulk of it off and rinse the rest out with water.
- Apply your solvent lightly to the back of the garment, underneath the stain. You want it to be soaking through and driving the stain back toward the surface, not deeper into the garment. Applying it to the inside also gives you a little more security in case the solvent ends up discoloring the fabric (but you checked first on an unobtrusive area like we told you to, right?)
- Lay the garment face down on a clean paper towel. Like the absorbent, this gives the chemicals that are actually causing the stain something to soak into. If you don’t provide that blank medium, all you’re really doing is spreading the stain out so thin that it’s not immediately visible — it’s still there in the cloth. The paper towel gives it somewhere else to go.
- Let the garment rest face down on the paper towel for an hour or so. Different solvents have different reaction times, but give it a while. The only real guideline here is to get back for your final rinse before the solvent dries completely. Keep an eye on it. If it is allowed to completely dry, you may just end up with a bigger, lighter-colored stain than before.
- Give the garment a final water rinse to remove both the stain and the solvent. If you can, immediately wash it, either in a laundry machine or by taking it in for dry cleaning.
Some stains can be removed simply by a wash or a dry cleaning, but it’s best to apply the specific treatment as well. In the case of delicate wools or silks, that may mean nothing but water.
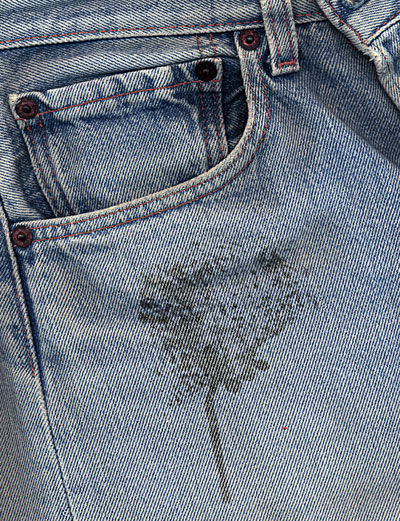
10 Common Stains and How to Treat Them
To give you a few examples of how to use the knowledge above, here are ten of the most common stains a man can expect to encounter. These could affect everything from his grungy work jeans to his best business suit.
Always take the type of fabric into account, and seek professional cleaning if you’re not sure what you can and can’t apply — it’s a lot cheaper to pay $10 for a professional’s help than it is to replace a suit because you used the wrong cleaner on it!
But if you have your heart set on home cleaning, here’s some general tips how to tackle common stains. The examples can be applied to other stains as well. Again, remember to adjust according to the directions above depending on the type of fabric the stain is on.
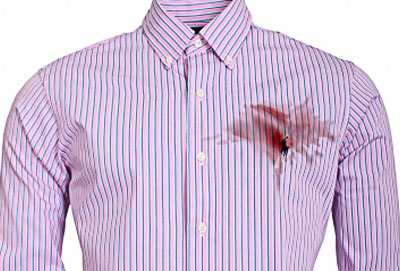
- Blood: Rinse immediately with cool water. If possible, immerse in room temperature water with detergent and let soak for 10-15 minutes. Spot-treat with an enzyme cleaner if possible, or with household ammonia. Launder in a separate load.
- Butter/Lard/Cooking Oil: Treat immediately with lukewarm water. If possible, immerse in warm water with detergent, using a spray or stick pre-treatment if available. Remove and gently dab stain with detergent; place face down on a paper towel and let stand. Repeat as needed. For persistent stains, carefully apply bleach or dry cleaning solvent from the inside of the garment and rest face down on paper towels, then wash thoroughly.
- Coffee: Soak immediately with lukewarm water. Gently dab stain with detergent or with vinegar diluted in water. Wash in the hottest water recommended for the fabric and repeat as needed. Avoid bar or powder soap, which can set the stain permanently.
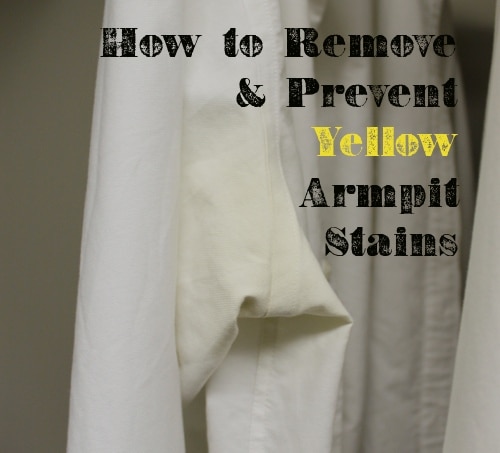
- Sweat/Armpit Stains and Collar Yellowing: Wash with hot water and detergent. If yellowing persists, soak in warm water and let stand with a dusting of salt, or apply an enzyme cleaner. Bleach can be used to remove staining on whites as a last-ditch solution.
- Tomato-Based: Remove excess sauce/paste carefully with a butter knife of spoon. Dab liquid detergent onto the stain. Rinse with cold water from underneath the stain; again, you don’t want to push it back into the fabric. Launder normally, according to the tag.
- Engine Grease/Machine Oil: Treat immediately with warm water. As soon as possible, soak in warm water with heavy-duty detergent. Remove, treat stained area with detergent directly, and lay face-down on paper towels. Launder separately. Repeat as needed.
- Mud/Dirt: Soak and agitate (shake around) in lukewarm water to remove as much as possible. Apply detergent to remaining stains and let soak for 20-30 minutes. Rinse and repeat. Launder normally, and treat any remaining stains with bleach if possible.
- Wine: Treat immediately with warm water. Salt stain and let stand if possible. Rinse salt out, dab gently with detergent or glycerin, and lay face down on a paper towel. Rinse again and launder normally. Avoid bar or flake soaps, which can set the stain permanently.
- Urine and Feces: Remove and rinse immediately in cool water. Avoid heat, which can set the proteins permanently. Soak and agitate in cool water with detergent. Drain and soak again, letting stand for 20-30 minutes. Launder immediately. Bleach if necessary, but rewash afterward in the case of diapers — bleach is too harsh for babies’ skin.
- Odors: Not all stains are visible. For odors that persist through a normal laundering, apply calcium carbonate crystals or activated charcoal and let stand for several hours (or several days, as needed). Shake off and use a gentle hand vacuum to clean residue. If there is a visible stain along with the odor, use an enzyme cleaner. Febreze can also work wonders here.
Treating Stains on the Go
You can’t always rush home to remove a stain from your clothes, and if you’re stuck with a big attention-grabbing stain on your clothes for hours on end without any chance to change, it can be embarrassing. Consider packing something like the Tide to Go Instant Stain Remover stick in your dopp kit and to keep in your car. It can remove several common food and drink stains from your clothes with an easy and quick application.
Conclusion: Immediate Action is the Best Product
Nothing treats a stain as well as immediate action. Get some room temperature water on it right away and you’re doing well. Once you’ve got the stain thoroughly soaked, you can take the time to look up the appropriate treatment, or get it to a professional cleaner. Don’t damage expensive clothing by trying elaborate home remedies when one commercial product or one trip to the dry cleaner will take care of everything.
__________
Written By Antonio Centeno
Founder of Real Men Real Style
Creator of The Internet’s Best Style Videos