While much of the world is in quarantine of some form, and often sequestered with children who are itching for something to do, we thought it would be fun to offer a weekly craft/project idea you can work on together to help while away the time. If you make the craft, we’d love to see it; share on social media with the hashtag #aomkidcraft.
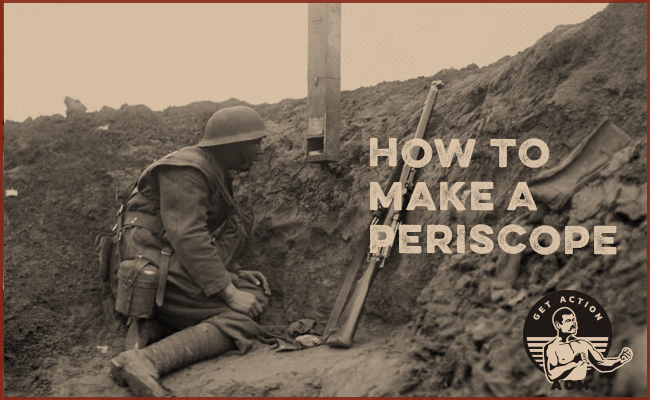
When I think of periscopes, the first thing that comes to mind is a submarine, cruising through dark waters, scanning the horizon for enemy ships. But as it turns out, periscopes have a much more varied history than I imagined. They’re used in tanks and armored vehicles, and were employed by soldiers in WWI both to see out of their trenches in general, and as rifle scopes that enabled them to target the enemy while remaining under cover.
Periscopes are simple devices that rely on either mirrors or prisms. Periscopes that use mirrors reflect light between two 45-degree mirrors while prism periscopes use the principles of refraction to bring an image to the viewer’s eye.
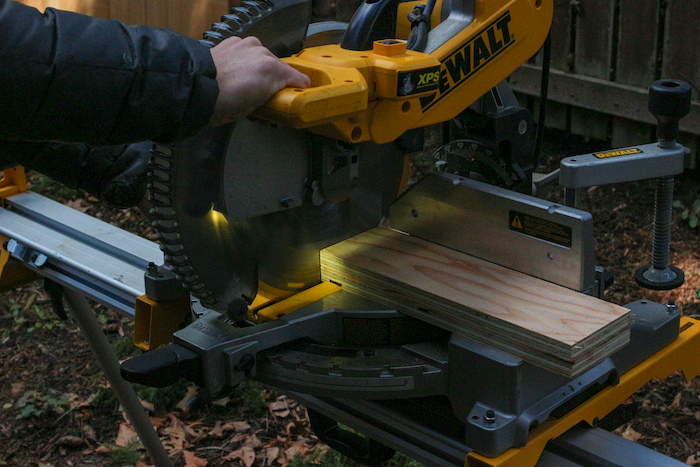
You can make a mirror periscope out of a material like cardboard, but the wooden variety is sturdier and feels and looks cooler. It’s a pretty easy weekend project for a kid to complete (with some help from Dad, of course), and all you need is some plywood, a couple mirrors, and a handful of other items, like glue and tape. Many wooden periscope instructions call for a specific size mirror, but in my experience, it’s not easy to find specific mirror sizes, and not all hardware stores will cut them to size for you. With that in mind, this tutorial is going to help you make a periscope that will fit whatever small, rectangular mirror you can get your hands on. Though, I’d recommend getting something that’s at least 2 x 2 inches and not bigger than 5 x 5 inches. Likewise, I’m using 3/4-inch plywood, but you can use 1/2-inch or something thicker if it’s all you have on hand.
Finally, while the list of materials I include here is very barebones, it can get the job done. But if you have things like a table saw, miter saw, and a pneumatic nail gun that shoots finish nails, the process is much easier.
How to Make a Mirror Periscope
Materials and Tools
- 2 small mirrors
- Plywood (a 4-by-4 foot sheet is plenty)
- Wood glue
- Hot glue gun (and/or clear packing tape or double-sided tape)
- Saw (ideally a table saw and miter saw, but a circular saw or even hand saw can work)
- Measuring tape
- Pencil
- Speed square
Step 1: Measure Mirror; Cut Plywood
Measure the width of your mirror (the short way, if using a rectangle) and mark it on the plywood.
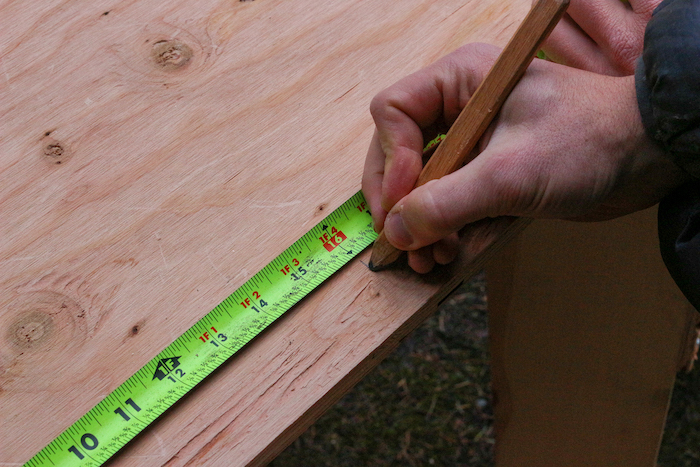
Cut a piece of plywood that’s as wide as your mirror and 16 inches long.
Repeat to create two strips of plywood and set them aside.
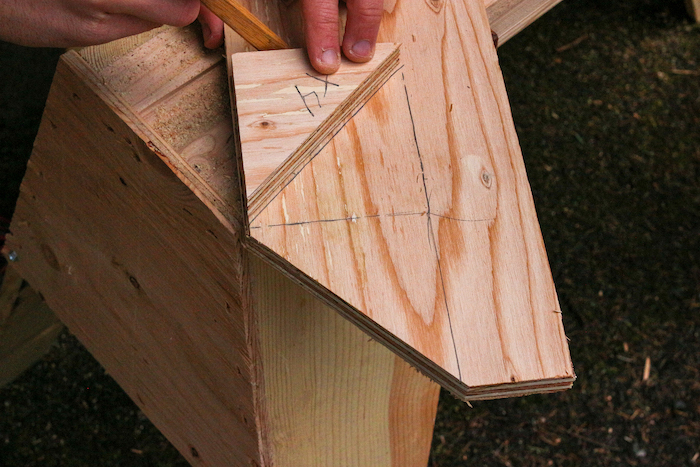
Step 2: Mark 45-Degree Angle
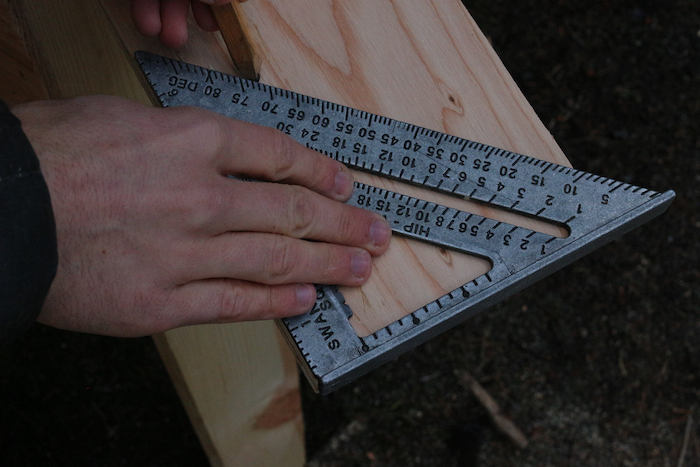
Use your speed square to mark a perfect 45-degree angle on another piece of plywood and draw a line.
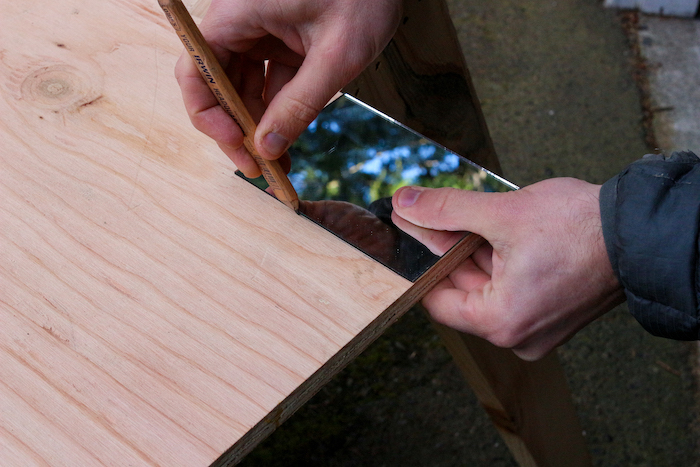
Step 3: Mark Out the Mirror

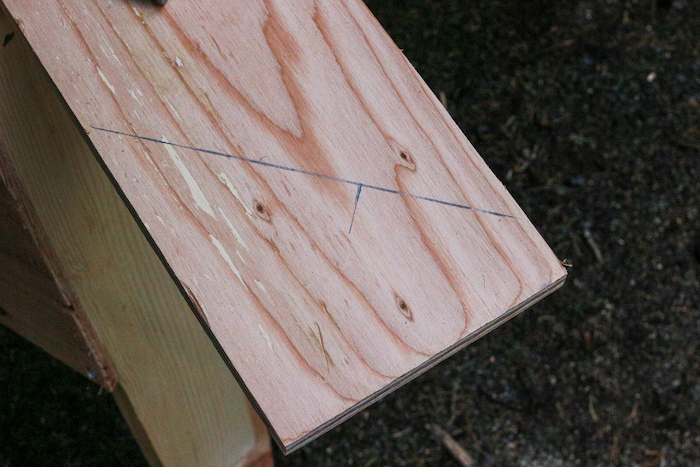
Place the long side of your mirror (any side if your mirror is square) along the 45-degree line. Make sure one corner of the mirror is flush to the edge of the plywood. Mark the spot where the other side of the mirror ends.
Step 4: Do Some Further Marking

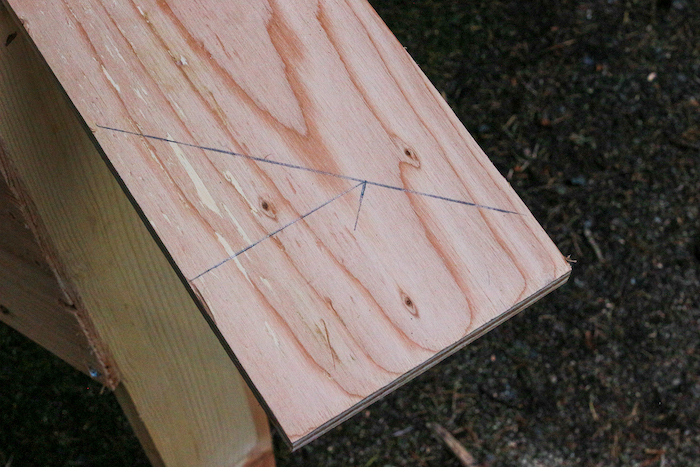
Use your speed square to draw a new 90-degree line from the base of the plywood up to the mark, indicating the length of your mirror.
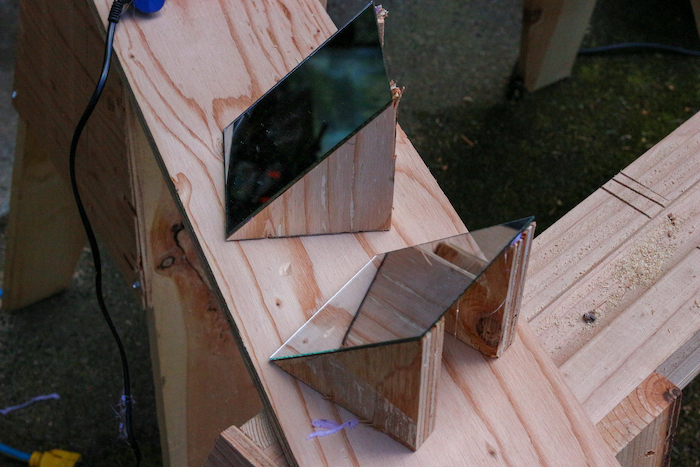
Step 5: Cut Out Triangle
Cut out the triangle you’ve just drawn and use it as a template to create three more.
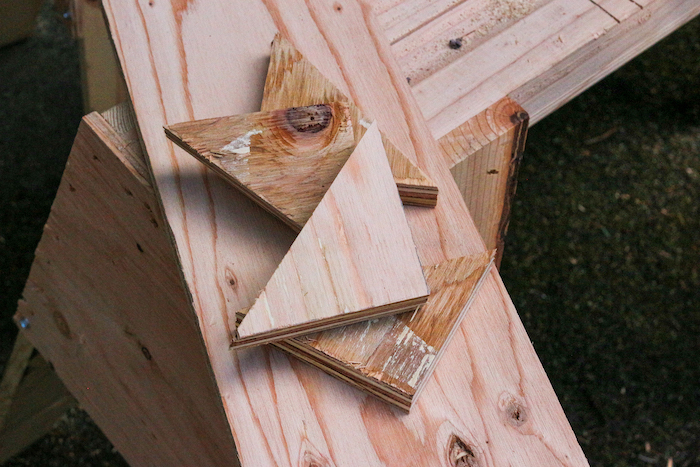
You should end up with four triangles whose long side is the same length as the longest side of your mirror.
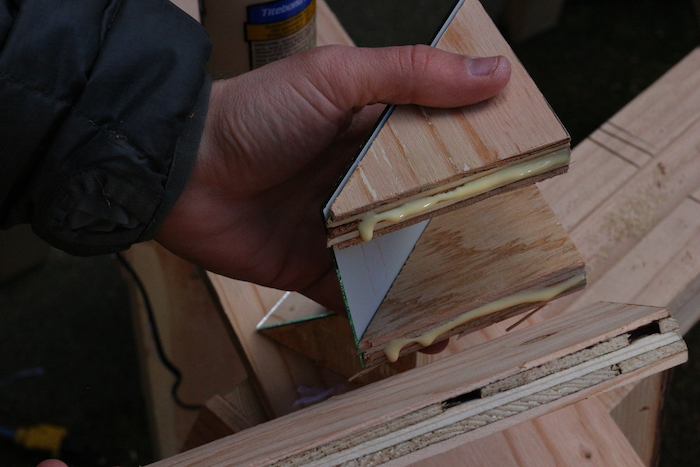
Step 6: Attach Mirrors
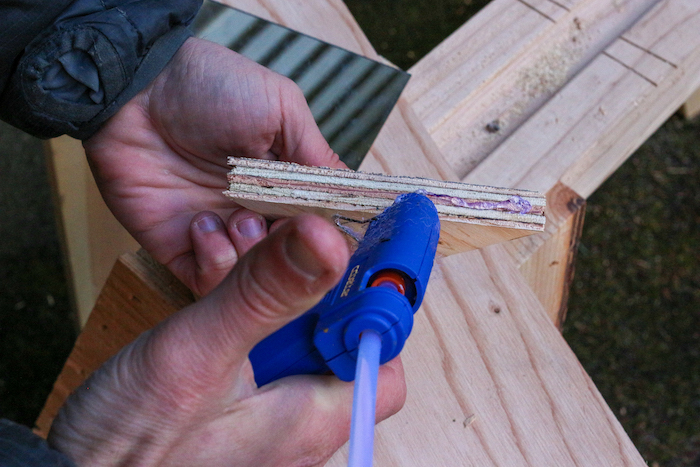
Use a hot glue gun, clear tape, super glue, or double-sided tape to attach your mirrors to your wedge-shaped pieces.
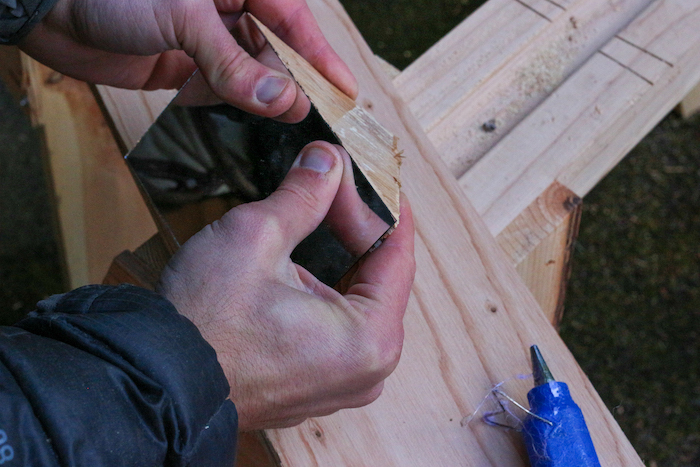
Note: I’m using a hot glue gun here, but cold temperatures made the bond weaker than I wanted, so I eventually added clear packing tape to help strengthen the connection, which you’ll see in later images.
Step 7: Glue Mirrors to Plywood Strips

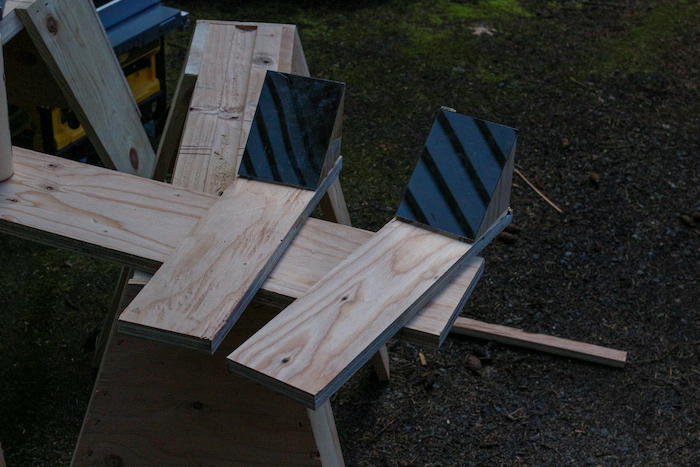
Glue your mirror wedges to the ends of your 16-inch-long plywood strips. Wood glue is your best bet here. Wait for the glue to set up, or use finish nails to hold it in place immediately.
Step 8: Measure the Sides
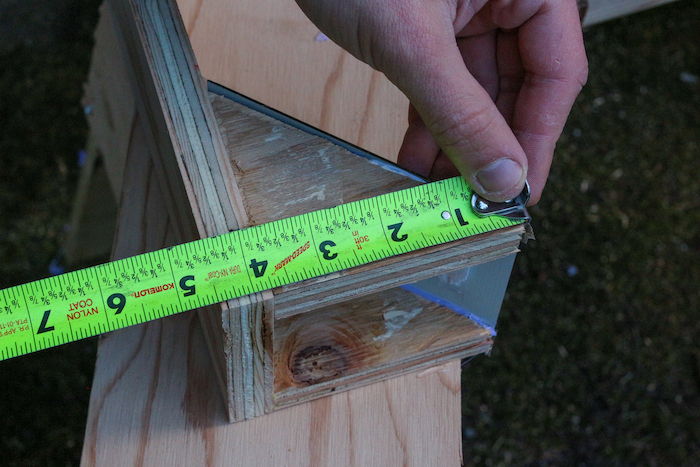
Prepare to cut the strips that will make up the sides of your periscope. Start by measuring the width of your existing plywood/mirror combo piece once the glue has set.
Step 9: Measure the Length
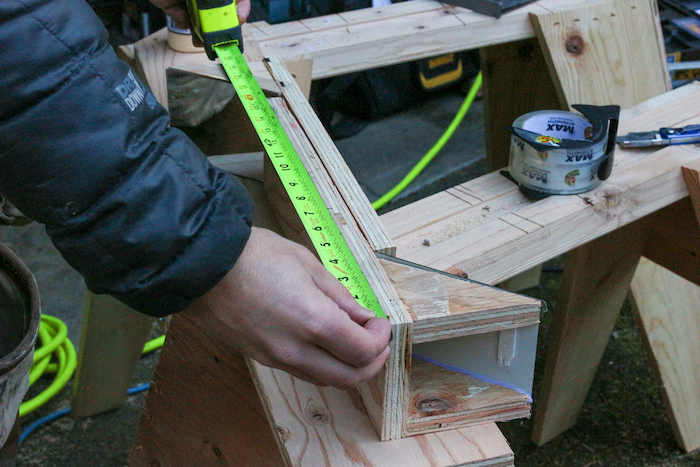
To measure the length, place your two mirrored strips together so that the top of one strip is against the top of the other strip’s mirror as shown above. Measure the total length of the pieces together.
Step 10: Cut the Sides
Use the width determined in Step 8 and the length determined in Step 9 to create two more plywood strips that will act as your periscope side pieces.
Step 11: Glue the Sides
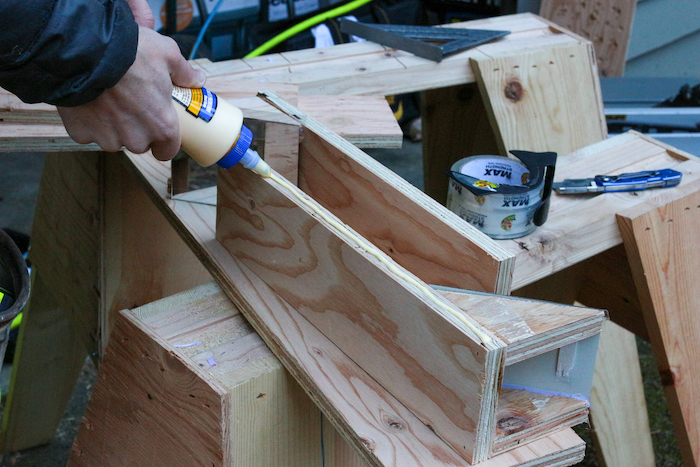
Glue your side pieces on so their edges are flush with the two mirrored plywood strips.
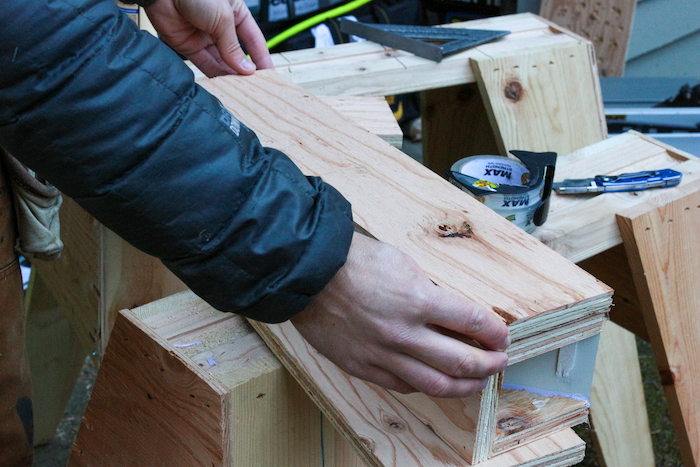
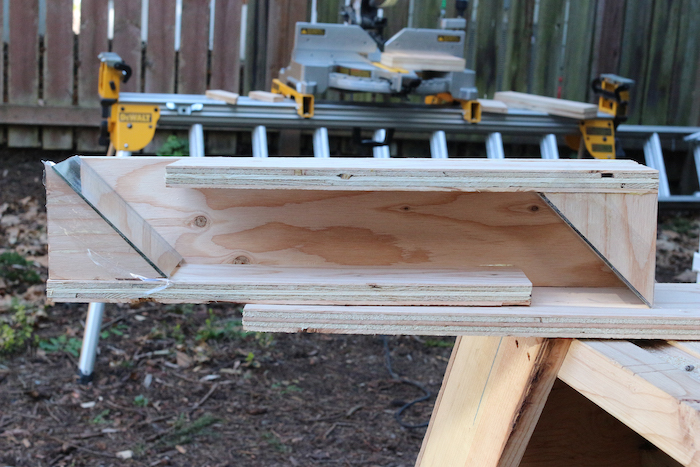
Step 12: Cut/Glue the Ends
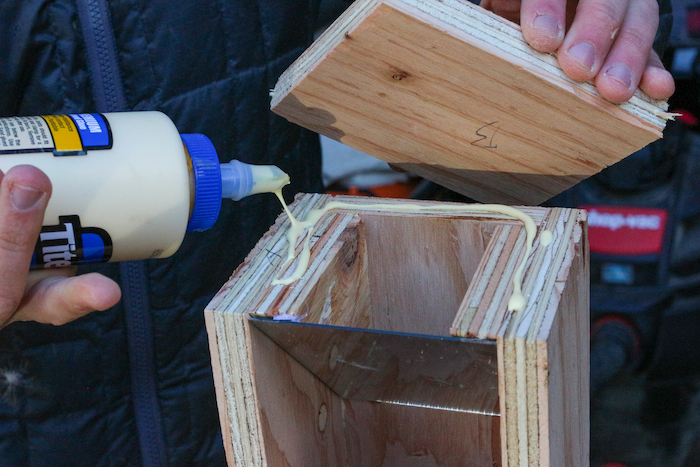
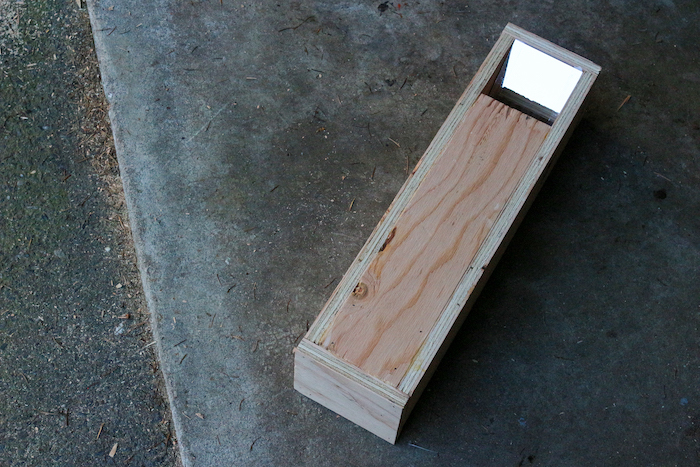
Finish your periscope by measuring/cutting small cap pieces and gluing them on either end of your periscope.
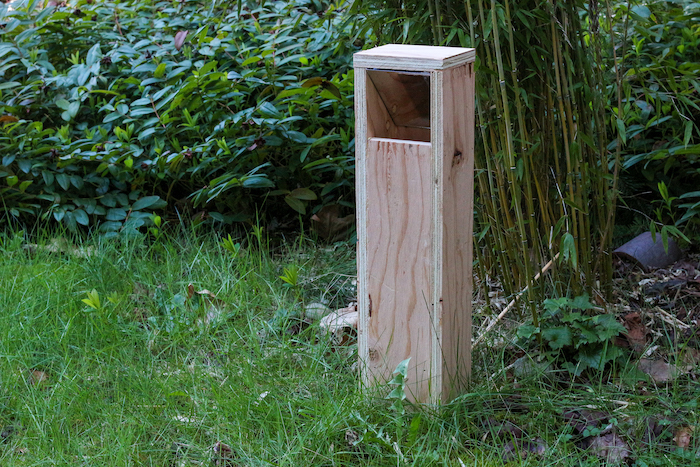
Step 13: Spy on Your Enemies!
The idea for this craft came from The Dangerous Book for Boys.
Here are some more fun, kid-friendly projects to keep your family busy:
- How to Make a Slingshot
- How to Make a Marshmallow Shooter
- How to Make Slime
- How to Make a PVC Blowgun
- How to Make a PVC Archery Bow
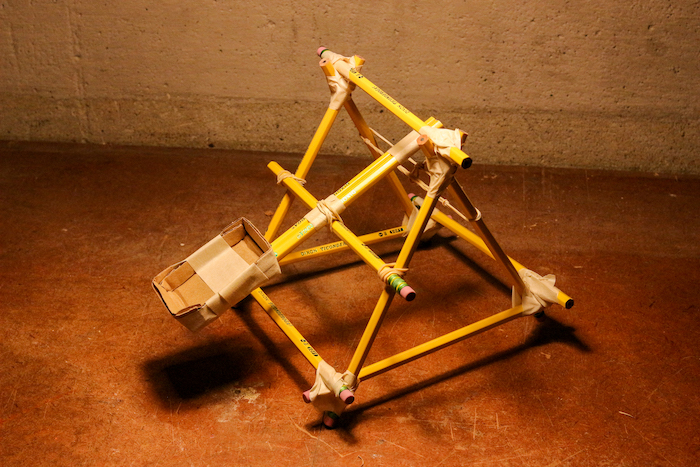
- How to Make a Pencil Catapult