While much of the world is in quarantine of some form, and often sequestered with children who are itching for something to do, we thought it would be fun to offer a weekly craft/project idea you can work on together to help while away the time. If you make the craft, we’d love to see it; share on social media with the hashtag #aomkidcraft.
Electricity is hard. Ask your friends how it works, and you’ll probably find that a vast majority of us have no idea what is really going on when we flip a light switch or pop a few batteries into our flashlight. But surely we can learn to understand electricity, and what better way to learn, than to create it yourself.
Making a battery is a great way to get introduced to some of the basic principles of electricity. At a basic level, electricity is a type of energy that results from the movement of electrons. Batteries contain all the necessary parts to create this flow of electrons because they include an anode, a cathode, and electrolyte. Anodes give up electrons, cathodes take electrons, and electrolyte is an ionic compound that electrons like to travel across, like a highway.
While modern-day batteries use complex alloys as their cathodes and anodes, you’ve likely got a plentiful supply of cathodes and anodes in your home. For our battery, we’re going to use aluminum foil as the anode and the copper found in quarters as the cathode. For the electrolyte, a mixture of vinegar and salt works great. Why? Because all acids work as the electrolyte. Adding salt increases the number of positive and negative ions and boosts the overall power of the electrolyte.
By layering aluminum, copper, and electrolyte, you can create a battery. Adding additional layers increases the power of your battery. Add enough layers, and you can drive a current powerful enough to run a small LED bulb.
Before you get started, keep in mind that the efficacy of this battery can be a bit finicky. I went through many rounds of testing and tweaking to get it to work more consistently, and as a result developed some protocols to increase your chances of success. Look for these “pro tips” along the way and heed their guidance as you build your battery. With some practice and patience, you’ll eventually get there.
How to Make a Battery Out of Coins
What you’ll need:
- Paper (standard 8.5 x 11 printer paper is fine)
- Aluminum foil
- Vinegar
- Salt
- Scissors
- 10 quarters
- 2 small pieces of wire
- Masking tape
- Small LED bulb
Step 1: Make Electrolyte Mixture
Add a tablespoon of salt to a half cup of vinegar and mix until the salt has dissolved. Measurements are very general here, so don’t worry about exact proportions.
Step 2: Cut Paper Discs
Cut out 10 discs of paper the size of a quarter. You can speed up this process by folding your paper over several times, then tracing out a quarter on the folded paper. When you finish cutting, you’ll have multiple discs the exact same size.

Pro tip: Cut just outside your traced circle to create discs that are slightly larger than a quarter. Bigger discs help keep the layer separate and prevent your battery from short-circuiting.
Step 3: Cut Foil Discs
Repeat Step 2 with aluminum foil to create 10 discs.
Pro tip: For the aluminum, cut just inside your traced line so that your foil pieces are slightly smaller than the diameter of a quarter. This is another safeguard against short-circuiting.
Step 4: Soak Paper Discs
Add your paper discs to the electrolyte mixture, stir them around a bit, and then soak for 30 minutes. The paper acts to hold the electrolyte in place once you start building the battery.
Step 5: Strip and Tape Wires
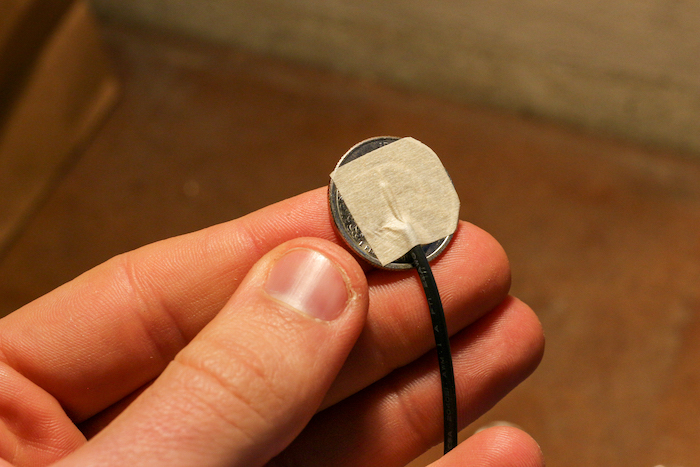
Strip both ends of your wires to expose about a quarter of an inch of bare wire. Tape the end of one wire to a quarter with masking tape.
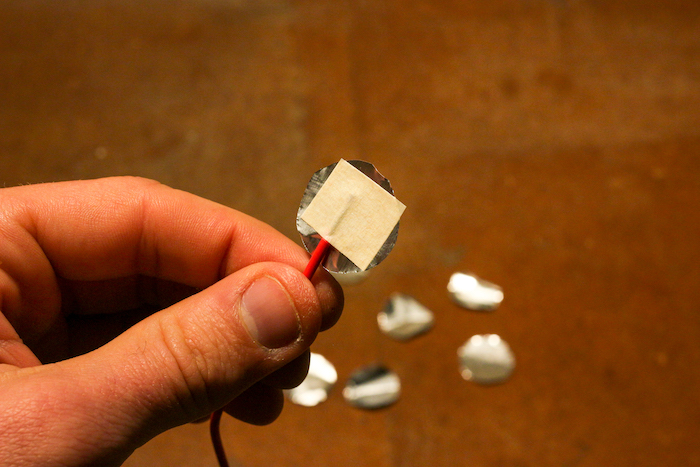
Tape the other wire to one of your foil circles.
Step 6: Begin Stacking the Battery
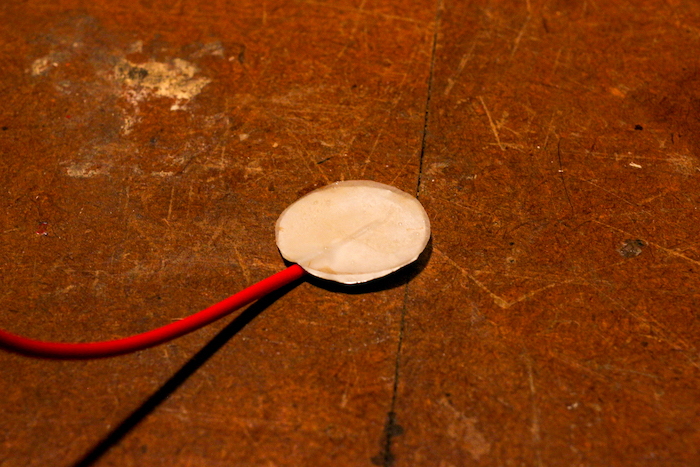
Create your battery stack, starting with the wire that has foil attached. Lay a piece of electrolyte-soaked paper on top of the foil.
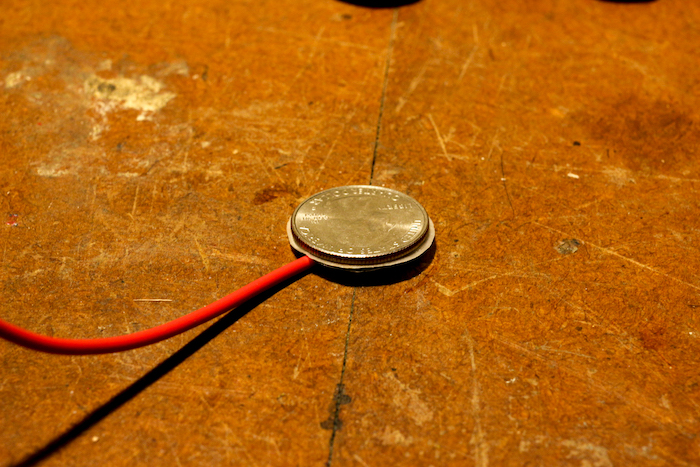
Then stack a quarter on top of that, followed by a piece of aluminum foil. Repeat this pattern: foil, paper, quarter (i.e., anode, electrolyte, cathode). Continue stacking until you have nine layers, ending with electrolyte.
Pro tip: Stack your layers carefully. If foil from one layer contacts your quarter from another layer, it will create a short circuit and ruin the battery.
Step 7: Finish the Stack
You should be left with a final quarter — the one that you attached to your wire with masking tape. Place that quarter atop the stack to finish it.
Step 8: Connect the Bulb

Bring the free ends of your wire to the terminals of your bulb.
With any luck, you’ll see the bulb light up! If it doesn’t work the first time, don’t despair. Double-check your stack to ensure you’ve got clean layers, and make sure your wires are firmly taped to each end.
The idea for this craft came from The Dangerous Book for Boys.
Here are some more fun, kid-friendly projects to keep your family busy:
- How to Make a Slingshot
- How to Make a Marshmallow Shooter
- How to Make Slime
- How to Make a PVC Blowgun
- How to Make a PVC Archery Bow
- How to Make a Pencil Catapult
- How to Make a Wooden Periscope