Editor’s note: This is an excerpt from Stacy Lyn Harris’s new book, Stacy Lyn’s Harvest Cookbook.
Making sausage yourself truly has become a lost art. Most people are satisfied to pick up a pack of Kielbasa from their local store and stick to those flavors as opposed to creating their very own flavor profiles. I have nothing against Kielbasa sausage. It really is fantastic, but knowing just how easy making sausage can be and that I get to determine every aspect of the recipe gives me the incentive I need to get out my own meat and CREATE!
While you can make your own sausage entirely with pre-packaged meat you buy at the grocery store, it’s an even more useful, practical, and delicious endeavor when you use and/or mix in fresh venison you’ve hunted yourself.
Venison is described as any game animal killed by hunting. Originally, you would categorize rabbit, pig, and even goats as venison. Here in America, when we refer to venison, primarily we are speaking of deer, including antelope, elk, caribou, whitetail deer, and the like. Keep that in mind as you read this article. Although I am using whitetail deer for my sausage recipes, feel free to substitute that meat with whatever venison you may have.
DIY sausage is one of those “must haves” if you frequently dine on venison. In most hunting circles, just mentioning venison sausage gives a nostalgic feeling of waking up to a hot camp breakfast after an enjoyable weekend of hunting. Every hunter needs to have in his skill set the ability to make his own sausage.
And while my tips here are angled at turning venison into sausage, every home chef, hunter or not, ought to try his hand at creating his very own sausage flavors.
The process is really very simple. Many people believe that making sausage at home is too time consuming or that they would rather leave that to the processor, but each of us are individuals with a variety of tastes and with just a little knowledge, you can make your own sausage to your liking with little effort and a super tasty reward.
Equipment Needed
Through years of speaking on the subject of eating wild, I’ve gotten to meet many resourceful farmers, hunters, gardeners, and wildlife enthusiasts. Recently, I have noticed that more and more of them are beginning to process their own deer and therefore, are looking for tools and recipes to make their processing easier. Fortunately, you can order almost all of the necessary tools right off the internet.
Meat grinder. You can use your stand mixer with the meat grinder attachments, a manual grinder, or you can go all out and buy an electric meat grinder. My family of 9 usually harvests about 13 deer a year, therefore we process quite a lot of venison. Our investment in an electric meat grinder has certainly brought a tremendous return. If you are going to be processing more than a deer or two a year, I suggest that you buy at least a 1/2 horsepower grinder. They are faster and much quieter than the lower horsepower grinders.
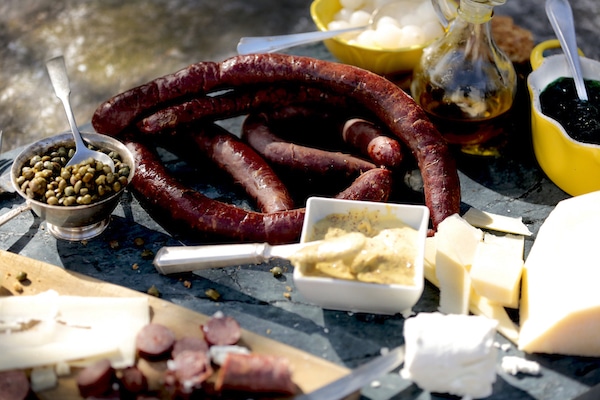
Casings. If you are going to make links, you will need casings. There are all kinds of casings out there, but I find that natural hog or sheep casing are the best for the money. Nothing is quite like using a natural casing. The natural casings “snap” when you bite into them and help to create a beautiful color to the sausage.
Stuffer. You don’t have to have a sausage stuffer and I didn’t for a long time, but I do think it is easier and more convenient to have one. Sometimes, using only the grinder attachment causes the sausage to get too hot, resulting in a sub-par texture. They can be expensive, but if you are planning on making sausage often, the investment is worth it.
Smoker. If you plan on smoking your sausage, you will need a smoker. You can purchase these at your local sporting goods store or make one yourself. This winter, I am planning on building a smokehouse to cold smoke my sausage, but for now, I am completely satisfied hot smoking.
Dry sausages such as summer sausage, pepperoni, and salami are cold smoked and require temperatures below 110 degrees for about 15 to 48 hours or longer for desired flavor and dryness. Cold smoking allows total smoke penetration inside the meat and has a very long shelf life. Curing salts, drying, and cold smoking are very effective and tasty ways to preserve meats.
Hot smoking relies on a humidity and heat balance to get that great smoky flavor. Placing a liquid filled pan (I like to use apple juice) inside of a small smoker and wetting wood chips an hour before smoking will help regulate the temperature inside. I prefer using a propane smoker since I am able to control the temperature to a greater degree than with an electric smoker, and the propane smoker reaches temperature faster. Hot smoking dries out the surface of the meat, creating a barrier for smoke penetration, but allowing enough smoke flavor to create great sausage in a relatively short amount of time. Hot smoked meats should be kept in the refrigerator and if not consumed fairly quickly, they should be frozen.
When smoking links, allow the links to dry for an hour or two before putting them in the smoker. Smoke the links for about 3 hours, maybe longer if they have not reached an internal temperature of 150-160 degrees. I usually remove the wood chips after the first 1.5 hours and continue to maintain the temperature in the smoker until the desired internal temperature is reached. You can remove the sausage from the smoker and finish them in a 200 degree oven if this works better for you. Allow them to cool before freezing.
How to Make Good Sausage
Good sausage is a result of fresh ingredients and proper balance. Venison is quite lean and needs a little fat, liquid, salt, and herbs and spices to create a super sausage. Once you have the right balance of ingredients, the sky’s the limit. Here are a few basic sausage making steps that will give you a leg-up on making your own.
1. Freeze Everything
Everything that you are going to be using to make your sausage, such as bowls, feeder for the grinder, stuffer, meat, and fat needs to be cold — very cold. If your ingredients get warm, your sausage mixture is going to get mushy. I suggest putting all your equipment, venison, and fat in the freezer for about an hour before using them.
2. Get Everything Ready Beforehand
Before removing your ingredients from the freezer, make certain that you have all your spices ready to go into your mixture. You are going to need to work fast so that your meat remains cold.
3. Cut, Mix, Re-freeze
Remove only your meat from the freezer and cut meat and fat into 1-inch cubes. Mix with your dry ingredients, cover, and place back into the freezer, along with any liquid that is to go into the recipe, for 30 minutes.
4. Set Up Work Station
After your sausage mixture has chilled, remove equipment and ingredients from the freezer and set up your work station.
5. Soak Casings
If you’re making link sausage, soak your casings in warm water to remove the salt and to soften them. I like to use 32–36 mm casings. If you aren’t making link sausage, ignore this step.
6. Feed the Grinder
Add the liquid to your chilled sausage mixture and blend with your hands. Attach the 3/8-inch plate (course or largest die) to the grinder and begin feeding the mixture. By using this plate, you have less chance of your sausage becoming mushy. If your mixture feels warm, place it back into the freezer for a few minutes while you attach the stuffer to the grinder and clean up a bit.
If you are not stuffing your sausage, freeze as if you were freezing ground venison, or prepare patties, freeze on a cookie sheet, place wax paper between the patties, and place in a freezer bag. Give them a night in the refrigerator if you are planning on eating them fresh; the flavors will then have been infused into the meat.
7. Case Your Sausage
Place a casing onto the stuffing tube leaving about 5 to 6 inches off the end of the tube to tie off; air will fill some of that casing. Feed the mixture into the stuffer. Allow the sausage to come out in one long coil, trying to keep the sausage casing consistent in size as it continues to come out of the tube. Remember to leave about 8-inches extra casing after the last of the sausage is stuffed. Tie off the casing in a knot.
8. Make Links If Desired
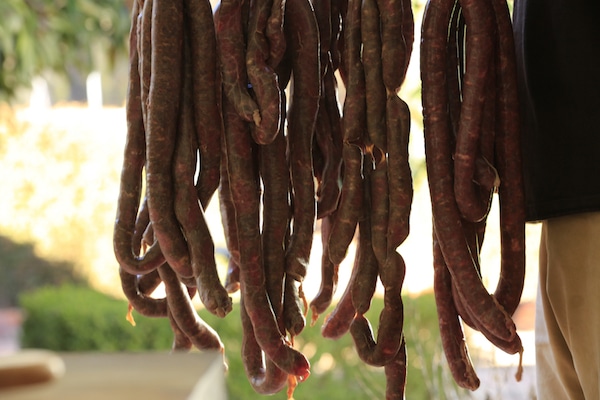
If desired, every 5-inches or so, pinch off what will become the links. Roll the link a few times and repeat until you get to the end of the sausage. Tie off the other end. Arrange the links on a cooling sheet where air can move around them. Allow the sausage to dry for about an hour. If you are smoking them, place them in the smoker, but if you are freezing them, refrigerate overnight then dry and package them for the freezer. If you are going to eat them, they will keep in the refrigerator for up to a week.
2 Recipes to Get Started
Italian Venison Sausage
One of my very favorite link sausages to make is Italian sausage. It is a wonderful sausage to smoke, grill, or fry. I personally like Italian sausage fried with onions and bell peppers. It is great on a bun or on top of greens, grits, or mashed potatoes. The versatility of Italian sausage amazes me. Oftentimes, I will remove the casing and add it to my pizza or spaghetti sauce.
If you try any sausage recipe at all, this one is a must. I like to smoke mine before cooking. It seems to add an earthy element to the sausage that I can’t get any other way. When in a fix, marinate your sausage in a dark beer. I like cooking with Guinness. If you don’t want to use beer, you can brush a very small amount of liquid smoke over the sausage links before grilling, baking, or frying them.
Ingredients
- 2 1/2 pounds ground venison
- 2 1/2 pounds ground pork
- 2 Tablespoons Kosher salt
- 1 teaspoon sugar
- 1 1/2 Tablespoons fennel seeds, cracked
- 1 teaspoon coriander
- 3/8 cup cold water
- 1 1/2 Tablespoon cayenne pepper
- 1 teaspoon fresh rosemary, chopped
Directions
- Chill attachments, venison, and pork in the freezer for about an hour. Remove meat from the freezer and cut into 1-inch strips. Mix dry ingredients into the mixture, cover, and return to the freezer for about 30 minutes.
- Meanwhile, if you are going to make link sausage, soak the casings in warm water to remove the salt and soften the casings. You can run water through the casings to make sure there are no holes in them.
- Remove equipment and ingredients from the freezer and quickly set up for grinding the meat. Add cold water to the meat and spices and mix with your hands. Place the 3/8-inch plate on the grinder and begin feeding the mixture through.
- If you are not making link sausage, you can freeze the sausage as you would ground venison. To make the link sausage, place a casing onto the stuffer leaving 6 inches of casing for tying off. Begin stuffing the sausage into the casing, leaving about 8 inches to tie off the end of the casing. If you have remaining sausage, use it as patties or ground sausage. Tie off the casing in a knot.
- If desired, every 5-inches or so, pinch off what will become the links. Roll the link a few times and repeat until you get to the end of the sausage. Tie off the other end. Arrange the links on cooling sheets where air can move around them. Allow the sausage to dry for about an hour. Freeze, cook, or smoke the sausage and enjoy!
Breakfast Sausage
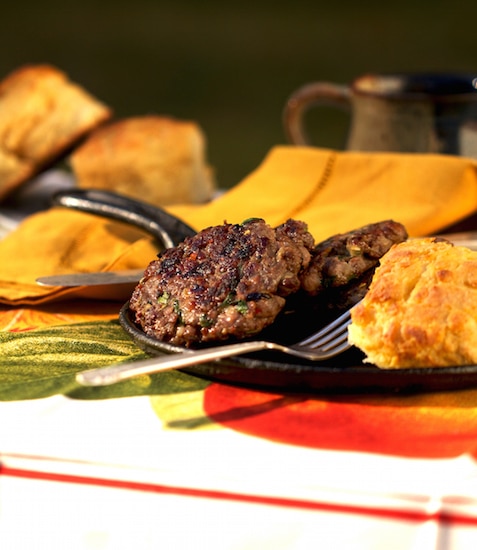
If you have never made sausage before, breakfast sausage is a great place to start. You can use any mixture of spices that you like. Traditionally, breakfast sausage consists of sage, rosemary, thyme, nutmeg, red pepper flakes, salt, and pepper. I have created a simple recipe that my family loves with very few ingredients. I often make link sausage with this recipe and save some of the mixture for a few servings of breakfast sausage as well. You can freeze this mixture as you would ground venison and bring it out for your favorite Italian dish, using it in soups, meatballs, and more.
Ingredients
- 4 pounds of venison scraps (you could use any part of the deer for this recipe), run through the largest holes of the meat grinder
- 2 pounds of pancetta run through the same grinder
- 1 Tablespoon salt
- ½ Tablespoon pepper
- ½ Tablespoon red pepper flakes
- ½ cup dry white wine
- 2 Tablespoons extra virgin olive oil
Directions
- In a large bowl, mix venison and pancetta with your hands until blended. Add salt, pepper, red pepper flakes, and white wine, and mix. Chill for about 30 minutes.
- Form sausage into 4-ounce patties. Do not over-handle the mix as this can affect the texture of the sausage.
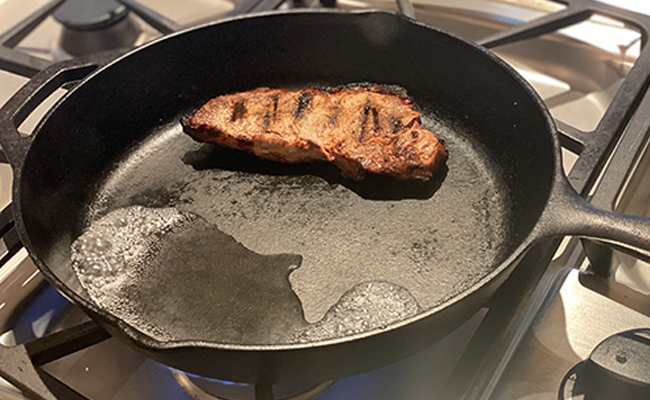
- Heat olive oil in 10-12’’ cast iron skillet. Add sausage patties and cook over low heat, turning frequently, until light brown on all sides. Cook in batches.
_____________________________
Southern chef Stacy Lyn Harris is the bestselling author of three books, founder of the popular Game and Garden blog, and a co-host of The Sporting Chef on The Sportsman’s Channel. This post is an excerpt from her Harvest Cookbook: Cook Fresh Food Every Day of the Year.