Editor’s note: This is a guest post from powerlifter, strongman, and Starting Strength coach Matt Reynolds, owner of Barbell Logic Online Coaching. And the obligatory disclaimer: As Matt will note in the post, this method of rehabbing has not undergone medical studies or scientific research. It’s based on years of on-the-ground experience from strength and conditioning coaches who have helped hundreds of athletes recover from muscle tears. You’re a grown man. You must decide for yourself if this is something you want to try. Be smart.
Nearly two weeks ago, I tore my left pec (“pectoralis major” to be exact, or for you bros, “chesticle”) attempting a 450-pound bench press at the Starting Strength Coaches Conference surrounded by some of the best strength coaches in the world.
My bench press warm-up was going great. The atmosphere in the gym was fantastic, and I was excited because my wife had just benched 215 pounds (a personal best) a few minutes earlier. Now I wanted to work up and hit a new max as well. I hit 315, and paused for an easy three reps. Then 365 for a single rep. Then 415. All very fast, all very easy.
We loaded 450 pounds on the bar, and I got my head right to focus and bench press the weight. I got a good set up on the bench, took in a big breath of air, and a coach gave me a great lift-off. Slowly I lowered the bar to my chest. I knew I would be able to bench press this weight today based on how easy it felt coming down. I paused when the barbell touched my chest for a full second, and then violently exploded the weight up towards lockout — every muscle in my body contracting and contributing to the lift. Things felt fantastic. Until…
I felt a little muscle spasm in my left pec. “No problem,” I thought, and pushed through the spasm. But then, the spasm intensified and instantly it felt like the middle of my pec “unzipped.” I could feel the individual muscle fibers tearing under the load as the bar lowered a couple inches on the left side, my now-tearing pec unable to contract at full strength and move the load. Quickly the spotters took the bar and saved me.
I immediately grabbed my pec. I knew I had torn it, and I knew it was a bad tear.

Dammit.
I had literally torn my pec down the middle of the “muscle belly” (basically, the meat of the muscle, between the tendons).
Frustrated, I began icing the pec immediately. I knew I was bleeding underneath the skin, with all the torn muscle fibers and the corresponding blood flow to those muscle fibers. Time to rehab.
The Starr Rehab Protocol
Fortunately, we Starting Strength coaches know an extraordinary method that will rehab torn muscle bellies in a very short time. We call it the “Starr Rehab Protocol,” named after the greatest strength coach who ever lived, the late Bill Starr.
I learned this method of rehab from Mark Rippetoe, who learned it directly from Starr. I called Rip, in preparation for this article, to ask him about the history of the method. He told me that Bill Starr shared it with him in the early 1980s, but that he believed Starr had actually created the rehab protocol as early as the late 1950s-early 1960s when he was stationed at Sheppard Air Force Base in Wichita Falls, Texas.
The story is that Bill had been struggling with an excruciating pain in his lower back — almost certainly a herniated disc that was causing him sciatic nerve pain. He was incredibly frustrated because he had dealt with this pain for months and couldn’t train. One day, having become totally fed up with the back pain, he decided to train on it anyway. So he loaded the bar to 135 pounds and deadlifted it with perfect form for a set of 15 reps. He immediately noticed that his back felt better by the end of the set than it had before he started. He waited a few minutes and performed another set of 15 or 20 reps, and again, felt even better. He then performed a third set in the same manner, and by the time he had finished three sets, his back felt better than it had in months.
Bill began training his deadlift again, adding small amounts of weight each day, deadlifting 4 or 5 times a week, and keeping the reps high until the weight got heavy. Amazingly, within a few weeks his back was totally healed, and he had no more pain.
The Starr Rehab Protocol was born.
Starr undoubtedly used this rehab protocol for decades — with the lifters at York Barbell in the ’60s, and then with his athletes on the various teams where he served as head Strength and Conditioning Coach. As far as we know, even though Starr was a prolific author, we have no knowledge or record of him writing about the method. As mentioned before, Starr passed down the information to a young Mark Rippetoe, in the early 1980s, and Rip used it quite frequently (and still does) in his gym, Wichita Falls Athletic Club.
The first I had heard of it was in September 2007, when Rip posted about the method on his StartingStrength.com forum. I’m going to repost it here in its entirety (with his permission):
____________
“Here is the tried-and-true injury rehab method for muscle-belly injuries we got from Starr and that has worked for years better than any other method I’ve ever used. It also works well on orthopedic injuries in general, and should be tried before anything more elaborate is used. Wait 3-4 days until the pain starts to “blur,” which indicates that the immediate process of healing has stopped the bleeding and has started to repair the tissue. Then use an exercise that directly works the injury, i.e., that makes it hurt, in this case the squat. Use the empty bar and do 3 sets of 25 with perfect form, allowing yourself NO favoring of the injured side. If it’s ready to rehab you will know by the pain: if the pain increases during the set, it’s not ready; if it stays the same or feels a little better toward the end of the set, it is ready to work.
The NEXT DAY do it again, and add a small amount of weight, like 45 x 25 x 2, 55 x 25 x 1 [weight x reps x sets]. Next day, 45 x 25, 55 x 25, 65 x 25, each for a set of 1. Continue adding weight every day, increasing as much as you can tolerate each workout. It will hurt, and it’s supposed to hurt, but you should be able to tell the difference between rehab pain and re-injury. If you can’t, you will figure it out soon enough. This method works by flushing blood through the injury while forcing the tissue to reorganize in its normal pattern of contractile architecture.
After 10 days of 25s [reps], go up in weight and down in reps to 15s, then to 10s, and finally to 5s. During this time do NO OTHER HEAVY WORK, so that your resources can focus on the injury. You should be fixed in about 2 weeks, squatting more than you hurt yourself with.
This method has the advantage of preventing scar formation in the muscle belly, since the muscle is forced to heal in the context of work and normal contraction, using the movement pattern it normally uses. The important points are: 1) perfect form with, 2) light weights that can be handled for high reps, 3) every day for two weeks, and 4) no other heavy work that will interfere with the system-wide processes of healing the tear.
It is also very important through the whole process of healing the injury that ice be used, during the initial phase after the injury and after the workouts. Use it 20 min. on/20 min. off, many times a day at first and then tapering off to morning, after the workout, and before bed. Ice is your best friend in a muscle belly injury, holding down inflammation and fluid accumulation (“swelling”) while at the same time increasing beneficial blood flow through the injury. But DO NOT USE ICE MORE THAN 20 MINUTES AT A TIME. More than that can cause more damage than it repairs.
… If you use this method exactly you can save yourself many weeks of lost training and long-term problems with muscle-belly scarring. Try it and see.”
____________
Why and How the Starr Rehab Protocol Works
When a muscle belly is torn (the term “muscle strain” is actually a small muscle tear), the fibers of the muscle tissue literally are torn in half and frayed. The body immediately begins an inflammatory response and sends blood flow to the area to begin the healing process. For the first 36-48 hours, we need to ice the injury to stop the internal bleeding that is occurring from the torn tissue and to avoid a horrible-looking bruise.
Once the bleeding has stopped, and the pain is a bit less acute and more of a “blur,” as Rip calls it, then we start the process of moving the muscle through its full range of motion. The vast majority of physical therapists, athletic trainers, and doctors would never tell you to be aggressive with the tear and almost always suggest several weeks of ice and rest, for fear of re-tearing the injured muscle belly.
The problem with resting the muscle is that the body will still attempt to heal the tissue and will lay down scar tissue at the point of the injury. Muscles contract when tiny filaments slide across each other and make the muscle “shorter.” (Try this at home: Look at the length of your bicep when your elbow is straight and the arm is hanging at your side. Now bend the elbow and bring your hand up towards your shoulder. What happened to the length of the bicep? The actin and myosin filaments actually slid over each other to cause the muscle to contract and “get shorter.”)
Unfortunately, scar tissue doesn’t slide. It is unable to contract. So if we do nothing about our injury it will still heal, but it will heal by laying a large amount of non-sliding scar tissue down in the middle of a muscle belly where all the rest of the fibers easily slide across each other to contract. So now, months or even years later, when you start getting the muscle strong again, there is a big scar running across the muscle belly, and this greatly increases your chance of re-tearing the muscle at the point where the healthy muscle meets the scar tissue, since that tissue cannot contract and relax.
If, on the other hand, we begin moving the muscle through its full range of motion within just a few days of the injury, then we’ll promote healing of the muscle fibers, without scar tissue. The body will literally lay down new muscle fibers across the injury, with the ability to contract and relax by sliding across each other.
Furthermore, when we use compound multi-joint exercises to work the injured area, we have found that the body has an incredible ability to allow the supporting muscles to potentially take more of the load than normal, and only give the injured muscle as much work as it can handle. So if I have a strained hamstring, rather than doing an isolation exercise like lying leg curls, where the hamstring is isolated and forced to do the work by itself, risking further injury, it would be far better to squat, and allow the glutes, quads, and calves to help with knee and hip extension and flexion. (The hamstrings are responsible for hip extension (straightening), but so are the glutes. The hamstrings are also responsible for knee flexion (bending), but so are the calves.)
We believe that the body must be trained as a system, because each piece was designed to work as PART of something greater than itself. We don’t train muscles in isolation, because they do not work in isolation in any normal human function. They work with both agonists and antagonists for the greater good of the body as a whole. Therefore, we both train and rehab the body as a system, and not in isolation.
Important Notes on the Starr Rehab Protocol
So what sort of injury does the Starr Rehab Protocol work best on? Very simply, we’ve seen that it works best for muscle belly injuries — things like strains and torn muscle bellies themselves. It has been our experience that it also works quite well with back injuries associated with disc problems (herniation, facet joint issues, sciatica, etc.).
What it DOES NOT work for are connective tissue injuries. Torn ligaments and tendons CANNOT be rehabbed this way. Tendonitis/tendonosis cannot be trained this way either — over-use injuries (like tendonitis) will not respond well to more use with a barbell. It does not work with plantar fasciitis. It does not work with Achilles injuries, but WILL work with calf injuries. So ultimately, the location and nature of the injury is highly important.
If the “muscle tear” is an avulsion where the muscle tendon completely tears and no longer works (as in the case with a pec tendon tear, or more commonly a bicep tendon tear), and the muscle rolls up and moves away from the insertion of the tendon, then the Starr Rehab Protocol obviously won’t work. (Did I actually have to tell you this?)
But for normal everyday muscle injuries — strained hamstrings or calves from running, strained/torn pecs, biceps, lats, adductor/groin (very common), etc. — the Starr Rehab Protocol works amazingly well, and in short order.
If this method works so incredibly well, and fast, why is it not used more widely and why is it not accepted in the medical community? First off, a study has never been done on this method and is never likely to be. Can you imagine going to the Institutional Review Board (IRB) and asking to run a test where we aggressively rehab muscle belly tears? There is absolutely no chance a study like that would get approved. So I want to be totally clear that I have no scientific proof that this works. Right now, it’s just a theory, and will more than likely remain so. However, we have seen this method work brilliantly hundreds of times in practice.
Charlie Francis’ Method
One more important note: In my research several years ago on the Starr Rehab Protocol, I actually ran across an extremely similar method prescribed by the late Charlie Francis, who was, arguably, the best sprint coach of all time. Sprinters strain their hamstrings all the time. If they are training for a big international race and strain a hamstring 10 days out, what do you think they’ll do? Shut it down and miss the international competition, or figure out how to rehab the thing and compete 10 days later?
Coach Francis’ method was taken from Gerard Mach’s book called Sprints and Hurdles, published in 1980, and no longer in print. “Charlie taught his clients that careful and methodical treatment will allow even the most severe tear to heal in a 10-day period. Charlie also enforced the idea that scar tissue needs to be properly managed as to prevent related injuries pulling from the original scar tissue.” (CharlieFrancis.com)
In Coach Francis’ method, he advocates icing the injury to stop internal bleeding for 24-48 hours. Then by day 4 following the injury, Charlie would have his sprinters perform some low-intensity and medium-volume calisthenics like marching, skipping, short 10-20 meter tempo runs (60-70% intensity), and squatting (and specifically no jumping or high impact work).
As each day progressed, Coach Francis would have his sprinters increase the distances of the tempo sprints, and slowly increase the intensity at which they ran. They would continue to squat throughout. By day 7, they would be running 100-300 meter sprints. On day 9, they would start from starting blocks. Coach Francis found out from his experience the same thing we have: muscle belly tears MUST be trained and worked, through full range of motion, in order to rehab quickly, properly, and in a way that manages scar tissue.
My Own Experience
I have successfully used the Starr Protocol to rehab a badly torn right pec (3 years ago), a torn lat, a torn bicep muscle belly, a torn adductor (left groin), and my current rehab on my left pec.
Bruise from torn lat muscle.
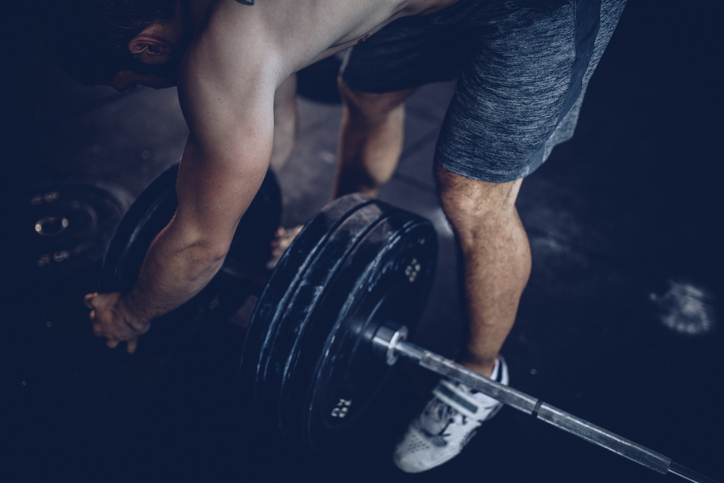
I want to focus specifically on two of those instances that I documented well. Ten days out from my last powerlifting meet, I tore my left lat while deadlifting with a mixed grip. My left hand was supinated (underhanded) and the strain on the lat was too much half-way up the lift, and the lat tore, right in the middle of the muscle belly.
I spent the next 10 days actively and aggressively rehabbing the lat — first with inverted rows and supinated lat-pulldowns, eventually moving to chin-ups with bands (to effectively reduce my bodyweight) and continuing to deadlift, albeit not heavy.
Ten days later I deadlifted 701 pounds at the meet, quite easily, and had no problems with my lat whatsoever. I actually missed a deadlift of 725, just above my knees, straining and struggling with the weight for 5 seconds or so before finally giving up on it. The lat held up just fine. The Starr Protocol worked wonderfully.

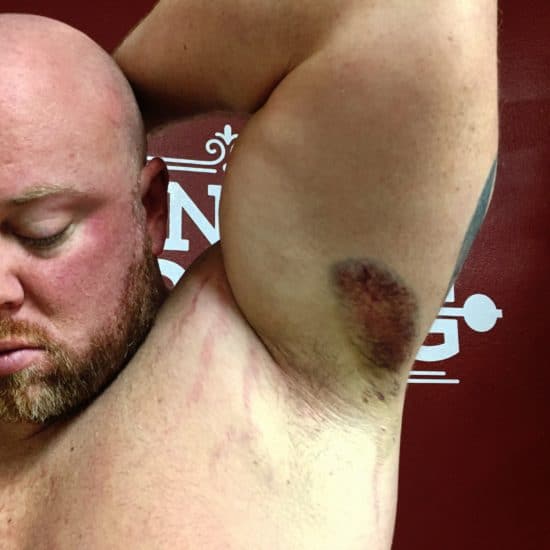
Bruise from torn pec muscle, 48 hours after tear.
In my current situation, I tore my left pec 11 days ago. I have bench pressed nearly every day since the tear, using high reps and light weight. 48 hours after the tear I benched the empty barbell (45 pounds) for 3 sets x 25 reps.
The next day:
- I benched 65 pounds: 3 x 25
- Day 3: 75 3 x 25
- Day 4: 85 3 x 25
- Day 5: 95 3 x 20
- Day 6: 115 3 x 20
- Day 7: 135 3 x 15
- Day 8: 155 3 x 15
- Day 9: 175 3 x 12
- Day 10: 185 3 x 10
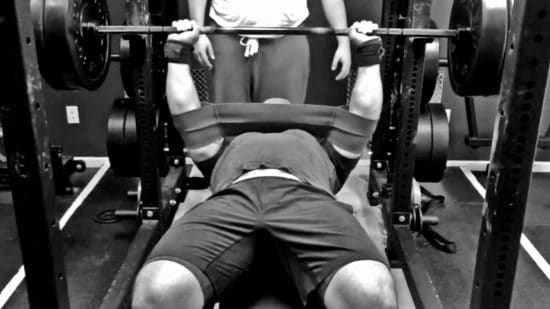
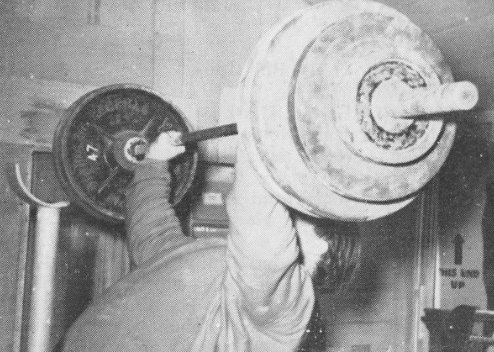
Using the SlingShot in the rehab process.
I also added in overhead pressing by Day 5, and started adding in SlingShot work on the bench press on Day 7, going about 50 pounds heavier with the SlingShot than I was benching without it. By the end of two weeks, I’ll be benching 225 for sets of 10, which is pretty incredible if you think about it — not because I’m incredible, but because the method is.
I’ll be 90% healed 4-6 weeks after the injury. The last 10% will probably take a little more time with an injury this severe, but again, I’ll most likely be pressing 405 just 4 or 5 weeks after a really bad pec tear. That’s how well this method works. (Update: Matt originally wrote this post over a month ago. He’s now back to benching 315 pounds for sets of 10.)
Remember, muscle strains and tears happen. If you are an active male and exercise hard, play hard, and/or train hard, chances are you are going to strain or tear a muscle or have low back pain at some point in your life. An injury like this doesn’t have to force you to the sideline, regardless of what conventional medical wisdom says.
Be smart. Work the area through a full range of motion with perfect form. Use high reps (20-25), start with extremely light weights, and add a little weight each day. You’ll repair the muscle faster than you ever would have thought, you’ll lay down fresh muscle fiber with the ability to slide and contract, you’ll drastically reduce scar tissue formation, and you’ll be back to your pre-injury strength much faster than you ever thought possible.
Watch the Video
_____________
Matt Reynolds is a competitive powerlifter and strongman. He’s a Starting Strength coach as well. Matt offers online coaching at his site: ReynoldsStrong.