Here at the Art of Manliness, we’ve talked a few times about the manly ritual of a good shoe shine over the years. For awhile now, I’ve kept my own shoe shine supplies in a box I got for Christmas a few years back. It’s a pretty nice box, but I’ve always had an itch to make one with my own two hands. Then a few months ago I was looking through some old Popular Mechanics magazines, and a nifty shoe shine box design in an issue from 1950 caught my eye.
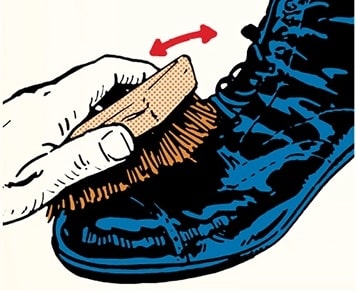
It’s a simple design. You’ve got a place to hold your brushes and polish cans and a place to rest your foot when shining your shoes. What makes this design so nifty is the two free-turning dowels placed inside the box. After you’ve given your shoes a good polishing, the dowels serve as rollers for your polish cloth for buffing your shoes to a mirror shine. Here it is in action:
This is an incredibly easy and inexpensive project. It only takes an hour to complete, but you’ll end up with a unique and sturdy little box that will last you a lifetime.
The Design
Here’s the modified Popular Mechanics design that I used to make my shoe shine box:

Click here for larger image.

Thanks to AoM reader Robert Heffern for providing this SolidWorks image. Click to enlarge.
Materials & Tools Needed
Materials
- (1) 3/4″ x 8″ x 8′ board (I used a cedar board I bought at Home Depot for $11. I was able to make two boxes out of one board. You can use whitewood for an even cheaper box.)
- (1) 5/8″ wooden dowel
- (18) #6 1-1/4″ wood screws
- Saw (I used my table saw. Miter saw works, too. Heck, you could even use a handsaw for this project.)
- Power drill
- Band saw or coping saw
- 11/16″ bore bit
- Compass
- Measuring tape
Measure and Cut Wood

Here’s the board that I’m going to cut my pieces from. It’s a 3/4″ x 8″ x 8′ board that I cut in half. While the width of the board is labeled 8″, its actual width is 7 1/4″.

I measured and marked all my cuts at once. I used the full width of the board (7 1/4″) for most of my pieces to make things easy.
Here are the measurements you’ll need:
- (1) 8 1/2″ x 7 1/4″ (this will be your bottom piece)
- (2) 5 5/8″ x 7 1/4″ (these will be your end pieces)
- (2) 3 1/2″ x 8 1/2″ (these will be your side pieces)
- (1) 2 3/4″ x 8 1/2″ (this will be your top)
- (2) 5/8″ x 7 7/8″ dowels

Cut your wood with your saw.

All the pieces for the box
Mark Arcs and Bore Holes

On the end pieces we will cut two arcs that are 2″ wide into the top corners. To mark the arcs, grab a compass and set the point and the pencil 2″ apart. Place the point in the corner and trace out your arc.

Mark where your bore holes will go for your dowels. They should be 1 15/16″ from the sides and 3 5/8″ from the bottom. Above you’ll see the marks and measurements for the arcs and bore holes.
Cut Arcs

I used my band saw to cut the arcs out.

Here are the two end pieces with the arcs cut out from the corners.
Bore Holes for Dowels

Time to bore the holes for the dowels. Get your 11/16″ wood bore bit.

You don’t want to bore all the way through the wood. Go about 3/8″ deep.
Screw Pieces Together (and Insert Dowels)

Now it’s time to screw all the pieces together. I recommend drilling pilot holes before screwing in the screws. Also, be careful not to use too much power with your drill lest you split the wood. Start by screwing the two end pieces to the bottom.

Three screws on each end of the bottom piece will do the trick.

The two end pieces screwed to the bottom piece.

Screw the two side pieces to the two end pieces. One screw in each corner.

I put my dowels in at this point. It took a bit of work to get them in their holes. I probably should have done this earlier, like when I was drilling the end pieces to the bottom piece.

Secure the foot rest on top with four screws in each corner. We’re pretty much done with this nifty shoe shine box. If you have some spots that look like they’re uneven, no worries. It’s nothing a little sanding can’t fix.
Sand

Give the entire box a good sanding. Spend time on joints that look uneven. Feel free to stain it. I liked the unfinished look, so I decided to pass on the stain.
Enjoy Your Shoe Shine Box You Made With Your Own Hands