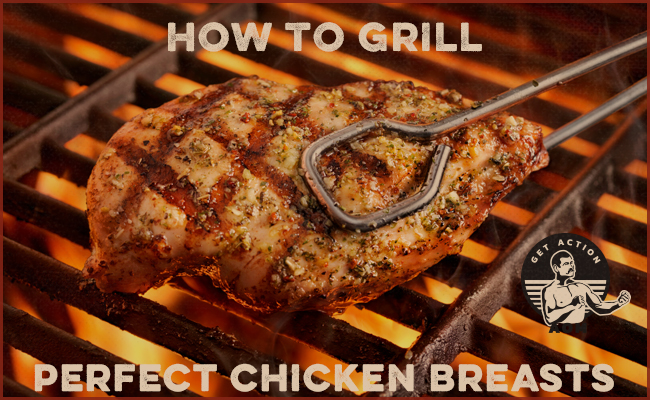
Chicken breasts are not a very popular meat for summer BBQs, as they’re perceived as invariably turning out dry and boring. But the truth of the matter is that the problem often lies with the chef and not the meat itself. Over the years I’ve learned a handful of tricks for grilling chicken breasts so that they turn out flavorful and juicy every time.
Read on for how to confidently include this delicious white meat at your next summer grill-out.
The Keys to Grilling Perfect Chicken Breasts
Slice the Cut Horizontally
When grilling any meat, you want a cut with even thickness all around — that’s the only way it’ll have a consistent temperature all the way through. Those giant chicken breasts you get at the store are always lopsided and inevitably cook unevenly. The thin side is done in 10 minutes, but the big end needs another 10 to get to temperature; by that point, half the breast is overdone and too dry to enjoy.
You have a couple options to even out the chicken to make it easier to grill. You could pound out the thick end of the breast, but I’ve always found that to be an unpleasant process. It leads to a mess and makes for misshapen cuts of meat.
My preferred tactic is to use a sharp knife and slice the whole thing horizontally. It’s still inevitably a little uneven, but not nearly as much as before. The internal temperatures may not be totally consistent, but since the cut of meat will be thin anyway, it doesn’t matter as much. You could “butterfly” the cut, which is where you cut horizontally but stop before you go all the way through. In my opinion, though, there’s not much point to that; might as well just go all the way, as it makes for easier handling on the grill and plate.
Salt Ahead of Time
Apply a light layer of salt to your piece of chicken — a “dry brine” — at least a few hours before cooking, up to a full 24. As Samin Nosrat explains in her book Salt, Fat, Acid, Heat, the benefit of this salting, which applies to any kind of meat, is that “the piece of meat remains moister, and you have a greater margin of error for overcooking.”
Juicier chicken, with less risk of a dried-out, overcooked product. Win-win! There’s no reason not to give the meat a dry brine. Here’s how:
- Apply 1/2-3/4 tsp of salt per pound of meat, spreading it evenly over the surface — top, bottom, and sides. It’s not a crazy amount of salt, but most likely more than what you’d normally add. Use kosher or table salt; whatever you have is just fine. If cooking a skin-on breast, note that salt will penetrate the skin; so go ahead and apply directly to the exterior. (As an added bonus, the salt will dry the skin, making it extra crispy and delicious.)
- Stick in the fridge — no need to cover — for anywhere from 2-24 hours.
Right before cooking, you can also apply any other seasoning you like — there’s no real reason to do it ahead of time with the salt. It’s the salt that’s doing all the work and any additional seasoning is just for flavor at the time of eating.
Read up more on the science and technique of salting.
And/Or Marinate
If you’re feeling saucy, go ahead and use a marinade. (If you’ve dry brined as well, just marinate it for the final 1-2 hours before cooking.) Store-bought does the trick fine, but something homemade is really easy to whip up and not prone to the over-sweetness of the stuff you find on grocery store shelves. This article has a great kabob marinade recipe (and some other general marinating tips).
A marinade will not penetrate through to the interior of the chicken breast; the point is simply to coat the outside of the food and give it a flavor-packed, caramelized exterior. The liquid will certainly penetrate some, but not much. You’re aiming for a crispy crust and a juicy interior.
Two quick tips for marinating:
- When grilling marinated foods, you’ll want to oil the grill a little bit to help mitigate sticking, which is common when you’re grilling with a sauce. Put a little bit of oil — about a teaspoon — on a paper towel and wipe the towel on the grill grates.
- Don’t poke holes in the meat. I used to do this, thinking it would allow the marinade to better soak in. Instead, what it does is allow the meat’s juices to run out and you end up with a drier interior. The combo of caramelized exterior and dry interior will then resemble slightly chewier sandpaper.
Cook on Medium-High for 11-12 Minutes
Since you’ve sliced the chicken, you now basically have a thin-cut poultry filet. Thin cuts always cook quickly (a good thing, in my book) so you’re not stuck flipping the chicken every few minutes to avoid burning.
Preheat your grill on medium-high heat; something between 425-475 degrees is perfect. Cook 6-7 minutes, flip it just once, and cook an additional 5-6 minutes. That’s all — quick and easy. Be sure to use a thermometer to certify that you can actually safely pull it off the grill . . .
Use a Thermometer, and Pay Attention to the Temp
You should always be using a thermometer when grilling meat. It’s especially important for chicken; beef and even pork can be served pink, but chicken really needs to be fully cooked in order to safely enjoy it.
The ideal temperature you’re looking for is 165 degrees F. You’re still good up to 170 or 175, but when you get to 180 or higher it’s going to start to dry out. Give the meat a check at 9 or 10 minutes; better to check it a little early than run the risk of dry chicken.