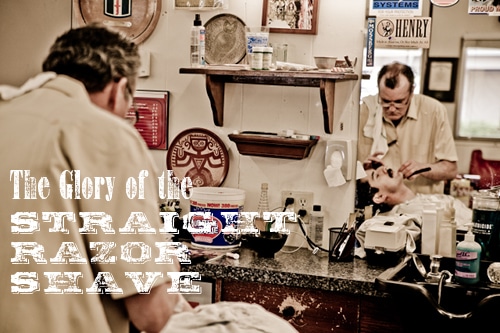
Our very first post on the Art of Manliness was a introductory guide to shaving like your grandpa with a double-edged safety razor. Since then, we’ve received requests to do a similar article on straight razor shaving. Well, after months of experimenting with straight razor shaving myself and researching the subject in old books on barbering, I present this beginner’s guide to shaving like your great-grandpa. I couldn’t possibly put everything there is to know about straight razor shaving in a single article, but the following presents the essentials of this old-time shaving ritual.
Benefits of Straight Razor Shaving
Better shaves. I thought my shaves couldn’t get any better after I upgraded from my Mach5 to an old school safety razor. I was wrong. The first time I shaved with a straight razor, my face looked as smooth as a baby’s behind. My wife noticed the difference without me even telling her what I had done and declared that it was the smoothest she’d ever seen. So make the switch to a straight razor. Your face will thank you for it.
Reduced costs. The upfront costs to get started with straight razor shaving are a bit on the expensive side. But after you buy all the gear, you’re set for life. You’ll never have to buy razor cartridges or double edge blades ever again. Just give your straight razor a nice stropping and you’re good to go. The only cost you’ll have from here on out is an occasional tube of shaving cream.
Environmentally friendly. Today’s modern shaving racket creates needless waste. When you’re done with a cartridge, you have to throw it out. When you buy new cartridges, you’re left with a ton of packaging material. Shaving with a safety razor reduces this waste, but straight razors take it one step further. The only waste you’ll create is biodegradable shaving scum. Stick that in your pipe and smoke it, greenies.
Meditative. Straight razor shaving has meditative benefits. It’s a craft that requires you to slow down and really focus on what you’re doing. After a few times of shaving with a straight razor, you just might start to notice yourself entering an incredibly manly zen-like state.
You’ll feel like more of a bad ass. You’ll be shaving with a tool that can double as a lethal weapon. Putting razor-sharp steel next to your throat every morning reminds you that you’re alive.
The Tools
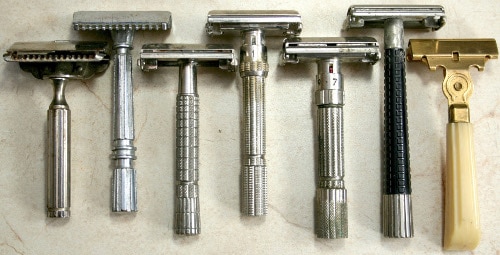
The Razor. Your most important tool is your razor. Don’t get skimpy with your razor and buy the cheapest one. You don’t want the cheapest; you want the best. Poor razors end up being more trouble than they’re worth. They will irritate your skin and cause nicks and cuts that will annoy you as long as you use it. A good quality razor, on the other hand, is a joy to use. If well maintained, a good razor will last for years. Your great-grandsons might even use it.

You can purchase straight razors either new or used. You can find used straight razors on ebay and antique stores. Used razors will likely have imperfections in the blade that will require professional honing. A professional blade restoration will set you back about 30 bones, but it will save you from cutting the crap out of your face.
If you’d like a new razor, check out classicshaving.com . You can purchase pre-sharpened blades that are ready to use the first time you shave for about $130.
When shopping for razors, consider the following factors:
- Check the steel’s quality. A razor with good temper sharpens better than poorer quality steels. One way to check if you have a well tempered blade is to catch the point of the blade under your thumbnail and let it slip off quickly. If the blade gives a good clear ring, it’s likely well tempered. If it doesn’t, the blade was likely tempered unevenly.
- Most modern straight razors are ground with a hollow. Hollowing places a concave on each side of the blade that makes the razor lighter, sharper, and easier to handle. You can purchase blades with varying degrees of hollowing. While full concaves will give you the sharpest edge, it’s not recommend for beginners. When such an edge comes in contact with a stiff beard, unless you hold the blade very flat on the face, it is quite likely to bend and spring, resulting in a cut.
- Also consider the blade’s width when selecting a straight razor. Don’t select one that’s too wide. Look for a 5/8 size. It’s easy to control and follows your face’s contours more closely than other blades.
- Finally, consider what type of blade point you want. Blades come in either rounded or sharp points. Sharp points have a tendency to nick and cut, so go with a rounded point.
Suggested Razors
Dovo Straight Razor with Black Handle 5/8″
Le Grelot Red Stamina 5/8″
Dovo Olive Wood Straight Razor 5/8″
The Hone. When you look at a razor’s edge under a microscope, you’ll see that it’s composed of several points that resemble saw teeth. When a razor becomes dull, these teeth are irregular and point in different directions. Honing a blade restores these teeth to their original condition.
The $10 whetstone you use to sharpen your pocketknife won’t work as a hone for your razor blade. They’re just too coarse for shaving blades. We need a quality hone with finer grit to get that sharp clean edge that will make shaving comfortable. A woodworking whetsone with a 4,000/8,000 grit combination will work, and you can easily find them at most hardware stores or online.
Another hone option is a ceramic or “barber hone.” These are little trickier to find. Most are vintage, and you’ll have to scour eBay or antique stores to find one. Because they’re less coarse than traditional whetstones, ceramic hones require more strokes to sharpen your razor.
Suggested Hones
Norton 4,000/8,0000 Grit Combo Whetstone
If you want to find a ceramic barber hone, look on eBay.
The Strop. A blade taken directly from a hone is left rough and unfit to put on the face. Stropping your blade smooths the rough edges off your blade and sets those teeth in perfect alignment. This gives your straight razor that keen edge that makes shaving a breeze.
The most common strop is the hanging strop. Hanging strops consist of two parts: one canvas strip and one leather strip. Again, don’t get chintzy with your strop. Cheaper models use coarse canvas and leather. Unless you want to ruin your razor, you should never put it to such a sub-par strop.
Suggested Strops
Brush. A brush helps hydrate the shaving cream in order to form a thick and rich shaving lather. Using a brush to lather up helps get the shaving cream up under each whisker which results in better, smoother shaves. Plus, it just feels nice on your face to lather up with a brush.
Brushes are made of either boar or badger hair. Boar hair brushes costs less, but they hold less moisture and consequently create a poor lather. Badger hair brushes cost more, but they produce a better lather. You can pick up a nice badger brush at any Crabtree and Evelyn or Art of Shaving. If you don’t have those in your area, try Amazon.
Suggested Brushes
Omega Creamy Curved Handle Pure Badger Shaving Brush
Porter’s Badger Shaving Brush
Shaving Cream or Soap. You commit shaving sacrilege when you use a straight razor with the mass-produced chemical goop that gets passed off as shaving cream. Invest in some quality shaving creams and soaps. They may cost more than the crap you buy in a can, but natural shaving creams and soaps nourish your face and make you feel absolutely manly. Plus, I’ve found creams and soaps last longer than shaving gels, so you end up saving money in the long run.
Suggested Creams and Soaps
Proraso Eucalyptus & Menthol Shaving Cream
Kiss My Face Fragrance Free Moisture Shave
Taylor of Old Bond Street Sandalwood Shaving Cream Jar
How to Hone a Straight Razor
Honing a razor intimidates many men. However, honing isn’t that hard once you know how to do it properly. This quick guide will show you how.
1. Wipe the stone clean
2. If you’re using a whetstone, you’ll need to add a lubricant to the stone’s surface. Water, oil, or even a bit of shaving lather can work. The lubricant serves two purposes. First, it prevents the blade from heating up as you scrape it across the stone. If the blade gets too hot, you can actually cause some warping in the metal which will ruin the blade. Second, lubricant clears off any steel and stone particles that are created during honing. You need a clear surface to get the job done right.
If you’re using a ceramic stone, you don’t have to add lubrication.
3. Lay the stone on a flat surface with the coarser side up.
4. Place the razor perfectly flat on the hone so the spine and edge touch the stone. If the edge only touches, you’ll end up with a short bevel and a dull edge.
5. Hold the razor by the shank and start sharpening. Because the blade is longer than the stone’s width, you’ll need to sweep the blade sideways as you work, so you sharpen the entire edge evenly. Draw the blade from heel to point, forward against the edge, and with moderate pressure. When honing, the blade’s edge LEADS the stroke. This means the blade’s edge should point in the direction you stroke.
6. Without lifting the blade from the stone, turn the edge up, so that the razor rests on the back of the blade.
7. Draw the blade from heel to point, towards you. Again, apply moderate pressure.

Diagram of proper honing
8. Continue honing until the blade is sufficiently sharp. A quick way to determine whether a blade is sharp enough is to draw the edge (from heel to point) very lightly, across a moistened thumbnail. If the blade digs into your thumbnail, with a smooth, steady grip, your blade is sufficiently sharp and is ready for stropping. A blunt razor will pass over the nail smoothly. An over-honed razor will stick into your nail and produce a harsh, disagreeable feeling.
The time required to hone your razor depends on your razor’s condition. If it’s in good shape, 8 to 10 strokes in each direction should do the trick. If you have several nicks in the razor, you’ll need to put in more time. If your razor is in really bad shape, send it to a professional cutler to have it properly ground.
Many men avoid straight razor shaving because they think they’ll have to hone the blade every time they shave. In reality, if you keep your blade dry and properly stropped, you won’t have to hone it that often. Most good blades can go 6 to 8 weeks between honings. You’ll know you need to hone it because stropping won’t sharpen it anymore.
How to Strop a Straight Razor
To get the most comfortable and effective shave, strop your straight razor every time you shave.
1. Hang your strop from your bathroom drawer using the hook on one end of the strop.
2. If you’re stropping right after honing, just use the strop’s leather side. Between shaves, start off with the canvas side before using the leather.
3. Holding the handle at the strop’s bottom in your left hand, pull the strop tight. If the strop is loose and you take your blade over it, you could end up with a rounded, dull edge, which means you’ll have to hone it more frequently.
4. Hold the razor by its shank in your right hand and place it flat on the strop on the end farthest from you. Unlike honing, the razor’s edge will TRAIL, and not lead the strokes. So, when you’re stroking the razor AWAY from you, the blade’s edge should face TOWARDS you. When you’re stroking the razor TOWARDS you, the blade’s edge should face AWAY from you.
5. Draw the blade towards you (again with edge pointing away from you), always keeping the heel of the razor in advance of the point of the razor.

6. When you reach the strop’s end, rotate the razor on its back until the un-stropped side comes in contact with the strop. The razor’s edge should face TOWARDS you now.

7. Draw the blade away from you, keeping the heel in advance of the point.
15-20 strokes in each direction on the strop should get your blade nice and sharp. If you’re first starting out with straight razor shaving, take slow and even strokes. Develop speed gradually. Once you get the hang of it, stropping a razor shouldn’t take more than 30 seconds.
How to Hold a Straight Razor
For first-time straight razor shavers, a big question looming on their minds is: “How in the heck do I hold this thing?” Ask five different straight razor aficionados how to hold a straight razor and you’re likely to get five different answers. Advanced straight razor shavers change up grips depending on whether they’re shaving with, across, or against the grain or if they’re shaving a certain part of their face. For the beginner, we suggest this basic grip:

Rest the first three fingers on the back of the blade. Rest your pinkie on the blade’s tang. Place your thumb on the side of the blade near the middle. This grip gives you nice control of the razor. You may have to adjust it when you shave different parts of your face, like your upper lip or your jaw. For more examples of how you can hold a razor, check out the Straight Razor Palace Wiki.
Everyone has their personal preference when it comes to the technique they use with a straight razor. Below we provide a suggested way to shave. As you gain experience wielding a straight razor, you’ll find yourself changing things up to suit your preference. If a particular way to shave with a straight razor works for you, then do it.
Beard Prep
For a comfortable, close shave, a little preparation before putting blade to face goes a long way. Soft whiskers cut more easily than dry whiskers. That’s why barbers wrap a hot towel around your face when you get a straight razor shave. The heat and water combination softens your beard and makes it ready for shaving. You can replicate the barbershop experience by soaking a towel in hot water, wringing it out, and placing it on your face for a few minutes.
If you don’t have the time for such luxury, just shave after you get out of a hot shower. If you want a really soft beard, rub some hair conditioner into your beard before you start showering and rinse it out when you’re done.
Lather Up
Place a nickel-sized dollop of shaving cream into your mug. If you’re using shaving soap, put the soap cake at the bottom of the mug. Soak your brush in hot water. Flick excess water off the brush. With the brush, mix the cream/soap thoroughly, using a combined stirring and churning motion until a thick lather appears. The more you rub the brush on the cream, the thicker the lather.
Apply the lather to your face with your brush in swirling motions. Ensure that lather gets up under every single whisker. When you’ve covered your face completely, take a few strokes to even everything out.
The Shave Stroke
Begin with slow, even strokes and shave in the direction of your beard growth. Shaving against the grain can cause ingrown hairs and razor bumps. Hold the blade at a 30-degree angle. Anything more and you risk cutting yourself; anything less and you won’t cut the whiskers. Also, apply very little pressure when you shave. Let the razor do the work! Pressing down on the razor will only cause cuts.
Shave the Right Side of Your Face

Start off by shaving the right side of your face. Reach over your head with your left hand and draw the skin upward with your fingers, thus making a smooth shaving surface. Shave downward until you clear about half the right cheek. Slide the left hand down further until the fingers rest in the middle of the cheek. Pull the skin upward. Continue shaving downward until you shave the entire right side of the face.
Shave the Right Side Under Your Jaw

After shaving the right cheek, move on to the right jaw. Tilt your head back and to the left, exposing the skin under your right jaw. With the fingers of your left hand, draw the skin tight under the jaw. Shave downward if the beard grows in that direction.
Shave the Left Side of Your Face

Many right handed shavers switch hands to shave the left side of their face. Personally, I don’t trust the dexterity and touch in my left hand to make the switch. So I continue using my right hand to shave.
Place the fingers of your left hand in front of and just above the ear. Pull upward on the skin so as to draw the skin taut. With the razor in your right hand, toe pointing upward, reach across the face, and shave downward. Walk your left fingers down as you get to the lower part of the cheek and chin. Keep pulling the skin taut.
Shave the Left Side Under the Jaw

Tilt your head back and to the right, exposing the skin under your left jaw. Pull the skin downward with your left hand and shave with the grain.
Shave the Upper Lip
Draw the upper lip down as much as possible to tighten skin. Shave downwards.
Shaving the Chin
Draw your lower lip up as much as possible. This will pull the skin tight, making it easier to shave the whiskers underneath your lip and on your chin.
Shaving Under the Chin

Throw your head back and elevate the chin. With your left fingers, draw skin downward. Take extra care as you shave. The skin under the neck is much more sensitive and prone to cutting.
Important Note: Always wear a sweet vest when shaving with a straight razor. This greatly improves the quality of your shaves.
Should I do multiple passes?
If you want that smooth as a baby’s behind look, you’ll have to do multiple passes with the razor going across and against the grain. For the beginner, I recommend just going over your face again with a downward stroke. Shaving across and against the grain increases the chances of cutting yourself.
After you gain some experience with your straight razor, you can try adding an across the grain and against the grain pass. An across-the-grain pass is when you shave in the direction perpendicular to that which the beard grows. So if your whiskers grow downward on your cheek, you’ll shave across your cheek from right to left or left to right. Shaving against the grain involves shaving against the direction your beard grows. It’s basically the reverse of shaving downward.
If you decide to do multiple passes, the sequence goes thusly:
- Shave with the grain.
- Shave across the grain.
- Shave against the grain.
Before each pass, wash your face off and re-lather.
Post-Shave
Rinse your face off with cool water. Splash a manly smelling aftershave on your face. Witch hazel and bay rum are nice. Aftershave helps reduce skin irritation and leaves your skin looking healthy. Follow by applying a small quantity of talcum powder to your face.
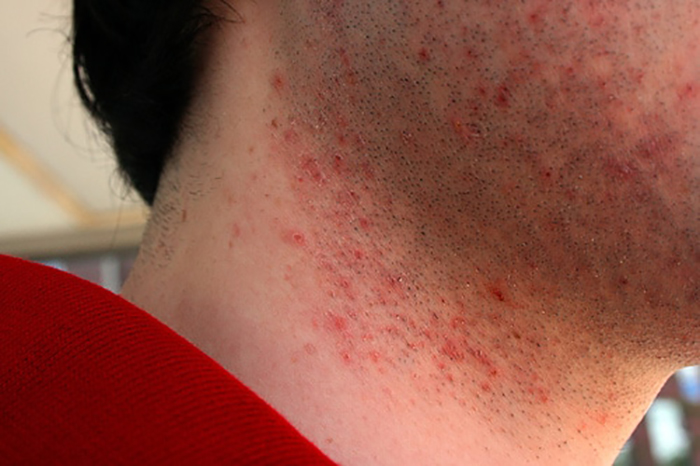
Dealing with Nicks and Cuts
Cuts and nicks happen for several reasons, such as:
- Using a dull razor
- Holding the razor improperly
- Shaving with a razor that’s too hollow
- Shaving in too great a hurry
- Shaving against the grain
When you first start out with a straight razor, you’re guaranteed to cut yourself. Don’t let this discourage you. Cuts happen to even the best barbers. Just keep at it. You’ll get the hang of it.
You can stop most minor cuts and nicks by simply pressing the cut together while adding pressure. If that doesn’t work, take a syptic pencil to the cut. If you cut your jugular, well, you’re sort of screwed. So don’t do that.
Getting Started
Some might understandably balk at plunking down $150 dollars for all the tools needed for getting started with straight razor shaving. After all, what if you don’t end up enjoying this method of shaving? (I’m pretty sure you will, but hey, you never know.) Luckily, there is a way to very cheaply dip your toes into the straight razor waters. Pick up a disposable straight razor from a beauty supply store or elsewhere. They only cost a few bucks, and there’s no need for honing and stropping. Just throw it away when the blade dulls. At that point, you’ll know if you want to go in whole hog or not.
Listen to my podcast with Mark Herro about all things shaving:
Further Reading
As I mentioned at the beginning, this post is just a beginners guide to straight razor shaving. Hopefully, we provided you with enough info to help you get started with this glorious man ritual. But don’t end your straight razor education here. People have written gobs and gobs about straight razor shaving. Below I include a list of must read sites on straight razor shaving. These sites will fill you in on more details:
Straight Razor Place. This site has it all.
Classic Shaving. Not only do they sell straight razor gear, they also have how to articles on the subject.
Sources:
Shaving Made Easy; What the man who shaves ought to know, 1905.
The Practice and Science of Standard Barbering, 1951