This article series is now available as a professionally formatted, distraction free paperback or ebook to read offline at your leisure.
If there remains a lingering sense among older generations of men that cooking is “women’s work,” I would think it is probably fading greatly among the younger set. True, for much of human history men did the hunting/farming and women did the cooking, and this arrangement continued to work well into the 20th century. Young men made a quick transition from living with their flapjack-flipping mother, to settling down with a meatloaf-making wife. Or, he lodged at boarding houses that provided victuals along with a bed.
But those days are long gone; accommodations that come with a cook are now virtually non-existent (although it lives on in fraternity houses), and men are remaining bachelors longer – well into their late 20s and early 30s. As all modern men still need to eat virtually every single day, the only choice that remains is either starving…or being completely dependent on restaurant meals and take-out food.
Maturing into a grown man means becoming self-sufficient, so daily dependence isn’t an option. Further, not only does learning to cook help you become more independent, it offers other benefits as well:
Keeps you healthy and strong. When you cook for yourself, you know and control exactly what you put in your mouth. Almost anything you make for yourself, even the same dish served at a restaurant, will have less salt, fat, calories, and additives than the commercially-made variety.
Saves you money. Sure, it is possible to eat cheaply by ordering all your food off the dollar menu, but while fast food won’t clip your wallet, it will take a toll on your health, which will cost you big bucks down the line. When it comes to making real, wholesome food, cooking at home is generally cheaper than eating out.
Impresses the ladies. As a young man, you’re going to be dating, and nothing impresses a gal like a man who can invite her back to his place for a home-cooked meal.
Gives you enjoyment. No, I don’t always enjoy cooking. But when you have time and are in the right mood, it can be very satisfying to create something tasty for you and for your friends/family.
Now, I’m not a home cooking zealot. Sometimes the way I feel about cooking can be summed up in this comic from The Oatmeal; it can seem like it is more hassle than it’s worth, and when you’re super busy and stressed, the convenience of take-out is a lifesaver. The key is striking a balance, and you can’t do that if you can’t cook anything beyond toast and ramen.
The good news here is that while gourmet chef-ery takes a lot of training and practice, simple cooking can be learned by anyone who knows how to read. So in this post, we cover many of the basics a young man who’s never cooked for himself needs to know to get started. First we’ll talk about how to stock your kitchen with equipment and your pantry with staple items. Then we’ll talk about a few basic skills and bits of know-how you need to learn in order to cook edible, hopefully delicious, food. Finally, because you don’t need to amass the kitchen equipment listed below all at once, we’ll talk about some things you can cook when your options and tools are limited.
Let’s get started.

Stocking Your Kitchen: Essential Equipment
For this section, I had AoM’s food writer, Matt Moore, give us the lowdown on how to outfit your kitchen. Here’s what he had to say:
For me, it’s always about quality over quantity. Instead of investing in specialty garlic presses, zesters, or other gimmicks – just give me a killer knife that’ll do all those jobs and not get lost in my junk drawer. Less is always more.
For that reason I’ve put together my list of essential kitchen equipment needed for every guy. You don’t need to go out immediately and stock your kitchen with everything listed here. You can acquire this stuff over time. Be resourceful and check yard sales, flea markets, or online outlets that offer these items at great deals. Meanwhile, improvise and make the most of what you have.
Hardware: Pots/Pans/Baking Dishes

- (1) Small 2.5-qt Pot with Lid – terrific for making sauces, steaming veggies, or heating liquids.
- 1 Large 6-qt Pot with Lid – perfect for boiling pasta or potatoes.
- 9×13 Pyrex Baking Dish – a must have for baking or roasting.
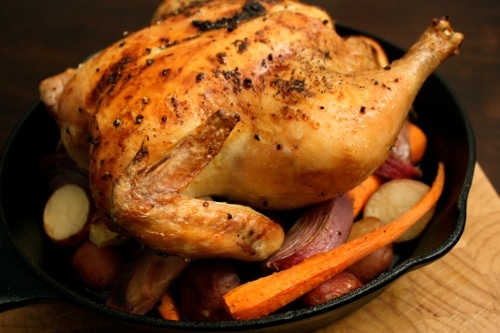
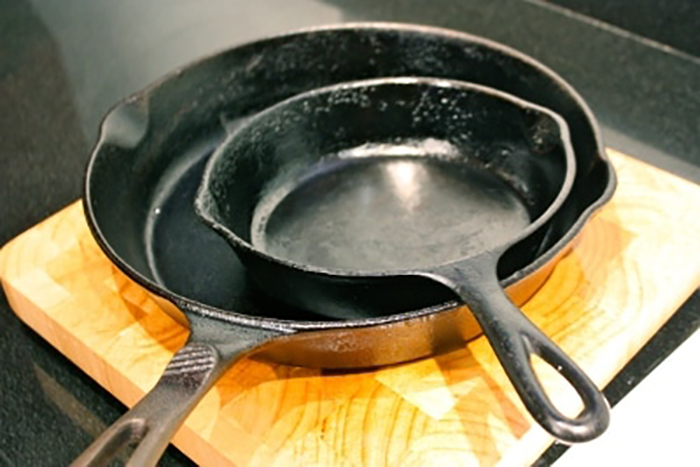
- 12-Inch Cast Iron Skillet – cast iron cookware is inexpensive and will last a lifetime. On top of that, it cooks evenly, retains heat, and is also believed to keep you healthy by supplying a steady dose of iron to your diet. For more tips on use and care, check out my post from last month!
- 12-Inch Non-Stick Skillet with Glass Lid – the non-stick surface makes cleanup quick and easy.
- Dutch Oven Style Pot with Lid – enameled cast iron is the best option; however any pot with a heavy bottom will do the trick. Great for making soups and braising meats.
- Grill Pan – a fantastic substitute for a grill. I prefer cast iron grill pans over the non-stick versions.
- Non-Stick Baking Sheet – super cheap, and probably one of my most utilized items in the kitchen.
Tools and Accessories: For the Utility Drawer

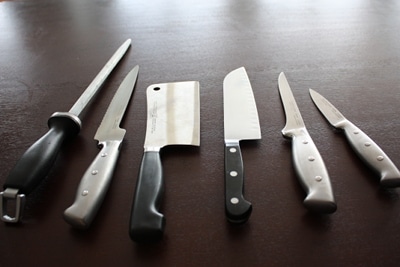
- 8-Inch Chef’s Knife with a Sharpening Steel – a chef’s best friend. Don’t go cheap here.
- Can Opener – I prefer the manual ones – still never figured out the electronic versions.
- Box Cheese Grater – I like these because it provides several different options in one; a slicer, a rough grate, a fine grate, and an extra fine grate for harder cheeses. Choose one with a large base to provide more stability.
- Food Processor/Blender – the workhorse of the kitchen. Great for saving time and creating specialized dishes.
- Pepper Mill – indispensable for any kitchen. Fresh cracked pepper is worth the extra effort, and this tool makes it easy to always have it on hand.
- Measuring Cups and Spoons – these will be absolutely necessary to make sure you are getting the right measurements when following recipes.
- Pot Holder/Oven Mitt – because I don’t know anyone who likes to burn themselves. A folded towel will also work.
- Spatula – my preference is stainless steel slotted spatulas.
- Tongs – great for when you need a more precise touch.
- Vegetable Peeler – fantastic for peeling fresh vegetables or shaving cheeses.
- Wine Opener –I prefer the ones that also have a bottle opener. A drill, drywall screw, and pliers will do the trick if you find yourself in a bind. Trust me.
- Potato Ricer/Masher – a ricer is a great tool for making silky smooth mashed potatoes. A masher is an even cheaper and more versatile tool that will provide a more rustic consistency.
- Digital Meat Thermometer – a useful tool to make sure your meat is always perfectly cooked.
- Cutting Board – I prefer a large wood cutting board over any other surface. Make sure it has a solid footing, so as not to slide while cutting.
- Whisks – extremely versatile; fantastic for making vinaigrettes, dressings, or even a roux.
- Wooden Spoon – heatproof and durable, I like having these in several different sizes.
- Colander – a must-have for draining, washing, straining, or rinsing.
Serving/Storage Items: For the Cupboards

- Flatware
- Assorted Serving Plates or Platters
- Assorted Mixing/Serving Bowls
- Storage Containers
- Storage Bags
- Plastic Wrap
- Aluminum Foil
- Wax/Parchment Paper
Thanks Matt! Now let’s take a look at stocking your pantry.
Stocking Your Pantry: The Essentials

These are the things that will come in handy for a variety of recipes or a spontaneous meal idea, and are always good to have on hand.
- All-purpose flour
- Baking powder
- Baking soda
- Brown sugar
- Honey
- Oats
- Sauces (Soy sauce, BBQ sauce, hot sauce, etc.)
- Cornstarch
- Peanut butter
- White sugar
- Olive oil
- Cans of beans
- Diced tomatoes/tomato paste/tomato sauce
- Herbs and spices (salt, pepper, Italian & Mexican seasonings, crushed red pepper, garlic powder, onion powder, curry powder, chili powder, basil, cilantro…whatever seasonings you enjoy)
- Instant broth (cans or cubes)
- Pasta and other noodles
- Rice
How to Read a Recipe
It’s true (and is often said) that all you need to know in order to cook is how to read a recipe. But how do you read a recipe? These tips will up your chances of culinary success.
1. First things first, read through the recipe in its entirety. It’s easy to look only at a recipe’s ingredients before deciding to make something. But when it comes time to prepare the dish, you may find you don’t have a tool or ingredient that may only be mentioned in the directions, or that it’s a lot more complicated than you thought, and a little above your pay grade. If the recipe includes terms you don’t recognize, look them up.
2. Add up how much time it will take. Be sure to check out the “prep time” (slicing, stirring, can-opening) and “cook time” (baking, frying, grilling). Add them up to find the total time needed to complete the dish. If it’s your first time making a certain recipe, it will definitely take you longer than the given time; give yourself an ample cushion.
3. Make sure you have all the ingredients. If you think you might have something already, but aren’t sure, check to see. Also make sure it’s still fresh. Then write a list of all the ingredients you don’t have on hand.
4. Take note of what you need to do before the preparations begin. Before you start slicing, dicing, and mixing, you may need to do things like preheat the oven, soften butter, or defrost meat.
5. Set out all of your ingredients and tools. Line up everything you will need: bowls, pans, and utensils are on the counter, ingredients are measured and ready to go. This will not only make things smoother as you go along, saving you from dashing to and from the fridge and the cupboards, but it’s basically a chance to check off the recipe’s ingredient and supply list one more time; you don’t want to get halfway through your preparations, only to realize you’re ¼ cup short of the required 1 cup of flour.
Measuring Ingredients
Dry Measurements Versus Wet Measurements
When a recipe calls for a ½ cup of this, and 2 cups of that, the tool you reach for depends on whether the ingredient is dry or wet (if it’s pourable – oil, sauce, milk — it’s wet).
There are two options: wet measuring cups and dry measuring cups. While they technically each hold the same volume, there are reasons why you should choose one or the other for respective ingredients.

A liquid measuring cup has small measurement gradients printed up the side, and the top fill line sits well below the spout, so you don’t spill any liquid when you pick up the cup. When you fill a wet measuring cup, don’t hold it in your hand – put it on a level surface and squat down to make sure the liquid is sitting right at the desired mark.
Dry measuring cups are meant to be filled up to the very top, and then leveled off with a knife. If you filled a dry measuring cup to the very brim with a liquid, you’d be bound to spill some. And if you used a wet measuring cup for a dry ingredient, you wouldn’t be able to level it off.
Here’s how you fill a dry measuring cup with a few common ingredients:
- Flour — lightly spoon into cup and level off with knife. Don’t tap the cup to settle, or pack in with spoon or fingers.
- White sugar — scoop directly from bag/container. Level off with knife.
- Brown sugar – scoop and then press with back of a spoon until the sugar is level with the brim of the cup.
- Peanut butter/shortening – pack with spatula (spraying the cup with cooking spray before using PB will result in it sliding out easier).
Tablespoons Versus Teaspoons
A common mistake beginner cooks make is to confuse the tablespoon with the teaspoon, as they are often abbreviated in recipes in different ways, and these abbreviations are very similar. You may see any of the following:
- Tablespoon: T, tb, tbs, tbsp, tblsp, tblspn. (May be capitalized or lower case)
- Teaspoon: t, ts, tsp, tspn. (Almost always lower case)
A tablespoon is larger than a teaspoon. In the US, one tablespoon equals three teaspoons.
You can use tablespoons and teaspoons for both wet and dry ingredients. A recipe may call for a level or rounded amount; rounded roughly sits above the rim of the spoon, level is done by scraping off the top with a knife.
Butter
A stick of butter will have the measurements printed on the wrapper of each stick. Just mark off what you need and cut through the butter, wrapper and all.
Basic Cooking Skills Every Young Man Should Master
There are tons of cooking techniques out there, and down the road you may want to learn to make a soufflé or smoke some ribs. But it really only takes a few basic how-tos to keep yourself well-fed and happy.
First we’ll cover one of the most basic of the basics – how to make pasta—and then I invite you to click on the images below to learn more simple, but handy, skills.
How to Make Pasta

Pasta is an especially good option for young men; it’s cheap, versatile, and relatively good for you (depending on what you add to it). It’s also really simple to make. At least, it should be. But I didn’t realize I was making it wrong until after I got married; Kate was aghast to see me put the pasta in right after filling up the pot with water, instead of waiting for the water to boil. A recipe for mushy pasta. Here’s how to do it right:
1. Use about 5 quarts of water for a pound of pasta. That sounds like a lot, but a common mistake is to use too little water, which leads to the pasta sticking and clumping together. When planning your mealtime, keep in mind that that much water takes a while to boil, especially because you want to start with cold water (as it absorbs the least amount of impurities from your pipes).
2. Choose a pot that will leave you some room on top, so the water doesn’t boil over. 5 quarts of water in an 8-quart pot works well. If all you’ve got is a 6-quart-er, just keep a close eye on it.
3. Bring water to a rolling boil. Thismeans it’s boiling across the whole surface of the water and you can’t stop the boil by stirring it. Putting a cover on the pot will help it reach this point faster.
4. Once boiling, add two tablespoons of salt. The salt boosts the boiling temperature slightly and adds a little flavor to the pasta. But fear not — it only raises the pasta’s sodium content a tiny bit.
5. Add the pasta, and stir it around immediately to keep it from sticking together, as the strands release their starch as they hit the heat. Stir the pot again every few minutes until pasta is done.
6. Consult the pasta package for relatively accurate cooking time. A minute before the minimum given cooking time on the package is up, fish out a strand with tongs and bite into it. The consistency you’re looking for is “al dente” (Italian for “to the tooth”) – tender, but with a little bite. Keep in mind that the pasta will continue to cook a bit even after you remove it from the heat.
7. As soon as the pasta reaches desired doneness, dump it into a colander. Pick up the colander and give it a few shakes to get the water out. But don’t overstrain it – a little wetness works well with sauce. Don’t rinse the pasta either (unless you’re making a cold pasta salad), as it rinses away the starch that coats each strand, and this starch will help the sauce stick to the pasta.
8. Toss pasta with sauce immediately, if you can. If you can’t, toss the pasta with a little olive oil to keep the strands from sticking to each other.
Click the images below to read past AoM articles on basic cooking skills:


What Can I Make With….?
Even if heading out on your own means setting up camp in a college dorm with a meal plan in hand, that doesn’t mean cooking can’t have any place in your life for the next two semesters. There will be times when you don’t feel like making your way over to the cafeteria or food court, and times when they won’t be open, leaving you to pillage the dorm vending machine. And unless you have an unlimited meal plan, making some meals for yourself can save you money.
Of course whether you’re headed to a dorm room or perhaps a tiny studio apartment that only offers a kitchenette, or you do have access to a kitchen but not the assortment of appliances and pots mentioned above, you may feel like it isn’t possible for you to make anything with such limited room and equipment. But with a little creativity, you can truly whip up some tasty stuff for yourself with only the most Spartan of supplies.
Below we offer a few suggestions for things you can make if you only have one or more of the following appliances.
What Can I Make with a Fridge and a Hot Pot?
This is the situation many college freshmen will find themselves in; dorm rules often allow students two appliances in their rooms: a small refrigerator and a hot pot (an electric kettle that quickly boils water). Obviously the number of things you can make with these appliances, beyond ramen and mac n’ cheese of course, is limited, but there are still options:
- Salad. Get some salad makings; raw veggies, pre-cooked chicken, and dressing – toss together.
- Cold sandwiches. You don’t have to limit yourself to bologna and cheese, either. There are hundreds of really good sandwich combos out there. Don’t forget wrap sandwiches too – get a Caesar salad kit, mix, add some precooked chicken, mix, and wrap.
- Oatmeal. Get the kind that’s not quite old fashioned whole oats, but are a step up from instant. Add nuts and dried fruit.
- Hard boiled eggs. Portable and nutritious snack.
- Canned soups. Easy, nutritious, and can hit the spot on a winter’s day.
What Can I Make with a Microwave?
Some dorms allow microwaves in students’ rooms, or have a common microwave for all to use. It is a surprisingly versatile tool — good for more than heating up your Hungry Man dinners.
- Scrambled eggs. This was a staple of mine freshman year, and not as bad as you might think. Scramble the eggs in a bowl, and nuke for 60-90 seconds, stopping to stir once or twice. Add salt, pepper, and ketchup to taste. You can also poach and “fry,” eggs this way. But never cook them in their shell, as they can explode, and always prick the yolk if you leave it intact.
- Bacon. What are eggs without bacon? Layer a plate with three paper towels, place bacon strips on top, and cover with another paper towel. Cook at about one minute per slice.
- Bean and cheese burrito. Warm up some refried or black beans and layer in a tortilla with cheese, guacamole, salsa, sour cream…whatever your heart desires.
- Rice+Tasty Bite/Soup. You can make instant rice in the microwave, or they even sell pre-cooked rice in a package that only needs to be warmed up. Add some beef stew or Tasty Bite Indian food on top of the rice. The latter is a good option for vegetarians.
- Pizza bagels. Better in a toaster oven, for sure, but fine in a pinch.
- Corn on the cob. Yes, you can actually make it in the microwave.
- Steamer meals. Primer Magazine did a great, well, primer, on how to use microwave steam bags to cook up tasty and super nutritious meals. You add meat, veggies, and sauce to the special bags, and steam in the microwave. Sample recipe: Beef fajitas strips, pineapple, onion, bell peppers (red, green, yellow), BBQ sauce.

Image from Primer Magazine
What Can I Make with a George Foreman Grill?
Obviously George’s Lean Mean Grilling Machine is adept at cooking things like burgers and chicken breasts, but it handles meats like bacon and sausage patties well, along with making good grilled cheese sandwiches, paninis of any variety, and tasty quesadillas too. I wouldn’t go out of my way to get one though – it’s one of those things that sounds handy, but will end up gathering dust on a shelf. At least it did for me.
What Can I Make with a Rice Cooker?
A rice cooker is basically a steamer and a hot plate, and if you have a microwave and a hot plate (or regular stovetop), you don’t need one, unless you enjoy using it and have the space. But you might live in a dorm that allows rice cookers, but not hot plates, and if that’s the case, take heart; despite the name, this appliance can cook a lot more than the white stuff – eggs, spaghetti, chicken soup, and even taco meat and spare ribs can be whipped up in one.
What Can I Make with a Crockpot?
The ladies have been all over crockpotting lately, and it’s perplexing more men don’t adopt this cooking tool, as it’s one of the easiest, least time-intensive methods of cooking available. One of my favorite crockpot meals is stupidly simple: plop in a couple of chicken breasts, pour some BBQ sauce over them, and then let it cook on low for six hours (or on high for four). When it’s done, you shred the chicken, and pile it on some Texas toast. Delicious. I also enjoy making easy beef stew: throw in some stew meat, cut-up potatoes, carrots, and green beans, and then some V8 juice and other spices to taste. Press cook. Go about your day. Enjoy your stew hours later.
Hundreds of other tasty crockpot recipes are only a Google search away.
What Can I Make with a Hot Plate/Stovetop and One Pot?
If you have a hot plate or stovetop, but your cookware is limited, do a search for “one pot meals.” These are just what the name implies, and they make clean-up a snap. Easy chili is one of my go-tos: brown hamburger meat at the bottom of the pan, add a can of drained pinto beans, diced tomatoes, and a packet of chili seasoning. Simmer for 10-15 minutes. Done. I like to ladle mine over some Fritos and top with cheese. It’s not going to win any prizes in a chili-cooking competition, but it’s really satisfying on a cold winter’s day.
Also, check out Matt’s post on one skillet meals that are proportioned for the bachelor; the stir-fry has become a staple around here.
But, Brett! I don’t even have any of the things above! Is there anything I can make for myself?
Maybe you’re living in a dorm that’s super strict about appliances in rooms. Well, there is one trick you can use…get out your iron. Yes, the one you use to get the wrinkles out of your shirts.
Iron-Made Grill Cheese
First, I’ll show you how to make a classic comfort food staple, the grilled cheese, using an iron in your dorm room.

What you need: an iron, a towel, aluminum foil, butter, two slices of bread and two slices of cheese. Heat up the iron to its highest setting (no steam!) as you get things together. You’ll want to iron on a towel or some other protective surface.

Butter the bread. I might have gone a little too crazy with it on this slice.

Tear off a piece of foil that is big enough to wrap your sandwich. Put down the first slice of bread — butter side down! — on the foil.

Slap on two slices of cheese, and then put down the second slice of bread — butter side up! — on top.

Wrap up the sandwich in the foil. You don’t want your grill cheese getting on your iron.

Place your iron on top and let it sit there for 1-2 minutes. Cook time will depend on how hot your iron gets, so the first time you try this, check on it 45 seconds in to see how it’s fairing and to make sure it doesn’t burn. Once one side is done, flip the foil packet over and repeat on the other side.

Boom! Grilled cheese sandwich! Adjust the toast level to your personal preference.

There you go — the perfect accompaniment to your late night study sessions. You can also add turkey or ham to make the sandwich heartier.
Iron-Made Bacon
Not only can you add turkey or ham to your grilled cheese, you can also add some…bacon! Here’s how:

What you need: bacon, foil, towel, and iron.

Tear a strip of bacon in half (you can make more or less depending on the size/width of your iron), and place on foil.

Wrap in foil and crimp the sides — you don’t want any bacon grease to escape.

Set iron packet on a towel and place iron on top. Let it sit there for about 5 minutes, check to see how it is doing, and then flip and repeat. Again, cook time will depend on the heat of your iron and desired doneness of the bacon.

Be careful when you open the foil — it’s hot. And there you have it. Freshly cooked bacon! In your dorm room! Made with an iron!
Okay, cooking with an iron isn’t too practical, but it’s really quite simple and fun. Give it a try — your lady friend or roommate will be delighted to know a real “iron chef!” Yar yar yar!
Got any other basic cooking tips for a young man heading out on his own for the first time? Share them with us in the comments!