An important part of manhood has always been about having the competence to be effective in the world — having the breadth of skills, the savoir-faire, to handle any situation you find yourself in. With that in mind, each Sunday we’ll be republishing one of the illustrated guides from our archives, so you can hone your manly know-how week by week.
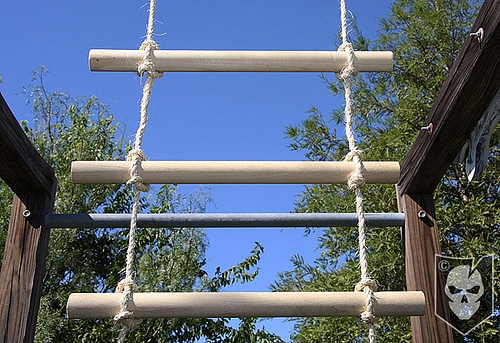
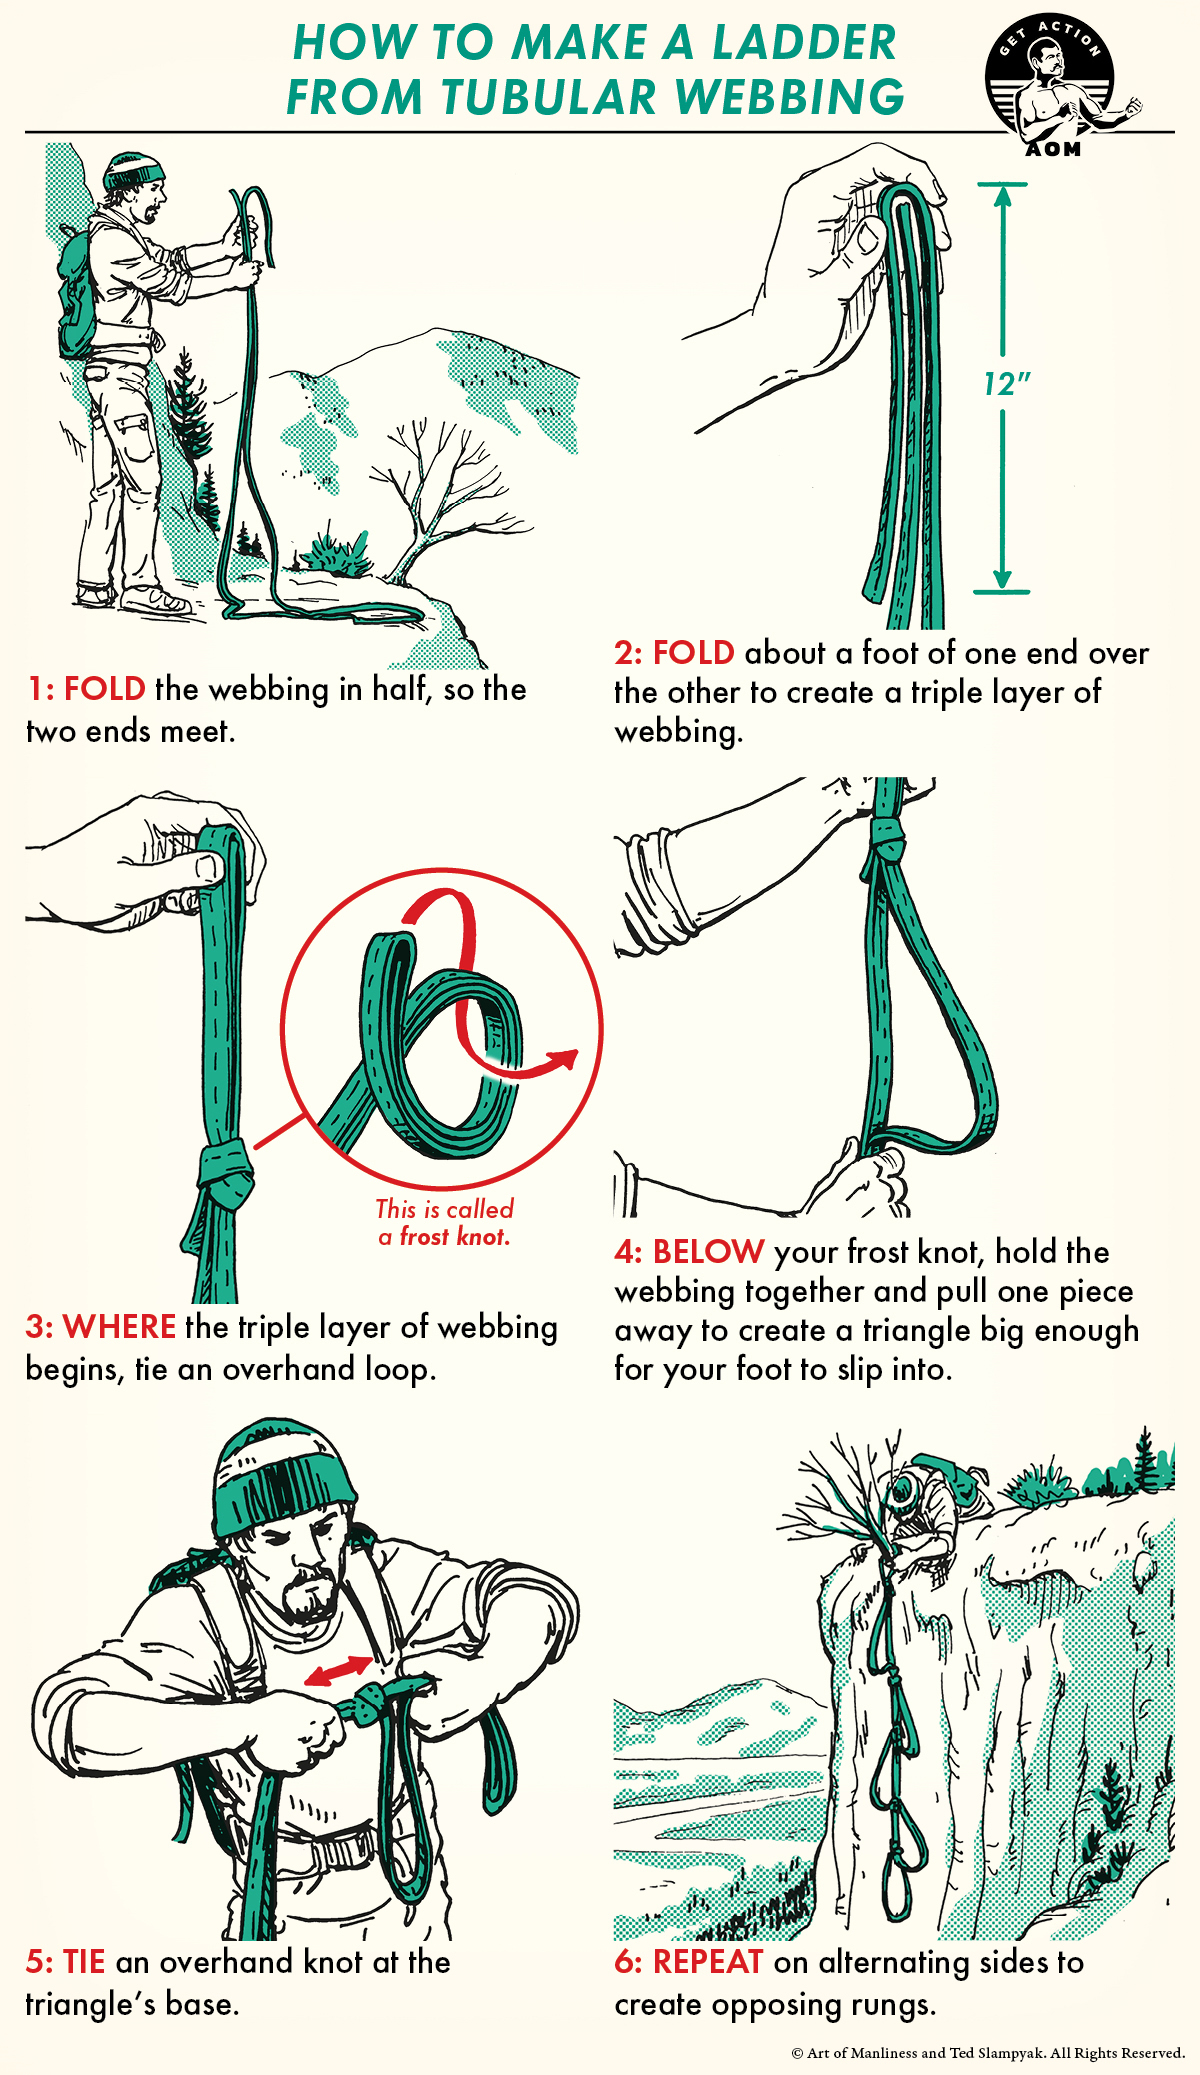
An etrier, also called an aider, is a French term for a short rope ladder, where each rung is simply a loop of rope or other material, created by tying repeating knots. Mountaineers have used etriers for centuries because they’re lightweight, compact, easy to customize, and exceptionally strong. Today, they’re often made out of tubular webbing because it is one of the strongest, lightest, and most versatile materials climbers and survivalists carry.
Tubular webbing is similar to the flat nylon webbing used to make the compression straps on your backpack, but with one key difference: tubular webbing is, as you might expect, webbing that’s woven into a tube (even though it lies flat, it’s indeed a tube). This gives it extra strength and more resistance to tearing when it rubs against rocks and other sharp surfaces.
To create a ladder, you’ll need a substantial amount of webbing. The general rule of thumb is to estimate the height of your obstacle and then gather twice as much webbing. So, if you’re scaling a building to reach a balcony 30 feet up, you’ll need 60 feet of webbing. You’ll also want a strong device to attach the ladder at the top; steel rebar hooks or extra-large carabiners are just a couple options. Once your ladder is complete, use a long pole to guide your hook onto a secure attachment point, or sling it like a grappling hook until it finds a solid hold.
Once you’ve got your ladder done, you can reinforce the loops with pieces of split PVC, paracord, or even duct tape.
Like this illustrated guide? Then you’re going to love our book The Illustrated Art of Manliness! Pick up a copy on Amazon.