
As the mercury rises, so do hopes of upping our grilling game. If you’re like me, you’re always looking for a little tip, a unique seasoning, or a handy new tool to impress not only your taste buds, but your friends, family, and neighbors too.
This year, I’ve discovered the wonders of using wood planks in my grilling.
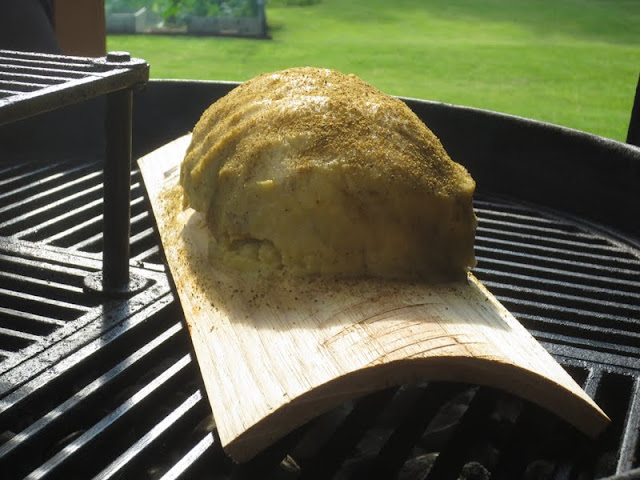
Just as it sounds, wooden grilling planks are single-use pieces of wood (typically about ~5” x ~11” in size) that go on your grill topped with food. They’re used in order to easily impart smoky flavors to the grub that can usually only be secured through other means.
Any kind of food you would normally cook on a grill — meat, veggies, fruits, etc. — can be cooked on a plank. I’ve been experimenting for the past couple months, and below share the general principles of using wood planks, the benefits of doing so, and a few different recipes to whet your appetite.
The Benefits of Using Wood Planks
1. Gives you a nice smoky flavor from a grill, quickly. Using a wood plank gives your food that nice smoky flavor that can often only be achieved with a real smoker, or a smoker box with chips. Using a plank is a far easier, far quicker solution which doesn’t require the preparation or time needed with other methods.
2. Keeps your food nice and moist. Since your food is in contact with the soaked wood versus the grilling grates themselves, your grilled eats stay much moister than they would otherwise. This also has the added benefit of giving you more leeway in your grilling times. I often notice a fine line between fully-cooked, moist meat and fully-cooked, dried out meat, especially with white meats like chicken and pork. There’s a short window of time that you have to pull the meat off the grill before it gets dry and tough. With a plank, that window is expanded a bit. The wood gives you some more wiggle room, and is likely to make you a better grillmaster in the process!
3. Prevents food from falling apart. When placed right on the grates, a lot of foods that you grill — especially veggies — can fall apart, stick to the grates, and even fall through and down into the burners (I’m looking at you, asparagus!). With a plank, your fish stays in one piece, your burgers and chicken breasts don’t stick to the grates, and your veggies stay nice and neat in one place. It’s functionally like using a grilling basket, but better because you’re getting that woody, smoky flavor.
4. Super easy clean up. While grilling is already an easy clean up, the plank makes it even more so. Since grilling planks are one-time use items (they get warped and scorched a bit), when you’re done, you either chuck the plank into the garbage, or into your next bonfire. No brushing or super-heating your grill needed.
5. You can use the oven! Smoked flavor, right from your oven? You betcha! Soak your plank (more on that below), put a drip tray — aka a cookie sheet — on a lower rack, and you’ll be all set! Turn the broiler on for the last 5-10 minutes of an oven-planked recipe to give a grill-like crispiness to your food. While I don’t feature any oven recipes in this article, you can learn more about using wood planks in the oven here.
How to Use Wood Planks
1. Stock up online, or at the grocery store. You might be asking where someone obtains these wooden planks in the first place. You’ve quite possibly never noticed them at the store. In general, you can find them most places where you can find groceries and/or grilling supplies. Wood planks are available at my local grocer, but only in one variety of wood (more on that below).
Going to an online retailer like Amazon or Wildwood Grilling (which specializes in grilling planks and other wooden accessories) will offer far more selection and allow you to buy in bigger packs, saving you money in the process.
Selection, you say? Isn’t a wood plank just a wood plank? Au contraire! You can get wood planks in a variety of species: cedar, maple, oak, alder, etc. Different woods will impart different flavors into your food. Alder is known as a gentler smoky flavor, while cedar brings a hearty, foresty taste, especially in vegetables and salmon (cedar and salmon is a common combo in the Pacific Northwest). Experiment and find the combinations you like!
You can also get planks in differing sizes, if needed. While the dimensions I mentioned in the introduction are the standard, you can also get bigger or smaller to accommodate whatever you’re grilling.
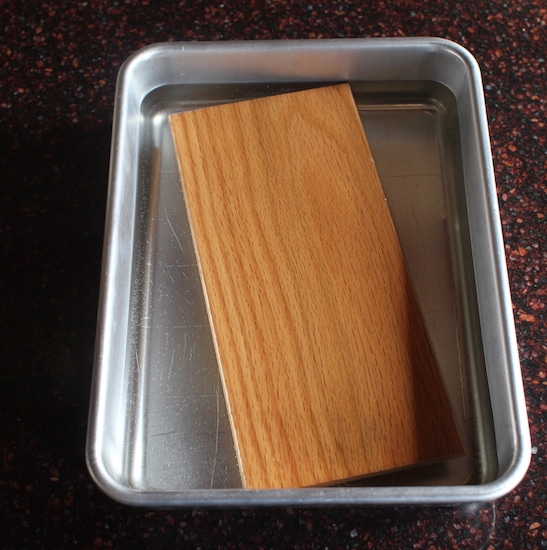
2. Soak the plank for 30-60 minutes. Before using, you’ll want to fully submerge the wood plank in water for at least 30 minutes, and ideally about 60. This helps keep whatever you’re grilling nice and moist, and simply prevents the plank from catching on fire. I’ve seen just one recipe which specifically says to not soak the plank, which is a grilled meatloaf that I featured last year.
3. Preheat the grill without the plank. You don’t want to pre-heat the plank in your grill. It would just dry out before you’d even put food on it. Pre-heat the grill first, then place the plank on it, along with your victuals.
4. Grill as you normally would, but with a spray bottle nearby. You want to keep a spray bottle handy for any flare ups. I did not follow that advice the first time I used a plank, and ended up with a slightly fiery plank towards the end of the grilling time. Moving forward, I did keep a spray bottle nearby, and used it nearly every time. Check your plank every five minutes or so and mitigate fire as needed, spraying the dried out and burning parts (don’t worry if your food catches a little bit of spray, but do your best not to douse it).
5. Be prepared for bowing. After a few minutes on the grill, the plank will bow downward, like a frown. For a bigger hunk of meat like a steak or a salmon filet, that’s not a problem. For veggies, burgers, brats, etc. it can be more of an issue as things roll or get a little misshapen. To counteract that, place the plank on the grill with no food for a few minutes, let it bow, then flip it over to create a little boat for your goodies.
6. Give things extra time. I’ve noticed that food grilled on a plank needs a little more time to cook than if it was sitting right on the grates. It has the effect of cooking with indirect fire, especially since the plank starts out wet and a little cold. A piece of chicken that would normally need 12-15 minutes on the grill grate will take closer to 20 on a plank. Same for a steak. So be prepared to add about 50% more cook time.
7. Sear meat for a couple minutes to get those grill marks and some char. One of the great things about grilling versus baking or pan-searing, is the lovely grill marks and slight char you get on your food. It has such a primal taste to it — like you’re eating something that’s been prepared the same way it was thousands of years ago.
Using planks, unfortunately, does not give you those particular grilling benefits. So, to counteract that, take your food off the plank for its final couple minutes and put it right onto the grates. You’ll get the benefits of the woody flavor, while also retaining the marks and char that everyone likes.
Recipes
In general, you can use any standard grilling recipe with planks. Just add some grilling time, as mentioned above.
Salmon
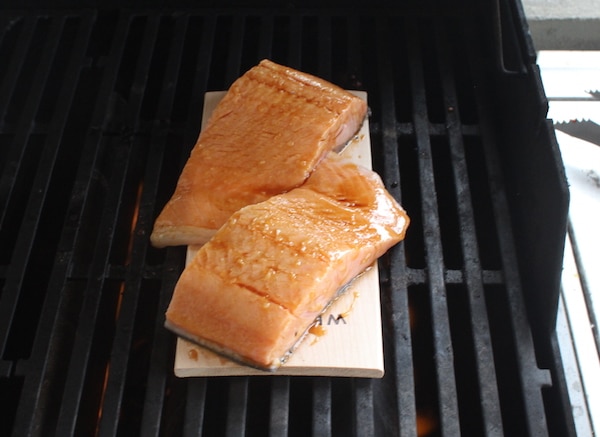
Salmon (and fish in general) is the most common food you’ll find when looking up grilling plank recipes. Fish tends to fall apart on grills, so putting it on a platform is especially handy, and lends itself particularly well to soaking up those woody flavors. Cedar is the recommended wood here, but any will taste great!
Ingredients
- 1.5-2 lb salmon filet, skin on
- 1 lemon
- 1 tsp salt
- 1 tsp pepper
Directions
- Soak plank for 30-60 minutes.
- 30 minutes before grilling, place salmon in a large dish and soak it in the juice of one large lemon.
- Preheat grill to medium (~400 degrees F).
- Season salmon with salt and pepper right before grilling.
- Place salmon on plank, skin side down, and grill 15-20 minutes until the fish starts to easily flank. With salmon, it’s much better to be slightly undercooked than overcooked.
Steak
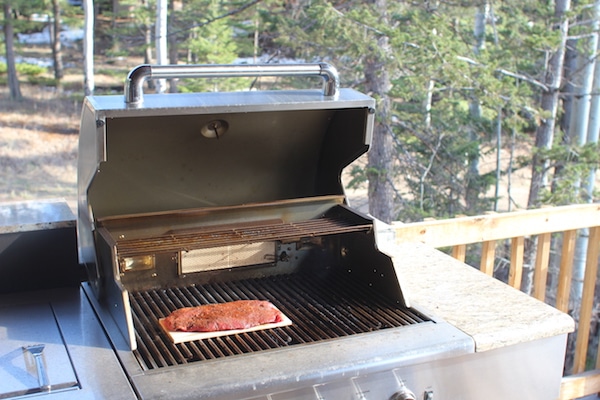
This was arguably the best steak I’ve ever made. It instantly turned me into a fan of the flat iron cut (one of the best “cheap meats” you can buy!).
Ingredients
- 2 lb flat iron steak
- 2 tsp. salt
- 2 tsp. brown sugar
- 2 tsp. chili powder
- ½ tsp. ground black pepper
- ½ tsp. cayenne pepper (adjust depending on desired spiciness)
- ½ tsp. garlic powder
- ½ tsp. cumin
Directions
- Mix all the dry rub ingredients in a small bowl.
- Rub seasoning mix evenly on the steak; refrigerate 2-4 hours.
- Soak plank for 30-60 minutes.
- Preheat grill to medium (~400 degrees F).
- Place steak on plank, 8-15 minutes, to desired doneness. Then place meat directly on grill grates for 2 more minutes for a nice char, if desired.
Asparagus
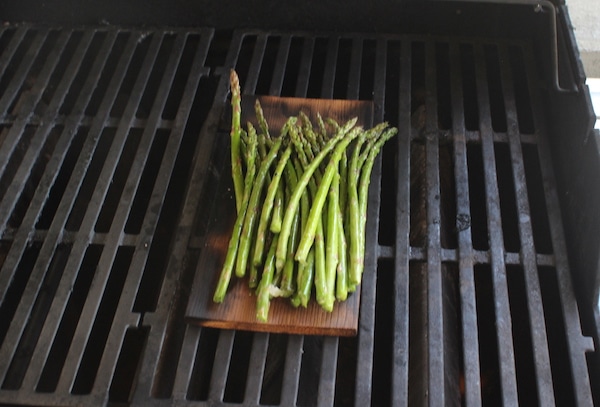
This recipe is about as simple as it gets, and makes for a darn fine side dish that goes with just about any main entree. All amounts for the ingredients below are based on how many you’re serving, and your tastes. You can also add halved or quartered little red potatoes to throw in more variety and color.
Ingredients
- Asparagus
- Oil
- Salt
- Pepper
- Garlic salt
Directions
- Soak plank for 30-60 minutes.
- Mix all ingredients together in a large bowl and mix.
- Preheat grill to medium (about ~450 degrees F).
- Place plank onto grill without food and let it bow for 3-5 minutes.
- Flip the plank over, and put your veggies on. Grill for 15-20 minutes, until asparagus is tender, but still has some crunch.
Big thanks to Evan Rains of Wildwood Grilling for providing a few tips and recipe ideas for me.
