As we dive into spring and summer, there are many sacrifices being made during this pandemic that are necessary for the greater good. I’ve quarantined myself and my family here in Nashville to do my own small part. However, that doesn’t mean that I’ve stopped living or, dare I say, enjoying my daily life. That’s especially true when it comes to my most favorite craft; whether in good times or bad, as the title of my newest book declares, I confess to being a serial griller.
The way I see it, every course, and every meal can be made better when grilled.
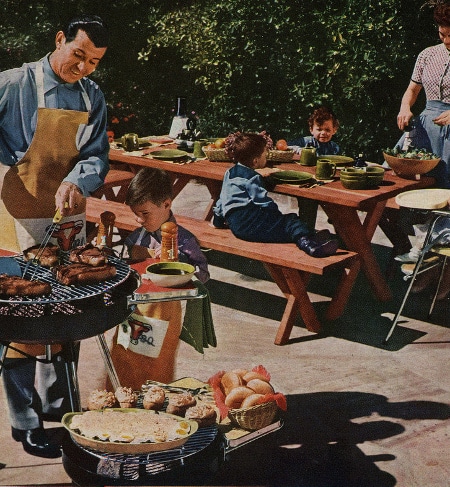
While the act of grilling is meant to be communal, with friends and neighbors around the backyard barbecue, this interim period where we can’t do that is a great time to boost your skills and know-how on your own. When we come out of this, you’ll have your tools sharpened and techniques honed so that when you’re able to welcome folks back over, they’ll be impressed by how much you’ve leveled up your grilling game. (For further leveling up, I’m also giving you a chance to win a new, KILLER grill — more on that below.)
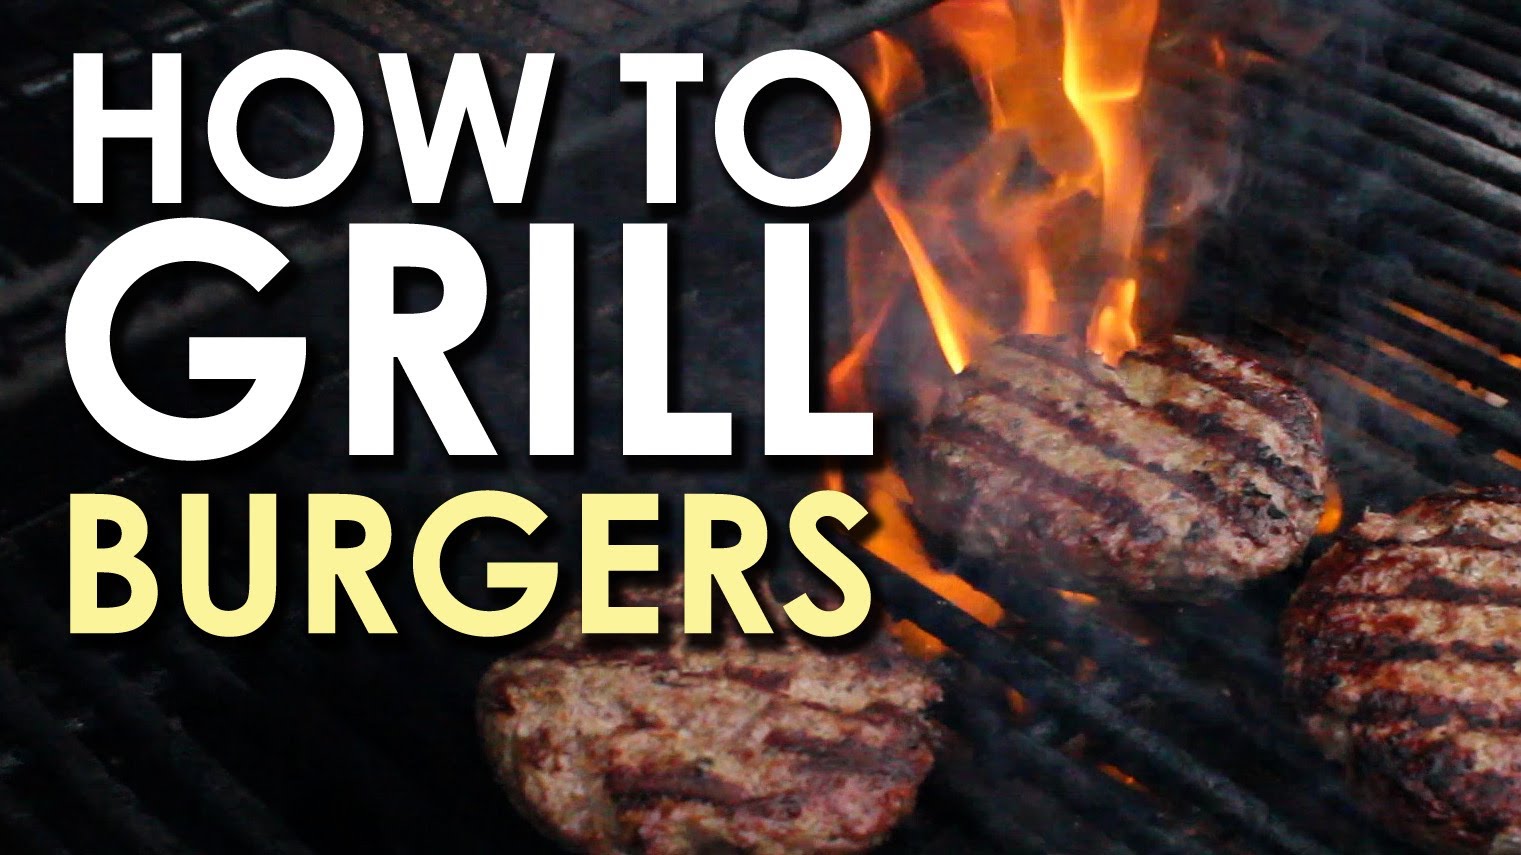
Over the years, we’ve explored quite a few grilling recipes and techniques here on AoM (e.g. grilling burgers). But I wanted to dig deeper. After years of studying and writing about all things BBQ, I sought to skip the low and slow mantra to discover the benefits of cooking hot and fast. So I traveled over 10,000 miles in three months to meet with other serial grillers across the country. The crowd was diverse: men and women of every race and creed, a few James Beard Outstanding Chefs, up-and-comers, and backyard pros. Rest assured, I’ll share with you several great recipes below.
But first, I thought we’d look more into the science of grilling. While I often get asked about delicious recipes, I find that most of us also have questions related to the how and why of cooking with fire and also the tools and setups that will allow you to perfect the art.
The Science of Grilling: The Maillard Reaction
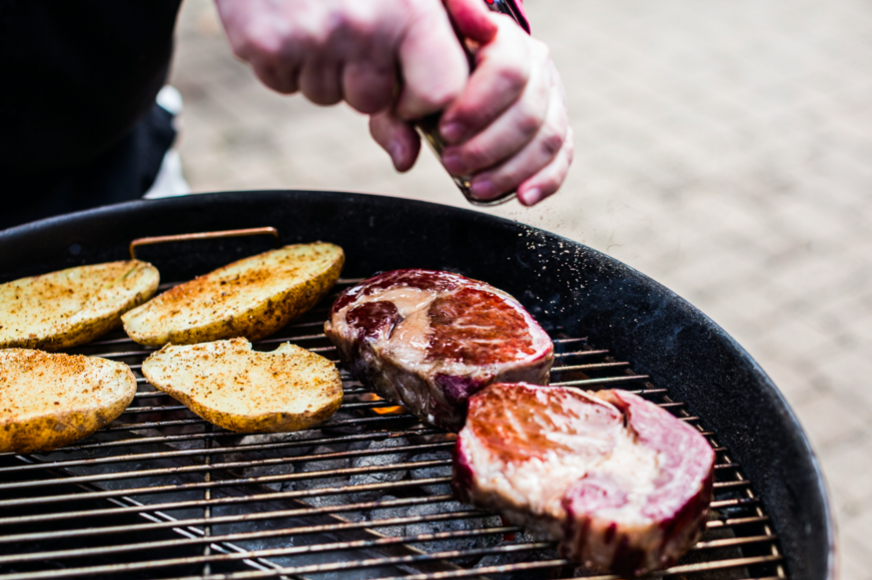
Put simply, browned food is good food. Put scientifically, browned food receives its distinctive look, smell, and taste from a process known as the Maillard reaction.
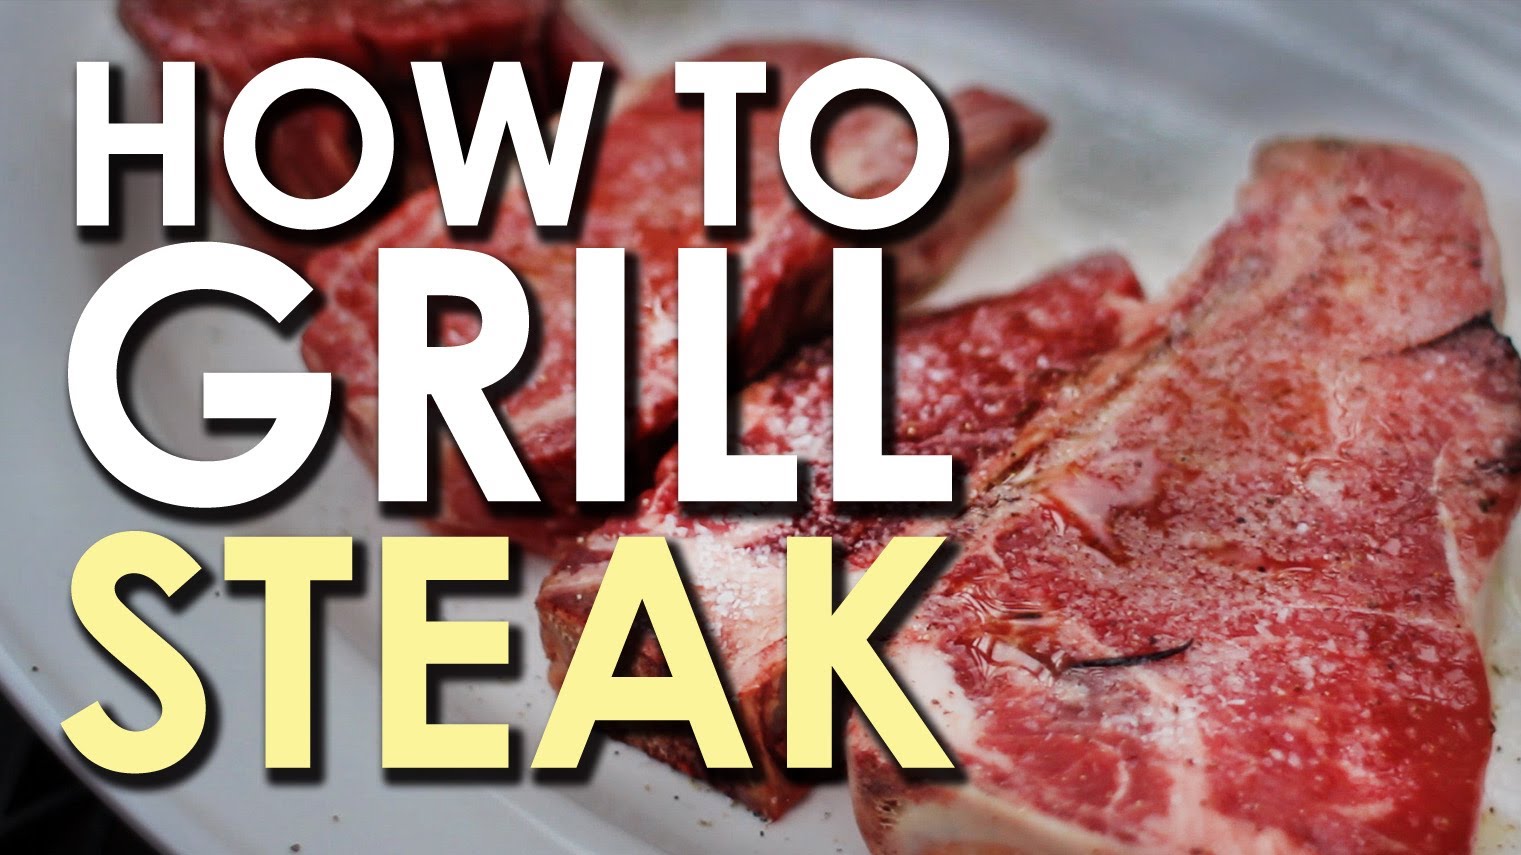
Yes, the grill marks on a steak and that golden char of crispy chicken skin which produces the rich, caramely, umami flavor you love is the result of a complicated scientific process. For detailing that process, we can thank French chemist, Louis-Camille Maillard, who discovered it back in 1912.
While studying amino acid and sugar reactions at increased temperatures, Maillard noticed elevated levels of browning that occurred when temperatures began to reach, and exceed, 300°F. These complex flavors are not just limited to grilled foods, as bread (and other crusty baked goods), roasted coffee, and my favorite beer (from malted barley), are all the result of this important reaction.
Here’s the good news — you do not need to fully understand the why in order to benefit from and take advantage of the science. At its basic level, you simply need to grasp that foods will produce enhanced flavors, aromas, and colors when the natural proteins and sugars are exposed to heat. Got it? Good.
So, when I tell you to preheat your grill, I’m doing it for a reason. I want it to reach the right temperature so that cut of ribeye, or that Brussel sprout, meets the grill at the right time and heat level to ensure that the Maillard reaction can occur.
When I tell you to not overcrowd your grill, I’m doing it for a reason. I want your food to react to the heat — to brown — and not steam cook. Putting too much food on the grill throws off the heat and moisture ratio.
And, when I tell you to pat your meats or vegetables dry prior to cooking, I’m doing it for a reason! For those paying attention, heat is your friend; moisture, from a grilling standpoint, is not. You don’t want to throw a “wet” steak on a grill — no sear, no bueno. Sometimes, salt is added hours in advance of cooking; this process, known as dry-brining, draws out the moisture. Otherwise, it’s simply added à la minute to reduce the loss of moisture during the grilling process.
Typically, foods that are boiled, poached, or steamed do not produce the same flavor as those that are grilled, roasted, or otherwise cooked at high surface temperatures. Of course, there are exceptions to every rule — but for grilling purposes, we are largely seeking to create an opportunity for the Maillard reaction to occur.
Which Type of Grill and Heat Source to Use
Now that we’ve covered the science portion, let’s discuss your grill — and goals.
It is estimated that 75 percent of Americans own some form of a grill or smoker. But what type of grill or smoker is best is hotly debated. Rather than get too far into that debate of which design or brand is best, I have a question for you: What are your grilling goals?
Better said, what are you willing to sacrifice if you can only choose one type of grill? The truth is, it really all comes down to your preferred balance of expense, time, convenience, cooking style, and, perhaps most importantly, flavor. Most grills are built based on how they will be fueled. So, let’s examine some of the most accessible fuel types and designs.
Wood
The OG. From open pit to campfire, wood is the original fuel for fire. As such, purists will state that dried, natural hardwoods are still the superior form of fuel for authentic grilling.
In practice, typical woods like hickory, mesquite, oak, and even fruit woods are often burned away from the grill, with the resulting hot coals then placed underneath the cooking area.
The main drawback to using natural hardwoods as a fuel source is that it’s normally a two-step, time-consuming process to cook food. Wood must be readily accessible and kept dry, and a fire must be started, followed by a period of burndown to produce coals for grilling. Though not convenient, it’s hard to argue with the authentic flavor and atmosphere of a true wood-fired grill.
Wood Pellets
There is a camp of folks who believe they can have their cake, and eat it too. I’m eyeing all of you pellet grillers out there. A relative newcomer on the scene, a pellet grill utilizes food-grade wood pellets as both a source of fuel and flavor, and offers consistent temps with less tending. But this convenience comes at a cost — and I don’t just mean the initial purchase price of a pellet grill, which is usually quite high.
Typically, a power outlet is required to light and fuel the pellets, and also to maintain an internal fan to keep the pellets burning at the desired temperature. In other words, you won’t find many pellet grills at tailgates, unless a power generator is nearby. In my experience, while pellet grills are a fantastic design for those seeking unmatched reliability for low and slow smoking, they fall a bit short when it comes to producing high heat temperatures for searing.
Charcoal
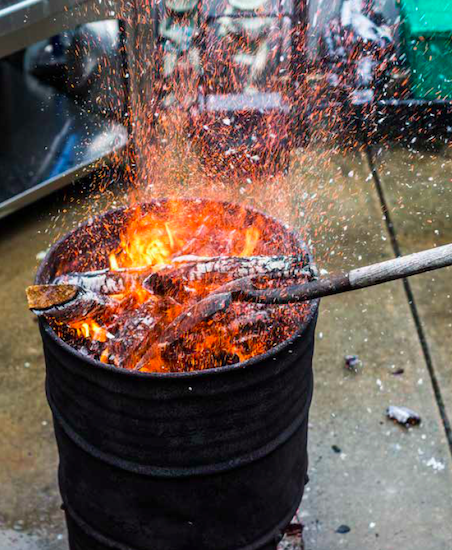
Lump
An accessible alternative to actual hardwood, charcoal is formed when wood (or another natural substance) is heated in an environment absent of oxygen, producing what we refer to as lump charcoal. With water and other components removed, lump charcoal can be lit quickly and reliably and reach high temperatures, producing very little ash. Though charcoal is composed of wood, it typically provides much less smoke compared to natural hardwoods. For that reason, lumps or chips of hardwood are often added to the lit coals to produce a more natural, wood-fired flavor. Grilling purists almost always prefer lump charcoal over the cheaper alternative, briquettes.
Briquettes
Like a good slice of bologna, sometimes knowing less about the content of your consumption is ignorant bliss. Most briquettes are manufactured with wood byproducts and other additives to allow for easier lighting and a more consistent burn. It’s the lengthy list of “additives” in most briquettes that causes concern for so many. While readily accessible and affordable, briquettes also have the disadvantage of producing a significant amount of ash, compared to lump charcoal.
That said, there are many folks, including some featured in my book, who find briquettes superior to lump charcoal. Briquettes are formed in a consistent size, unlike lump charcoal which can come in large chunks or small pieces, meaning they provide a reliable, consistent amount of energy, which can translate to superior temperature control.
Gas
About 62 percent of grill owners own the gas variety. Why the majority? We are creatures of convenience. Gas provides an open flame environment with unrivaled ease and consistency. Available in virtually any shape and size, gas grills utilize propane or natural gas, either by tank or fixed line as a heat source. Temperature control is precise and simple, used by dialing the knobs to the preferred settings. When cared for properly, these grills can last for decades.
While ease of use, affordability, and convenience might be king, flavor from a gas grill is certainly lacking. Some versions support grates designed to vaporize drippings to enhance flavor, but such elements seem more like a sales gimmick to this guy. Wood chips, usually contained within a foil packet, can be used over direct heat to produce a smoke effect, again to a varying degree of success.
Electricity
This form is used most in urban environments where an open flame is prohibited, like condos or small apartment communities. Flat top grills (usually referred to as griddles) or grill pans can also be used for indoor environments on stovetops (electric or gas). These setups provide a consistent source of reliable heat to deliver a grill-like look and flavor. Recently, infrared smokeless grills have also been gaining in popularity.
Types of Grills & Setups
Open: Hardwood, lump, or briquette coals are typically positioned close to the cooking surface, and no lid or cover is utilized. Examples include flat top grills, hibachis, and Spanish-style parrillas. Open grills are most effective for high-heat, direct grilling due to the inability to trap heat for convection cooking, and are typically utilized for cooking smaller cuts of food that have been skewered, such as kebabs, satay, or yakitori.
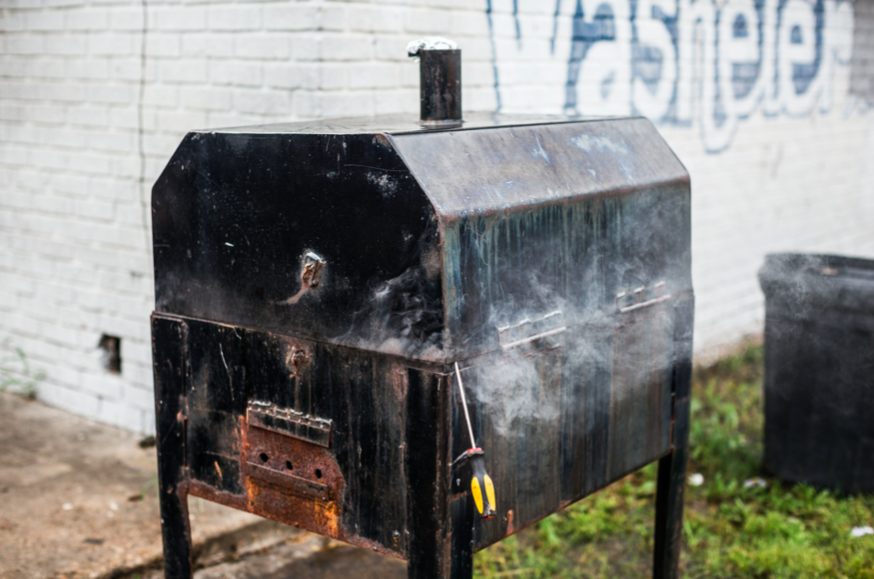
Closed: This is the most common of all setups, with the ability to burn nearly every type of wood or charcoal. Closed setups (i.e., with a lid) allow for direct-heat grilling, indirect grilling, and convection cooking by trapping the heat and maintaining a controlled airflow. The most popular designs are kettle, drum, or barrel — which all provide a large range of affordability and versatility.
Kamado: Often referred to as egg-style smokers or grills, these setups serve as a great dual-purpose grill and smoker. Lump charcoal, and not briquettes, are typically encouraged for this design. More expensive versions are made of thick ceramic or cast-iron to provide an elevated source of insulation and allow the grill to maintain extremely precise temperature control for very low and high heat temperatures.
Hybrid: A setup that most often can use both gas and charcoal, a hybrid is ideal for folks who want the convenience of gas cooking along with a charcoal-driven alternative for enhanced flavor when time permits.
4 of My Favorite Recipes for Expanding Your Grilling Repertoire
Now that we’ve examined the science, fuels, and setups most common to grilling, it’s time to literally fire up the grill and get to it.
While you may only associate grilling with time-honored (and perfectly delicious) fare like burgers and brats, there’s so much more you can do with it as well. What I love most about grilling is the fact that it is embraced by nearly every culture and cuisine around the globe. My goal in putting together Serial Griller was to provide you with a go-to cookbook filled with recipes that cover both the all-around classics, as well as more unconventional and diverse dishes.
Here are four of my favorite recipes from the book which can work on both charcoal and gas grills and will help you expand and elevate your grilling repertoire:
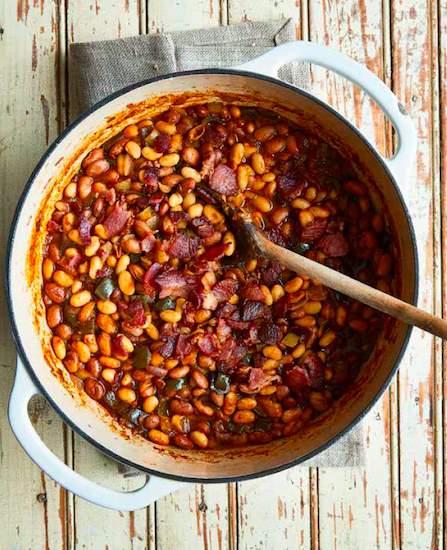
Grilled Baked Beans
Ingredients
- 1 large (10-ounce) yellow onion, cut into ½-inch-thick slices
- 2 medium poblano chiles (about 5 ounces)
- 2 medium Hungarian wax peppers (about 5 ounces)
- 2 medium jalapeño chiles (about 3 ounces)
- 1 tablespoon olive oil
- 4 thick-cut bacon slices (about 3½ ounces), chopped
- 2 (14½-ounce) cans pinto beans, drained and rinsed
- 2 (14½-ounce) cans Great Northern beans, drained and rinsed
- 1 cup water
- ½ cup ketchup
- ¼ cup packed light brown sugar
- 2 tablespoons molasses
- 1 tablespoon yellow mustard
- 2 teaspoons chili powder
- 1 teaspoon kosher salt
- ½ teaspoon freshly ground black pepper
- 3 tablespoons apple cider vinegar
Directions
- Open the bottom vent of a charcoal grill completely. Light a charcoal chimney starter filled with charcoal. When the coals are covered with gray ash, pour them onto the bottom grate of the grill, and then push to one side of the grill. Adjust the vents as needed to maintain an internal temperature of 450° to 500°F. Coat the top grate with oil; place on the grill. (If using a gas grill, preheat to high [450° to 500°F] on one side.)
- Toss together the onion, poblanos, wax peppers, jalapeños, and oil in a large bowl. Place the vegetables on the oiled grates directly over the side with the coals (or the lit side of a gas grill). Grill, uncovered, until charred on all sides, about 12 minutes, turning halfway through cook time. Transfer the onion to a cutting board. Return the poblanos, wax peppers, and jalapeños to the large bowl; cover with plastic wrap and let stand until cool enough to handle, about 10 minutes.
- Roughly chop the onion. Remove and discard the skin, stems, and seeds from poblanos, wax peppers, and jalapeños and roughly chop. Set the chopped vegetables aside.
- Place a Dutch oven on the grates directly over the side with the coals (or the lit side of a gas grill). Add the bacon to the pot and cook, stirring often, until crispy, about 5 minutes. Transfer the bacon with a slotted spoon to a plate lined with paper towels, reserving the drippings in the pot. Add the chopped vegetables to the pot, along with the pinto beans, Great Northern beans, water, ketchup, sugar, molasses, mustard, chili powder, salt, and pepper. Move the Dutch oven to the grates over the side without the coals (or the unlit side of a gas grill). Cover the Dutch oven and close the grill. Cook until the beans are tender and the sauce has thickened, about 1 hour. Stir in the vinegar and sprinkle with the bacon.
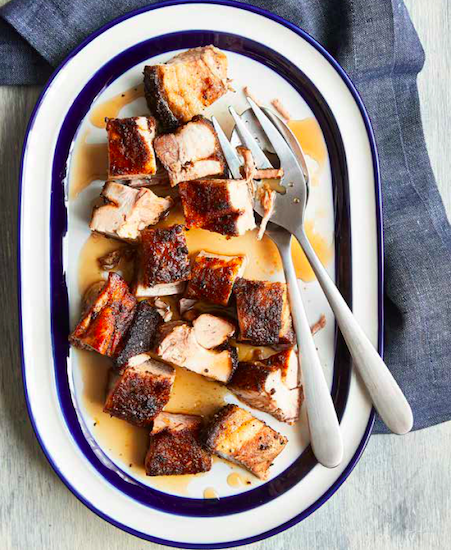
Grilled Pork Belly With Peach Vinegar Sauce
Ingredients
- 2 medium white onions (about 1 pound), quartered
- 4 celery stalks, cut into 2-inch pieces
- 3 medium carrots, cut into 2-inch pieces
- 1 tablespoon paprika
- 1 tablespoon freshly ground black pepper
- 2 teaspoons onion powder
- 1½ tablespoons plus ¼ teaspoon kosher salt
- 1 (4-pound) pork belly
- 1 cup packed light brown sugar
- ⅓ cup water
- 1 cup apple cider vinegar
- 1 cup finely chopped peaches (from 2 [6-ounce] unpeeled peaches)
Directions
- Open the bottom vent of a charcoal grill completely. Light a charcoal chimney starter filled with charcoal. When the coals are covered with gray ash, pour them onto the bottom grate of the grill. Adjust the vents as needed to maintain internal temperature of 450° to 500°F. (If using a gas grill, preheat to high [450° to 500°F].)
- Place the onions, celery, and carrots in a high-sided roasting pan (just large enough to fit the pork belly). Stir together the paprika, pepper, onion powder, and the 1½ tablespoons salt in a small bowl. Score the skin side of the pork with a sharp knife, making ¾-inch-deep slits down the length of the pork, leaving about ¾ inch between each slit. Rub the paprika mixture over the surface and into the slits of the pork. Place the pork, skin-side up, on top of the vegetables in the roasting pan. Place on the unoiled grill grates. Cook, covered, for 20 minutes. Adjust vents as needed to reduce grill internal temperature to 300° to 350°F. (If using a gas grill, reduce temperature to medium-low [300° to 350°F].) Cook, covered, until the pork is very tender and the fat is dark brown and crispy, about 3 hours. Transfer the pork to a cutting board; discard the vegetables.
- Meanwhile, combine the sugar and water in a saucepan on a stovetop over medium-high heat. Cook, stirring occasionally, until the sugar dissolves, about 5 minutes. Continue cooking, undisturbed, until the mixture turns a dark caramel brown, about 5 minutes. Add the vinegar all at once; use caution as the mixture will splatter. Bring to a boil over medium-high heat. Add the peaches and cook, uncovered and stirring occasionally, until the sauce is reduced and slightly thickened, about 5 minutes. Strain the sauce through a fine-mesh strainer into a heatproof bowl; discard the solids. Stir in the remaining ¼ teaspoon salt. Cut the pork into 1-inch chunks and drizzle with the peach sauce.
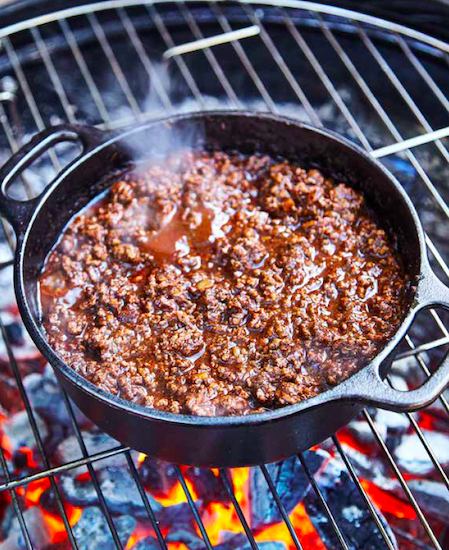
Chili on the Grill
Ingredients
- 2 tablespoons olive oil
- 1 medium (8-ounce) yellow onion, chopped (1 cup)
- 1½ tablespoons minced garlic (from 4 medium cloves)
- 2 pounds 80/20 lean ground beef
- 2½ tablespoons chili powder
- 2 teaspoons kosher salt
- 1½ teaspoons ground cumin
- 1½ teaspoons ground cinnamon
- ½ teaspoon unsweetened cocoa
- ¼ teaspoon ground allspice
- ¼ teaspoon cayenne pepper
- 1 (15-ounce) can tomato sauce
- 1 cup water
- 1 tablespoon red wine vinegar
Directions
- Open the bottom vent of a charcoal grill completely. Light a charcoal chimney starter filled with charcoal. When the coals are covered with gray ash, pour them onto the bottom grate of the grill. Adjust the vents as needed to maintain an internal temperature of 400° to 450°F. (If using a gas grill, preheat to medium-high [400° to 450°F].)
- Place a cast-iron Dutch oven on the unoiled grates. Add the oil and heat until shimmering. Add the onion and cook, stirring occasionally, until softened, about 5 minutes. Add the garlic and cook, stirring constantly, until fragrant, about 1 minute. Add the ground beef and cook, breaking up chunks with a wooden spoon, until browned, 8 to 10 minutes. Stir in the chili powder, salt, cumin, cinnamon, cocoa, allspice, and cayenne. Cook, stirring constantly, until fragrant, about 1 minute. Stir in the tomato sauce, water, and vinegar and allow the mixture to come to a simmer.
- Adjust the vents as needed to reduce grill internal temperature to 250° to 300°F. (If using a gas grill, reduce temperature to low [250° to 300°F].) Cook, covered and stirring occasionally, until the meat is tender and the sauce has thickened, about 1 hour.
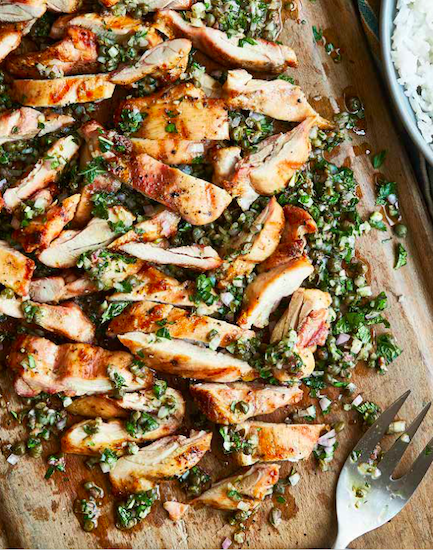
Chicken Thighs with Herb Salsa
Ingredients
- 8 boneless, skinless chicken thighs (about 2 pounds)
- 1 teaspoon kosher salt
- ½ teaspoon freshly ground black pepper
- ¼ cup chopped shallot (about 1 medium shallot)
- 2 tablespoons capers, drained
- 2 tablespoons chopped fresh flat-leaf parsley
- 2 tablespoons chopped fresh mint
- 2 tablespoons chopped fresh basil
- 1 teaspoon fresh thyme leaves
- 3 medium garlic cloves, chopped (about 1 tablespoon)
- 4 anchovy fillets
- ¼ cup olive oil
- 2 cups hot cooked white rice
Directions
- Open the bottom vent of a charcoal grill completely. Light a charcoal chimney starter filled with charcoal. When the coals are covered with gray ash, pour them onto the bottom grate of the grill. Adjust vents as needed to maintain an internal temperature of 400° to 450°F. Coat the top grate with oil; place on the grill. (If using a gas grill, preheat to medium-high [400° to 450°F].)
- Sprinkle the chicken evenly with the salt and pepper. Place on the oiled grates. Grill, covered, until charred on both sides and a thermometer inserted in thickest portion of the chicken registers 170°F, about 5 minutes per side.
- Meanwhile, place the shallot, capers, parsley, mint, basil, thyme, garlic, and anchovy fillets on a cutting board. Chop the mixture until the consistency resembles a rough paste; drizzle with the oil.
- Remove the chicken from the grill and place directly on the shallot mixture on the cutting board. Let rest for 5 minutes. Slice the chicken against the grain into ½-inch-thick slices and toss gently with the shallot mixture. Serve directly off the cutting board, family style, alongside hot rice.
Enter the Giveaway
To celebrate the release of my new book, we’ve partnered up with Golden’s Cast Iron to give away five (5) Golden’s Cast Iron Mini Cookers, a $699.99 value.
View Giveaway
_______________________________
Matt Moore is a regular contributor to the Art of Manliness and the author of Serial Griller.