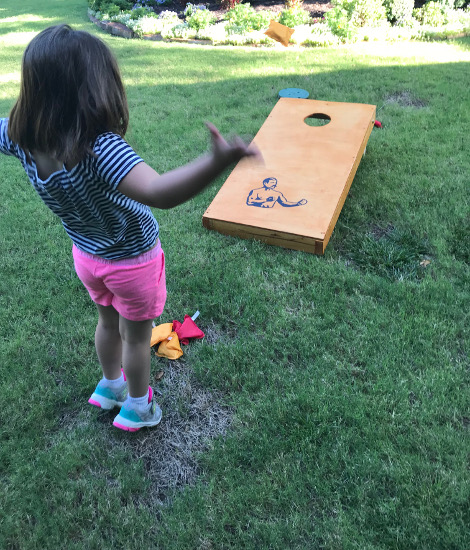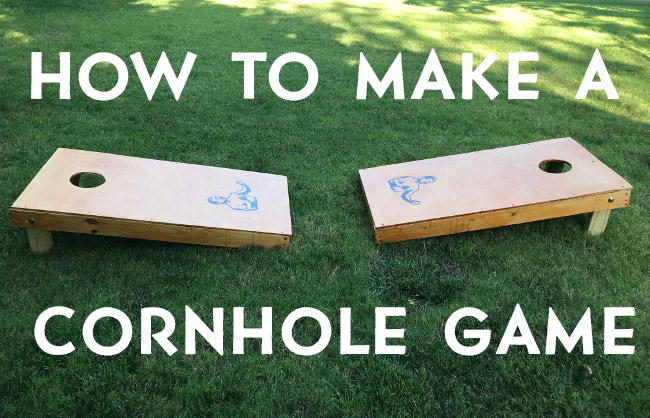
Variations of the game of cornhole — in which players attempt to pitch bean bags through the hole of a raised platform — date back to the 19th century, and today it remains a great summertime lawn game. It’s relaxing and just plain fun; kids like it, grown-ups like it, and it’s so low-key you can play while sipping on a soda or beer.
With Independence Day coming up next week here in the States, I thought it would be fun to add a cornhole tournament to my family’s day of festivities. Instead of dropping $150+ for a pair of pre-made cornhole platforms (which are often flimsy and non-regulation size — yes, there are official cornhole regulations), I drove over to my local Home Depot, bought $85 worth of materials, and made my own sturdy custom set.
It’s a super simple project that takes about a day. My kids had fun helping me make the cornhole platforms, and now they’re having a blast playing with them.
If you’re looking to add some cornhole to your summertime activities, here’s how I made mine.
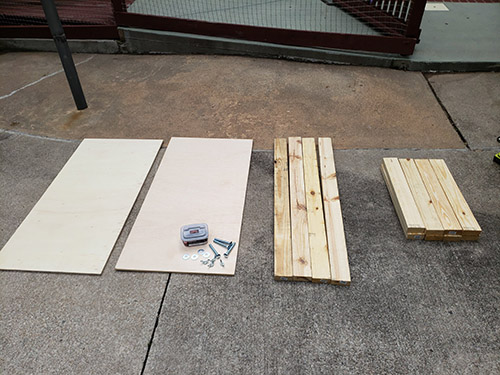
Materials & Tools
These materials will net you a set of two cornhole boards/platforms. Cornhole matches are played with two sets of bean bags (which in official play, are actually filled with corn kernels) and two platforms which are placed directly facing each other, 27 feet apart. You can find all the rules of play here.
We’ll be making regulation-sized platforms, which consist of a 2′ by 4′ board, with a 6-inch hole centered 9 inches from the top. The board sits on legs at an angle, with its top edge 12 inches above the ground, and the bottom edge 3–4 inches above the ground.
Materials
- (2) 2′ x 4′ pieces of 1/2″ plywood for the surface (Home Depot sells pieces already cut to this size)
- (4) 2×4 x 4′ for the frames (Home Depot sells pieces already cut to this size)
- (8) 2×4 x 2′ for the frames (4 of them will be cut to 21″, and 2 will be cut into 11-1/2″ pieces; you really only need 6 of these 2x4s, but might as well buy a couple extra in case you make a mistake)
- 1-lb. box of 1-5/8″ deck screws
- (24) 3″ deck screws
- (4) 1/2″ x 4″ carriage bolts with (4) washers and (4) wing nuts
- Primer and paint of your choice (or wood finish)
- Plus don’t forget bean bags (there’s a regulation size and weight for those too; though of course any will do for casual backyard play)
Tools
- Circular saw
- Jigsaw
- Power drill
- 1/2″ drill bit
- Clamps
- Tape measure
- Compass
- Orbit sander
Step 1: Cut Wood to Size
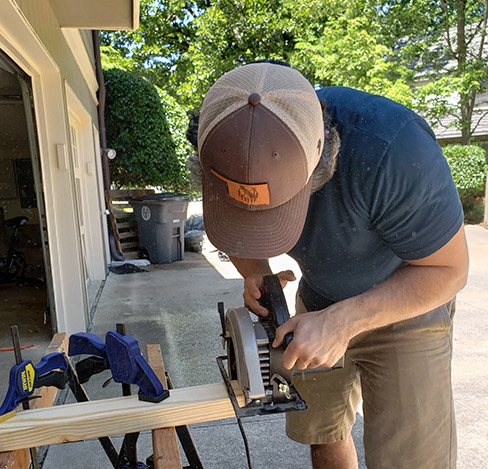
I took four of the 2′ 2x4s that I bought and cut them down to 21″ with the circular saw. These will be used in the frame for the cornhole box.
I took another two 2′ 2x4s and made four 11-1/2″ long pieces for the legs.
Step 2: Construct the Boxes
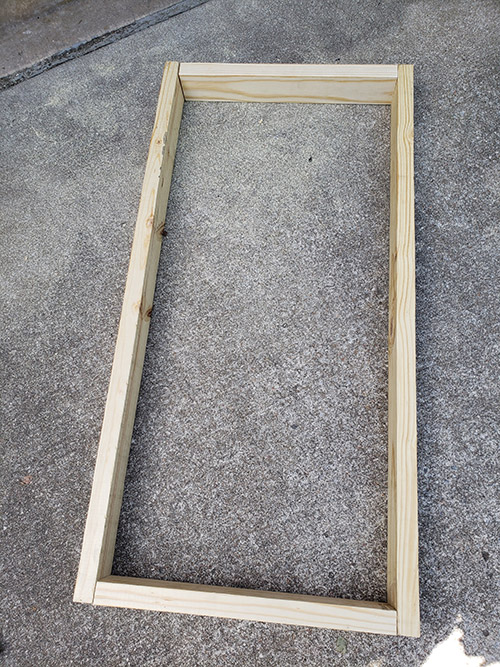
Gather two 4′ 2x4s and two 21″ 2×4 pieces. Fasten them together into a rectangle with the 21″ pieces inside the 4′ pieces.
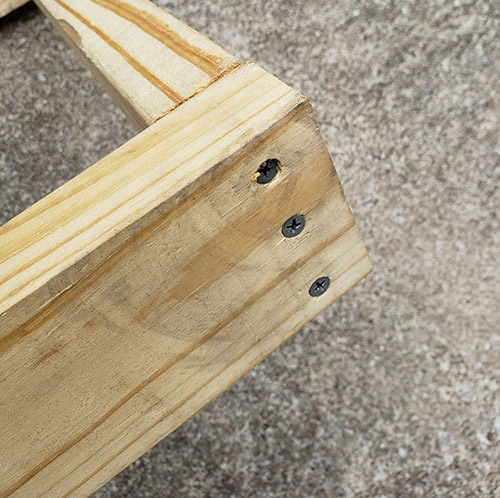
I used (3) 3″ deck screws at each joint to fasten things.
Repeat for the second cornhole box.
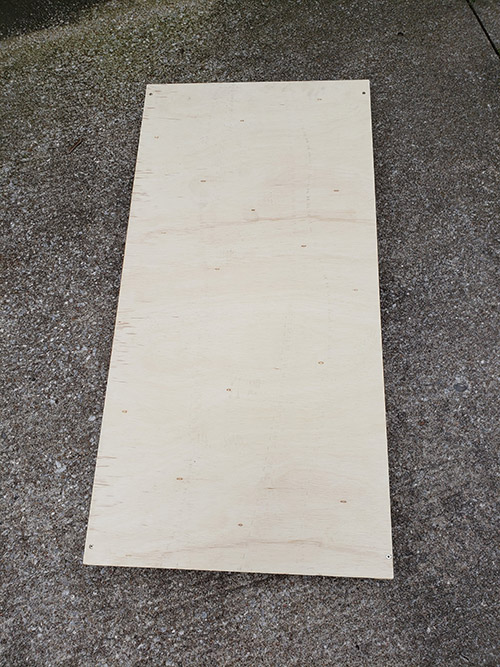
Place the plywood on top of your 2×4 box. Fasten it down with several 1-5/8″ deck screws. Repeat for other cornhole box.
Step 3: Round Off the Legs
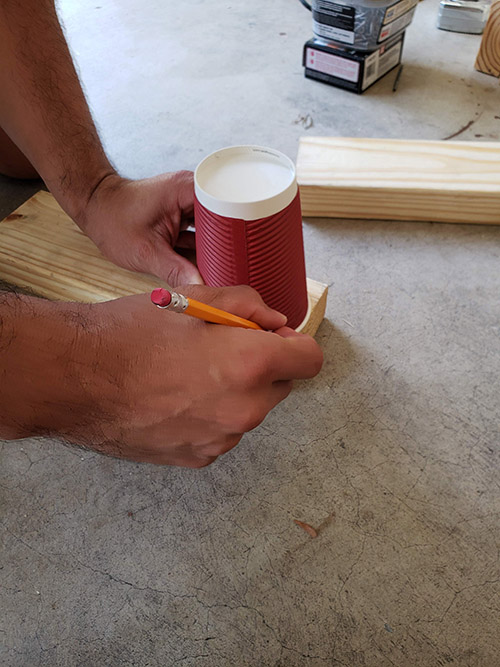
Grab two of the 11-1/2″ 2x4s that you cut earlier. We need to round off the top of them so they can swivel inside the box. I just took a coffee cup to trace an arc around the top with a pencil.
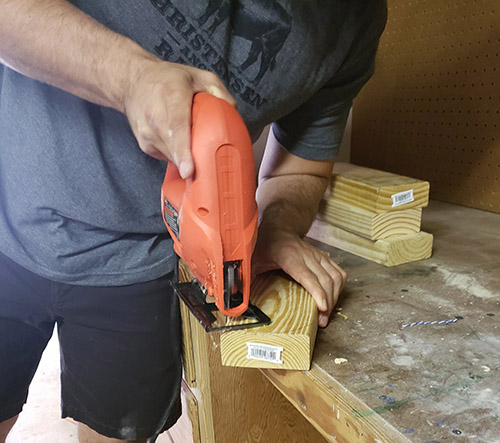
Use a jigsaw to cut along the line. Sand it.
Repeat for the other two leg pieces.
Step 4: Fasten Legs to Box
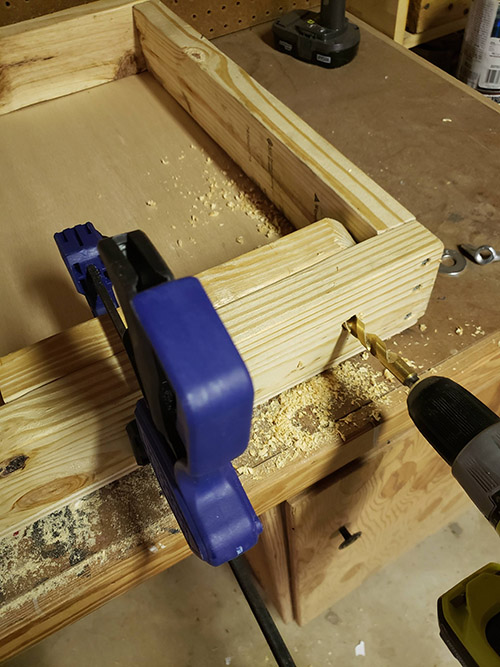
Time to fasten the legs to the cornhole box. Grab one of the boxes and turn it upside down. Lay a leg parallel, flush up against one of the top corners with the radius side in the corner. Clamp into place.
Make a mark on the outside of the box 3-1/2″ from the top of the board and right in the middle of the 2×4.
Drill a 1/2″ hole through both the frame and the leg using your 1/2″ drill bit. Repeat for the other side of the cornhole box. And then do it again for the other box.

Attach the legs to the box with the carriage bolt and washer and a wing nut. Check to see if you can swivel the leg up and down. You may have to adjust the radius top a bit to allow for the swivel. Use your sander and jigsaw to do this.
Step 5: Cut Legs to Proper Height
Cornhole regulations require that the top of the board be 12″ inches from the ground. To get that height, we’ll need to cut the bottom of the legs a bit.

Place the box up on a workbench with the legs extended out. Prop the cornhole box on some stuff so that the top of the platform is 12″ off the tabletop. (I used some defective Art of Manliness books to get the job done.)
Move things over so that the leg closest to the edge hangs just over the table edge.
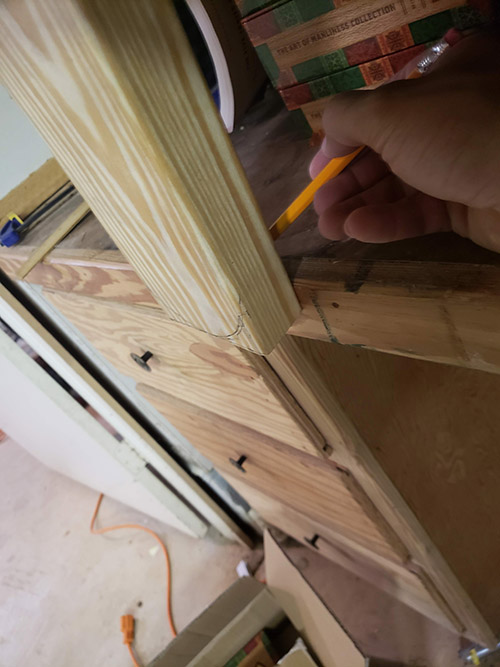
Using the tabletop as a guide, draw a straight line across the bottom of the 2×4. Repeat for the opposite side.
Detach legs and cut along the line using a circular saw. Do the same for the other box.
Step 6: Cut Hole in Platform
Mark the center of the hole. It’s 9″ down from the top and 12″ in from each side.
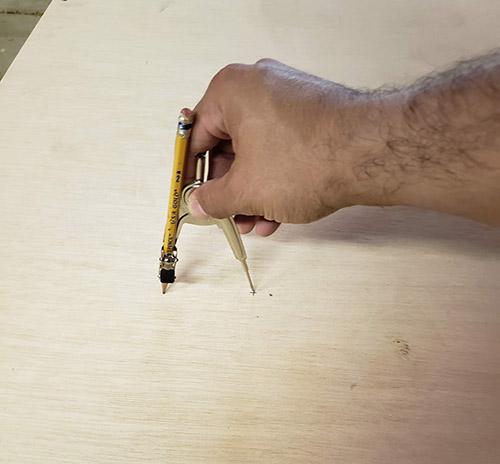
Using a compass, draw a 6″ diameter circle with a pencil.
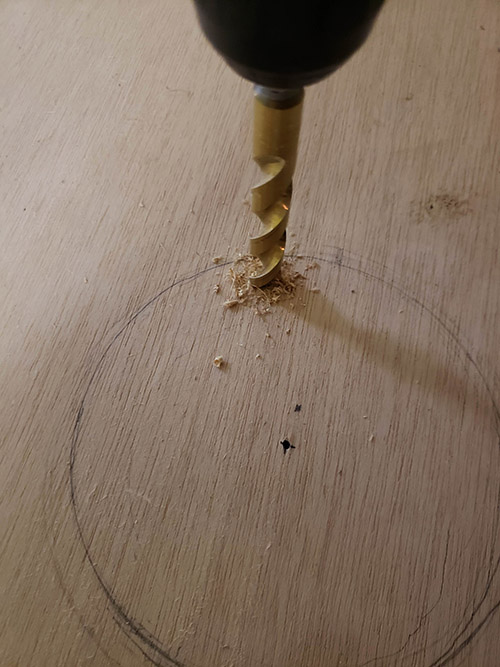
Using your 1/2″ drill bit, drill a hole along the inside edge of your circle. This will give you room to put the jigsaw blade in.
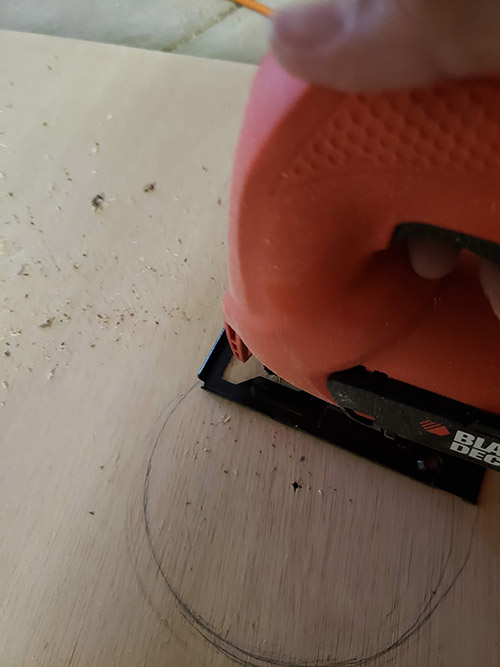
Cut along the line using your jigsaw.
Step 7: Sand
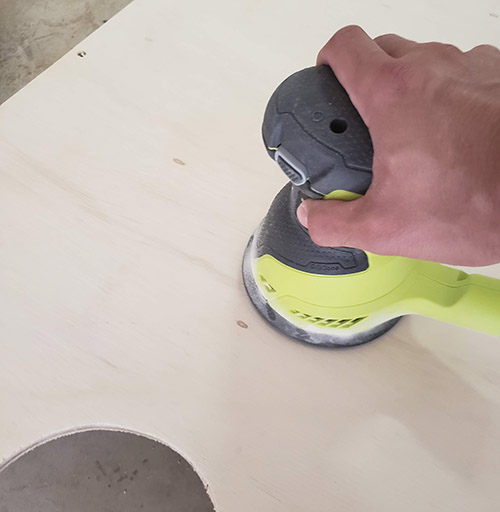
Sand the surface of the box with your orbital sander. Make sure to get inside the hole you cut; if you’ve got a drill drum sander, use that. Wish I had one. It would have helped in getting a cleaner surface for the hole.
Step 8: Decorate

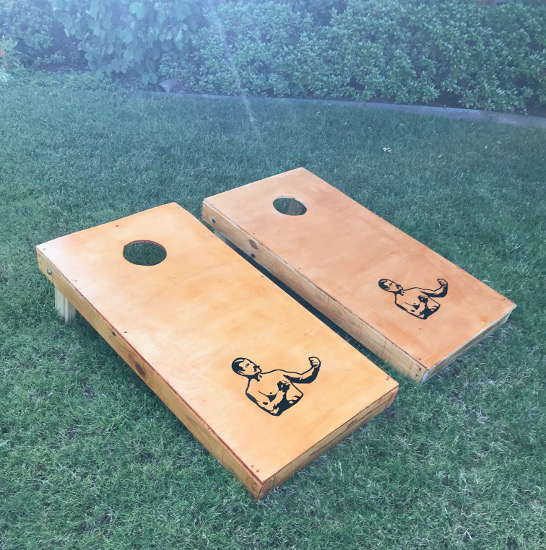
With the kids “helping” with the finish, it turned out a little spottier than might be desired, but that’s part of the fun!
This is where you can add some personality to your cornhole game. You can paint the boxes. I opted to go with a wood finish and a John L. Sullivan vinyl decal for mine.
Step 9: Enjoy!