This is a guest post by Ethan Hagan from One Project Closer. Check out some of his other manly contributions like How to Install a Toilet.
Being able to wire an outlet is a great skill to have in your repertoire, and, once mastered, you’ll be able to replace old or damaged outlets in a matter of minutes. To help you know what to expect, I’ve created a tabletop guide with pictures illustrating how to properly wire an outlet.
This tabletop demonstration illustrates how to wire a typical electrical receptacle. This means I’m making some assumptions, and if you find wiring in your home that looks different, that doesn’t mean it was done wrong. In fact, there are many possible variations including a different amp circuit, amp receptacle, wire gauge, number of wires, and more. With that said, what I’ve presented below is a very common scenario, and it’s a great place to start.
Code and Permits
Obviously a tabletop demonstration doesn’t require pulling permits. However, local code often requires a permit for new or extended circuits, and sometimes only licensed master electricians can pull permits. In some counties homeowners can take a standard test and obtain permits for almost all work within their own home. Check out your county or state government’s licensing and permits website to learn specifics for your area. Most jurisdictions follow some variation of the National Electric Code (NEC), and you can get limited free access to the NEC via the National Fire Protection Association (NFPA) website.
Tools & Materials
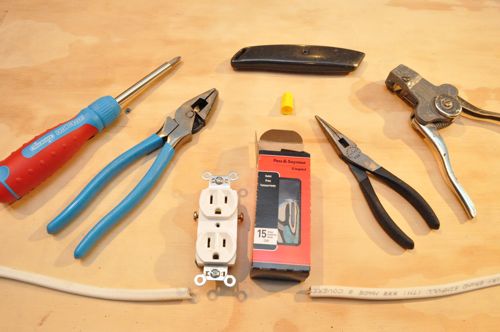
Most electrical projects can be completed with a few hand tools. For this demonstration, I grabbed:
- Screwdriver
- Lineman’s pliers
- Utility knife
- Needle-nose pliers
- Wire strippers (many wire strippers have loop makers, eliminating the need for the needle-nose pliers)
- Voltage tester (not shown in image; here’s how to use one)
- 15 amp receptacle
- 14/2 wire
- Electrical box
- Wire nut
You can find all the necessary tools and materials at your local DIY center. A 15 amp outlet like the one shown here only costs about $0.60, and you can purchase 100′ of 14/2 Romex for $35.00! If you’re planning a big project, purchase the “contractor packs,” and keep your eye out for a Home Depot coupon for even better prices.
Step 1: Turn Off the Breaker
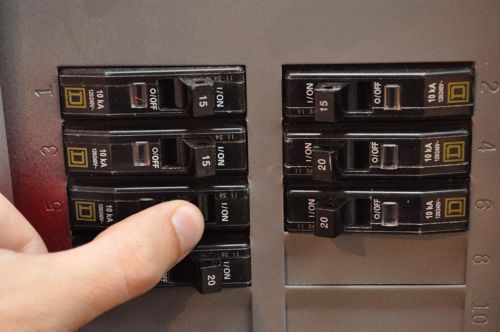
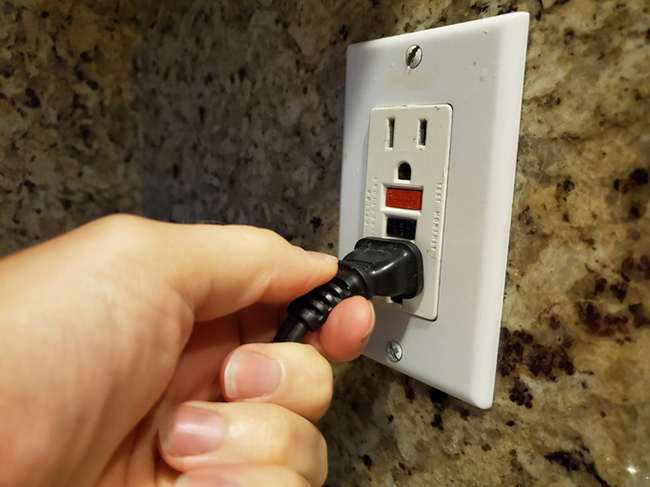
If the outlet you’re working with is already connected to the breaker panel, turn off the appropriate breaker, and double-check that it is off with a voltage tester or even a lamp (that you know works). After turning off the appropriate breaker and double-checking with a voltmeter, remove the faceplate. You’ll see screws at the top and bottom of the outlet, and after removing those, the receptacle can be pulled out of the box. If the wires have enough excess length, they can simply be cut and re-stripped. If there isn’t much wire to work with, they need to be disconnected by either backing out the screw terminal or pressing the release slot to disengage the stab-back connection.
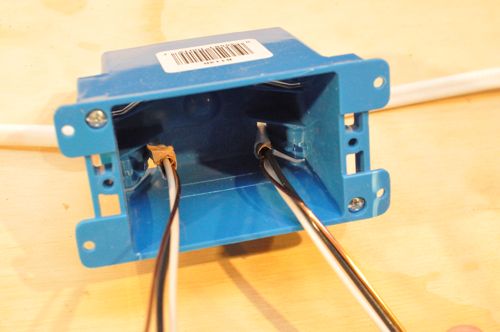
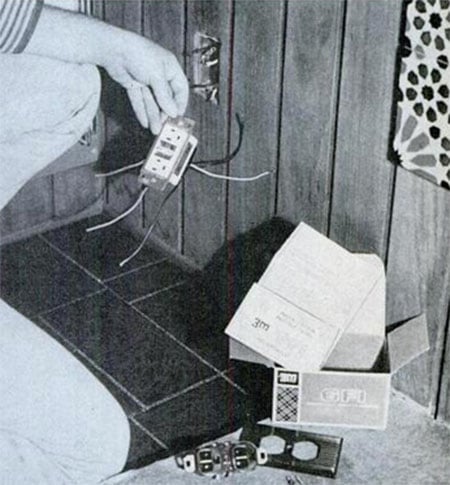
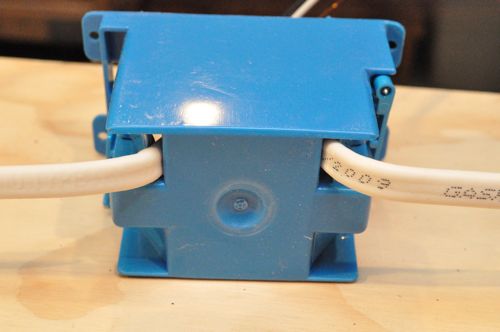
New work electrical boxes will be nailed to a stud, and remodel electrical boxes (like the one pictured below) will be affixed to the drywall. The box will have at least one cable (bundle of wires) entering through the backside. This demonstration shows 2-wire, which means each cable contains one black and one white wire, plus a ground wire.
Step 2: Pigtail Ground Wires
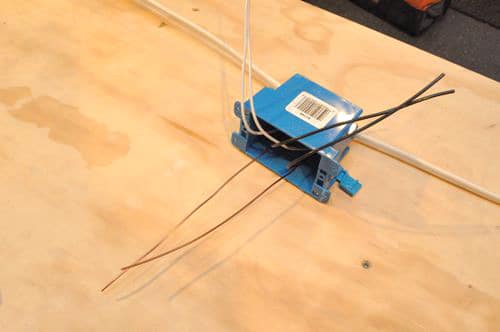
If you’re replacing an existing outlet, odds are good that you can skip this step because you can reuse the existing splice. However, if any of the wires are nicked or damaged, they should be cut back and redone.
Since this box has two ground wires and the outlet has only one ground terminal, we need to splice the ground wires along with a pigtail. Don’t make the mistake of just lining up the wires and twisting on a wire nut! That splice is sure to fail. Here’s the right way to do it:
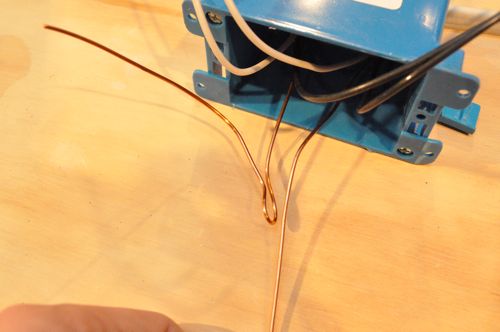
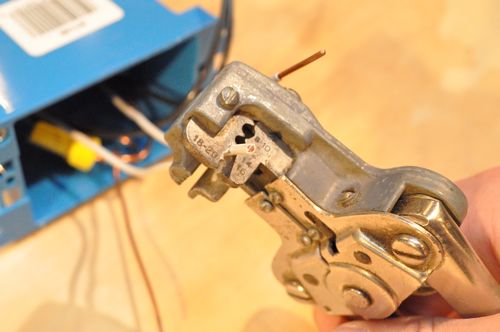
Bend one of the ground wires back on itself.

Trim the other ground wire to the same length.
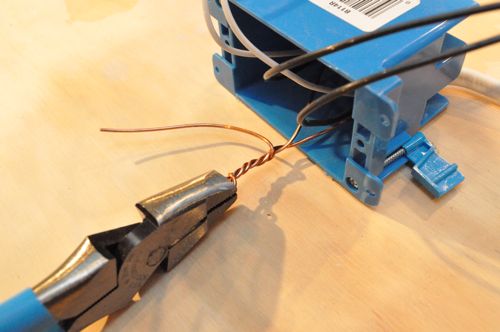
Use lineman’s pliers to tightly twist the wires together.
Next, cut off the ends.
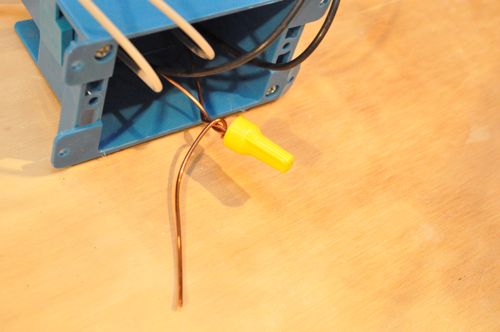
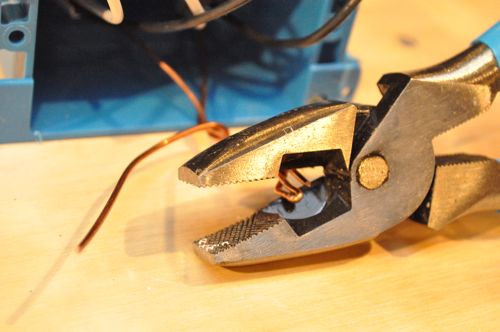
Lastly, twist a wire nut over the splice. Make sure the wire nut is sized appropriately.
Step 3: Strip and Connect the Neutral Wires
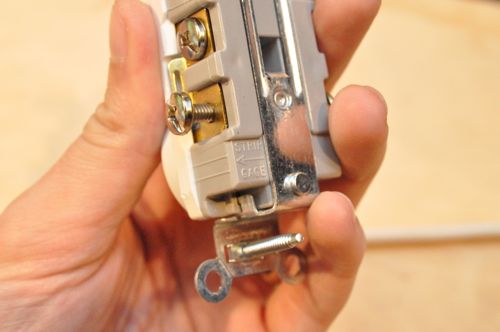
Most receptacles have a strip gage on the back for easy reference. A strip gage defines how much bare wire should be exposed after stripping away the insulation. It’s just enough to loop around a terminal screw or make a solid connection with stab-back connection.
Line up the white (neutral) wires and cut them to an equal length. Next, strip back the insulation with wire strippers.
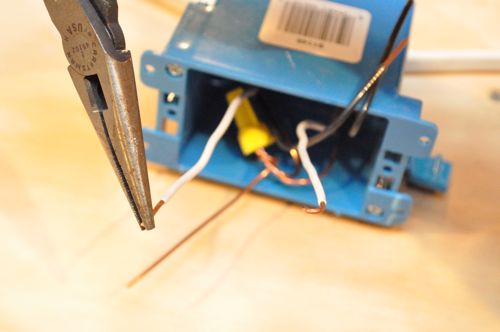
Using pliers or a loop-maker on the wire strippers, twist the exposed wire into a half-circle.
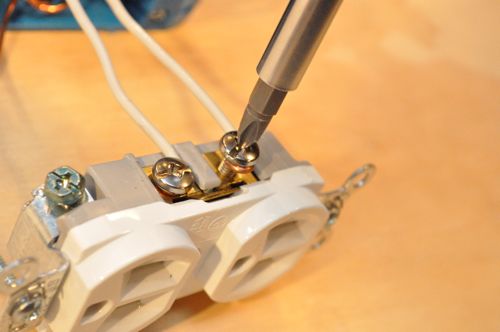
Slip the neutral wires around the silver screws in a clockwise rotation (the same direction the screws turn), and tighten down the screws.
Step 4: Connect the Ground Wire
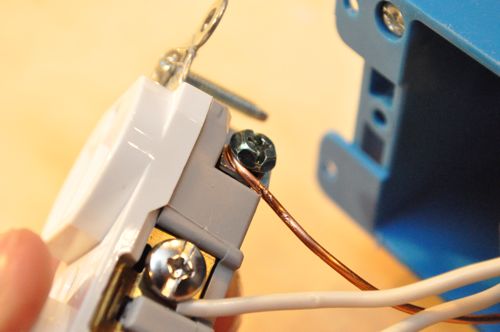
Loop the ground pigtail wire around the green ground screw and tighten the screw down.
Step 5: Repeat for the Hot Wires
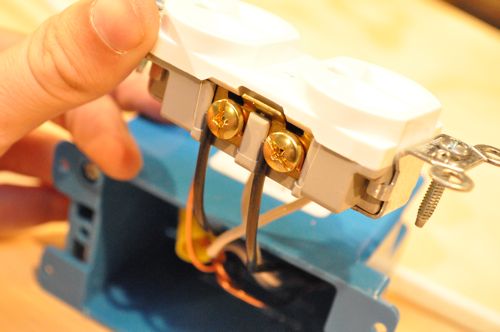
Repeat the same process of cutting, stripping, and attaching the hot wires to the gold screws.
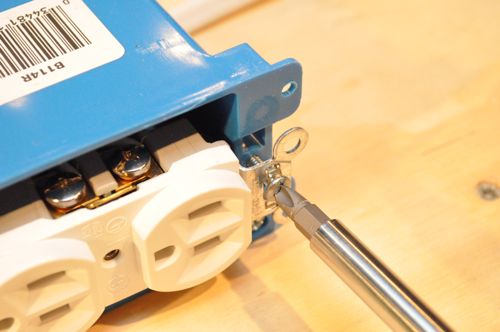
Step 6: Secure the Receptacle to the Box

Carefully maneuver all the wires into the box and attach the receptacle with the two screws.
Step 7: Install Faceplate

Lastly, install the faceplate.
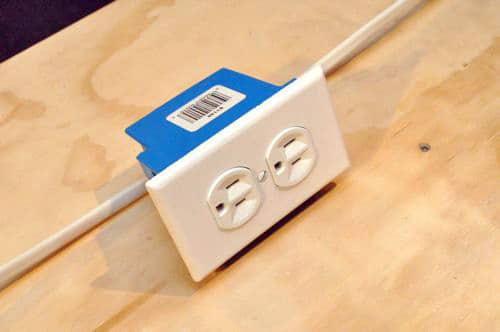
At this point you can flip the breaker back on and test the outlet.
______________________________
Ethan Hagan owns and operates a home improvement website called One Project Closer. On One Project Closer you’ll learn how to tackle projects with expert knowledge from professional contractors. Check out OPC for home improvement how-tos (called Pro-Follows), and follow them on Facebook.