Nowadays, lighting up your campsite or backcountry getaway typically means flicking on an LED headlamp or flashlight. These modern torches are undeniably convenient and efficient, but in some ways they can’t hold either a metaphorical or literal candle to an old fashioned lantern. Lanterns not only throw light in multiple directions rather than concentrating it in a single beam, but they also have an alluringly warm glow.
Lanterns conjure up images of old railroad days, covered wagons, and long-forgotten cabins. They’re romantic, reliable, and a source of heat — something that the best headlamps could never provide. You can still easily find old-fashioned oil lanterns in most sporting goods stores and online, but those can be bulky, plus you have to haul around oil.
Instead, you can make a lantern yourself with a bare minimum of tools and materials.
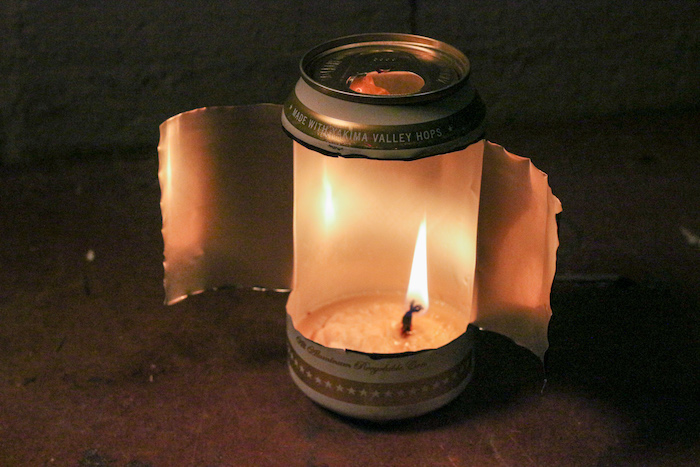
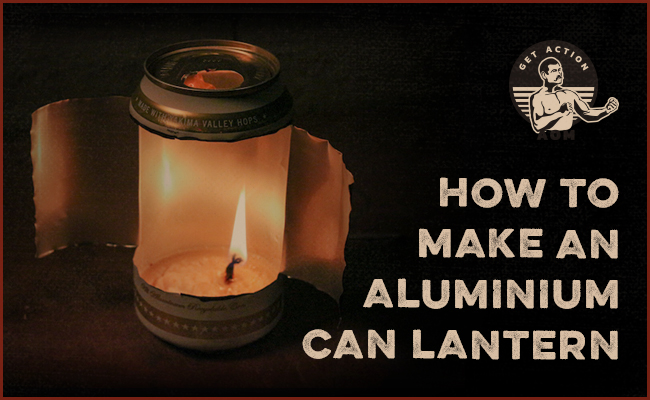
Making a lantern out of an aluminum can is an easy evening or weekend project, and there are lots of different styles to choose from. The version shown below is one of the simplest, but also most effective, because of the way it reflects ambient light and concentrates heat towards a focused area. And if you don’t have a candle or don’t want to include them in your pack, I’ve included a “recipe” for a bacon fat version.
It’s rather fun to see what outdoor/survival supplies you can create with household items. Here’s how to MacGyver both a lantern and a candle from the remnants of common food and drink.
Materials
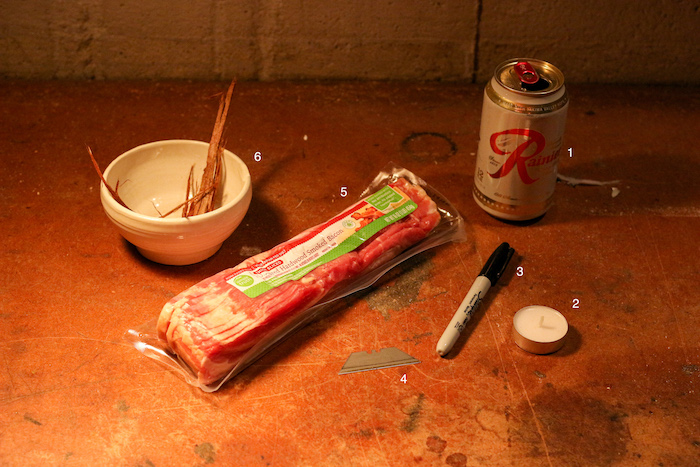
Lantern Materials
- Aluminum can
- Candle
- Marker
- Razorblade (or scissors or sharp knife)
Bacon Fat Candle Materials
- Bacon
- Cedar bark (or other cordage)
How to Make an Aluminum Can Lantern
Step 1: Cut the Can
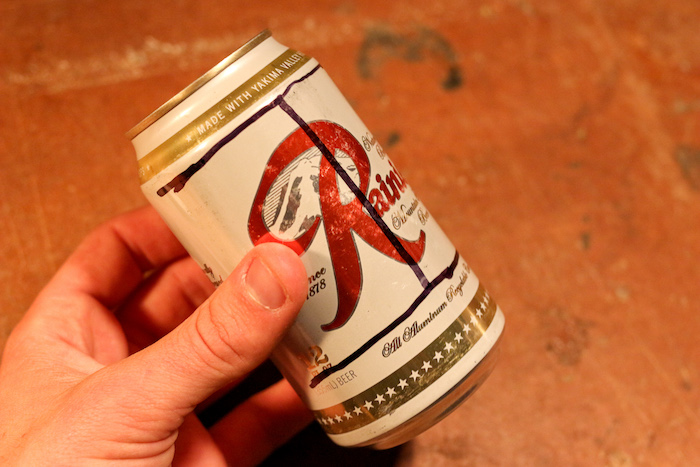
Use a marker to draw a big sideways “H” on the can. The top line should be at the shoulder of the can, where it angles toward the mouth. The bottom line should be about an inch from the bottom of the can. The legs of the “H” should extend about halfway around the sides.
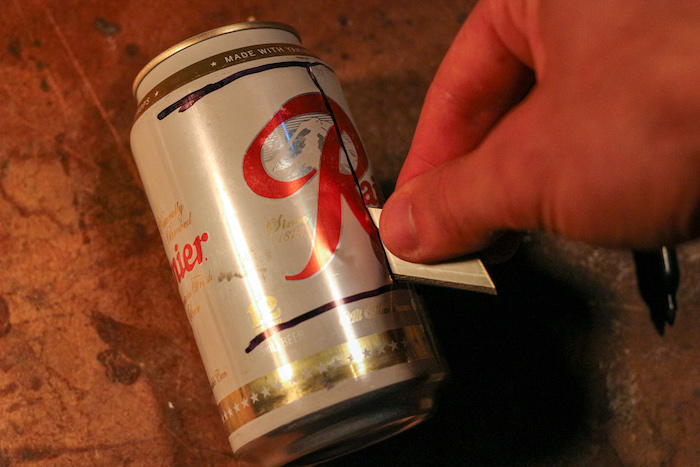
Use a razor blade — or scissors or knife — to cut along the marker lines.
Step 2: Open the “Wings”
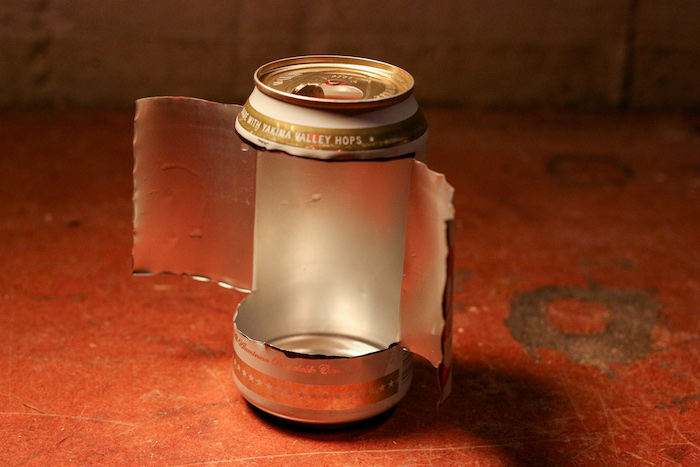
Fold open the can and bend the wings that you made with the cuts. Each wing should be almost perpendicular to the curve of the can, but not quite.
Step 3: Flatten Bottom of Can
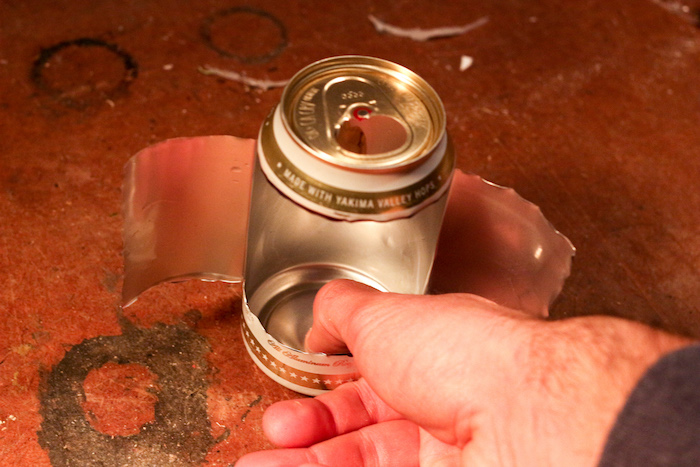
Use your thumb to depress the raised dome at the bottom of the can. This will give your candle a flat place to sit.
Step 4: Insert Candle
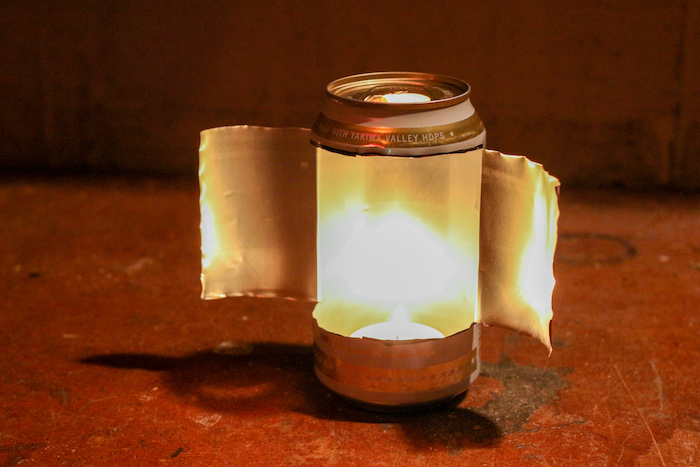
Place a candle inside, light it, and adjust your wings until they reflect the maximum amount of light. Bonus tip: use the empty mouth to hang your can lantern up from a tree branch or hook.
How to Make a Bacon Fat Candle for the Lantern
But what if you don’t have a candle? In a survival scenario, you might be left with a random assortment of items that don’t make sense together or seem useful. But, if you have a can, a knife, some bacon grease, and access to a cedar tree, you can cobble together a can lantern that provides hours of light and heat:
Step 1: Cook Bacon! Yum!
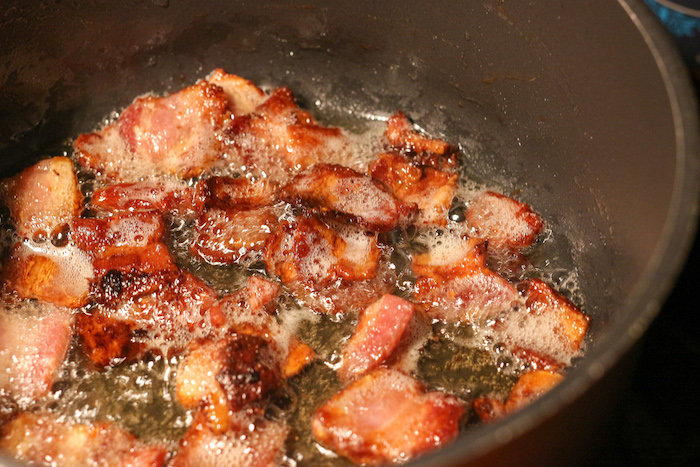
Cut about half a pound of bacon into large chunks. Cook over low-medium heat until all the fat is rendered.
Step 2: Harvest Bark
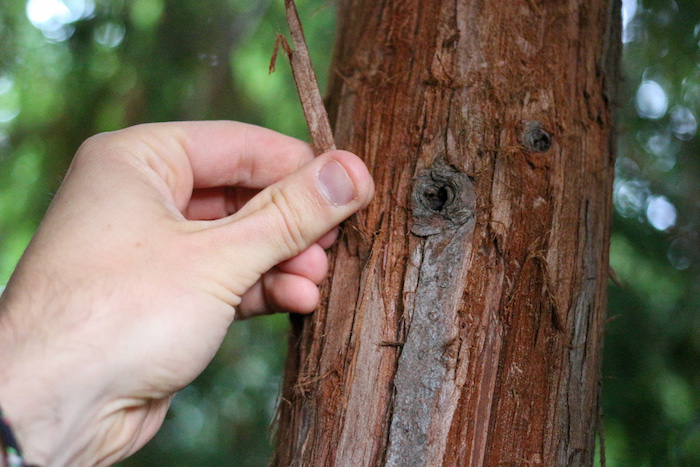
Harvest a piece of bark from a cedar tree. Look for pieces that have the consistency of twine and peel off the tree like string cheese.
Step 3: Weave Bark Into a Wick
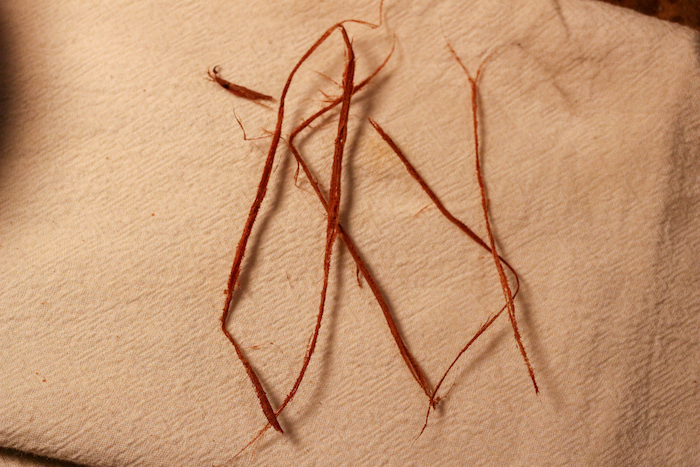
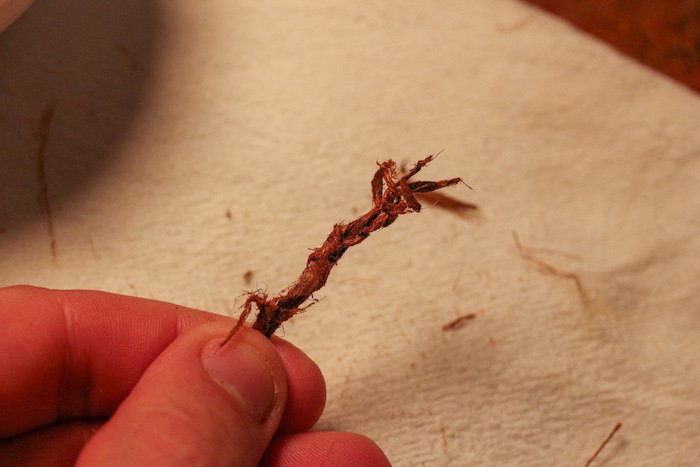
Separate the bark into thinner strands, and then weave them or twist them together to make one uniform piece of cordage. This will be your wick. It’s also worth mentioning here that you don’t have to use cedar bark. Any thin cordage that will absorb bacon grease will do the trick.
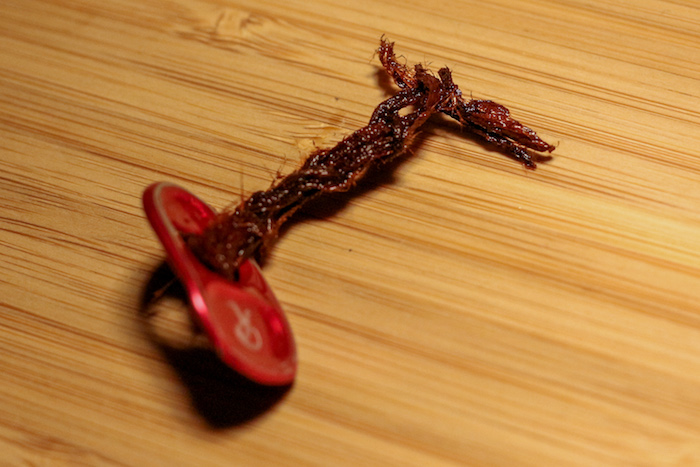
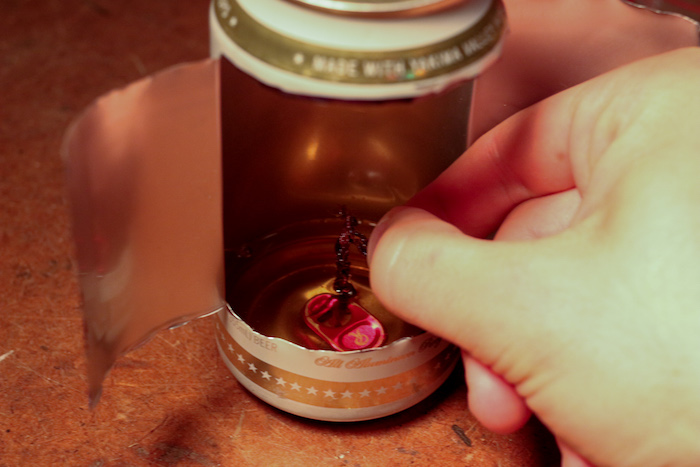
Step 4: Remove Can Tab

Remove the tab from the top of your can and tie your wick to it.
Step 5: Saturate Wick
Remove the cooked bacon from the pan and saturate your wick in the grease. Set the wick aside.
Step 6: Pour Grease Into Can
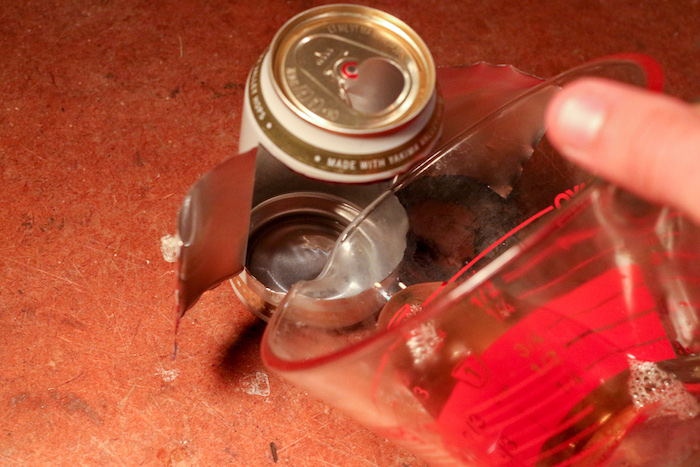
Let the grease cool for at least a few minutes and carefully pour it into the bottom of your lantern.
Step 7: Set the Wick
Set your wick in the bacon grease (you don’t have to hold it) and wait for it to harden. Once the bacon grease has hardened, trim your wick if necessary (you don’t want it more than an inch or so higher than the grease) and light your new candle.