")
Editor’s note: This is a guest post from Australian AoM reader, Aaron Round, who built a barbershop in his garage and shared the results with us. Thanks a lot Aaron–I tip my hat to your imagination and initiative!
So you want to be a barber? But you don’t have enough scratch to pay for barbering school quite yet. What’s a man to do?
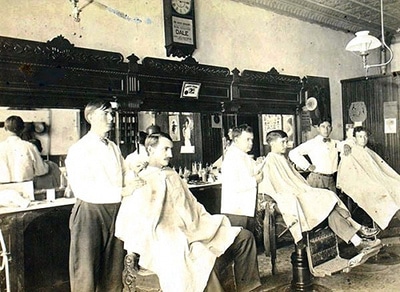
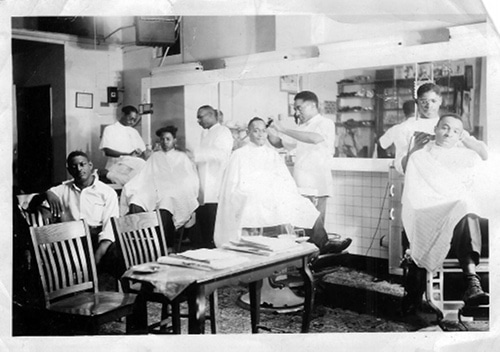
That’s the pickle I found myself in not too long ago. Whilst browsing the Art of Manliness, I stumbled upon the article, Rediscovering the Barbershop, and I found myself suddenly hooked on the idea of becoming a barber. But there is nary an old school barbershop to be found around these parts. They’ve all but been replaced by spas and beauty salons.
And there are also few barber-specific courses in Australia and even fewer “Master Barbers” to learn from. Given the $14,000 AUD asking price for a general hairdressing certificate (only to need advanced classes in shaving and men’s hairdressing down the road), I wondered how I could kick-start my dream without going broke in the process.
My solution? Building a barbershop in my garage. Here’s how I did it and you can too.
Find a Clear Space
“Be miserable. Or motivate yourself. Whatever has to be done, it’s always your choice.” –Wayne Dyer
Working in the garage one day, I noticed I had a large, empty space with the potential to be turned into a mini barbershop. It would be a place where I could practice my skills and where friends could relax, have a chat, and learn more about life and manliness.
As my fiancé and I both drive small cars, they could fit in the garage along with the barbershop. Regardless of your particular situation, you’ll need to have a permanent location for your equipment–one where stray hair will not be a problem to clean up. It should be at least 5m2.
")
Make it fun by involving your family in the build!
Prepare & Plan Your Space
Before the transformation, the corner of the garage was a mess; full of cobwebs and holes, it simply wasn’t visually appealing. But I could see its potential.
The first step to transforming your garage into a barbershop is to take a pad and pencil and sketch out how you would like the shop to look. Think about how it will be laid out, and things like color as well.
Once you’ve got an idea of what you’re going for, strip down the area you’re going to use before applying your color scheme. From research, I found a lot of barbershops employ burgundy and cream, but make the choice your own. Dark and vintage colors always look great.
For flooring, I used linoleum, as it’s cheap and easy to sweep clean. Hair gets into the darndest places, so ease of cleaning is a priority here. The most popular finishes for flooring seem to be timber or black and white checkers for a traditional look.
When designing your shop, you can always ask a mentor or your family for their ideas. Just make sure you keep the main theme your own and keep it manly.
Hustle Some Equipment
“Things may come to those who wait…but only the things left by those who hustle.” –Abraham Lincoln
Proper equipment is necessary not only to make your barbershop functional, but to make it look like a million bucks, like a place where people will want to hang out. There are three big pieces of equipment you’ll need to acquire:
Barber’s Chair
The most expensive piece of equipment you will require is a barber’s chair. A good barber’s chair is sturdy, reclines, and is comfortable to sit in. It’s also the centerpiece of your shop, so it’s important it fits with your desired theme.
My own chair came from a local barber supplier, and with some hustling and haggling, I got it for just 100 dollars. You can also try the local classifieds, barbershops, and the internet to source yourself a great second-hand chair.
The chair I bought was dirty and needed re-covering, but it had good bones. This old barber chair was built to last.
A quick trip to an upholsterer and the chair was looking brand new. To save on costs, I had the upholsterer do the tricky parts, while I completed the headrest and backing myself. Upholsterers can also help you source vinyl and foam for very reasonable prices–if, say, you wanted to do the whole chair yourself.
")
")
")
Mirror
Mirrors can be quite expensive brand new, especially if you’re after one in a nice wooden frame. Local classifieds and eBay are your friends here and will enable you to pick up a great vintage or second-hand mirror for chump change. Mine cost just 10 dollars.
Counter
You can really let loose when it comes to the counter. I’ve seen old drawers, buffets, and marble counters all used to great effect. A low-cost option I employed was to visit the local kitchen supplier and ask if they had any off-cuts I could have or buy. Anything over 1500mm length and 300mm depth would be perfect. It was then just a quick trip to the hardware store to locate brackets. While you’re there, pick up some hooks so you can hang your clippers and blow-dryer. It makes storage a breeze.

Once you have these three main items, you’re halfway there. Bully for you!
Cutting Equipment & Consumables
")
Cutting equipment is next and can be quite expensive, so it’s always best to do it right the first time. The knowledge you can gain from established barbers in this area is absolutely invaluable. Talk to your local barber and also have a look around their shop to see what they use. They can provide opinions and help you locate the best places to purchase equipment.
Typically, professional barbers will buy from a wholesaler, so call the wholesaler first and find out if they sell to the general public. Some incredible savings and advice can be had here. Shopping in these places makes you feel like a kid in a candy shop.
To list all of the equipment required would be a post in itself, but the basics would include: clippers, scissors, straight razor with disposable blades, combs, cape, disinfectant jar, spray bottle, shaving bowl, shaving brush, and dusting brush.
Your consumables can also be bought from the wholesaler or your local barber. This includes basics such as creams, razor blades, and styling products.
")
Set It Up
")
To set the shop up, I used basic hand tools, with the most expensive being a cordless screwdriver. Saws, hammers, wrenches, and screwdrivers were the tools that got the most use–things many men already have in their toolbox.
If in doubt during the building stage, consult someone with experience to help you out. Luckily, my father is a builder, so I had a dab hand installing the counter, mirror, and chair. This doubled as great bonding time, and hey, two heads are always better than one, right?
Finally, arrange your equipment in a way that feels logical to you personally. You may like to keep all of your hair cutting tools together in one area and then have your shaving supplies in a separate spot. Practice on some willing friends and you’ll soon find what equipment needs to be closest to hand and where it should be positioned.
")
Set the Mood
")
One of the best things about a barbershop is the ambiance and the smell.
For ambiance, consider desk lamps or a floor-standing lamp. Change the lightbulbs, or even use a DIY halogen lighting kit to provide spotlighting where needed.
Music is another essential element to help create that old-school feel. Something classic, jazzy, and light at a low volume will be appreciated by your clients and allow them to relax whilst enjoying a shave or cut. You can pick up record players and old radios at garage sales, which are perfect for this task.
Finally, the smell…
“Nothing revives the past so completely as a smell that was once associated with it.” -Vladimir Nabokov
There is a huge amount of discussion as to where that wonderful old barbershop smell comes from. For some great suggestions, check out How to Smell Like a Barbershop.
Here are a few things I’ve personally found to be helpful, but as always, try what works best for you: Bay rum, talcum powder, Old Spice, Barbicide, Como shave oil plus various sandalwood shave soaps, and menthol based creams such as Proraso.
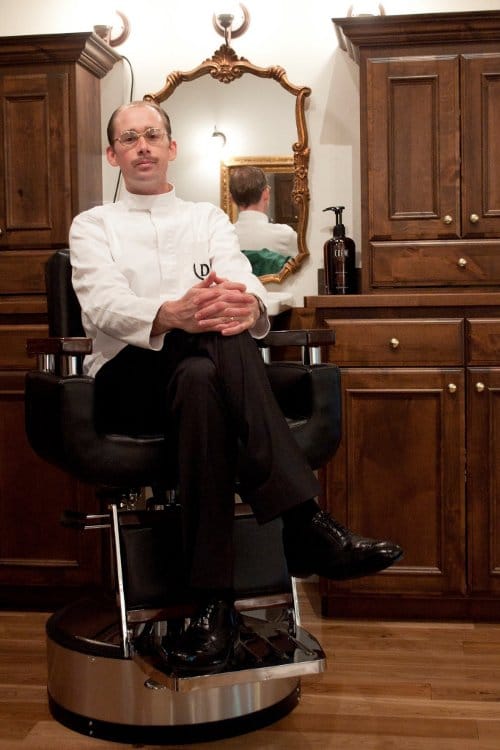
The Garage Barbershop
You need a license to work as a real barber, so for the moment, I run my garage barbershop on weekends simply for the enjoyment of family and friends. All donations for the cuts and shaves go into savings so I can complete a hairdressing course and become licensed. Once I have my license, I’ll move the contents from my garage into a small shop, and work it into a full-time business. With the garage barbershop I get to practice my skills (I have some trusting friends) and share my love of all things old and timeless with people who wouldn’t normally be exposed to it. It’s a great place to bond, and it helps keep the dream alive until I can have a real shop of my own.
I would also love to travel to the States and complete a Master Barber course and then share those skills back in Australia with other young men.
Well, I hope I’ve given you gents some idea of what to expect if you decide to build your own barbershop. It’s truly wonderful having your own space to practice and enjoy fellowship with friends.
So, why wait? Give it a go! With a little imagination, not too much dough, and plenty of elbow grease, you can step out of the house and into your very own barbershop:
")
Good luck!