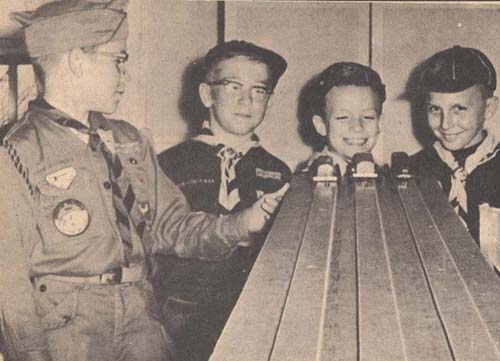
When it comes to father/son bonding experiences, few can match the satisfaction of working on a pinewood derby car together. Most Cub Scout packs have an annual pinewood derby race. Little Scouts turn blocks of wood into super fast racing machines. In the process, they get a basic lesson in physics, tool handling, and competition. If you never had the pleasure of taking part in this glorious boyhood rite of passage, here’s how you can guide your son in building a pinewood derby car that will race to the head of the pack.
1. Remember, he’s supposed to do most of the work. Don’t be one of those uber-competitive dads who wrenches the project from his son’s little hands and takes complete control of the construction of the car in order to secure the blue ribbon. You can always tell which cars were built entirely by a dad, and everyone resents him. His kid ends up at the receiving end of that animosity, and worse still, feels like his dad doesn’t trust him. Your role in the car making process should be as minimal as possible. Once you fully understand these steps, your job is to simply offer guidance and encouragement and perhaps do any cutting that requires heavy machinery.
2. Check the rules. While there are general pinewood derby rules, some scout packs have local rules. You don’t want your son to spend hours working on his car only for it to be disqualified for not complying with the guidelines.
3. Trace the template on the block of wood. Included with the official pinewood derby set your scout pack will give you are a variety of car designs to choose from. You can get as creative as you want. Keep in mind that intricate designs often sacrifice speed for looks. Growing up, my dad and I always had success with very basic designs that looked like a wedge of cheddar on wheels.
The easiest way to get your chosen template on the block is to use carbon paper. With a sheet of carbon paper underneath it, place the template design on the side of the block of wood. Trace the design. Repeat on the other side. Make sure the front of the car is facing the same direction on both sides of the block.
4. Cut the block. Using a coping saw, cut just outside the template designs. You can sand down to the actual lines after you cut it.
5. Prepare the axle slots. Cars with longer wheel bases tend to be faster. So you might consider moving the two pre-made axle slots further towards the end of the block. If you decide to do this, make sure the new axle slots are exactly square with the side of the block or else the car alignment will be off.
6. Drill holes for the weight. Pinewood derby cars work on basic Newtonian physics. The cars race down a sloped track, propelled only by gravity. Thus, the heavier your car is, the more potential energy it has, and the faster it will go. When adding weight to your car, you have two options on where to place it: externally or internally. Externally is the easiest option. You just glue the weight on the top or the bottom of the car. However, this increases wind resistance. That’s why the best place to apply the weight is internally, inside holes drilled in the car. It’s best to place the weights near the rear of the car, so drill your holes there. You’ll probably have to drill 2 or 3 holes to get all the weight in. Pick a drill bit width that will allow space to insert the weight (see Step 13).
7. Sand. Start with heavy grit paper and work your way to a finer grit. Finish it off by going over the car with some steel wool. The car should be nice and smooth for the paint.
8. Paint and finish. Prime the wood surface of the car by applying a wood sanding sealer. Now you won’t have to put on several coats of paint. Spray paint is fast and gets the job done. But if you’re going for more elaborate designs, you’ll have to paint it by hand. After you paint it, sand it one more time with a fine grit paper. Apply decals to the car as desired (studies have shown that flames on the side will make the car go faster). Finally, go over everything with a clear-coat finish to give the car that glass-like look.
9. Check the wheels. Make sure there aren’t any burrs or extra plastic on the tread of the wheel. Blemishes like these will only slow the car down. If you see any, gently sand them down.
10. Polish the axles. The axles in pinewood derby cars are small zinc nails. If you want your car to be a speed demon, you need to reduce the friction between the wheel and the axle. The first thing you can do is polish the axles by gently sandpapering them. This will remove any burrs or blemishes that the spinning wheel can get snagged on.
11. Mount the wheels. This is a key step in building your speed machine. The wheels should be aligned to minimize the amount of friction on the wheel. Thread the nail/axle through the plastic wheel. Place the pointed end of the nail into the car’s axle slot. When you do, angle it so the head of the nail is pointing slightly toward the back of the car. This will reduce friction by causing your wheel to ride near the end of the axle instead of near the body of the car. Test roll the car to see if rolls straight. If it veers off in any direction, adjust the axles accordingly to straighten out the car. Adjustments should be made slowly with repeated trials.
12. Lubricate the axles. Dry lubricants are usually the only lubrication permitted. Powdered graphite is the most common dry lubricant. Just place some in the axle hole of the wheel and spin the wheel around a few times to ensure that the entire inside of the hole is covered with the graphite.
13. Add the weight and seal the holes. You have several options for weight. I always used lead buckshot. It’s definitely manly. Another option is zinc. Many Boy Scout and hobby stores sell zinc weights for pinewood derby cars. Cars cannot weigh more than 5 ounces, and it’s better to be slightly underweight than overweight because it’s easier to add weight than to remove it. Seal the weight in with some wood putty and sand smooth. Leave an extra hole empty in case you have to add more weight. Make sure to bring some extra weight along with some fast drying putty to the derby in case you have to add more weight to get up to that 5 ounce weight limit.
Do you have any more tips on building a fast pinewood derby car? Share them with us in the comments!


