When you’re planning an at-home dinner date it can be hard to come up with just the right menu. You want something that tastes great, obviously. You want it to feel sort of fancy and luxurious in order to replicate that restaurant feel. And you want something, perhaps counterintuitively, that can be stretched out and not consumed within 20 minutes; good conversation sometimes takes some marinating of its own.
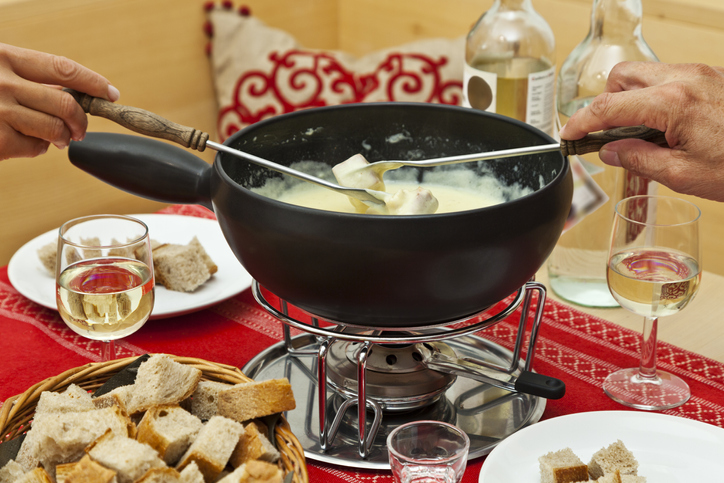
So, for your next at-home date, why not throw your evening back a half century to the wonders of the fondue pot?
Fondue first became popular in the 1960s and 70s, and restaurants centered around dipping various foodstuffs into pots of cheese and other tasty meltables have seen a resurgence in the last decade. The fondue dining experience is certainly nice, but holy crap are these meals expensive. At least part of that is due to just how long you’re taking up a table — by the time you’ve done three courses you’re looking at a 3-hour dining experience. You can copy that menu at home for a fraction of the cost, even when factoring in buying a new fondue pot.
My wife and I tried out three courses of fondue — experimenting with multiple recipes and cooking methods — and I’ve provided our conclusions and favorite recipes below.
The First Question: Which Type of Pot?
A classic fondue pot uses a flame for heat — utilizing either specialized fire gel or sterno canisters. The pot itself is usually made of heavy cast iron or ceramic. With these pots, it’s usually recommended that you heat the food on the stove and then transfer it to the pot; a sterno flame doesn’t produce enough heat to get whatever you’re cooking in it up to the right temperature in a reasonable timeframe. It’s more about holding the right temperature.
There are some benefits to the traditional cast iron pot: it looks really nice on a table (which certainly counts for something), has an unquantifiable nostalgic appeal, and can hold a temperature reasonably well. Going into it, I was sure I would prefer the traditional pot.
But, in my testing, the practical drawbacks outweigh those benefits. Using a sterno flame gives you little-to-no temperature control, which is crucial in producing the best possible fondue product. It can work well for cheese or chocolate, which require low temps, but when it comes to using broth or oil for cooking meat, there are just too many temperature problems for it to be an enjoyable experience. I was constantly fiddling with the fire and trying to figure out if the liquid was hot enough. The classic pot produced more stress than tasty victuals.
For these reasons and to my own surprise, I’m a big fan of the electric fondue pot. No, it doesn’t look as nice on a table, nor is it convenient to inevitably need to use an extension cord to plug it in; but for producing the best final product, it simply can’t be beat. The precision temperature control that an electric pot offers makes it worth it. Making a great pot of food often requires adjusting the temperature as needed; sometimes you need a little more and sometimes you need a little less. The classic pot just doesn’t work real well in that regard.
My final verdict: go with an electric fondue pot and don’t look back.
Constructing the Meal
While your first thought might be to go all out and make three fondue courses for your special date night, I’d advise against that for a few reasons. First, it’s a lot of prep to do three fondue courses in one evening, and not all of it can be done ahead of time. You’ll inevitably be spending a lot of time in the kitchen chopping, cleaning, etc. Second, with just a single pot, it can be difficult to cool it down, clean it out, and swap out the contents in a reasonably timely manner. Finally, by the third course, the novelty and excitement of dipping things in a hot liquid has perhaps worn a bit. My recommendation is to pick two courses for a fondue date night: either the cheese appetizer or main entree, and then definitely the chocolate for dessert; it was undoubtedly the fondue highlight in our testing.
The Appetizer: Cheese
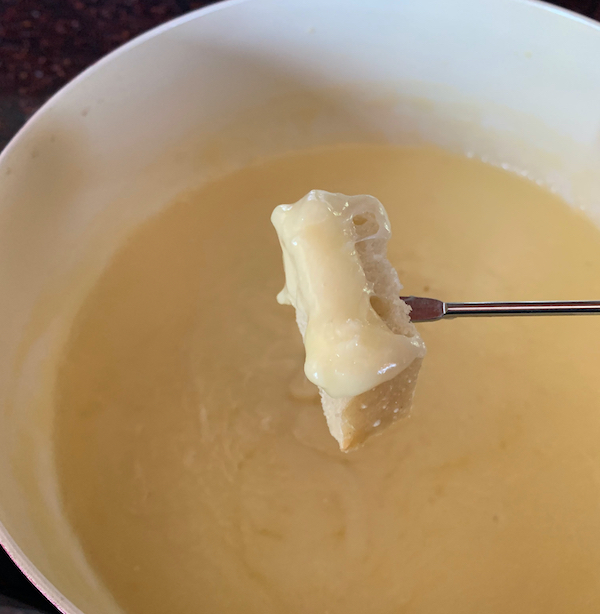
Cheese fondue is equal parts delicious and dangerous. I’ll warn you that it’s a little too easy to just keep dipping bread into the cheese, and boy does it sit heavy if you’ve had too much. On our first attempt, my wife and I both had too much cheese and had to skip dinner entirely. That said, it’s a great appetizer to start with a little earlier before dinner than you usually would and to pair with something lighter for the main course — fish and salad, for instance. Plus, the recipe can pretty easily be scaled down if needed.
Cubed bread is the traditional thing to dip into cheese fondue, but blanched vegetables also do great: green beans, asparagus, broccoli, etc. Also don’t overlook more unique ideas like potatoes/french fries, sausages, etc. (just be sure to pre-cook those types of things, as nothing will cook in the cheese itself).
One note on the cheese: buy blocks and shred by hand. Pre-shredded cheese has some additives that don’t lend as well to smooth melting.
Ingredients

- ½ lb any type of Swiss cheese (I used emmentaler), shredded
- ½ lb gruyere cheese, shredded
- 2 tbsp cornstarch
- 1 cup white wine (or chicken broth)
- 1 garlic clove, minced
- 1 tbsp lemon juice
- Assorted dippers: cubed French bread, nearly any vegetable, apples, cooked potatoes, cooked meats, etc. (I’d go with 3-4; no need to get crazy on the appetizer)
Directions
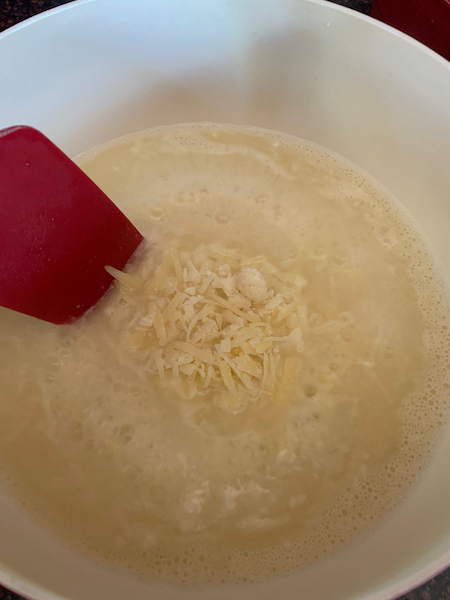
1. Toss the cheese with the cornstarch so that it’s evenly coated. This keeps the cheese from clumping together and ensures a nice smooth texture.
2. Add wine, garlic, and lemon juice to the fondue pot. Turn it on to 250 degrees and stir until the mixture starts to simmer (it won’t take long).
3. Add the shredded cheese a handful at a time and stir until melted. Keep adding the cheese slowly, by the handful, until it’s all worked in. Stir the whole time and you’ll end up with a smooth finished product.
4. Turn the fondue pot temperature to simmer and enjoy. Perhaps surprisingly, the cheese holds up well as leftovers. It’ll look weird in the fridge, but it reheats just fine either back in the fondue pot or under a broiler for nachos (trust me on that one).
The Main Entree: Asian-Inspired Broth
If your only experience with fondue is of the traditional cheese variety and/or the dessert version with chocolate (perhaps in the form of a chocolate fountain at a wedding), you may be surprised at the possibilities for cooking a main dish in a fondue pot. An assortment of meats and/or veggies can be cooked in a pot full of hot oil (to fry the food) or broth (sort of a combination of sous vide and braising).
While oil is perhaps the most well-known cooking liquid for a fondue entree, and frying your add-ins certainly adds a great texture, I prefer the liquid base to have a little more flavor.
And let’s be honest, oil is also just slightly terrifying to cook with. If you get it too hot or you don’t totally dry off your meats/veggies, you’re looking at a big mess, at best. If kids are in the mix for your fondue party, it’s an even worse idea.
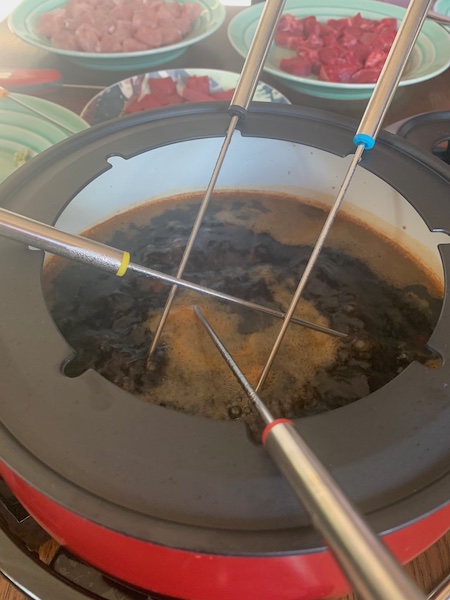
Using broth as your liquid is a tastier, more flavorful, scare-free way to a successful fondue entree. With the electric pot, it’s incredibly easy to get the broth to a light boil and keep it there, which will cook all your meats and vegetables safely and quickly (though not as quickly as oil, to be sure).
For meats, I prefer to stick with red meats, for the sake of avoiding the worries of doneness that come with white meats (pork can and did work in our taste testing, but it takes longer to cook and tends to have a weird texture, in my opinion, even when cooked safely to medium-rare). The higher the quality of meat you buy, the tastier your final product will be, natch.
Any raw vegetable also works — carrots, potatoes, broccoli, etc. They’ll take a little longer to cook, but are absolutely delicious.
Ingredients
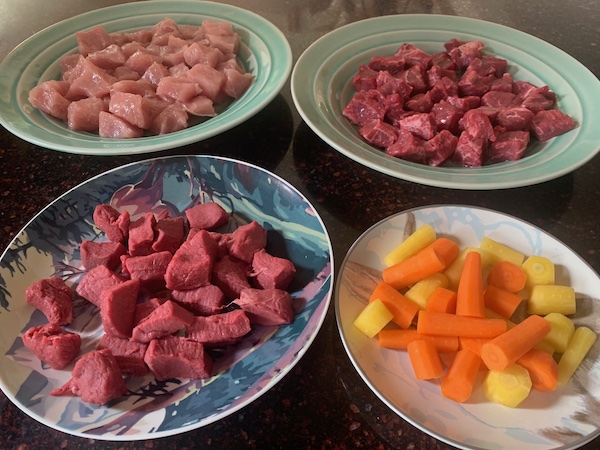
Pork tenderloin, ribeye, bison tenderloin, and rainbow carrots. Yum.
- 3-4 cups beef broth (start with 3, but you may need to add more as some boils off)
- ½ cup soy sauce
- 1 garlic clove, minced
- 3 green onions, chopped
- 1 tsp ground ginger
- 1 tsp chili powder
- For dipping:
- ⅓-½ lb meat per person, cut into 1-2” pieces (you’ll likely eat less than usual since you’re cooking/eating bite-sized pieces at an interval of every few minutes)
- Assorted vegetables, cut into bite-sized portions
Directions
1. Add all non-dipping ingredients to the fondue pot and stir well to combine. (If your fondue pot is on the small end, scale down just the liquid amounts by half.) Set the temperature to 350 and let the liquid come to a boil. Once it does, set it to the lowest temperature that will maintain a low boil — probably 200.
2. Using the fondue forks, put the meat into the liquid to cook. Depending on your doneness preferences, let it cook for anywhere from 2 to 5 minutes. Most pots come with 6-8 forks, so you can cook a few pieces of meat per person at one time. Vegetables take a little longer — 8-10 minutes, usually — so they can be tossed into the liquid without forks and fished out once they’re cooked.
The Dessert: Chocolate
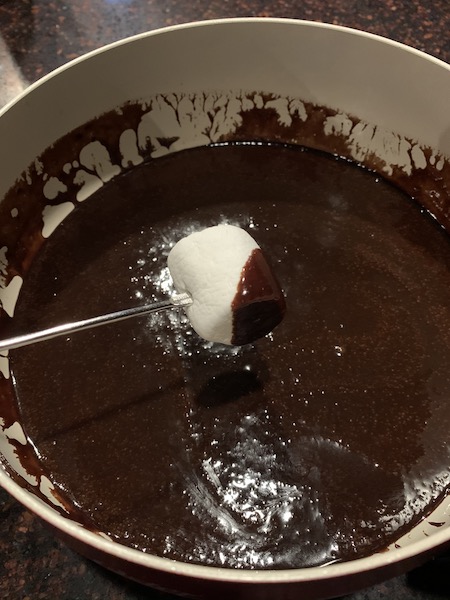
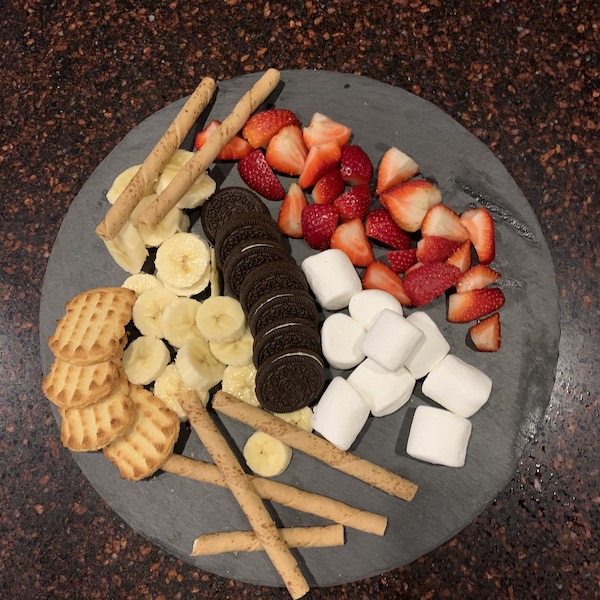
Though cheese is where fondue started, chocolate is really the star of the show, in my book. It’s the easiest of the recipes to make and is as universally enjoyed as any food can be, given the wide variety of items that can be deliciously dipped:
- Fruits: berries are especially good, but bananas (sliced) are also really tasty
- Cookies: Oreos, Milanos, shortbreads — pretty much anything in the processed cookie aisle of your grocery store will taste amazing
- Salty snacks: pretzels, plain potato chips, bacon! (cooked, of course)
- Misc: large marshmallows, angel food cake, brownies
When it comes to the chocolate itself, Ghirardelli’s Melting Chips are perfect. You actually want to avoid regular chocolate chips, as they don’t create quite the right texture. If those melting chips aren’t available, you’ll want to get semisweet baking bars and cut them into small chunks.
Ingredients
- 10 oz bag Ghirardelli Dark Melting Chips (if not available, get 8 ounces of semisweet baking bars (since they usually come as 4oz bars))
- ⅓ cup milk
- ⅓ cup heavy whipping cream
- 1 tsp vanilla extract
- Assorted dippers (see above)
Directions
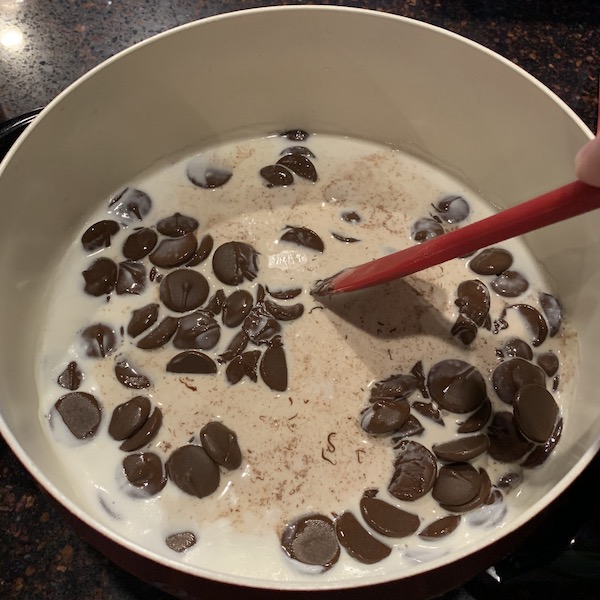
1. Combine the chocolate, milk, and cream in the fondue pot. Use the “warm” setting to very slowly heat the mixture. Stir continuously and don’t let it come to a boil. If it does, just turn the heat down or off and keep stirring. Once the chocolate is smooth and fully melted, stir in the vanilla.
2. Dip the goodies and enjoy! Keep the fondue pot “off” as long as the chocolate is warm, then turn it back on for a minute or two as needed if it gets too stiff. The chocolate can be kept in the fridge to be used again in the fondue pot, or heated up in the microwave as hot fudge for ice cream.
Need more at-home date ideas? We’ve got 18 fun, cheap, and creative ideas here.