Editor’s note: This post is based on a series that was written by the ITS Crew and originally ran on ITS Tactical.
Potential Navy SEALs face many challenges during BUD/s (Basic Underwater Demolition/Navy Seal Training) as they become schooled in swimming, diving, parachuting, and enduring grueling physical exercise. Another challenge every candidate must complete is the Underwater Knot Tying Test. During the first phase of BUD/s, students are taught five knots–the Bowline, Square Knot, Becket’s Bend, Clove Hitch, and Right Angle–which they’re required to tie one at a time underwater, each on a single breath hold.
How would you do on this test? Why not take it yourself and find out? Below, we provide instructions in both photograph and video form on how to tie the five required knots, and then set down the test conditions you’d experience at BUD/s, along with a video demonstrating how the test is performed.
Knot Tying Line
All knots tied during the test are with the BUD/s student’s knot tying line that he’ll have with him at all times during BUD/s until completing the Underwater Knot Tying Test.
The rope used at BUD/s is just common nylon rope that usually measures 5/16″ diameter and is around 20″ in length.
Students are encouraged to practice their knots whenever they can fit it in during their days at BUD/s to prepare themselves for the test.
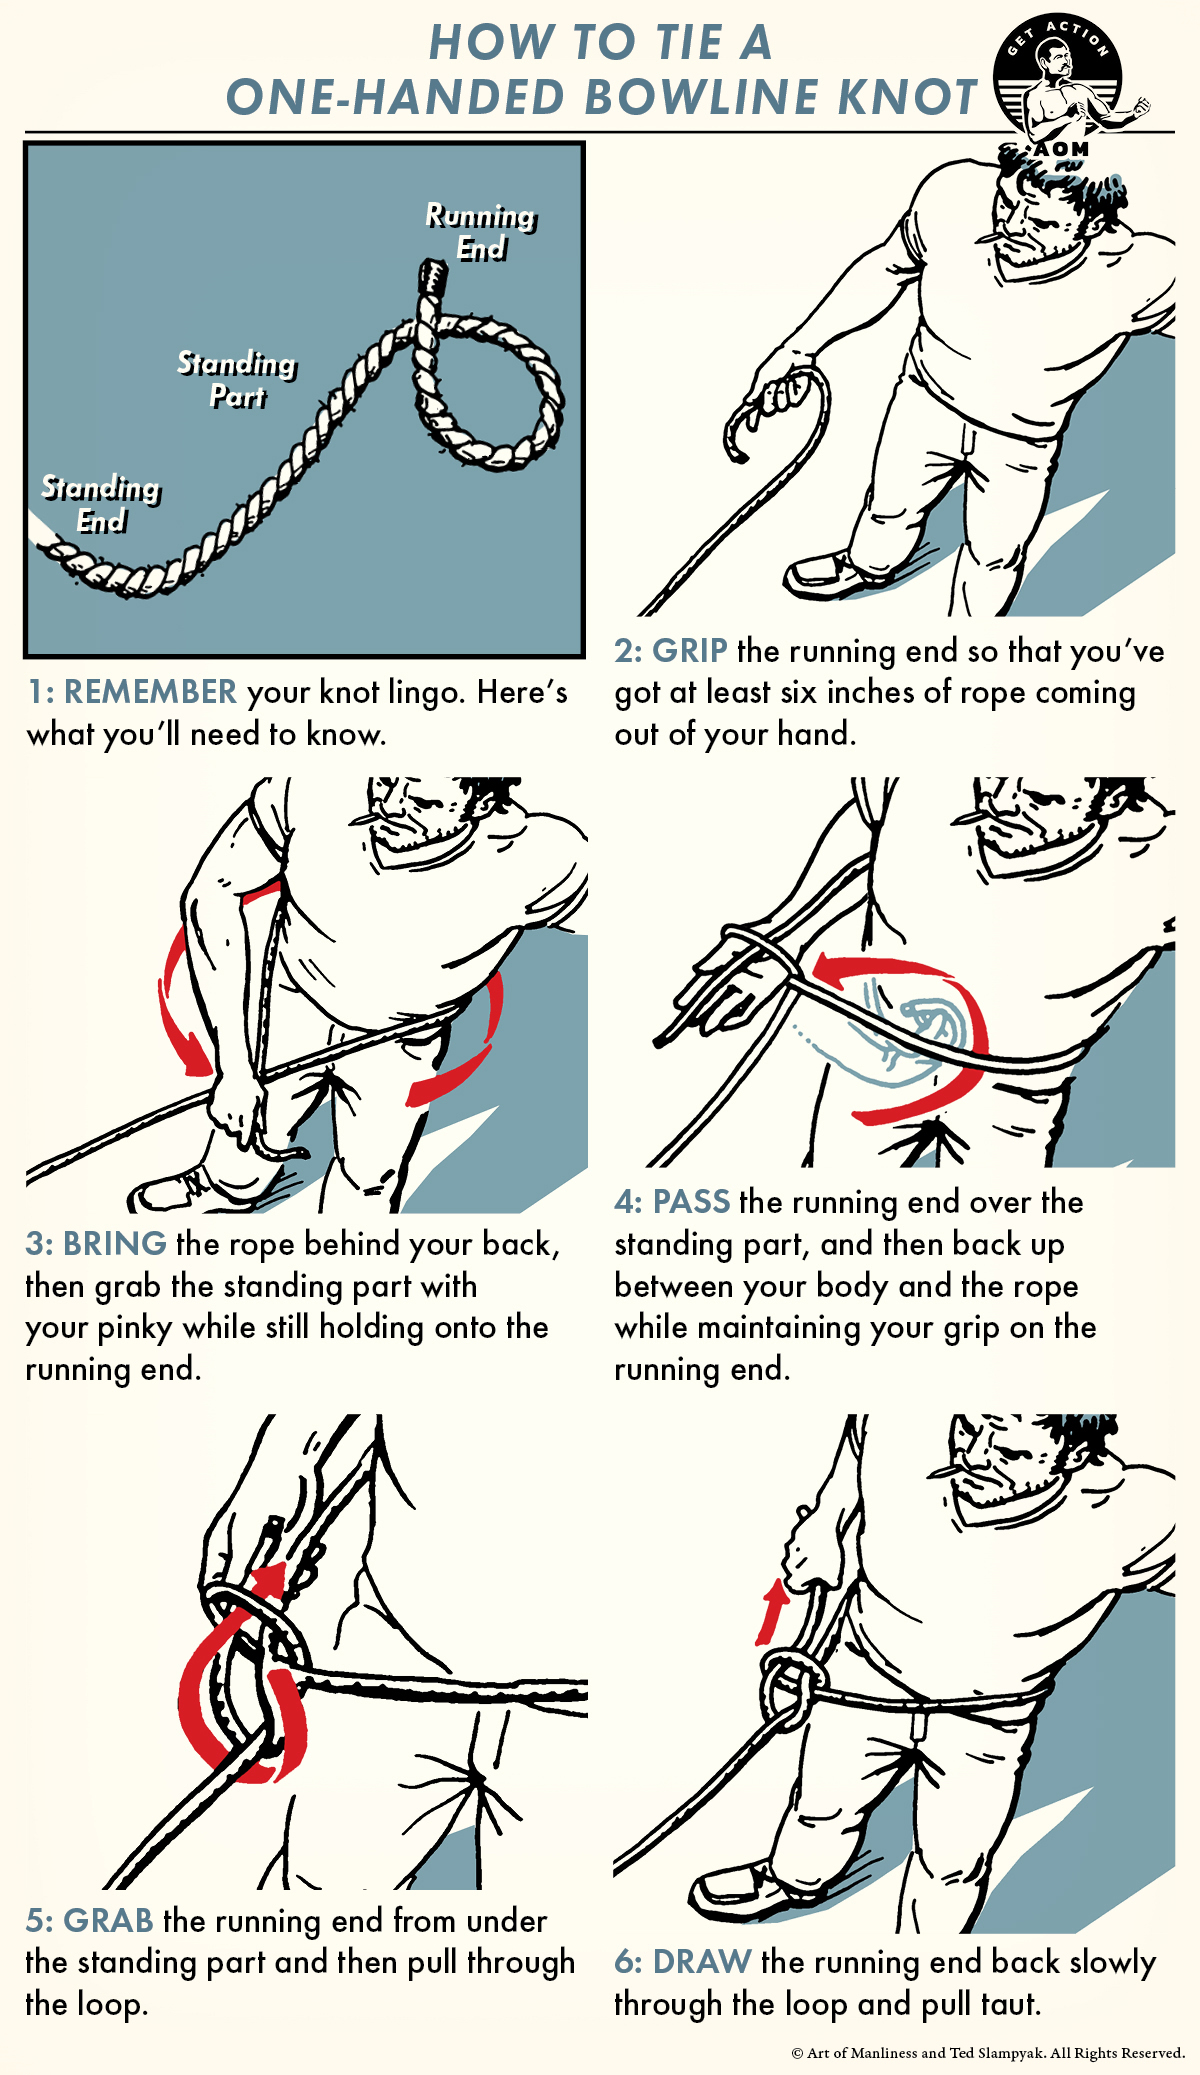
Knot #1: Bowline » Loops
(Strength: 2/Secure: 2/Stability: 4/Difficulty: 3)
Please refer to this post for a description of what these ratings mean.
Before we continue any further we’d like to clear the air on how to properly pronounce bowline. This knot comes from the need for attaching sails to the bow of a ship for stabilization, and is pronounced “bow” like a ship’s bow, not “bow” like bow and arrow.
The Bowline Knot was originally used for the purpose just mentioned, but has progressed to include a host of other uses today.
Nowadays, you’d most likely see a Bowline used for mooring a small boat to a pier or in rescue applications when a fixed loop is needed that won’t close around a waist or foot.
In rescue applications we highly suggest, due to the somewhat unstable nature of the Bowline, that a half hitch is added to the knot at the very end to further secure it.
If the Bowline is not kept under load, it can easily come untied which is why we recommend the extra half hitch (we’ll explain below).
Uses:
- Mooring a small boat to a pier
- Emergency applications where a fixed loop is needed
- Joining two ropes bowline to bowline (there are better ways to join ropes though)
Tying Instructions:
- Create a bight in the rope, forming a “q” shape
- Ensure that the “q” is made overlapping the standing part of the line
- Your working end will be wrapped around whatever you’re tying on to
- Create a loop and feed the working end through the underside of the “q”
- Bring the working end around the back of the standing line
- Continue passing the working end back through the “q” running parallel with the loop
- To tighten, pull the loop and working end with one hand, and the standing line with the other
- For increased security, create an overhand knot in the loop with the working end
- Pull the working end to tighten and finish the Bowline
View the gallery or YouTube video below and follow along with the steps above!
Knot #2: Square Knot » Bends
(Strength: 2/Secure: 2/Stability: 1/Difficulty: 1)
Please refer to our this post for a description of what these ratings mean.
Yes, the Square Knot is a somewhat simple knot, but the primary purpose of teaching this knot at BUD/s is for demolition.
When working with Det Cord (Detonation Cord), lines need to be spliced together. The simplest way to do this is with a Square Knot.
It’s debatable whether or not to back up the ends when dealing with Det Cord. It burns from one end to the other when ignited and is basically just cord with a PETN core that burns at a calculated rate.
When the Det Cord burn reaches the backed up portion of the Square Knot, it will start burning not only towards the center of the knot, but also take off in the direction of the tail. This is why some don’t back up the knot.
At least a six-inch tail must be left after tying the Square Knot to prevent moisture from entering the Det Cord through the exposed end.
During the BUD/s Underwater Knot Tying Test, it’s not required to back up the knot.
Uses:
- In demolition to splice Det Cord
- One of the most common knots in surgery
- Used in first aid to tie bandages, as it lies flat
- Tie boot laces to prevent boots getting pulled off by mud
Tying Instructions:
- Pass the right end over the left end and back under the left
- Pass the left end over the right end and back under the right
- Check the knot (the two loops should slide on each other, if not you have a granny knot)
- Tighten by pulling both strands on each side of the knot
- Back up the square knot by making an overhand knot using the working end of each side of your knot
View the gallery or YouTube video below and follow along with the steps above!
Knot #3: Becket’s Bend » Bends
(Strength: 2/Secure: 2/Stability: 2/Difficulty: 2)
Please refer to our this post for a description of what these ratings mean.
There’s a method to our madness in showing the Square Knot before the Becket’s Bend, as the two are tied similarly.
Much like the Square Knot, the Becket’s Bend is used to splice together two lines of Det Cord when working with demolitions.
The Becket’s is more secure than the Square Knot in certain applications. To add additional strength to the knot, a second turn can be added with the working end when tying.
As with the Square Knot, a six-inch tail must be left in both ends after tying. This prevents moisture from entering the Det Cord through the exposed ends.
Uses:
- In demolition to splice Det Cord
- Joining two ropes of unequal diameter
Tying Instructions:
- Form a bight in the standing end, ensuring that the bitter end is hanging down
- Insert the working end through the backside of the bight
- Pass the working end around the back of the bight
- Tuck the working end behind the working part of the line
- Tighten by pulling the bight, the working part and the working end of the line
View the gallery or YouTube video below and follow along with the steps above!
Knot #4: Clove Hitch » Hitches
(Strength: 4/Security: 2/Stability: 4/Difficulty: 3)
Please refer to our this post for a description of what these ratings mean.
The Clove Hitch is an especially important knot taught at BUD/s, and also has its purpose rooted in demolition.
A Clove Hitch is the preferred knot to fasten Det Cord to underwater obstacles, linking them together in a chain for demolition.
During WWII the NCDU’s (Naval Combat Demolition Unit), the predecessor to UDT’s (Underwater Demolition Teams) and eventually Navy SEALs, cleared the beaches for the Normandy invasion.
You can bet that Clove Hitches were used during Normandy, just like they’re still used today. Anyone interested in a great article about the background of Navy SEALs, visit this link.
Uses:
- Linking obstacles together with Det Cord for demolition
- Securing a rope to a post
- Temporary tie in to an anchor point
- A brake or check of an unwieldy object
Tying Instructions:
- Begin by wrapping the line around the post
- Cross the working end on top of the standing part
- Continue passing the line around the post working in the opposite direction of the first wrap
- Feed the working end under the standing part of the second wrap
- Clean up the knot by squeezing the two loops of the clove hitch together
- Tighten up the knot by pulling on the working end and the standing end
- *Ensure that there is a least a few inches left in the working end after tying*
An alternative method of tying the Clove Hitch is tying it on the bight, which means that it’s tied without having either working end available.
(This additional method is also shown in the video, but not the photos)
- Form two back-to-back, or opposing loops, on the bight
(Similar to the Sheepshank) - Stack the right loop on top of the left loop
- Place the stacked loops over a post or into a carabiner
- Tighten up the knot by pulling the two ends
View the gallery below and follow along with the steps above!
Knot #5: Right Angle » Hitches
(Strength: 4/Secure: 3/Stability: 4/Difficulty: 3)
Please refer to this post for a description of what these ratings mean.
The Right Angle is a knot that is typically used as an alternate to the Clove Hitch, which we just covered.
When used, the Right Angle creates a more secure knot than the Clove Hitch, and if you know how to tie the Clove Hitch, you know how to tie the Right Angle.
As mentioned above, the Clove Hitch is the preferred knot to fasten Det Cord to underwater obstacles, linking them together in a chain for demolition. The Right Angle is used if you have multiple obstacles which would be linked to a ring main, or main line of Det Cord. To link each obstacle’s Det Cord lead to the ring main, a Right Angle is used.
Uses:
- Attach an explosive charge’s Det Cord to the ring main
- Securing a rope to a post
- Temporary tie in to an anchor point
- A brake or check of an unwieldy object
Tying Instructions:
- Begin by making two turns around the post with your line
- Cross the working end on top of the standing part
- Continue passing the line around the post working in the opposite direction of the first two turns
- Feed the working end under the standing part of the third turn
- Clean up the knot by squeezing the loops of the Right Angle together
- Tighten up the knot by pulling on the working end and the standing end
- *Ensure that there is a least a few inches left in the working end after tying*
View the gallery below and follow along with the steps above!
Test Conditions
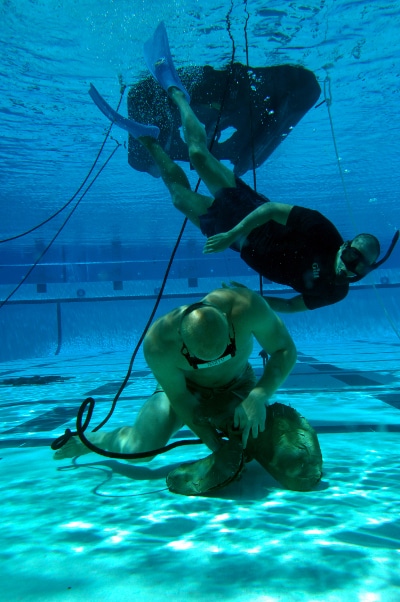
At BUD/s, the Underwater Knot Tying Test is performed in the 15 ft. section of the CTT (Combat Training Tank), where students must swim out to a waiting instructor who is treading water over trunk line on the bottom of the CTT.
Upon reaching the instructor, students tread water while sounding off with their name, rank, and which of the five knots they’ll be tying.
One knot is tied at a time to a trunk line or stationary rope, and the student and instructor tread water between each knot that is tied.
After sounding off on which knot he’ll be tying, the student gives the waiting instructor the downturned thumb signal to descend. The instructor will return the signal, and the student and instructor will descend. The student must descend without splashing the surface of the water.
Upon reaching the trunk line on the bottom of the CTT, the student ties the specified knot and signals the instructor with an OK sign. The instructor then ensures the knot is tied correctly and returns the OK sign.
The student then unties the knot, grabs his rope, and signals the instructor with an upturned thumb to ascend. The instructor returns the signal, and the student and instructor will ascend.
After reaching the surface the student and instructor will tread water again as the student sounds off with the next knot he’ll be tying, and the process repeats itself.
FAIL!
Some things that will cause a student to fail:
- Tying a sloppy knot or not dressing the knot before giving the OK sign to the instructor
- Incorrectly sounding off on the surface, or stating they’ll be tying a knot they’ve already tied
- Tying the wrong knot underwater
- Running out of air and shooting up to the surface like a Pegasus missile, which while funny looking, doesn’t make the instructors happy
If the student does run out of air underwater, he’s instructed to give the slash across the throat sign for out of air, followed by the upturned thumb to ascend.
In the video below we’ve recreated the BUD/s Underwater Knot Tying Test, so you can see how it works:
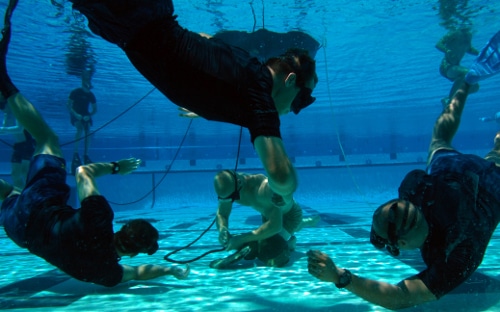
Note: Because photos of the BUD/s test are not available, the photos above depict SWCC (Special Warfare Combatant Crewman) students training, who take the same test, in the same pool as SEAL candidates.
____________________
ITS Tactical (Imminent Threat Solutions) is an awesome website run by Military Veterans and those serving in the Special Operations community that covers skill-set information, tactical gear reviews, and DIY projects that can help you live better and survive any scenario. Check ‘em out and become a member!
Tags: Knots


