Editor’s Note: This guest article was written by Stratton Lawrence.
Few tastes in this world compare to a first bite of kalua pork that’s just fallen off the bones of a pig you’ve spent two days preparing and roasting.
Like the pitmasters of the American South, the Hawaiians know that to create a meal worth remembering for the rest of your life, you can’t cut corners. And what could be more rewarding than cooking an entire pig underground in a traditional style and feeding 100 of your friends with a meal they’ll talk about for weeks after?
Cooking a pig in the ground is not easy. It requires gathering an array of supplies, difficult manual labor, and considerable planning and time commitment. It’s an ancient method of cooking, but with a few modern twists and technological helps, you can increase your chance of success on the first try. And when you pull your first pig from the ground and spread it across a table for your gleeful guests, you’ll be counting the days until you get to do it again. In short, it’s well worth the effort.

The Hokulea.
Here in Folly Beach, South Carolina, our occasion to host a traditional pig roast (and luau!) came when the crew of the Hokulea, an ocean-going voyaging canoe modeled after the Polynesian ships that sailed between Hawaii and Tahiti, visited on their way up the East Coast. I invited them to the party to see how our hog would measure up.
For our feast, I recruited Chef Alex Lira, a man who has smoked more than his share of whole hogs, to join me in an attempt at this classic technique. We put the pig in the ground at 9am on the day of, and then hit the water to welcome the Hokulea into Charleston Harbor, before the crew joined us for an evening of celebration. Our exchange of aloha was warm, and their compliments on our pork were sincere. What a night!
You can create some of this same Hawaiian magic with hearty amounts of supply hunting, preparation, and patience.
1. Study Up
Cooking a pig in the ground is more than just a novel way of cooking food — it’s a cultural experience, and one that you’ll best appreciate if you familiarize yourself with its methodology.
The pit that you cook the pig in is called the imu, and the meat that it prepares — noted for its soft, moist consistency — is called kalua pork.
For help understanding the cultural significance and proper techniques, Chef Lira and I recruited an expert Hawaiian, Gordon Lee, Jr., who talked us through the various steps over the phone and then joined us for the luau. Lee’s grandfather was an imu digger in Hawaii, and that knowledge has passed to each successive generation.
Those tips he gave us I now pass on to you, reader. Read through all the steps before embarking, and take plenty of notes. Read it at least once more, and then get to work.
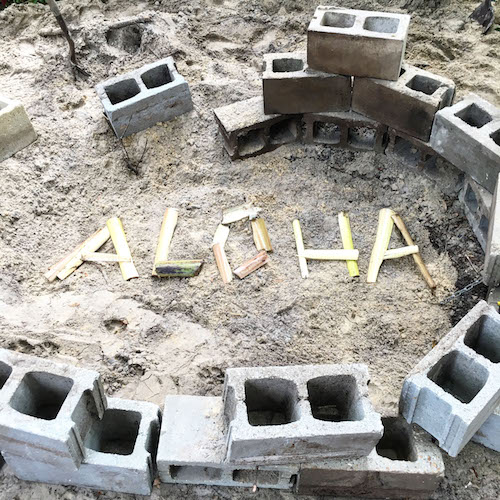
The most important ingredient for cooking a pig in the ground? Plenty of aloha put into every step. (While the word is a greeting, is also means love and affection.) So take your time and enjoy this!
2. Gather Your Supplies
You’re going to need an array of materials. I’ll list them and then go into a greater detail for a few of them below:
- A location near a hose
- A whole pig
- A banana tree or substitute (cabbage and corn husks)
- A pound of rock salt
- At least three burlap bags
- A sheet of canvas, at least 8’ x 8’
- Chicken wire, about 8′ (order non-galvanized online, if you have time)
- Aluminum foil
- Solid rocks or bricks that won’t hold water inside
- Shovels
- Post-hole digger or fire tongs
- A very sharp knife
- A saw (for banana tree)
- Lots of firewood – about an eighth of a true cord will work. In layman’s terms, at least a half full pickup truck bed worth, or 20 bundles from the grocery store. It’s easiest (and cheapest) to call a local supplier and have them deliver.
- Leather gloves
- A few feet of flexible wire (to tie the legs together)
- 12 to 20 feet of chain
- A wireless thermometer or two (not required, but helpful)
Pig: A 100-pound pig will feed roughly 100 people, so plan your pig size according to your guest list. If you can find a local heritage or natural farmer, it’s worth the extra cost. If not, a commodity hog can usually be found from a local butcher for around $2/pound, with prices varying depending on where you live.
You want a whole pig with the head and hooves on. It should be gutted and cleaned, but don’t have the butcher snap the spine (which is common when purchasing a whole hog, to make it lay flat on a grill).
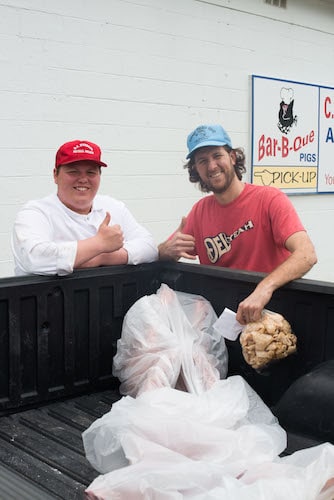
Pick it up the day before you cook and arrange to store it in a nearby walk-in refrigerator. We asked a friend who owns a nearby bar. You can also ask if the butcher is available for early pickup the morning of.
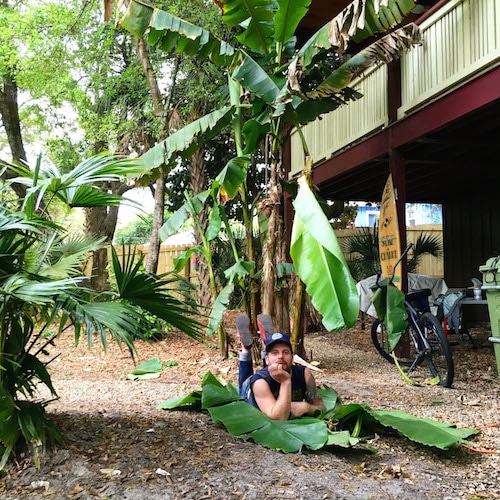
Chef Lira relaxing under our chosen tree.
Banana Tree: When you cut open a banana tree trunk, you’ll be amazed at the amount of water inside. Cooking a pig in the ground is all about the steam, and a banana tree’s trunk is the perfect way to create this and impart subtle flavor. If you cut down a banana tree, it quickly grows back within months.
If you live an area that doesn’t have banana trees, go to the grocery store and ask about getting some cabbage that’s past its sale date (you’re not eating it — you’re just using the water inside of it). You’ll need 15–20 heads. Corn husks also work — check with a local restaurant. You’ll need enough to fully cover the base of your pit (see step 3 for more about pit size). Don’t use lettuce — it’ll wither away too fast.
Burlap Bags: These are soaked with water and laid over the pig after it’s in the ground to keep the moisture in.
Canvas: This goes over the burlap and over the pig, and its edges should overlap the pit, allowing you to remove it without dropping dirt inside on the pig.
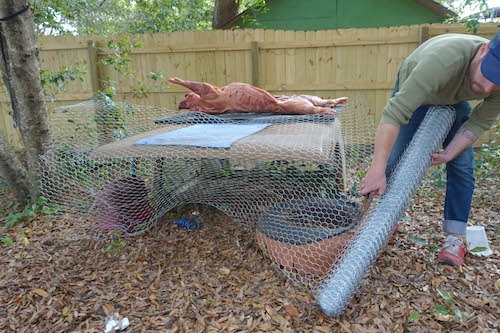
Chicken Wire: When you pull the pig out of the imu, it will fall apart because it’s so juicy. Chicken wire gives you something to hold on to when pulling it out, and it keeps the meat intact until it’s on the table. Ideally, you’ll use non-galvanized wire, but this is hard to find (it can be ordered online, however). If you use galvanized wire, put a layer of aluminum foil between the wire and the pig’s skin, to prevent any of the galvanized material from leaching into the meat (although it’s unlikely that your imu will get hot enough to do this).
Rocks or Bricks: Rocks from a river can hold water inside which can boil and cause the rocks to explode, which can lead to serious or fatal injury. In Hawaii, volcanic rocks are used that absorb and hold heat, but in South Carolina, we used both granite and stone from a local landscape supply store, as well as bricks. Look for rocks between 4 and 8 inches across. You’ll need enough to fully cover the bottom of the imu.
Firewood: You’re cooking with this, so don’t use construction material or trash. Choose a quality firewood like hickory or cherry.
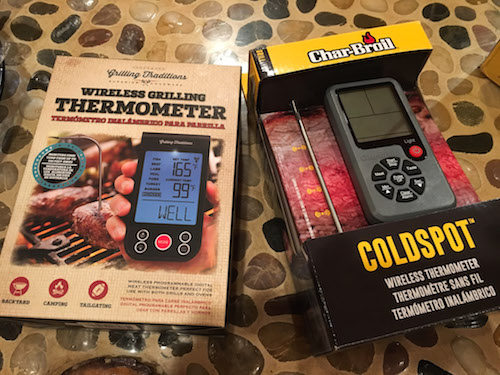
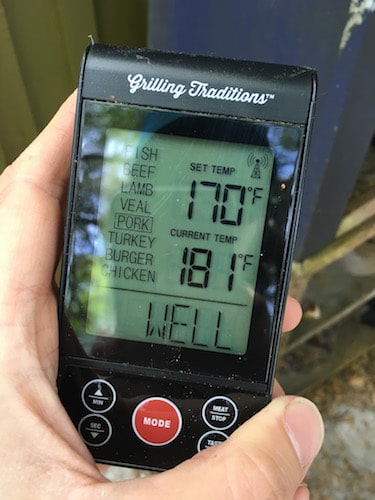
Wireless thermometers give you confidence and peace of mind that your pig is successfully cooking underground.
Wireless Thermometer(s): Once you put your pig in the ground, it’s staying there for at least eight hours, and when you dig it up, there’s likely going to be a crowd of hungry people watching. That can make for real nerves if you don’t get it right. Make one sacrifice to modernity and invest in an electronic wireless thermometer or two so that you can be assured that you’ve reached the critical cooking temperature before you unearth the pig. With pork, you’re shooting for about 185 degrees at the shoulder and 195 degrees at the ham. Although we purchased two thermometers, there are also options with two probes to get two different readings from different parts of the pig.
3. Dig the Imu

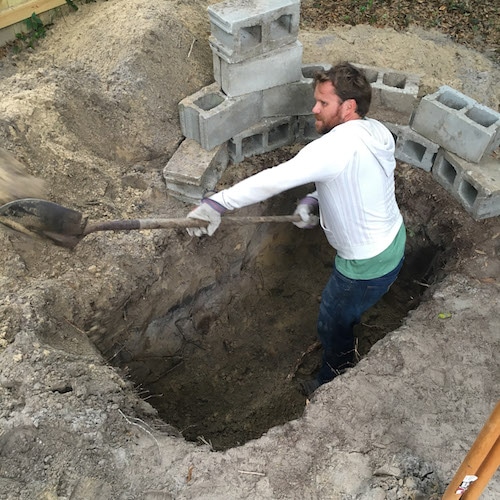
The cinder blocks are just to keep my dog from rummaging around the pit and pig; not needed for most folks.
You’re going to dig a significant hole and make a huge fire in it, so think about safety first. Choose a location with water access nearby in case the fire gets out of hand, and don’t dig in your yard without calling your local utility to identify gas and water lines first.
It’s a good idea to dig your imu the day before you cook the pig. Recruit a couple of friends for this. The more people who are part of the process, the more exciting the meal will be. You want your imu to be about twice as deep as your pig is (for a 100-pound pig, about 2 1/2 feet deep). It should be three times the width of the pig (so that it can lie squarely in the middle), and twice as long, leaving half-a-pig’s length at the tail and snout.
Your imu should ideally have rounded rather than square sides. This helps the steam to spread evenly around the pig.
If you live near the beach, choose the hardest soil you can find, as the steam may dissipate and be released through sand.
As you dig, remember to breathe, and convey aloha into your efforts. This is fun!
4. Make the Fire
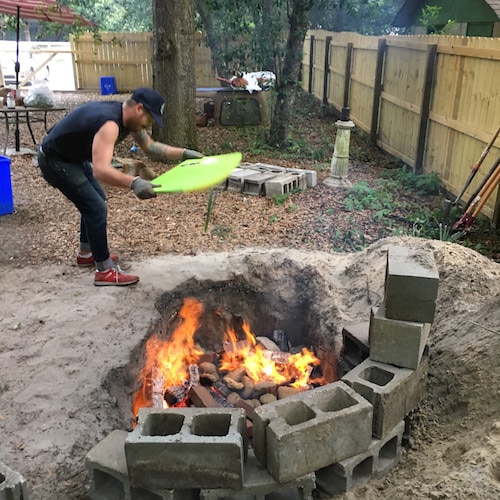
A boogie board makes for a great bellows.
A 100-pound pig needs to cook for 6-10 hours (let’s say eight), so you’ll need to put it in the ground long before meal time. For a 6pm dinner, you’re putting it in around 10am. It takes several hours for your fire to get hot enough and your rocks to heat, so you’ll need to set the alarm and get up early.
We rose at 5am, and had a roaring fire about an hour later. Start off with a small pile of logs to get the fire going, then add wood steadily over the course of a couple hours. You don’t want to just dump all of your wood on at once. Fires have to breathe. So as the fire spreads across the whole pit, just keeping adding wood until you’ve burned it all down. After your last pieces go in, they’ll still need 30 minutes or so to burn down to coals.
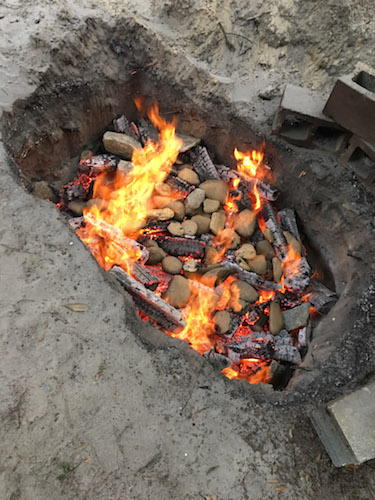
After those last logs are down to coals, add your rocks so that they have an hour to heat up before you add the pig.
5. Prep the Pig
Open up the “pits” of the pig so that hot rocks can be placed inside.
Use the hour while the rocks are heating to prep your pig. It helps to have a table set up to work on the pig, and you can use this table to serve it when it’s ready. We used a large metal grate from a smoker.
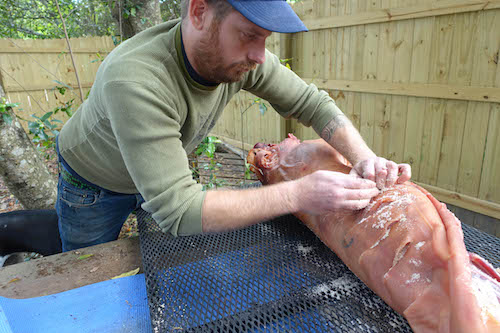
Apply liberal amounts of salt inside the incisions you cut.
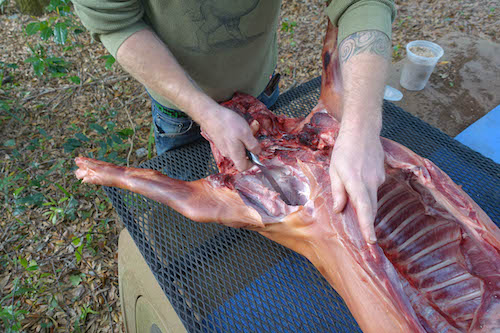
Use a knife to score the pig along its back and ribs, making incisions every couple of inches. Stuff rock salt into each incision.
Then, use the knife to open up the joints around the legs (the armpits, essentially). Pull the legs back enough that at least a 4-inch rock can be wedged in there (don’t do it yet, though). Spread salt into the cut, and throughout the belly of the pig.

Cutting up the banana tree trunk. You’ll use pieces of it now to stuff the pig, and pieces of it later to line the cooking pit.
Now, use some of your banana trunk (or cabbage) and place it inside the cavity against the meat.

Retrieving hot rocks from the imu.
Then, use your fire tongs or post hole digger to pick up hot rocks and place them in the pig.
We wrapped our rocks in aluminum foil (to hold them together just in case they exploded inside the pig), but it’s fine if your rock touches flesh.
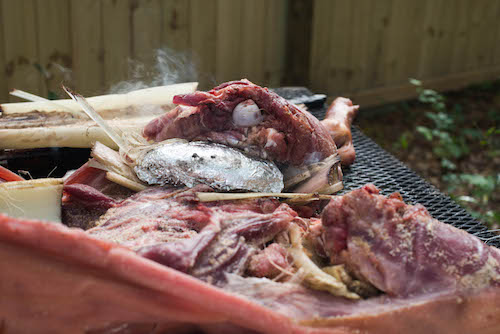
Put a rock or two in all four armpits and a couple in the belly. You may immediately see sizzling! That’s good, you’ve got hot rocks.
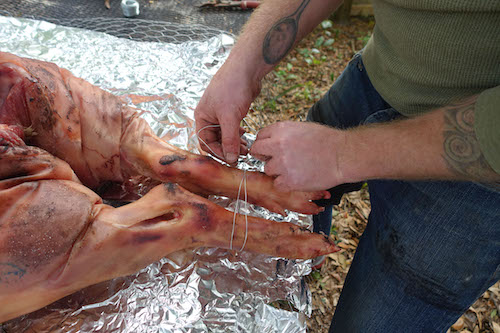
Cut your loose wire into two pieces long enough to wrap the legs and tie them together. Tie the front legs together, and the back legs together.
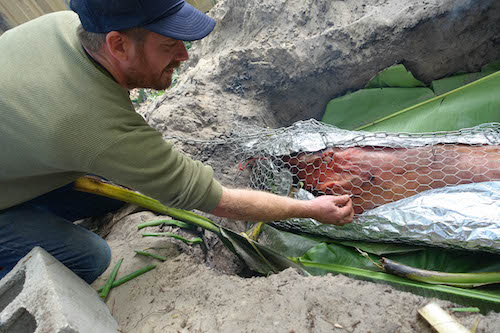
Next, you’ll cut about 8 feet of chicken wire — enough to wrap all the way around the pig with a foot or two of overlap (you can prep this in advance). We laid a layer of aluminum foil on ours since we were using galvanized wire. You want to leave an opening in the foil on top, rather than wrapping the pig completely, to allow steam from the rocks and banana tree trunk/leaves to fully encapsulate the pig.
Pick up the pig and place it in the middle of the chicken wire. Wrap it up, then run chain through the wire to hold it closed. Leave enough length on each end that you can use the chain to pick up the pig from the pit once it’s cooked.
It’ll literally be falling apart when you remove it from the fire, and the quality of your chicken wire wrap and chains hooked on the end will determine how easily you can transfer the pig from the imu to the table.
6. Prep the Imu
After your rocks are scorching hot, use shovels or a post-hole digger to make sure they are spread evenly across the bottom of the imu, making an even layer of heat.
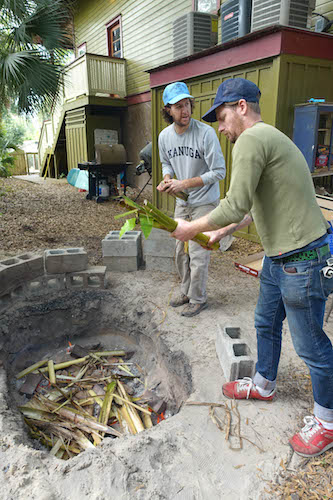
Now, add your green material, whether that be banana trunk, cabbage, or corn husks. You can also supplement with other plant material that’s dense and contains lots of water. We added onion and asparagus stalks to our banana trunk because Chef Lira had them on hand.
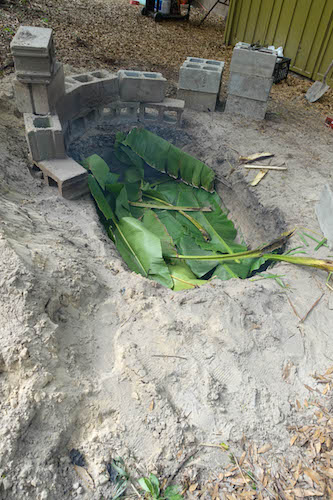
We then laid a layer of banana leaves (not necessary, but do it if you have the material available).
Once there’s a full, even layer of green material in the imu, it’s time to add the pig!

Lowering the pig into the imu with chains wrapped through and around our chicken wire and foil pig taco.
Carefully carry it over and place it in the imu. We cooked our pig with its belly facing down. Say a blessing and convey your thanks and aloha.
Placing the digital thermometer probe in the pig’s shoulder.
Now’s the time to place your digital thermometers. We placed one in the shoulder and one in the hindquarters. Stick the metal sensor deep into the flesh and run the cable out and over the edge of the imu. Note: When you bury the pig, leave the transmitting part of the thermometer unhooked from the wire while you add dirt. Hold the end out with a brick or rock, and then plug it in once you’ve added the dirt. This way you won’t yank the transmitter into the hole or accidentally bury it in dirt.
Also, run your chains to the edge so that they’re accessible when you’re digging it up later on.
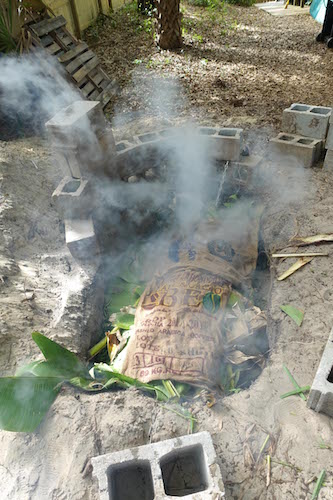
Next, we laid a layer of wet burlap bags completely overlapping the animal’s body. Get ready for lots of steam!
Lay your canvas over the entire imu, overlapping the edges so that dirt won’t fall into the hole around the sides.
The last prep step is to add water. Pour in 3 gallons of water around the sides of the imu (just lift up the edges of the canvas to pour it in) to create even more steam on the hot rocks. Then immediately fill the imu back in with dirt. We dug ours deeper than we needed to. Many imus will actually have a rise in the middle over the pig.
As you add dirt onto the imu, look for spots where steam is escaping. Cover and plug those holes with dirt — that’s heat getting away that you need for cooking. Stick around for at least another hour, as steam holes will appear that need to be plugged.
7. Take a Break and Relax
The most important ingredient.
For a 100-pound pig, let it cook for eight hours. With a 200-pound pig, give it 12 to 14 hours. Go take a nap, do some work, go for a run; whatever you do, don’t sweat it, because at this point there’s nothing you can do.
Almost to success!
Check your digital thermometer after a few hours and make sure it’s cooking nicely. You’ll want to hit at least 185 degrees when it’s all said and done. It’s okay to go hotter, but if you don’t get to 185 at the shoulder (and ideally 195 at the ham), it may be time to call the local BBQ restaurant for a backup catering option for your party tonight. Our pig hit 215 and it came out just right.
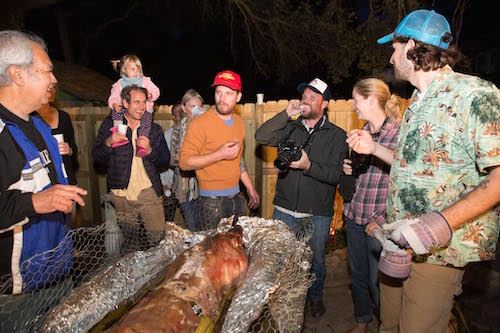
8. Dinner Time!

The sun is setting, a crowd is gathered, and it’s luau time. Before you unearth your pig, gather your group together to give thanks. It’s not often that we consume an entire animal at once, and these moments are worth stopping to reflect for a minute about where our food comes from and our role on the planet.
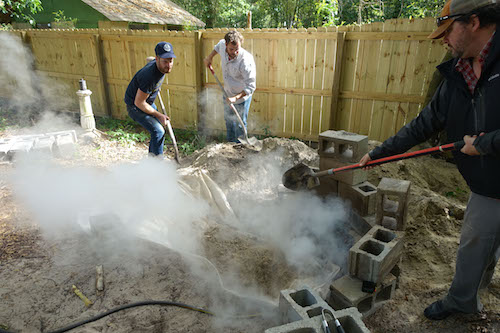
At our luau, the crew of the Hokulea offered a moving blessing as 100 of us stood with arms around each other, setting the tone for an incredible communal meal. Everyone was excited as Chef Lira and I nervously took our shovels and began the unearthing process.
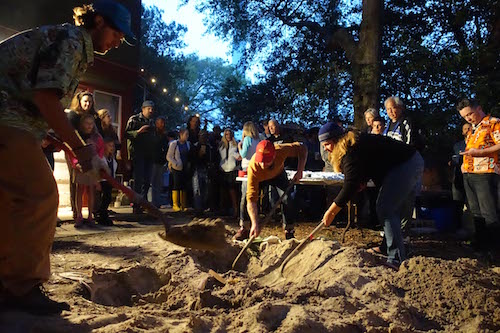
Digging up the imu at dusk.
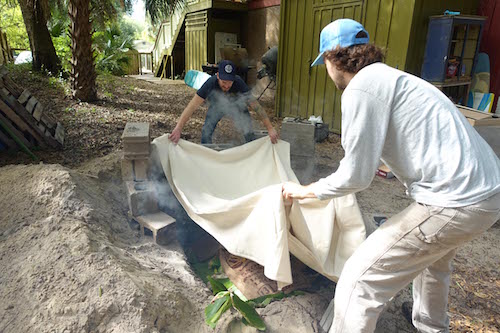
As you dig, be careful not to let your canvas slip into the imu. Have bystanders hold the corners to keep it taut, keeping dirt from falling in.
Once you’ve removed all (or most) of the dirt from atop the canvas, carefully peel it back to one side, exposing the burlap. Remove the burlap and set it aside.
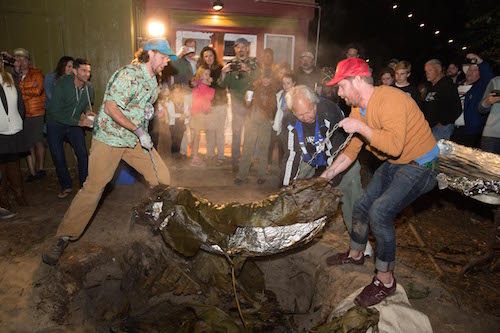
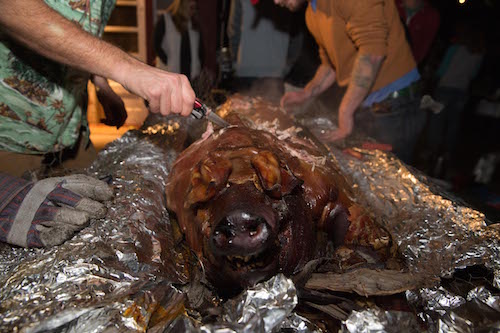
Removing the pig from the imu is a glorious but nerve-wracking moment.
There’s your pig! Carefully lift it onto the table.
Discard your banana leaves, remove the chain, and open up the chicken wire. You should have meat falling off the bone!
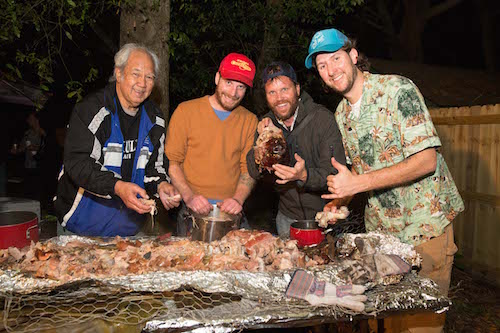
Give your dignitaries in attendance the honorary first bites, but don’t wait too long before trying it yourself. You did it!
It’s a good idea to help out your guests by cutting the pork from the pig, which is likely very hot to the touch. Let your guests cut their own portions, or serve it to them.
Although it’s not traditional Hawaiian, American palates may appreciate a dousing of vinegar hot sauce on the meat. “Spice, tart, sweet and salt elevates the flavor of the pork,” says Chef Lira. We cut our pork into a “Hawaiian bowl” and a “Carolina bowl” to give our guests the option. Note: If you’re at a house, heat the sauce on a burner inside to avoid cooling down the already quickly cooling meat.
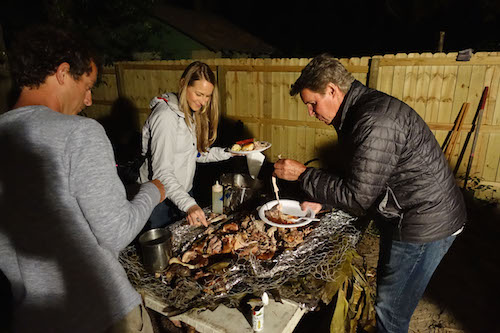
Now it’s time for hugs, high fives and a cold drink! Sit back and enjoy the best plate of pork you’ve ever eaten in your life. Aloha!
__________________
Stratton Lawrence lives by the ocean in Folly Beach, South Carolina, but he left his heart in Hawaii after spending three months in Maui and Kauai in 2015. A professional writer, avid eater and constant adventurer, he jumped at the chance to bring together the two cultures he loves most—Southern hospitality and Hawaiian aloha. Stratton frequently writes about tech, travel and fitness for eBay, where you can find electronics like the wireless thermometers used to cook a whole pig in the ground.