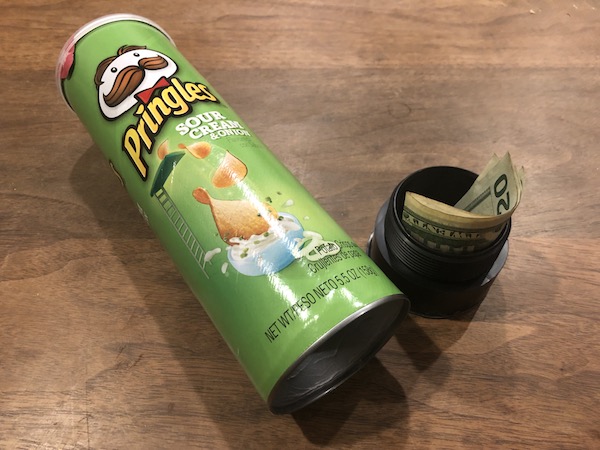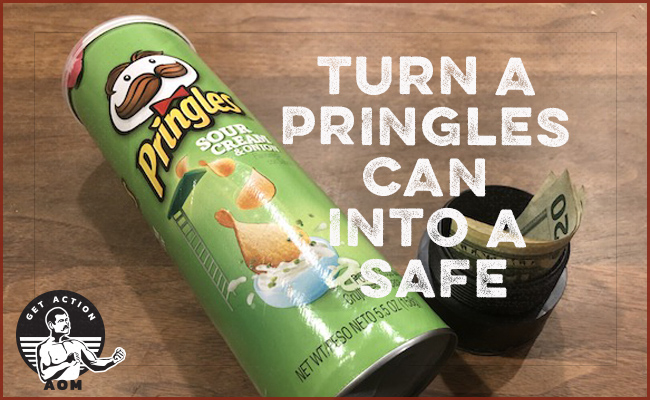
Pringles cans are one of the most versatile DIY materials you can get your hands on. People have made the iconic chip packaging into speakers for their phones, storage containers for dry goods, gift boxes, and even pinhole cameras. One of the most creative uses for a Pringles can is a safe. Based on the idea that the right illusion is more secure than a steel-reinforced vault, the Pringles can safe maintains the top seal and most of the chips inside while concealing a small spot for your valuables in the bottom.
There are lots of ways to make a Pringles can safe. The simplest way only calls for some cardboard and duct tape, but the end result isn’t great for repeated use. Instead, our method integrates PVC pipe fittings to make a more secure, and more reusable safe.
Tools/Materials

- Pringles can
- Can opener
- Scissors
- Scrap of cardboard
- Pen or marker
- Duct tape
- Hot glue gun
- Set of 2” PVC or ABS pipe adapters (You can find these fittings at any hardware store. Look for things labeled “2-inch PVC adapter.” The key is to get a set of two-inch adapters that screw together and create a small pocket of space for your valuables.)
How to Turn a Pringles Can Into a Safe
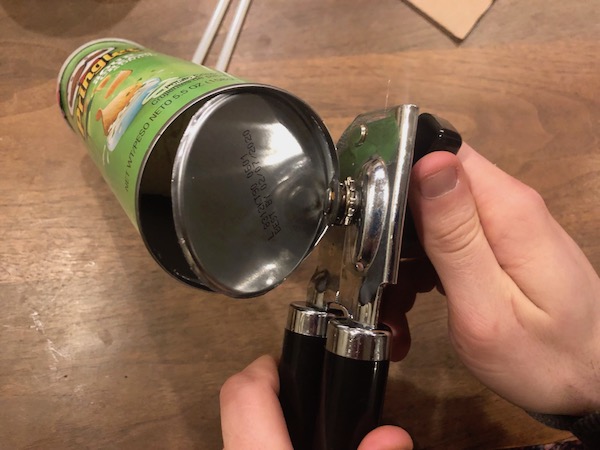
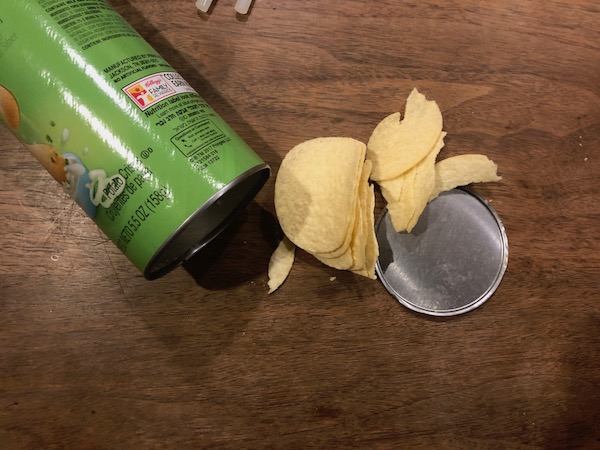
Step 1: Remove the bottom of the Pringles can using a can opener.
Step 2: Take out a few inches of Pringles and dispose of them however you see fit.
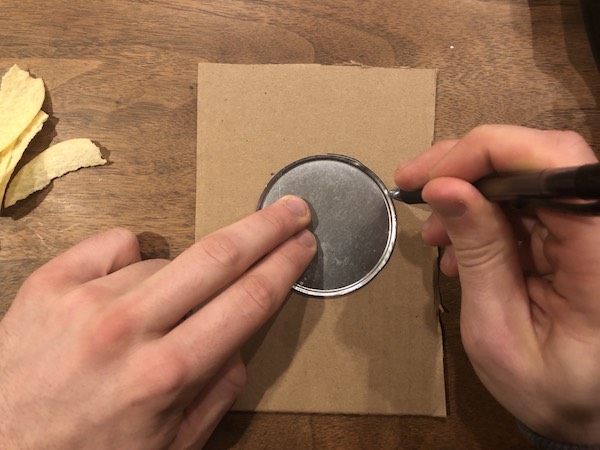
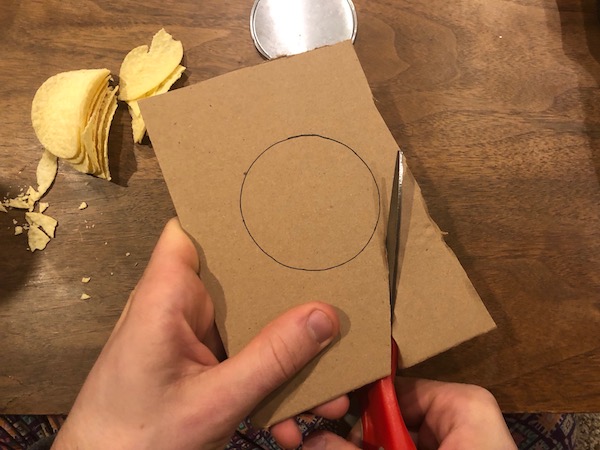
Step 3: Trace the bottom of the Pringles can onto a scrap of cardboard and cut it out.
Step 4: Cover the cardboard circle with duct tape.
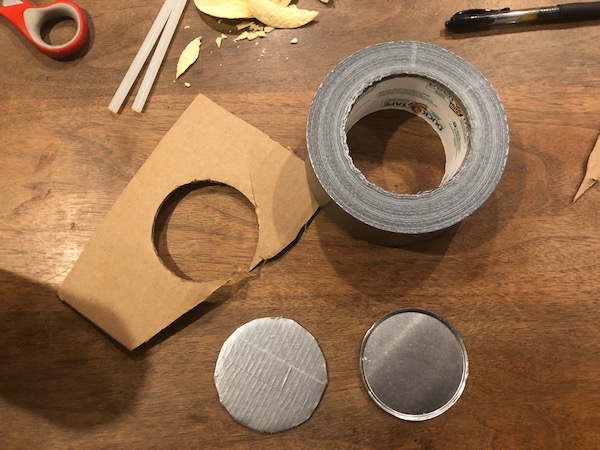
The duct tape will help mimic the metallic bottom of the can. This is the part that would be seen should some criminal-type (or a hungry kid) pop open the Pringles and finish all the chips.
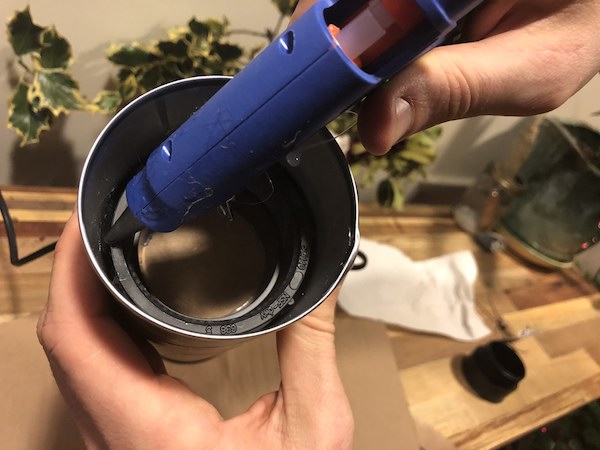
Step 5: Create the upper half of your safe by hot gluing one of your PVC fittings to the cardboard circle.
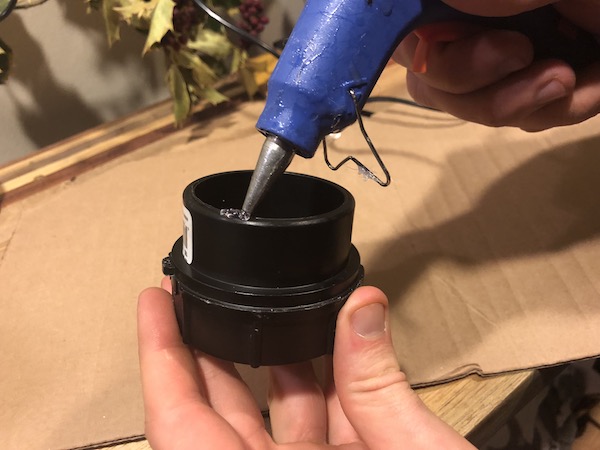
Make sure the duct tape side is facing out and that you glue the circle onto the fitting’s non-threaded side.
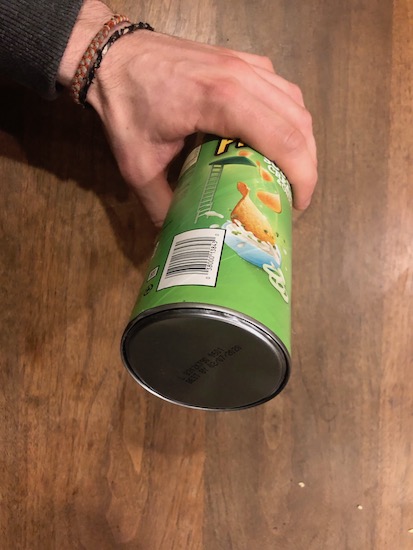
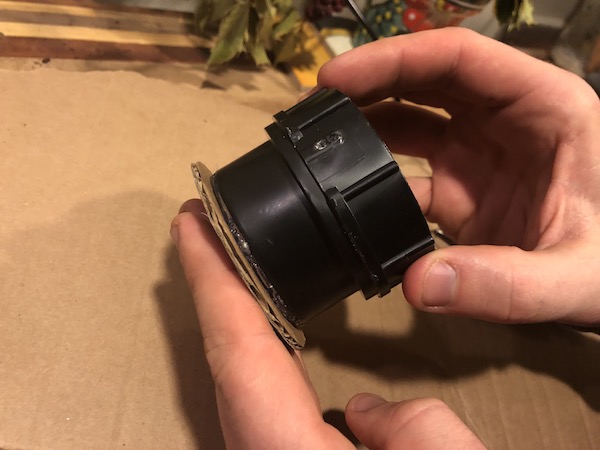
Step 6: Create the bottom half of your safe by hot gluing the other PVC fitting to the bottom of the can that you removed with the can opener.
Make sure you’re gluing the can bottom with the expiration date facing out. And be sure that you’re gluing on the non-threaded side of the fitting.
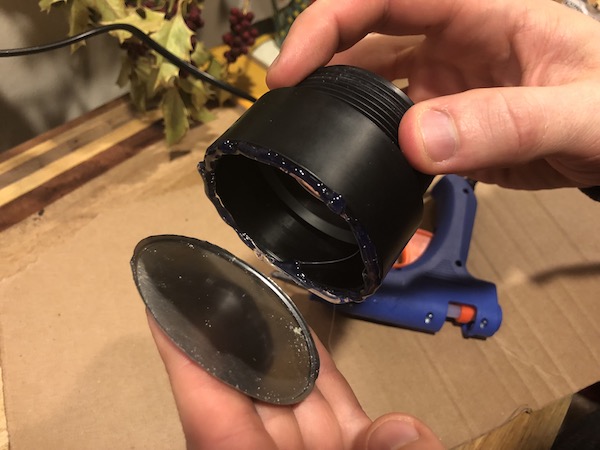
Step 7: Slip the upper half (with the cardboard circle) inside the can, so the duct tape side is towards the chips.
Screw on the bottom half to check that it is flush with the bottom of the can when tight. If it’s not, adjust the upper half of your safe inside the can so it sits at the correct depth.
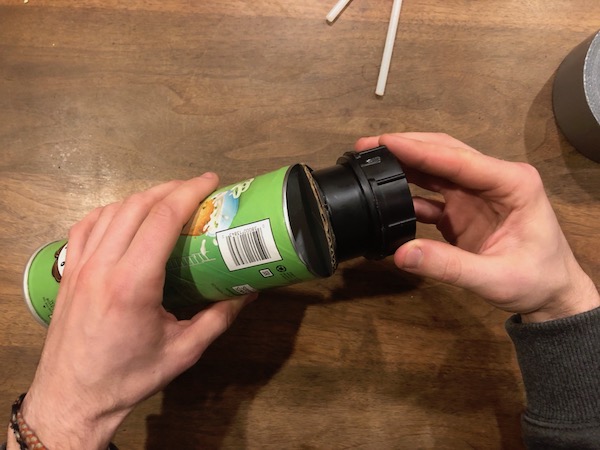
Step 8: Once you’ve set the depth of the upper half of your safe, run a bead of hot glue around the edge of the fitting where it meets the can to hold it in place.
Step 9: Add your valuables, screw on the bottom, and protect your stuff!