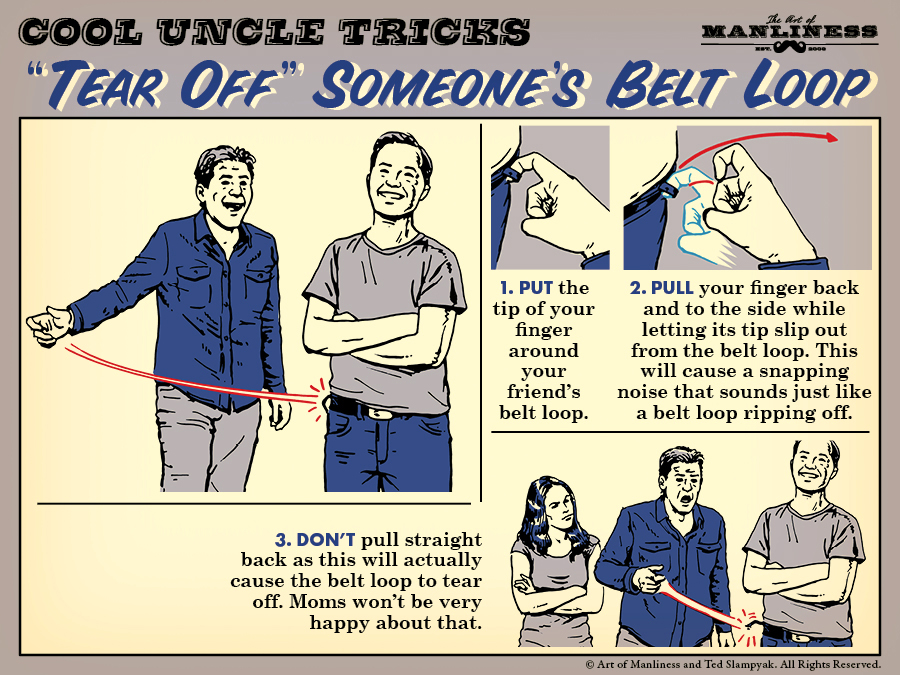
Editor’s note: This is a guest post from Michael Magnus.
Whether being worn for function or fashion, a well-made leather belt can last a lifetime. Many “genuine leather” belts available to purchase at stores, though, are a layered, man-made material that’s more akin to a leather pressboard than true leather. These types of belts are sewn together by sewing machines, which don’t offer as strong of a stitch as sewing leather by hand and tend to separate and fall apart with time.
Why not make your own durable belt, from a single piece of real leather, that will last decades and also provide a sense of confidence as your wear something you fashioned with your own two hands?
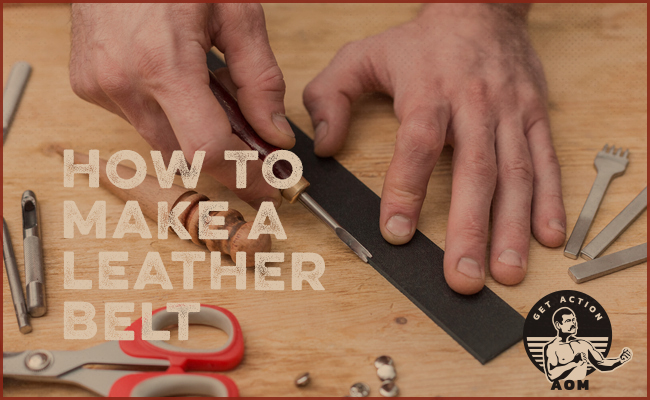
In this tutorial, we’ll cover the basics of how to create a minimalist leather belt with basic tools.
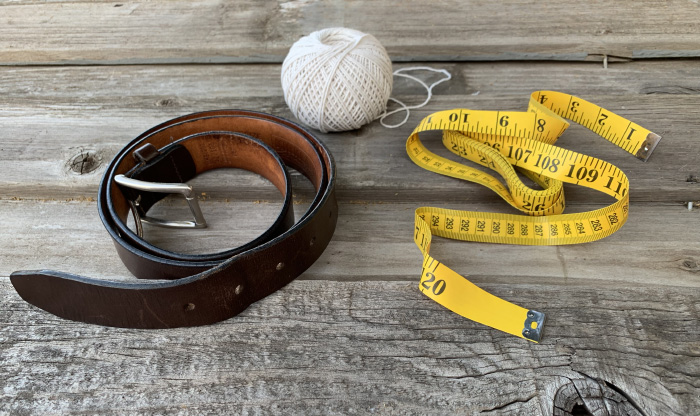
Materials/Tools
In this article, I demonstrate how to make a belt from a large piece of vegetable tanned hide. This can be purchased at a number of craft stores, or online at TandyLeather.com. However, you can use whatever leather you have access to that will give you the length you need. Although perhaps not as durable, you could even use this method to make a belt from an old leather couch or other full grain leather products.
- Leather
- Belt buckle
- Measuring tape or ruler
- Long straight edge
- Utility or other sharp knife
- Rotary punch (optional)
- Rivet setter and rivets
- Olive oil (or other finish of your choice)
1. Measuring for Belt Length
For starters, you’ll want to know the belt length needed, either by measuring against a current belt or measuring your waist with a string or tape measure.
If measuring against an existing belt, measure the total length of the belt and add 2” for the buckle fold (explained later in this article).
If measuring your waist directly, add 8”: 2” for buckle fixture and 6” for the belt tip.
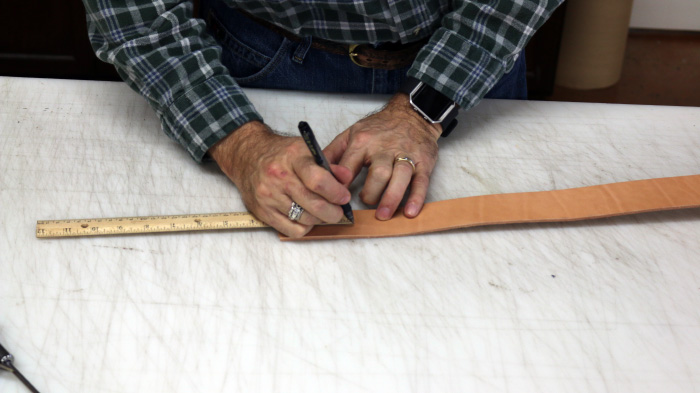
2. Cut the Strap of Leather for Your Belt
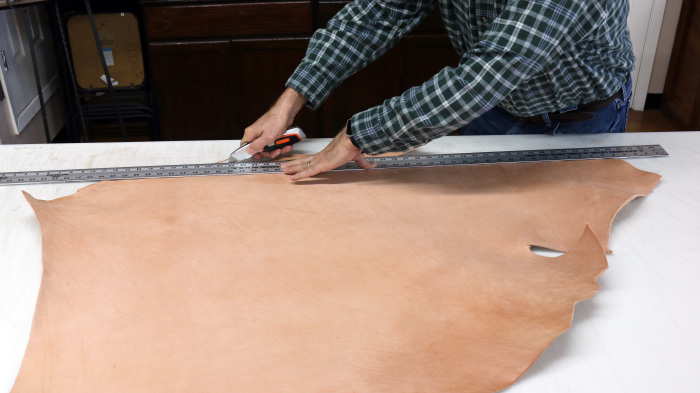
When making your belt, first you have to create a strap from the leather. When cutting the strap, you want to have a uniform width throughout, so you’ll need to start by creating a straight edge at least the length of your belt. You can use any straight edge for this, such as a level, a steel ruler, or even a straight piece of lumber in a pinch. This may require you to cut off some scrap leather that can be saved and used for other small projects.
Once you have your initial straight line, measure and mark your 1 1/4″ width (or whatever other width you’re going for, generally between 1 and 1 1/2 inches) every 12-18 inches to create guide markings. (Also be sure your width matches the buckle you have on hand.) From this point, you can either scribe a guide line with a pen and a straight edge, or you can use a metal ruler to serve as a guideline for your cut.
Typically you’ll get better results using a metal guide as a straight edge; just make sure you apply firm downward pressure with your non-cutting hand to prevent the ruler from slipping and be careful when cutting near your fingers.
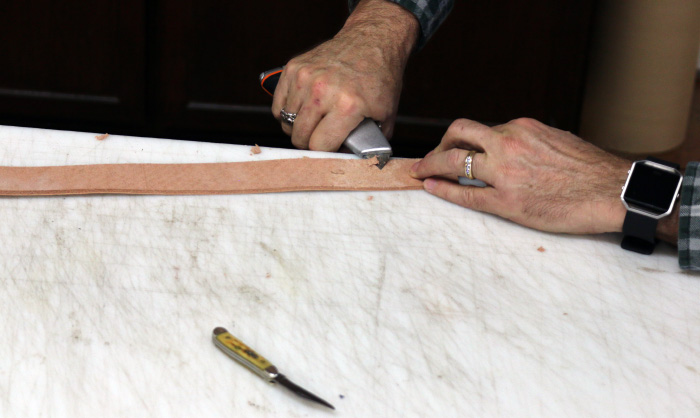
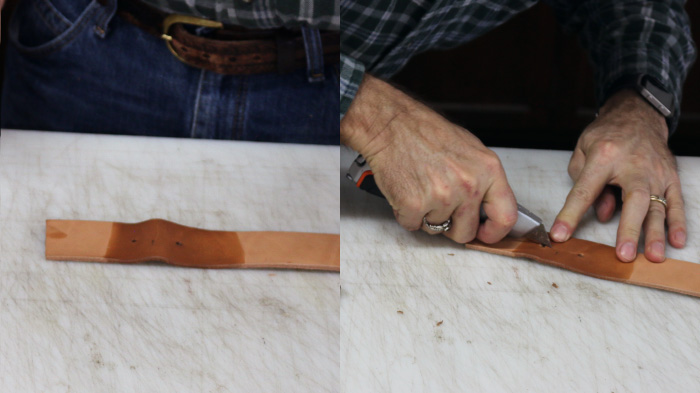
3. Creating the Tip
Now that you have a 1 1/4″ wide strap, you’ll want to determine which side you want to be the buckle end and which side you want to be the “tip” or “tongue.” Doesn’t matter which, just pick a side.
Know that the tip end of your belt may indeed feature just natural edge or a flat cut. These can work just fine and are obviously less work, but there are two other methods that make the belt tip easier to slide through the buckle.
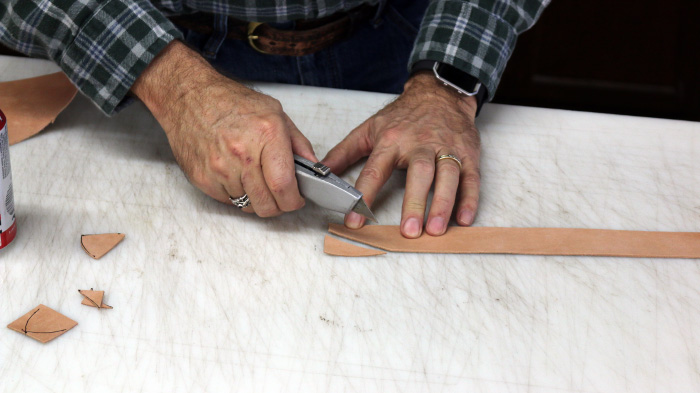
The first technique, and most simple method, is just making a diagonal cut that leaves a point on the tip of the belt.
If you want a rounded edge, there are tools specifically for that, however you can also accomplish a similar effect with an aluminum beverage can.
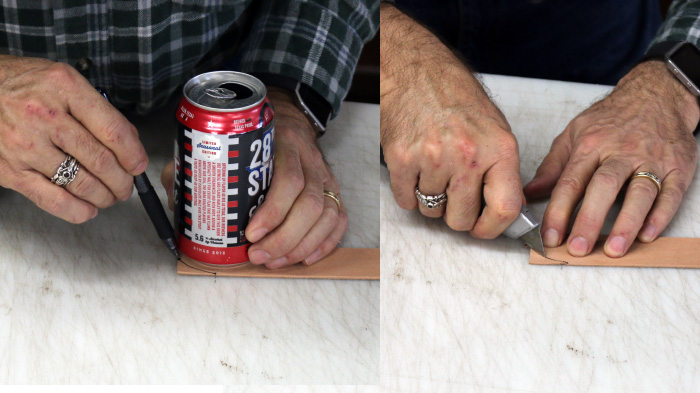
To accomplish this, start with a 90 degree cut to give yourself a straight-edged end to work with. From there, mark the center of the belt at ½”, as well as 1” down on both the left and right sides.
Align an aluminum can on the dots to use as a guide and trace a curved line. Cut that line with your utility knife. And there you have it: a rounded edge.
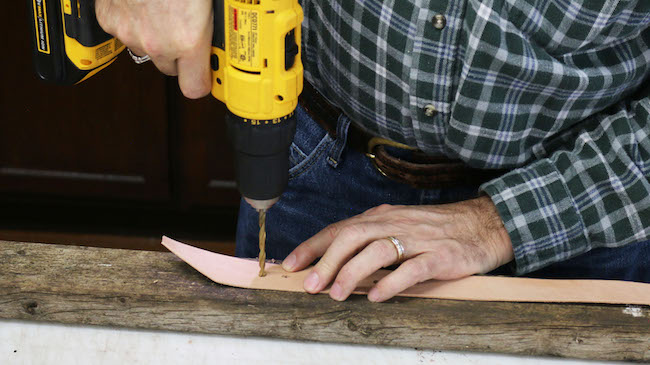
4. Make Belt Holes
On the tongue/tip end of the belt, you’ll want to add 5 holes for the prong of the buckle to connect through.
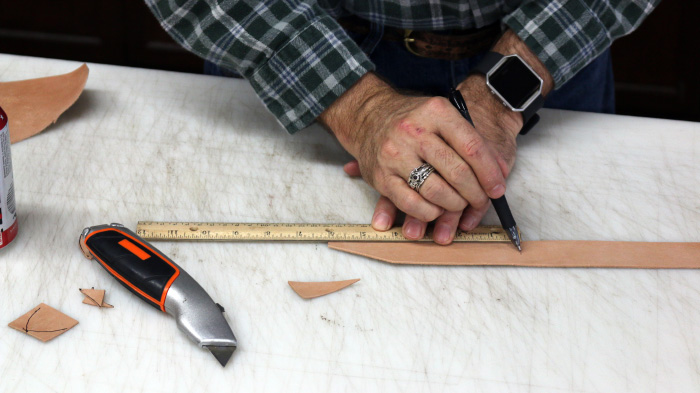
For the first hole, measure 6” in from the tip of the belt and create a mark centered on the leather strap. Once you have your initial hole marked, mark two more holes in both directions at 1” and 2” from the initial marking. This will create your initial 5 holes, each 1” apart. If needed, more can be added later.
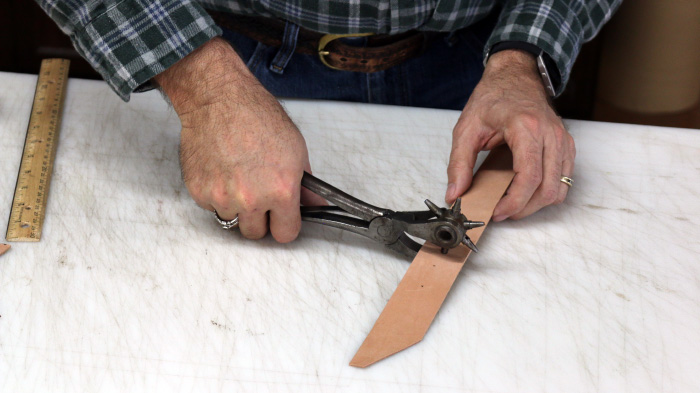
Once marked, you’ll want to put these holes into the belt. In the image here, I used a rotary punch, however there are a number of different methods for puncturing the hole in the leather, as detailed in a previous article.
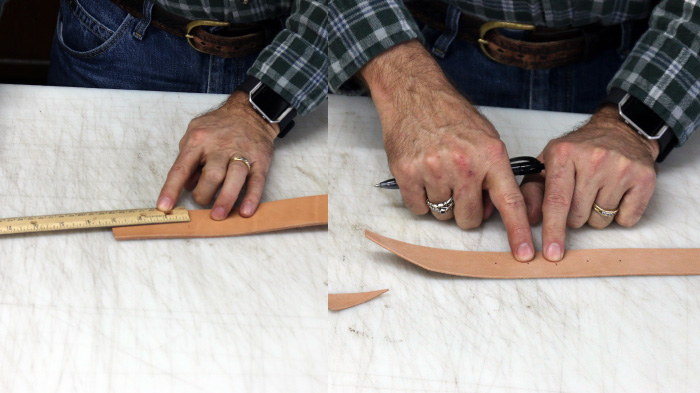
5. Thinning the Buckle Side
Now moving to the buckle side of the strap, trim the leather to a 90 degree angle so you have a straight edge to work with.
When adding a buckle, the leather will be folded back on itself to “trap” the buckle into place (refer to step 6 if you’d like a visual). If you’re using a relatively thick leather, chances are you’ll need to thin the material where it folds to avoid an uncomfortably thick loop.
Measure and mark 3” in on the flesh (rough) side of the leather. You’ll want to thin the leather to roughly half of its thickness, spanning one inch in either direction of the mark that you’ve made so that you have roughly 2” of thinned material centered from the 3” mark.
Using a sharp pocketknife or a utility knife, very carefully “thin” the leather by holding the blade almost flat against the leather and scraping or “whittling” small amounts of material away until it is roughly half of its original thickness. You can always take more away, but you can’t add leather back, so be patient and careful with this step.
If you plan on making belts somewhat regularly, you might consider investing in a safety beveler to make this process faster and safer.
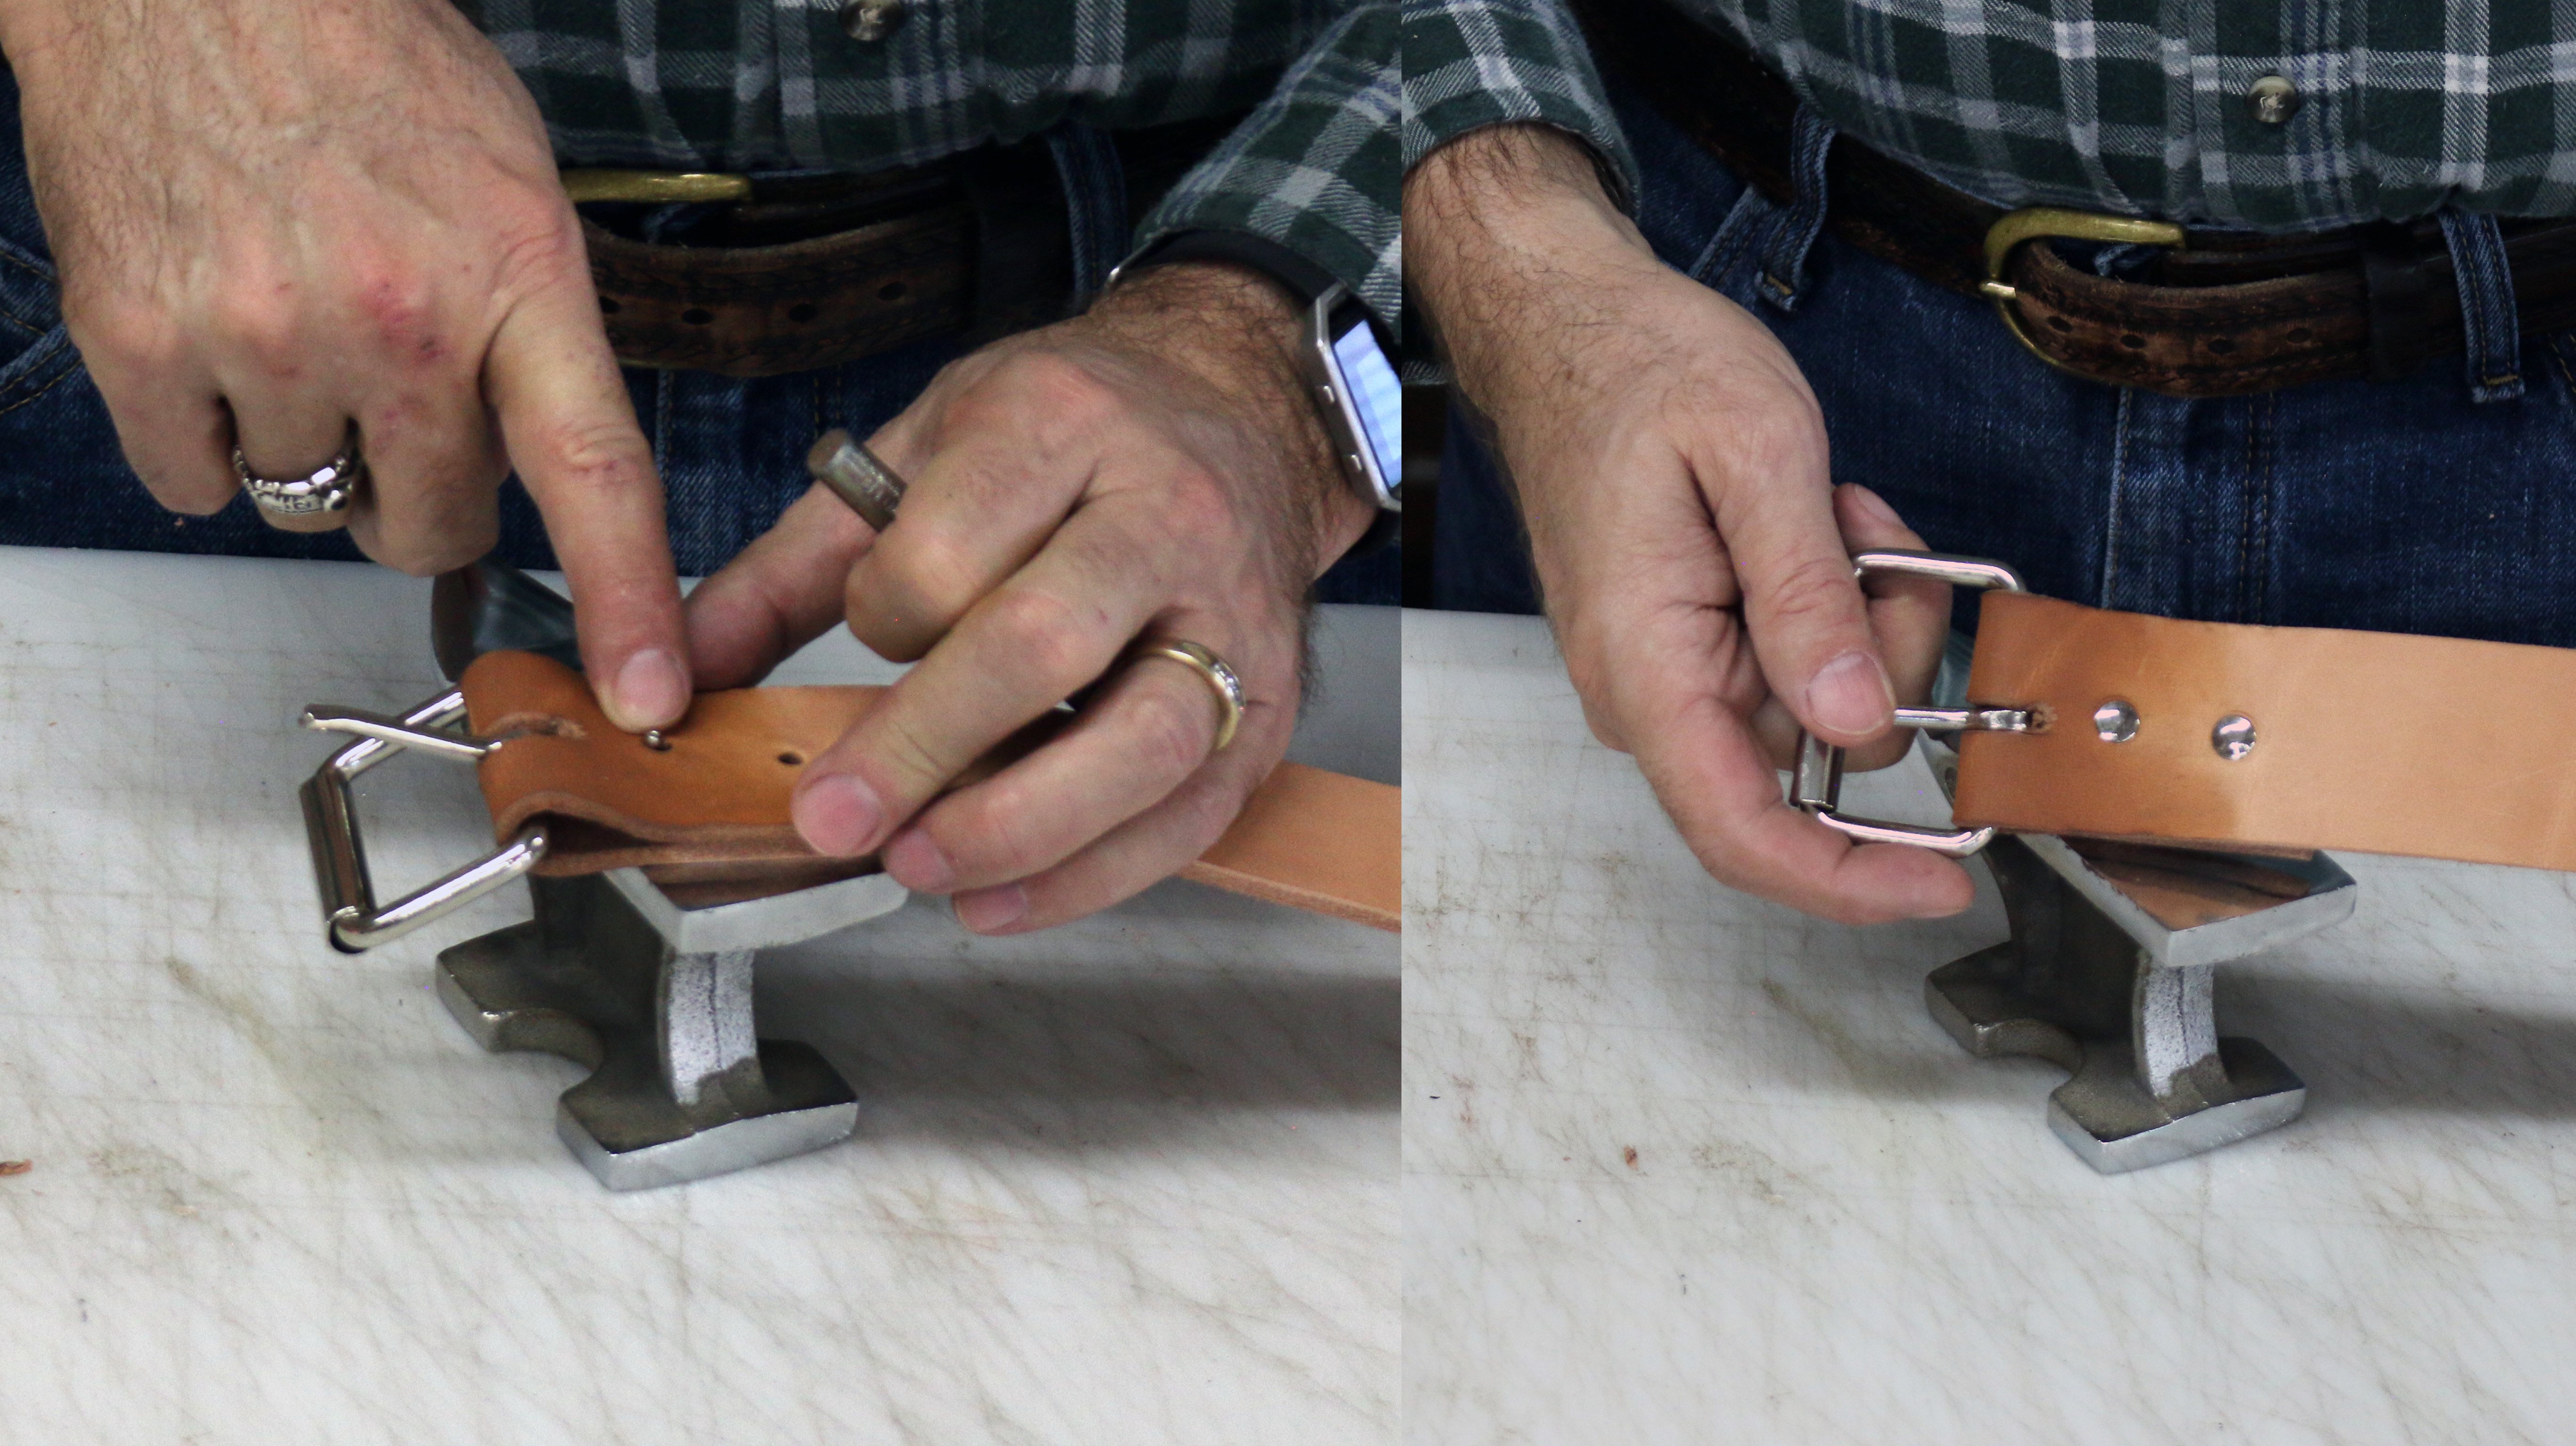
6. Preparing the Leather for a Buckle
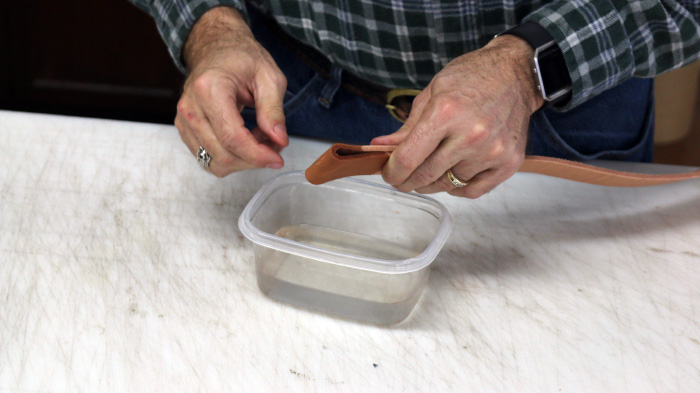
Once you’ve thinned the belt, you’ll want to fold the leather over the thinned portion and soak it in water. Let the water saturate the leather, which will make it more pliable and moldable, and better able to hold its shape.
From the tip, measure in 2.5” and 3.5” and create holes at those marks using whatever method you found most useful in the hole punching article mentioned above. Once these two holes are created, you will use a utility knife to make two cuts to connect these holes into one elongated hole.

Cut from the left side of one hole to the left side of the other hole and repeat the process on the right side until you have a 1” cutout centered on the thinned part of your leather. Once this hole is created, the tongue of your buckle should slide through the newly created hole and the belt should fold over flat, as pictured.
At this step, it’s important to confirm that the belt buckle is “right side up” to function with the holes on the other side of the strap. It can be very frustrating to set everything in place and realize the buckle is upside down.
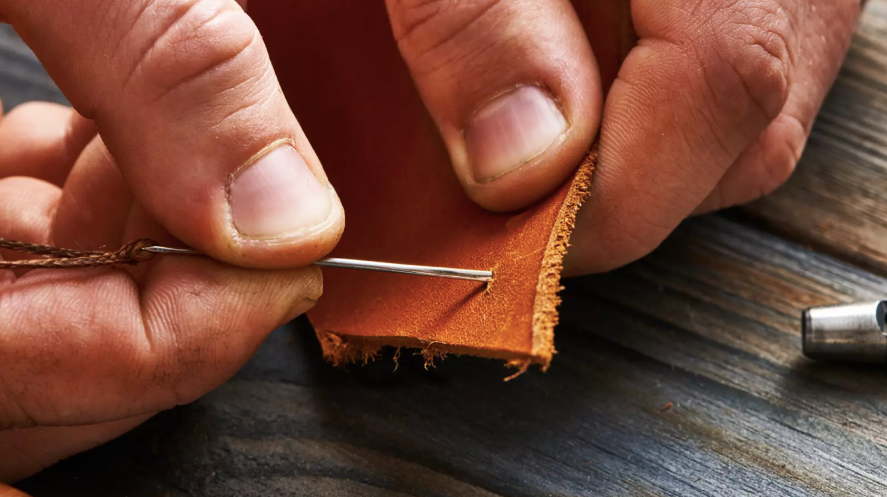
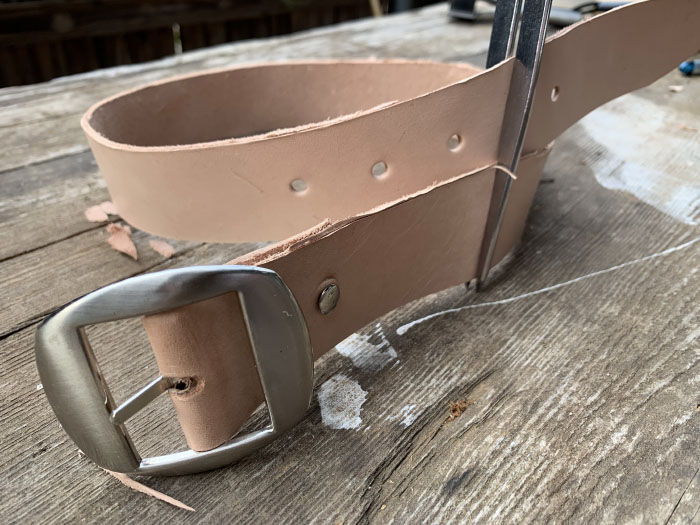
7. Securing the Buckle in Place
At this point, you could theoretically sew the buckle into place by sewing the remaining flap of leather back on itself. However, most people opt to use a rivet to secure the buckle in place.
If you use this method, you’ll want to set at least one rivet close to the buckle to secure it into place. To do this, you’ll need to create aligned holes on both the top of the belt and in the flap underneath. From there, you can use a rivet setter and a hard surface (such as a small anvil, which many rivet setter kits come with) to set the rivet into place. You’ll also want to set a second one aligned with the end of the flap to ensure that the remaining length doesn’t get caught on things. (This is a very rudimentary description of setting rivets. For a more detailed video description of how to set a rivet into leather, here’s a video by leatherworking legend George Hurst.)
8. Finishing
There are a wide variety of ways to finish a belt like this, which can get somewhat complicated, especially for the new leatherworker: dyeing, staining, coloring, antiquing, oiling, etc.
Something simple that you can do is just rub down the grain (smooth) side of the leather with a light coat of olive oil on a paper towel; I’d recommend against oiling the flesh (rough) side, because it will rub off on your clothes. This will offer a simple conditioning of the leather that will darken it slightly and help it patina.
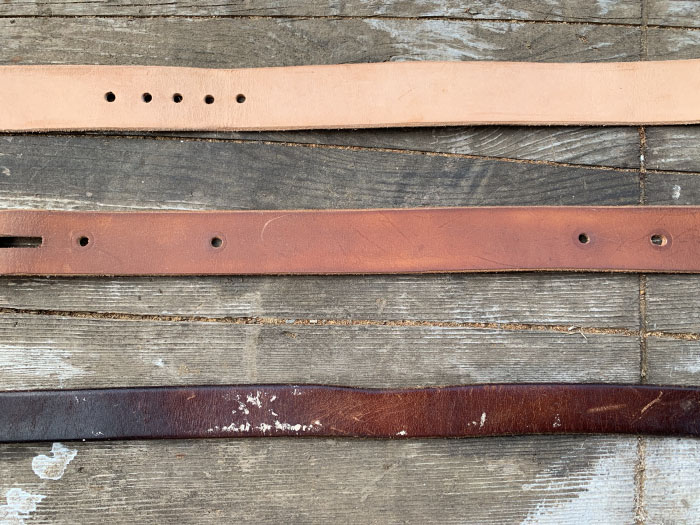
Top: raw leather. Middle: freshly oiled leather. Bottom: oiled with one year of everyday use.
As long as you aren’t regularly getting the leather soaking wet, that should be enough to finish the belt. Water can dry out leather and make it brittle because it removes the oils added in tanning that make it supple, so belts getting a lot of exposure to water may need to be oiled more often, and with oils specifically formulated for leather, like Mink Oil or Snow Proof Paste.
Remember two things:
- You can add more light coats, but you can’t remove oil, dye, stain, or any other finish if you put it on too heavily.
- Whatever method you use, let everything fully dry, ideally overnight.
You may also want to consider adding decorative elements to your leather, though that element is beyond the purview of this particular article. Several resources for this information include Jim Linnell’s free Leatherworking Basics video, Don Gonzale’s Leathercraft Academy, or the hundreds of videos available on Tandy Leather’s YouTube channel.
_____________________________
Michael Magnus is a digital advertising lecturer, consultant, and freelancer based in North Texas. When not teaching or with his family, Magnus promotes the art of leatherworking as a recreational leathercraft historian and content creator with the Elktracks Studio.