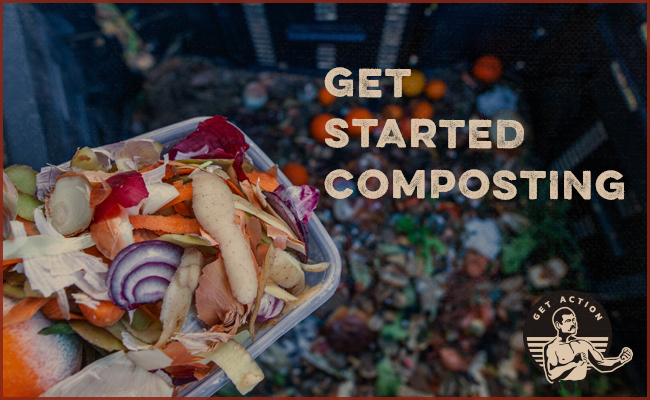
Once upon a time, I figured composting was either for serious gardeners or “zero waste” type folks who spent a lot of time and energy on reducing their carbon footprint. As it turns out, though, composting doesn’t have to be a big, zeal-requiring commitment; you can, in fact, take it slow, experiment, and see if it’s something that works for your life and property, and the benefits extend to people and households of all types.
It’s also a practice that fits with all budgets. While you can buy a large compost bin online or at your local gardening center for a price that almost always runs into triple digits (with “fancy” ventilated and easy-turning models getting close to $500!), you can readily take the DIY route for a cost of just $10.
If you’ve been interested in getting started with composting, today I’ll walk you through all the basics you need to know, from how to create a composting bin in less than 10 minutes to maintaining all the waste you put in it.
What Are the Benefits of Composting?
I long asked myself this question before digging in and actually finding the answer. Here’s what I discovered from research and experience:
It helps the environment by reducing how much waste you send to landfills. It’s estimated that somewhere between ¼ and ½ of all household waste is organic in nature. Not all of that can be composted (see lists below), but most can. When you reduce your own waste, you decrease the volume of trash you send to landfills. This does two things: 1) slows down how fast landfills reach capacity, and 2) reduces the harmful methane gas that landfills spew into the air (which happens when waste is compacted and has no oxygen, changing its byproduct from CO2 to harmful methane).
It creates healthy soil and fertilizer. There are a ton of very sciencey horticultural benefits to composting. In short: composting can amend your gardening and planting soil to create a healthy growing environment, especially in places that don’t naturally have great soil (like here in the Denver area). Soil and fertilizer are not cheap; take advantage of your own trash!
It’s surprisingly fun! Observing the process of the healthy destruction of your own food waste is like a real-life episode of Magic School Bus. It gives you a bit of wonder at the life cycle of nature — “unto dust shalt thou return” and whatnot. Plus the kids think it’s kinda fun, and it instills in them some idea about doing right by Planet Earth.
Types of Composting
Aerobic Backyard Composting. This is what I’m showing you in this article. With either a large bin or an aerated pile in some other structure, you create a backyard compost pile that requires some maintenance and has some limits on what you can toss in. It’s aerobic because it’s using oxygen to maintain a healthy, non-smelly pile that creates a nutrient-rich product at the end.
Vermicomposting. This type of composting utilizes worms in the process, and can be done either indoors or outdoors in an even more contained environment. Requires some maintenance and volume is generally less than what you’ll get from a standard pile in the backyard, but worms will naturally improve your soil to a higher degree and also provide some additional aeration through their eating and tunnel-digging.
Home Pickup. Composting services that come to your home once or twice a month and pick up the contents of a large bin — just like your trash or recycling bin — are becoming more and more common. They haul away your organic waste and scraps, compost it en masse, then generally sell back the soil and fertilizer either to garden centers or the public directly. It does cost money — $30/month seems pretty common — but there are generally no restrictions on meat and dairy, which allows you to recycle even more of your waste.
How to Compost Using a Backyard Bin
If you choose to go the aerobic composting route, you could literally get started by simply creating a pile of waste somewhere in your backyard.
However, containing your composting within a bin is the easiest way to start into it for a few reasons:
First, it’s a cleaner, tidier look than making a big pile of dirt and kitchen scraps in some corner of your yard. Depending on the neighborhood, an open compost pile may not even be allowable. While you can make some sort of larger protective covering for an open pile, it takes a bit more work and commitment. Start small and tidy to see if it’s for you. While many folks then go larger at some point, certainly not all do.
Second, a covered bin keeps the smell at bay. While pro composters all claim that a healthy pile should smell more fresh than rancid, the reality is that rotting food scraps still smell unpleasant, even when doing what nature intended them to do. If you have a large property and your neighbors aren’t real close by, by all means keep an open pile if you don’t mind. But in many communities, the lid provides some smell protection to both you and your neighbors.
Third, the bin keeps larger critters out of your compost pile. You need some “scavengers”; bugs and bacteria are essential to breaking down food scraps and other waste material. But the bigger creatures — squirrels, raccoons, etc. — will only be a nuisance. Again, if you go with a bigger composting system, there are other ways to avoid that, but for starter purposes, the covered bin is your best bet.
Making the Compost Bin
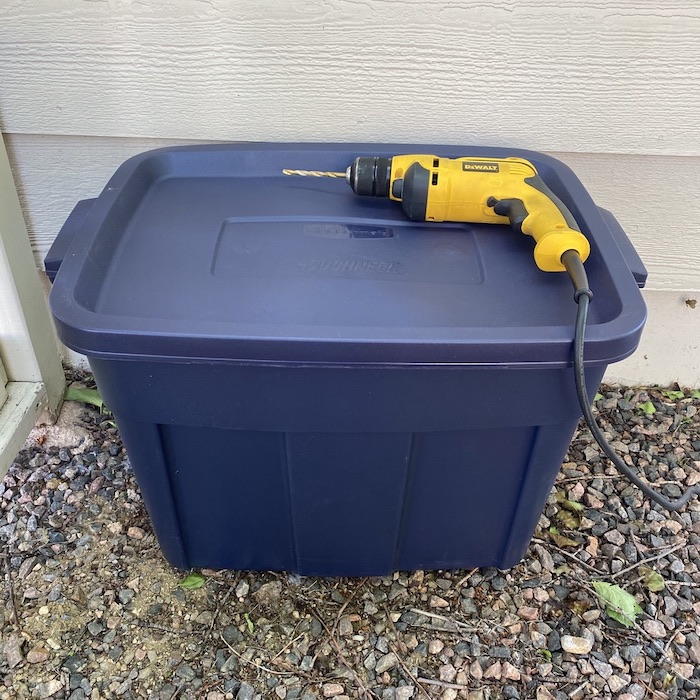
All you need to create your compost bin is a large plastic bin with lid, a drill, and some starter material.
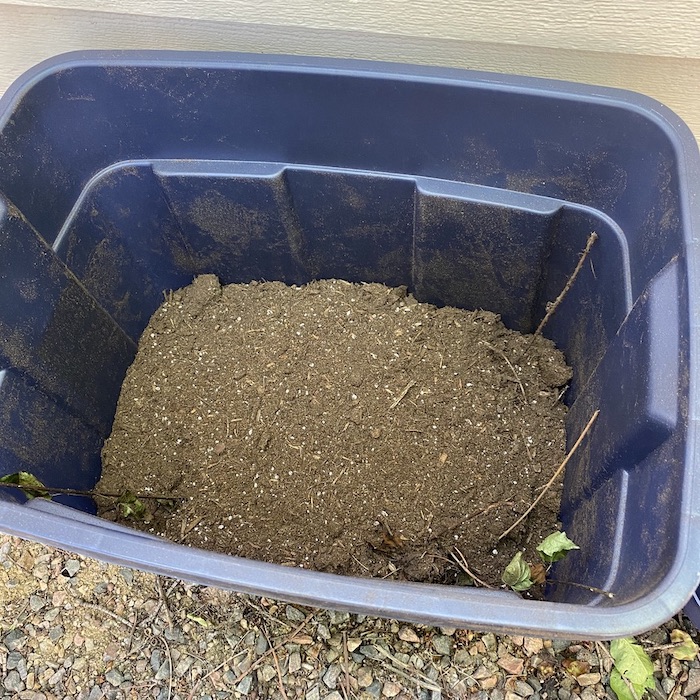
Pick a bin that’s in a dark or neutral color, as to not stand out too much in your yard. The bigger the better; mine is about 1.5’ x 2’, and about 2’ deep.
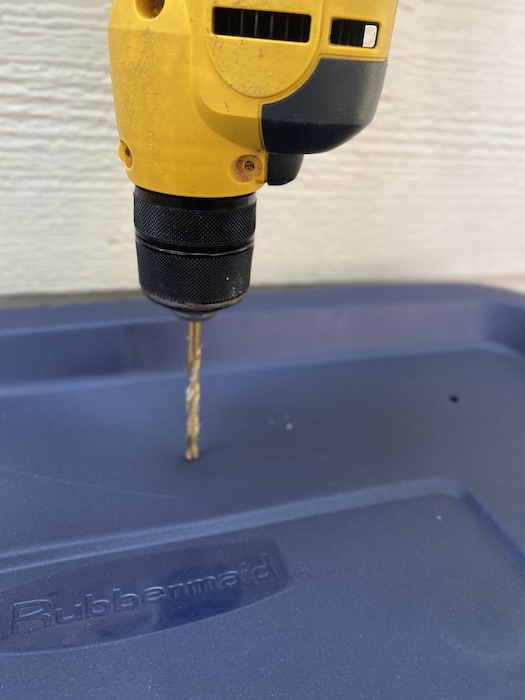
Once you’ve got your bin, use a drill (or a knife) to create 10-15 holes in the bottom and in the lid; this will allow for the drainage and air flow that are essential in maintaining a healthy compost pile.
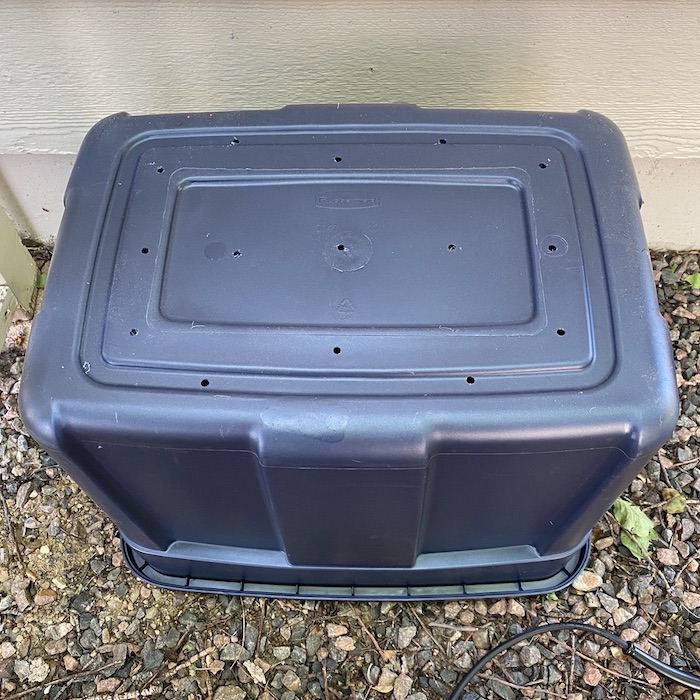
That’s pretty much it. Next you’ll fill your aerated bin with starter material, the contents of which I’ll explain next.
Starting Your Compost Pile
Getting your actual compost started isn’t quite as easy as just tossing in your kitchen scraps, but it’s not far off. A healthy compost pile has the proper mix of what’s called “brown materials” and “green materials.” These can be confusing terms, as the color of the items isn’t really what it’s about. Green vs. brown is more about fresh vs. dried, or nitrogen-rich vs. carbon-rich.
Green matter, for the most part, consists of food scraps, fresh yard clippings, soil (which is considered “green” despite its color), etc. — these things are high in nitrogen. Brown matter is anything dried and devoid of those nutrients — sticks, dry leaves and yard clippings, paper materials, ashes even.
What green and brown materials do is balance each other out so that you get a pile that breaks down into healthy soil in a timely manner. A pile that consists of only brown materials — dried yard clippings, sticks, paper, etc. — takes a long time to break down. Without that organic material, it just sits there. A pile of only green organic material, on the other hand, could easily turn into a stinking pile of moldy, slimy, and unusable mush. The greens need the balance of the drier material to get to that sweet spot of breaking down into usable soil in 2-6 weeks. (Note that green material, especially yard waste, dries and eventually breaks down to become brown material before breaking down further.)
To start your compost bin, go with 2 or 3 parts brown material for 1 part green material.
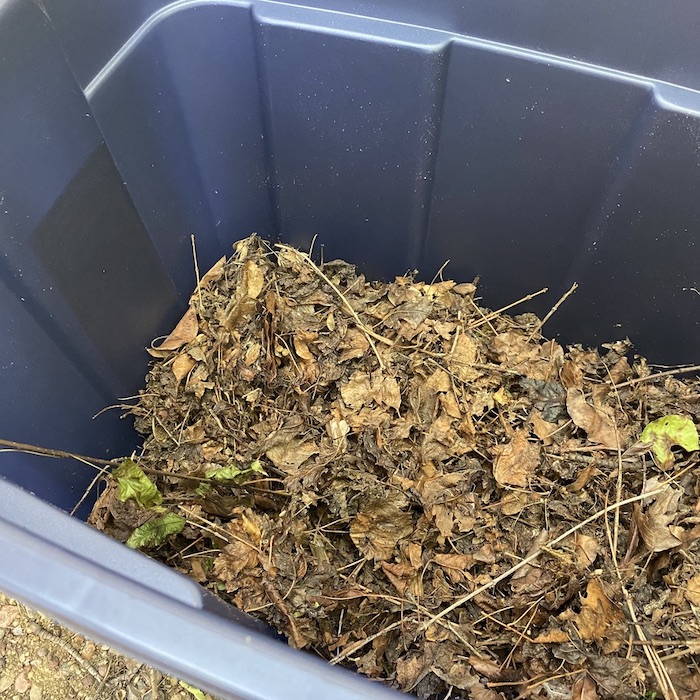
In my bin, I put about 6 inches of dried leaves and small twigs at the bottom.
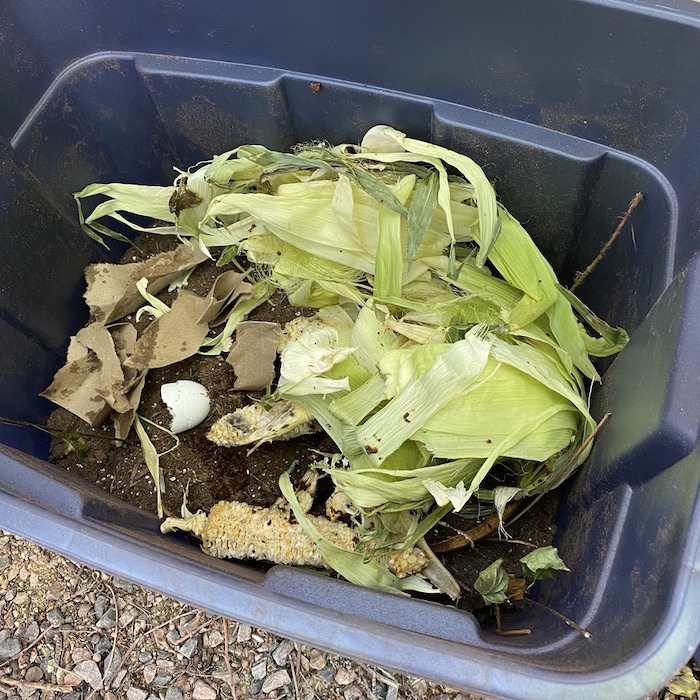
Then I added a few inches of nitrogen-rich soil and a small pile of kitchen scraps (including corn cobs, which are technically “brown” material).
You can buy compost “starter” that provides some healthy microbes to get things kickstarted in your pile.
What You Can/Can’t Put Into Your Compost Pile
When it comes to what you can toss into your composting bin, it’s largely a matter of what’s organic, biodegradable, and natural; the waste that readily breaks down, and that you wouldn’t mind converting into soil, to grow food, that you’d feel good about eating.
Rather than keeping an open pile of scraps on your kitchen counter, use a contained, smell-dampening vessel which you can bring out to the pile once every day or two.
What to Put In
- vegetable scraps (hard peels/skins take longer to decompose)
- fruit scraps and cores (ditto)
- grain products
- coffee grounds
- egg shells
- tea bags/leaves (staples won’t break down, however)
- paper products (napkins; paper towels; cut/shredded black and white newspaper; cut-up, non-waxed, brown cardboard)
- cut/pulled weeds
- garden trimmings
- grass clippings
- small twigs/sticks
- sawdust and wood chips
- ash (but not from charcoal, unless it’s natural)
Much of our compost pile additions come from kitchen scraps. We go through a ton of produce (which makes for a lot of scraps) and have young kids who routinely don’t finish meals.
The other large category of what we add is stuff from around the yard — weeds, grass, leaves, sticks, etc. Not all of our landscaping clippings end up in the compost, as there just isn’t enough room. The size of your own pile will determine how much of that stuff you can toss in.
What to Leave Out
- meat, seafood, bones (okay in some cases, but can quickly turn rancid-smelling and also attract large critters that you don’t want prowling around your yard)
- dairy products — milk, cream, cheese, etc. (the concern here is that these animal products will attract larger vermin — you can compost dairy, but it shouldn’t be a large percentage of your pile and it should be added with brown material each time to help mitigate smell; with a small-ish starter pile, it may be better to just avoid this category of kitchen waste)
- pet droppings/litter
- garden/grass clippings that have been chemically treated
- glossy or waxed paper/cardboard
- plastic, metal, glass — any non-organic material that won’t break down
Maintaining Your Compost Pile
Though it doesn’t need to turn into a time-consuming task, there are a few things to do and keep an eye on with your compost pile to make sure it’s doing its job — especially if you want usable soil/fertilizer from it. Here are the two primary maintenance jobs for keeping the pile going:
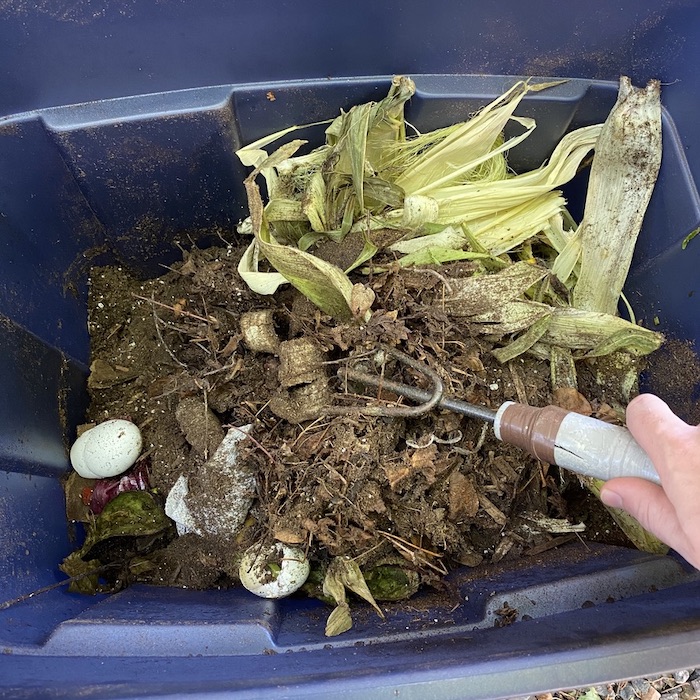
Turning. It’s easy for your bin to become a compost lasagna of layers of different materials stacked on top of each other — leaves, kitchen scraps, grass clippings, more kitchen scraps, etc. All that stuff needs to work together to decompose efficiently though. Which is why, once a week or so (erring on the side of more rather than less), you’ll want to give your compost a hearty stir, or “turn.” Any forked garden tool works great; the main thing to keep in mind is that you want to aerate and mix rather than compress all the materials.
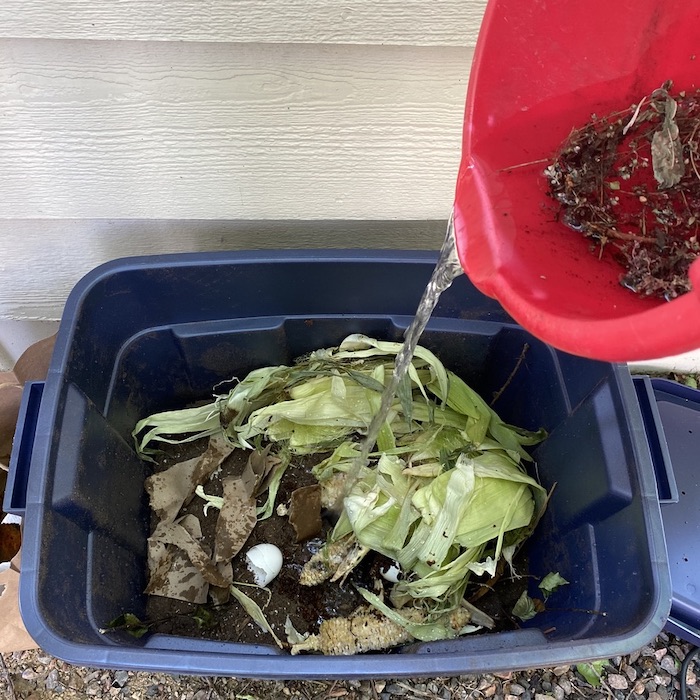
Wetting. As funny as it first seemed to me, many compost piles need watering! Those microbes need water to survive and do their job, and depending on your environment (in the Denver area, we’re on the edge of semi-arid and desert) and what’s going into the bin, you may need to adjust the moisture level by adjusting the ratio of materials and/or by adding water directly.
If the pile seems crispy and rather dry when you turn it, give it a small bucket’s worth of water (½-1 gallon), and some more green materials. If it’s too moist (the pile is getting slimy and really smelly), add some brown materials, and if your bin is being exposed to too much rain, consider placing it under cover.
You don’t need to worry about exact ratios here; rather, let yourself rely on what you’re seeing and smelling. Make adjustments and then wait a few days to see what happens. You’re ultimately aiming for your compost to have the consistency of moist, rich soil.
I may be making it seem sort of finicky, but it’s really not. With our household compost, the pile did just fine with my starter material and our regular additions of kitchen scraps and some weeds/leaves/grass clippings. I’ve watered it once in a few weeks, though it’ll probably need it more as summer goes on and the rain stops falling.
That’s all it takes! With a small amount of maintenance, you can do your part for both your own garden and the environment. Get out there and get composting!