Editor’s note: This is a guest post from Paul Moore.
So, you’ve finished building a woodworking project, but is it really finished? It’s not, unless you’ve applied a wood finish. Well, that’s if you don’t want it left in raw wood.
Wood finishes can be intimidating and daunting, but they don’t have to be. It’s really easy to put down a good finish, if you know what you’re working with and how to apply it.
Ready to learn how to make your project look great? Read on, we’ve got some great info for you.
Why Apply a Finish?
There are really two reasons to apply a finish to your woodworking project: protection and appearance.
Protection. Wood is a porous material, capable of soaking in anything that gets on it, such as oils, dirt, and chemicals. A finish can seal the wood and keep “gunk” out of the grain. You’ve put a lot of time into your projects, so you’ll want to keep them looking good for years.
Appearance. All wood has a grain, some more vibrant than others. Finishes like stain will highlight and add some color to the grain, livening it up. (Stain won’t, however, protect the wood; you’ll need to apply a clear coat afterwards.) Even clear coats add a sheen and warmth to wood that isn’t found when left raw.
Types of Finish
The level of protection and effect on appearance offered by a finish varies by the type you use, and there are many varieties to choose from.
Some are used alone and some in conjunction with others. You don’t have to use all of them — just those that fit your needs and desires. There isn’t a “right” or “wrong” choice for your project; every woodworker comes to find a favorite finish after experimenting and figuring out their preferred look, application method, and desired effect for a piece.
The information below will get you started deciding how to best finish your projects.
Paint
Paint is a basic finish that covers and protects the material that it’s applied to. Paint isn’t usually used over natural wood, but it can be. If the paint coverage is thin, or semi-transparent, then the wood grain can show through, with dramatic effect.
Paint is commonly used on woodworking projects made of MDF or plywood, as well as woodworking projects that require color.
Stain
Stain is used over natural woods or plywood so that the grain is visible and accentuated, while still adding some color — be it red, dark brown, light brown, etc. It can add some pop and warmth to a wood that might look a little boring otherwise.
Clear Coat
Wax. Wax is a simple finish to apply, as it’s simply rubbed on and buffed to a sheen. It works best on fine-grained woods that have been sanded to a smooth surface. It’s not best on rough-grained woods, such as oak or ash.
Wax is not only applied to bare woods, but also on top of other finishes, such as shellac, to protect it from moisture.
Oils. Oils are an easy way to finish woodworking projects as they are simply applied heavily then wiped down to a dull sheen. They are quick to apply and can be re-coated over the years. Oils do not provide a shiny surface, though, and may feel sticky for some time.
There are a few options if you want to finish your projects with oil:
- Linseed oil. Made from flax seeds.
- Tung oil. Made from the kernels of tung tree seeds. It protects the wood without providing much shine.
- Mineral oil. Can be purchased in food safe grades so that it can be used for toys, cutting boards, wooden kitchen utensils, and more.
Shellac. Shellac is an age-old finish that’s not used much these days. It is a resin that is dissolved in alcohol and then brushed on to projects. It’s not known for moisture protection, so it’s fallen out of favor over the years. Not the best choice for table tops, but can be used to add a natural amber-like warmth to your projects.
Varnish. Varnish is similar to shellac, and also lacquer (see below). Varnish is usually wiped or sprayed on. More durable than shellac, varnish will stand up to moisture; one type is even used in wooden boat applications.
Lacquer. Unlike oils, lacquer dries to a hard and durable finish that does not need re-coating. Lacquers dry much quicker than oils, so finishing can be done more rapidly. Since it dries hard, projects with lacquer finish are prone to cracking and chipping with age.
Polyurethane. Basically a liquid plastic that provides a durable finish when it cures. It’s available in gloss to matte finishes and is applied by wiping, brushing, or spraying. A solvent is necessary to clean brushes or spray guns, so throw-away cloths or even paper towels are often used. Polyurethane does not dry quickly, which makes it prone to collecting dust as it sets up. Keep this in mind when you choose where to finish your projects.
Polyacrylic. A water-based polyurethane which dries quickly to a tough, durable finish. It cleans up with soap and water and is usually applied by brushing or spraying. Polyacrylic is very easy to use and clean up, so it’s gaining great favor with woodworkers.
Methods to Apply Finish
There are several ways to apply finishes. Some are simple and others a bit more involved. Let’s take a brief look at each method.
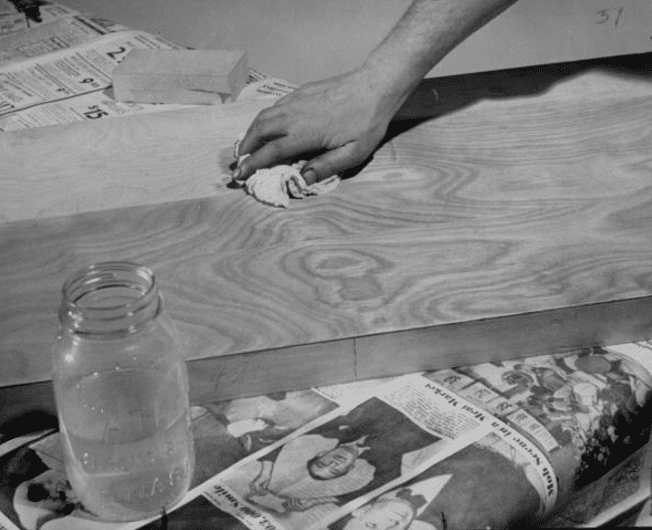
Wipe On
Many finishes can be wiped on with a rag, such as oils, varnish, and shellac. Excess is wiped off with a dry rag. This is a quick way to finish projects. When done, toss the rags away. Easy clean up, huh?
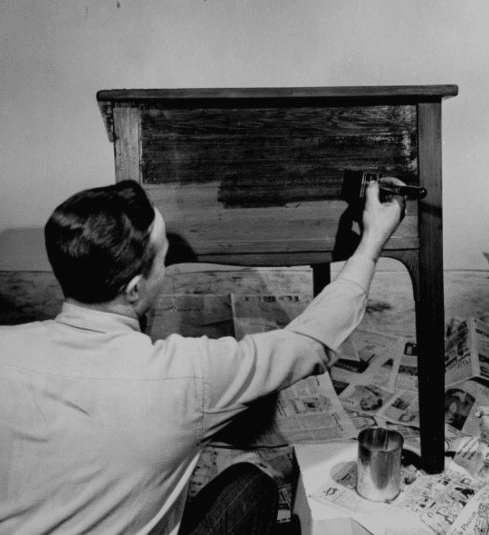
Brush On
Brushing a finish is a bit more complex than wiping. It requires cleaning, which can be difficult, and brushing may also leave marks in the finish, making it doubly important to purchase quality brushes. Use a brush for stains and obviously paints. You can also use a brush for clear coats if you want a thicker layer of protection.
Spray On
Paints, stains, and clear coats are available in spray cans these days, which make it easy to lay down a nice finish without much fuss and cost. Clean up is also quick and easy. They are about as convenient as it gets. You obviously won’t have the same precision though, and coats may not be even if you aren’t careful.
Applying Your Finish Without Runs or Drips
Runs and drips are a frustrating side effect of adding too much finish to your project and can really spoil the aesthetics of the wood. There’s plenty of material about removing them, but the best method is preventing them from occurring in the first place!
Note that finishes put off fumes, so protect your lungs when you use them. A respirator or mask will keep your lungs clear for years to come.
Use a Glass Jar and Be Gentle
The first step is to pour the finish into a glass container; a mason jar is ideal for this purpose. It is far too easy to overload your brush when taking the finish directly from its container. In contrast, a jar with a lipped edge is perfect because you can drain the brush or rag before applying the finish. When applying, remember that you’re laying it on the surface as opposed to forcing it.
Stay Away From the Edge
A lot of people make the mistake of beginning from the edge; don’t do it! This significantly increases the chances of drips occurring. Remember, your brush/rag leaves a deposit the second it touches the surface of the wood. Begin away from the edge and move towards it.
Use careful and delicate strokes, going up and down in a smooth motion. Always ensure the largest amount of finish is located towards the center of the wood, as you can then brush/wipe the excess towards the edges.
Don’t Go Back Over Your Work
If you have perfectionist tendencies, this next bit of advice may be hard to follow! Resist the urge to continually brush back and forth. Once you have spread the finish over the wood, leave it alone. If you go back over previously-applied areas, it becomes more difficult to achieve an evenly-applied coat.
Utilize Good Lighting
Always look to apply wood finish under reflective light, as it creates a glare on the surface which helps you see if there are runs or if you’ve missed a spot. You’ll be shocked at how much you miss if you rely on ambient light only!
There will be occasions when drips and runs will creep up on you, but if you’re careful, patient, and follow the above tips, you’ll increase your chances of applying the perfect finish to your wood.
________________
Paul Moore has had a lifelong passion for woodworking, and is the creator of woodworkboss.com, where he seeks to share his experiences and knowledge with aspiring hobbyists.