With our archives now 3,500+ articles deep, we’ve decided to republish a classic piece each Sunday to help our newer readers discover some of the best, evergreen gems from the past. This article was originally published in June 2020.
This guest article was written by Tony Galloway.
There was a time when nearly every man knew how to fiddle around and fix things on his car. Today, with automobiles having become more complex and technologized, the idea of working on your vehicle seems more intimidating, and most guys bring their ride into the shop whenever it has a problem or simply needs maintenance.
While major auto repairs may be something many modern folks don’t have the time, patience, and skill to tackle (though with attention to proper preparation and process such projects could be more accessible than you think), there are still plenty of basic maintenance jobs that any man, regardless of experience or inherent handiness, can do himself.
DIY auto maintenance has much to recommend it: Each job is an opportunity to develop new skills, as well as a deeper understanding of how your car works; things that once mystified you become simple. Along with this increase in capability and competence, comes a confidence in knowing you can take care of things that go wrong, no matter the time or place. As a practical matter, handling maintenance jobs yourself can save you significant amounts of money over outsourcing the work to an auto shop. Plus, while it may not seem like it, DIY maintenance can even be more convenient too; when you factor in the drive to the shop, the time you’ll wait while your car is being serviced, and the drive home, you can oftentimes have done the job yourself in as much or less time — and again, for cheaper.
If you’d like to start working on your car yourself, below you’ll find 11 jobs that even a real automotive neophyte can tackle. Not only do they not require any experience, they don’t require anything beyond basic hand tools, and in some cases, any tools at all.
1. Engine Air Filter Replacement
- Maintenance interval: Once a year or every 15,000 to 20,000 miles
- Shop cost: $30-$60
- DIY cost: $5-$15
From the 1950s right up through the late 80s, a typical automotive tune-up consisted of changing the spark plugs, spark plug wires, and the air filter. There have been major advances in spark plug and ignition technology over the last 20 years that, along with computer-controlled fuel injection, have eliminated the need for an “annual tune-up” where those components are concerned. That just leaves the humble air filter, a technology which has remained essentially unchanged for half a century or more. It’s just a paper, cardboard, or foam insert that keeps all the pollen, dirt, and bugs from getting sucked into your engine. Over time it gets dirty and clogged up with debris and the engine has to pull air through all that muck. The end result is a loss of power and decreased fuel economy.
It’s almost as fast and easy to change the air filter in your car as it is to change the filter in a coffeemaker. While the exact process will vary by make and model, there’s usually a how-to illustration in the owner’s manual, or online. On most modern vehicles the filter is housed in a plastic box under the hood that is easily accessible and usually held closed by a clip or latch. It is just too easy a job to justify paying a mechanic $30+ to do it for you.
2. Cabin Air Filter Replacement
- Maintenance interval: Once a year or every 15,000 to 20,000 miles
- Shop cost: $30-$50
- DIY cost: $7-$18
The cabin filter is a relatively new development in automobiles, having become standard equipment shortly after the turn of the century. It is exactly what it sounds like: a filter that cleans the air entering your vehicle cabin through the vents. The concept is the same as the filters you change monthly in your home heating and air system. It keeps leaves, bugs, and debris from getting inside the vehicle’s vent system which might cause damage, strange rattles, or bad smells.
This is a job as easy as the engine air filter. The location of this filter will vary depending on the type of vehicle. It’s often accessed behind a plastic door under the hood, just below the passenger side windshield wiper, or behind the glovebox. You’ll have to do a little research to figure out where it is located on your vehicle, but DIY-ing this job will cost a small fraction of what you’d pay at the dealership. And, as an added bonus, most auto parts stores stock scented filters that can keep your car smelling fresh.
3. Windshield Wiper Blades
- Maintenance interval: Every 6-12 months, or when they visibly don’t clear water as well
- Shop cost: $40-$60 (auto parts stores will do this install as a free courtesy if you buy from their store)
- DIY cost: $10-$30 (per blade)
Having functional wipers is critical to driving safely in inclement weather. Over time the rubber blades become worn or dried out from sun exposure. The result is a smear of water across your field of vision instead of the clean slate swipe you would expect. If you buy your blades at a major auto parts chain they will usually install the new wipers for you as a courtesy. There is something to be said for learning how to do it yourself, however. This is another tool-free repair, as the blades usually snap into place using a simple plastic clip. You can do this in less than three minutes, so accept the offer of free installment if you like, but there’s never a need to pay someone to do the job for you.
4. Bulb Replacement
- Maintenance interval: No set interval — replace when the bulb fails, which varies significantly by vehicle and usage
- Shop cost: $20-$30 for a standard bulb; $50-$150 for headlights
- DIY cost: Quite variable, from $10-$100
Although headlights can be a little fiddly on some newer model vehicles, they, along with other bulbs throughout the car, are generally replaceable without any special tools. I once replaced a headlight on a co-worker’s Jeep Grand Cherokee in the parking lot at my office. The dealership had quoted her $500, citing the difficult-to-access location of the bulb and the hours of labor disassembly and reassembly would take. That particular bulb was expensive, and it did take me almost 45 minutes to get the job done, but she saved more than $400 by going the DIY route.
Most bulbs are super easy to replace, but there are a couple of things to keep in mind. Most all types of bulbs get hot when they are switched on. If you touch the glass part with your fingers you will contaminate the bulb with oils from your skin. The oils will burn on the surface of the glass and lead to premature failure. Nitrile gloves make it much easier to install bulbs without contamination. Another tip is to use a thin coat of dielectric grease (on the socket, not the bulb itself) to keep moisture away, which will prevent corrosion.
5. Fluid Check
- Maintenance interval: Check and top off levels monthly
- Shop cost: $20-$30
- DIY cost: No monthly cost, just buying the fluids every once in a while as needed
Monitoring fluid levels used to be a common practice among almost all automobile owners, but as the systems that seal against fluid leaks have improved over the years, it has become a lot less common. Part of this owes to the fact that most modern vehicles have sensors that will alert you to a low fluid situation.
Nonetheless, you shouldn’t trust your car exclusively to this sensor system. With so much about a vehicle’s well-being and longevity dependent on various fluids, it is worth learning how to perform a periodic visual inspection; a manual check may help you catch small problems before they become big, expensive ones.
The most important fluid to check is the engine oil, both for the proper fill level and to make sure it’s not burned, discolored, or contaminated. Right behind it on the priority list is the engine coolant, usually easily checked by looking at the fluid levels marked on the reservoir. Other things to check include brake fluid, power steering fluid, and windshield washer fluid. On some cars you can also check the transmission fluid with a dipstick similar to the engine oil.
6. Serpentine Belt
- Maintenance interval: Every 40,000 to 50,000 miles, or when it gets squeaky and/or cracked
- Shop cost: $80-$140
- DIY cost: $12-$40
A serpentine belt is a rubber belt that drives all of your accessories, such as the alternator, power steering pump, and the air conditioning compressor. As they age in the hot confines of the engine bay, they stretch, dry out, crack, and eventually break. It is an easy thing to keep an eye on; because it runs back and forth among so many different pulleys, you can get a good glimpse of both sides of the belt. It’s also an easy matter to test the belt’s tightness with your finger.
If there are visible cracks in the material of the belt, it feels less than taut, or it squeals when the engine is running, it may be time for a replacement. You will need some basic hand tools to attempt this, but all that is really required is a socket of the appropriate size and a long-handled ratchet, or a short ratchet with a piece of pipe over the handle for a little added leverage. Before you start, make sure there is a sticker somewhere near the belt that shows the proper routing of the belt among the many different pulleys. If there isn’t one, you can usually locate a diagram for your make and model online, or you can draw your own diagram before taking the old belt off. Sometimes the box the new belt comes in will have a diagram for the different models that belt fits. Making sure you have that information is the toughest part. After that it’s just a matter of using a ratchet or long wrench to take tension off the belt, removing, and replacing.
7. Battery Replacement
- Maintenance interval: Most car batteries have a service life expectancy of 3-5 years, and it is recommended you replace them within that interval, but if you feel adventurous you may get some extra time; I have a Jeep Wrangler with an 8-year-old battery still going strong
- Shop cost: $170-$250
- DIY cost: $90-$120
Batteries are one of the most failure-prone components on a vehicle. The more luxurious your car, the bigger your battery will be and the harder it will be to get enough amperage to jumpstart it when the battery falters. Knowing how to install a new one yourself will not only save you some cash but might also be the difference between being stranded waiting for a tow or getting yourself back on the road.
A simple ratchet set with a couple of extension bars is all you’ll need to do the job. It’s just a matter of loosening and removing the positive and negative battery cables and the clamp that holds the battery in place. After that it’s as simple as removing the old defective battery and securing the new one in place. It is usually best to disconnect the black cable first and replace it last. Once you’ve done it a couple of times it’s almost as easy as changing the batteries in your television remote, and you’ll wonder why you ever paid a mechanic to do something so simple.
8. Oil Change
- Maintenance interval: Generally, every 3,000 to 5,000 miles; refer to your vehicle’s owner’s manual
- Shop cost: $45-$70
- DIY cost: $25-$40
Oil is the lifeblood of any combustion engine. We talked earlier about the importance of keeping a check on engine fluids, but it is also important to remember that over time even the best synthetic oil begins to break down and becomes dirty. So you may have enough oil in your car, but it might not be doing its job very well anymore. That’s why it is imperative to change the oil at the regularly recommended intervals. Some of the oil change chains will change your oil for as little as $30, but if your vehicle uses synthetic oil, or takes more than four quarts, that price will quickly balloon to $50 or more, and you can count on about double that at a dealership. Both places will also invariably try to talk you into letting them change your air filter, cabin filter, and possibly windshield wipers, all things you can and should do yourself.
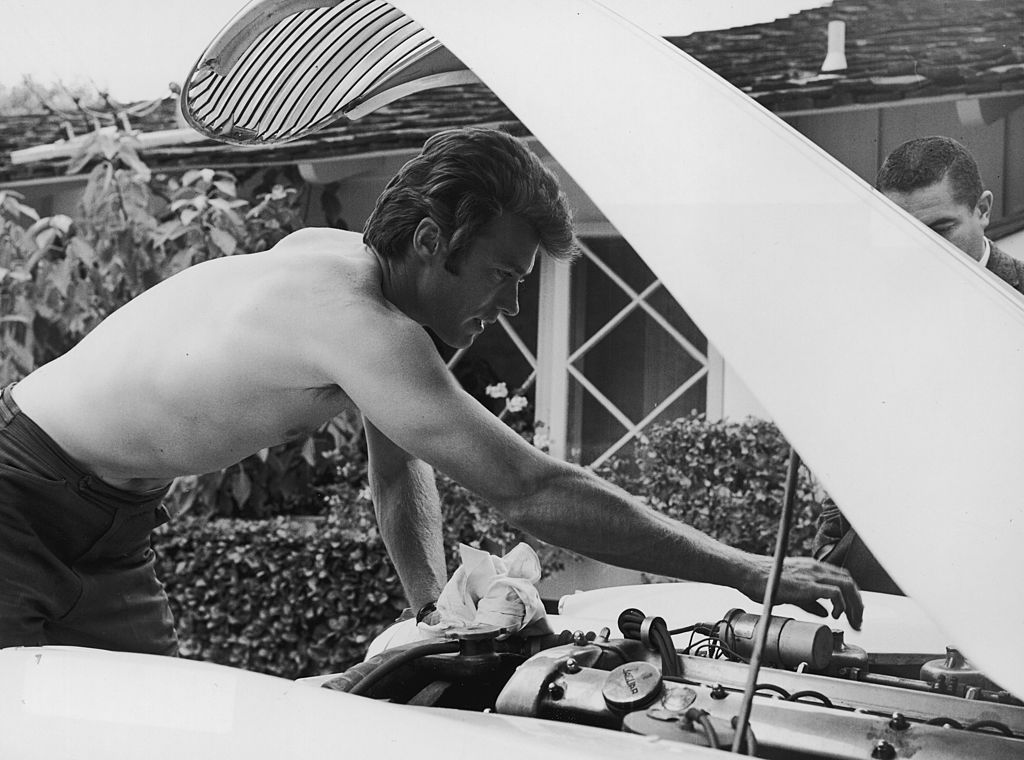
Anybody can do this job themselves if they aren’t afraid of getting a little bit dirty. All you’ll need is a jack with jack stands or a set of car ramps, a basic ratchet set, and a container to catch the old oil for disposal. If you drive a large SUV or truck, you may not even need a jack or set of ramps. For everybody else, you’ll need them to get enough room under the car to work. Read up on jack safety online, and never work under a vehicle supported by a jack alone. There are a lot of great resources out there that can help you follow best practices when working with hydraulic or mechanical jacks. Getting under the car is really the hardest part of this job. After that, if you can remove a drain plug bolt with a wrench or ratchet and position a drain pan to catch the old oil, you’re mostly done.
Because this is one of the most frequently performed jobs in automotive maintenance, the DIY-er stands to save a lot of money over the life of a vehicle. Consider a typical oil change interval is 5,000 miles and most modern vehicles are capable of going a quarter of a million miles with proper maintenance and upkeep, and figuring that most people will save $20 to $40 each time they change their own oil, the total savings can easily run into four figures over the course of several years.
9. Brake Pads
- Maintenance interval: Every 50,000 miles, or when the brakes start squeaking/grinding
- Shop cost: $120-$250 per axle
- DIY cost: $30-$60 per axle
Full disclosure, I shied away from doing brake pads for quite a while after I was doing everything else on this list. It’s a little more involved than the other jobs and there is some worry of making a critical mistake — the stakes seem a bit higher when you think about how essential brakes are to your safety. It really is dead simple, though, and once you get in there and see that, you’ll trust yourself to do the job a whole lot more carefully than the mechanic who is rushing through your repair to get to the next twenty waiting behind it.
You can inspect brake pads with the wheel on, but you can get a much better look at things with the wheel off. Jacking your car up to remove it is actually easier than when doing the oil change; you only need to support one corner of the car at a time and you don’t have to place yourself in harm’s way by being under the car while working. Speaking of wheel removal, you’ll need a lug wrench; most cars come with one. You can usually find it near the spare tire in the trunk or mounted someplace under the hood. If not, it is an inexpensive purchase to get a four-way tire iron and you might need it if you ever have a flat on the side of the road.
There are several great YouTube videos that take you through this job step by step and show specifically what to look for. If there isn’t one for your particular make and model, you can probably get by watching a video featuring a different car; disc brakes are pretty similar on most vehicles. One of my favorite videos for this can be found on Chris Fix’s YouTube channel. In less than fifteen minutes you can get all the information you need to tackle this by yourself.
10. Rotate Tires
- Maintenance interval: Every other oil change or every 10,000 miles
- Shop cost: $30-$40
- DIY cost: free
Once you’ve changed the oil and done the brakes, you’ll be an old pro at getting your car safely off the ground. For this job it is easiest if you can get the whole car elevated. This is pretty simple to do with two jacks, or with one jack and a couple of jack stands. You can even do it with just a single jack and nothing else, although it will require playing musical chairs with your tires. You’ll have to find out what the rotation pattern is for your particular ride. Usually the tires on the front swap sides and go to the back of the car, while the rear tires are moved straight up to the front, but it varies between front-wheel drive, rear-wheel drive, and all-wheel drive configurations. When in doubt, do a little research.
Rotating your tires every couple of oil changes will save you money in multiple ways. First, it prolongs the life of your tires and ensures they wear down evenly. Tires are expensive; a set of four can run anywhere from $400 to $1000. With such a high cost it makes sense to make them last as long as possible. In addition, this is essentially free to do yourself, costing just your time, but you’ll pay $30 or more to have a shop do it for you.
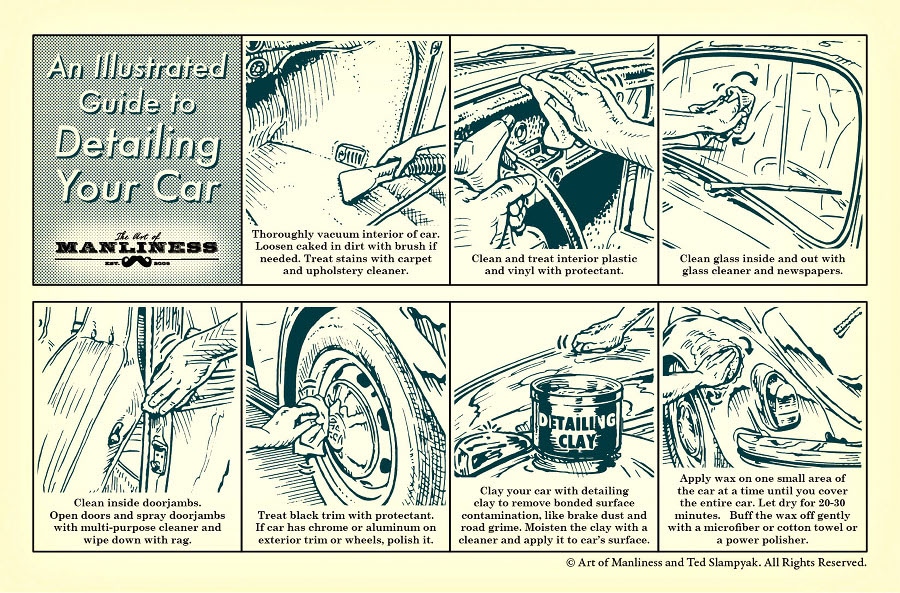
11. Detail Car Wash
- Maintenance interval: Every 6 months, or more frequently as desired
- Shop cost: $100-$200
- DIY cost: Procuring some basic cleaning tools and supplies will run less than $30 and will last you a few years even if you wash monthly
When you think about DIY car maintenance you probably don’t think about a car wash, but there are several reasons you should. Keeping the undercarriage of your car clean of salt and road debris can significantly reduce the risk of rust, especially for those who live in northern climates and drive on salted highways. It can also make it much easier to spot leaks you might otherwise overlook among all the muck. The same is true for the painted surfaces of your ride. Keeping caustic salt rinsed away will keep your paint looking great for many years. Other dangers to your paint include bird poop and tree sap, both of which can damage the shiny clear coat over your paint with their acidity. Paint is the only thing between the elements and the rust-prone metal that is your car, so taking care of that exterior will save you from expensive body and paint repairs in the future.
The engine bay is often overlooked during a car wash. There are concerns about spraying high pressure water around all those electrical connections. But with a little care it is possible to make the engine bay look brand new, no matter how dirty it has gotten. There is another great Chris Fix video about all of the steps needed to super clean a car’s engine.
Cleaning your interior is usually the last step, but it shouldn’t be rushed. This is where you spend most of your time, so it should definitely be clean and comfortable. The interior of your car takes a lot of wear and tear from passengers, especially if they are children, and from temperature extremes which range from the hot summer sun that shines through the windshield to the freezing winter ice that forms on your vehicle and turns it into a car-cicle. Eventually your leather seats will crack and so will your vinyl dash. There are many products on the market specifically designed to condition and protect these materials. Taking the time, even just twice a year to clean and protect your interior can make a world of difference in how your car looks when it is ten years old. You could spend a couple hundred dollars having your vehicle detailed, but it is so much cheaper to do it at home and you’ll do a better job.
Even if you have never worked on your car before, you can handle any of the above jobs. There are so many things in life we don’t try because we are afraid of messing them up. Automotive maintenance doesn’t have to be one of them. If you get stuck, you can always fall back on paying a mechanic. While a dealership likely won’t install your home-bought parts, many independent shops will, and will just charge for labor. And while you always risk doing damage with your DIY efforts, these jobs are pretty low-risk. So, start with these simple jobs, save some money, and see where it leads.
_____________________________
Tony Galloway likes reading, writing, and all things DIY. If he’s not at work, or spending time with his wife and four kids, you can usually find him in his basement tinkering with something.