The number of ways a person can tie things together is more or less limitless, from the thousands and thousands of legitimate knots and roping techniques used by sailors, hunters, and savvy outdoorsmen, to the countless impromptu tangles and knot nests crafted by those of us too impatient to learn anything more than a never-ending square knot.
But in that infinite fray of tying techniques, lashing is one of the most practical and easy to learn. At its basic, lashing is a method used to secure two things (often poles or pole-like items) together. A knowledge of lashing requires an understanding of two terms: wrapping and frapping. A wrap and a frap are two different techniques used when lashing. To wrap is to wind your binding material, usually rope, around your poles. To frap is to wind your binding material around itself, usually in-between your poles. Wrapping brings the poles together, while frapping generally tightens the lashing and helps prevent the poles from rotating in place. Before you start practicing your lashing skills, brush up on how to tie a clove hitch and a timber hitch, as they come in handy when beginning or ending your lashing.
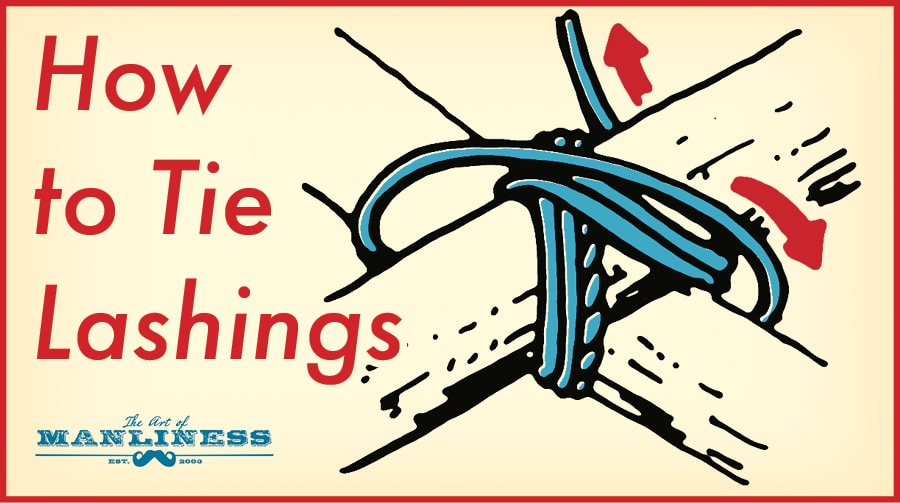
Below you’ll find illustrated instructions on how to tie the 3 most useful lashings: square, diagonal, and shear.
Square Lashing
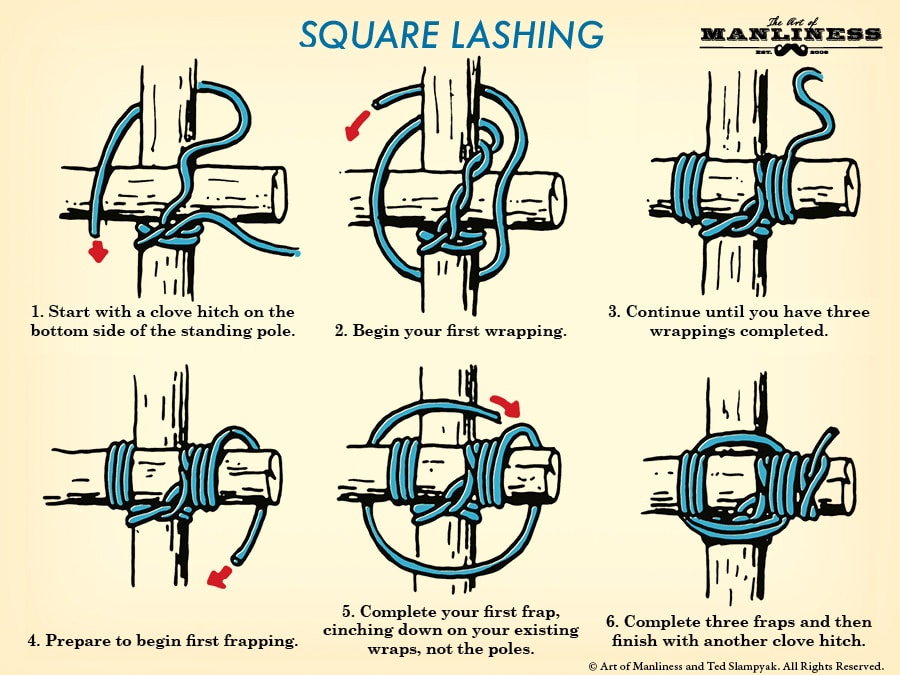
A square lashing is used to bind two things (often logs/poles) together at a right angle. It is important to note that it is used for items that will be used at a right angle to the ground as well. If poles are intended to be used diagonal to the ground, or diagonal to their load, then a diagonal lashing should be used.
- Start with a clove hitch on the bottom side of the standing pole.
- Begin your first wrapping.
- Continue until you have three wrappings completed.
- Prepare to begin first frapping
- Complete your first frap, cinching down on your existing wraps, not the poles.
- Complete three fraps and then finish with another clove hitch
Diagonal Lashing
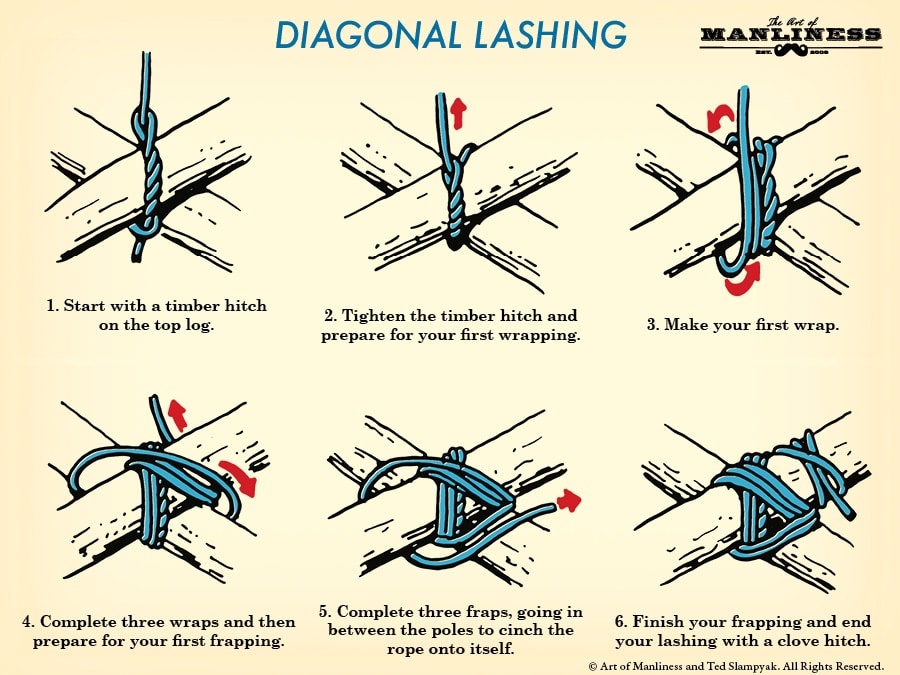
A diagonal lashing is used to bind two poles together diagonally and prevent racking, which is the term given when poles twist or rotate within their lashing. Like a square lashing, the poles do come together at right angles, but in a diagonal lashing the poles themselves are diagonal to the ground or the load which they are supporting, like the legs of a picnic table.
- Start with a timber hitch on the top log.
- Tighten the timber hitch and prepare for your first wrapping.
- Make your first wrap.
- Complete three wraps and then prepare for your first frapping.
- Complete three fraps, going in between the poles to cinch the rope onto itself.
- Finish your frapping and end your lashing with a clove hitch.
Shear Lashing
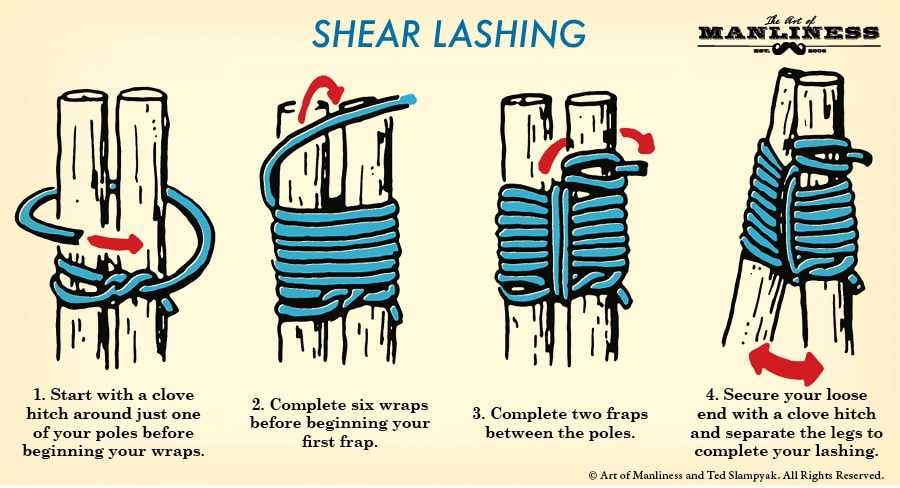
A shear lashing is used when you need to bind two poles at their tops so that they can ultimately support weight, like the legs of a sawhorse or the basic supports of an A-frame structure. When starting a shear lashing, begin with your poles parallel and adjacent to each other. After the lashing is completed, you can separate the legs to create the basic A-frame shape.
- Start with a clove hitch around just one of your poles before beginning your wraps.
- Complete six wraps before beginning your first frap.
- Complete two fraps between the poles.
- Secure your loose end with a clove hitch and separate the legs to complete your lashing.
Like this illustrated guide? Then you’re going to love our book The Illustrated Art of Manliness! Pick up a copy on Amazon.