One of my fondest memories growing up was going to my grandpa’s ranch in Bosque Farms, New Mexico and riding horses. The “grandkids’ horse” was named Sugar. I loved that horse. Because I was just knee high to a grasshopper, Grandpa usually did all the saddling himself. And because Grandpa sold the old ranch while I was still young, I never got to saddle her myself.
Seventeen years later I decided it was time I learn this skill I had missed out on as a lad. Sure, if you’re a city slicker or suburbanite, it’s not exactly a basic life skill, but it’s just one of those things that’s cool to know (like how to throw a knife), and can help you avoid being called “punkin lily,” “young squirt,” “googoo,” “Jane Dandy,” or “dude” the next time you go on a cattle drive with Billy Crystal (those were just some of the names veteran Dakota cowboys called Theodore Roosevelt before he learned the ropes of ranching).
To learn how to saddle up, I visited our favorite cigar-chomping, tomahawk-throwing cowboy, Tom Warren, at Meadow Lake Ranch in Sand Springs, Oklahoma. Here’s what Tom showed me.
Let’s saddle up!
How to Bridle a Horse
Before we actually put the saddle on the horse, we need to put on the bridle. The bridle is the piece of horsetack that allows you to lead and direct the horse. It consists of some leather straps that go around the horse’s muzzle and head and a bit that goes into the horse’s mouth. The reins attach to the bit and you use them to “steer” the horse.
Here’s how you bridle a horse:

Because I was with folks who had never been around horses before, Tom left the horse harness on the horse and tied him to a hitching post for safety purposes. You can remove the harness before bridling a horse if you want. Before Tom starts putting the bridle on the horse, he pets him softly between the eyes to calm him down and let him know that he’s in safe hands. Stroking the horse on its muzzle also causes him to lower his head, making bridling easier.

It’s time to put the bit in the mouth. Before we show Tom putting the bit in the horse’s mouth, we need to know where the bit needs to be placed. Between the horse’s incisors (or canines, if present) and molars, there’s a space where there are no teeth called the interdental space, or “bars.” The bit will be placed in the interdental space as shown above.

Hold the bridle over the horse’s muzzle with your right hand and hold the bit in your left. Place the bit at the horse’s lips. To encourage the horse to open its mouth and accept the bit, place your thumb in the interdental space of the horse’s mouth and wriggle it around. When the horse opens its mouth, guide the bit gently past the horse’s front incisor teeth and towards the interdental space. Be careful not to bump the horse’s teeth with the bit as you’re doing this.

With the bit in place, slide the crown of the bridle over the horse’s ears. Do one ear at a time. Either fold the ears back or forward to get the crown over the ears. Try not to pull the bridle up too much while you’re doing this, as this will pull the bit in the horse’s mouth.

Fasten all the buckles on the bridle. Make it tight enough so that it’s secure, but loose enough that the horse will have room to flex his neck and jaw.
Proper Bit Position
After you’ve bridled the horse, you want to make sure the bit is placed in the interdental space correctly. Traditionally, correct bit placement is determined by using the “wrinkle method,” which involves looking at the horse’s mouth and counting the number of wrinkles it has in the corner of its mouth where the mouth meets the bit. The more wrinkles in the horse’s mouth the more constant pressure the horse experiences from the bit and the more it will feel it when you pull back on the reins. Suffice it to say, you don’t want too many wrinkles in the horse’s mouth or the bit will become painfully unbearable for it.
What number constitutes an appropriate amount of wrinkles will vary from horseman to horseman. Some say just one, while others say two is the right number. And of course, you’ll find other horsemen who say the wrinkle method is a bunch of malarkey and a horse shouldn’t have any wrinkles in its mouth.
The handler at Tom’s ranch was a two-wrinkle man, but was humble enough to admit that his preference wasn’t horse doctrine.

Horse with no wrinkles in corner of the mouth. May mean the bit is sitting too low in its mouth. If the bit is too loose in the mouth, you risk having the bit hitting the horse’s teeth as you ride. Horses don’t like that.

Horse with two wrinkles at the corner of his mouth. Some horsemen think this indicates proper bit placement.
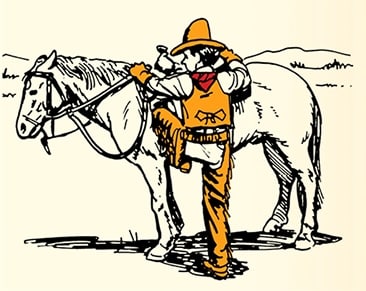
How to Saddle a Horse
Now that you have your horse bridled, it’s time to saddle him up. Here’s how.

Get to know your saddle. The parts we’ll be working with while saddling a horse are the cinch, cinch ring, latigo, and D-ring.

Locate the horse’s withers. It’s the area between the horse’s crest (neck) and back.

Place the saddle pad high on the horse’s withers.

Slide the pad a bit down on the horse’s back. This ensures that the hair on the horse’s back lies flat beneath the pad and saddle. The front edge of the pad should be right where the horse’s withers begin.

Place the saddle on the horse making sure it’s nice and centered.

It’s time to fasten the front cinch (yellow finger) It’s the big strap that goes underneath the horse. Lace the latigo (red finger) through the front cinch ring just like Tom is doing here.

Bring the end of the latigo back up towards the saddle, tightening the front cinch while you do so. Don’t make it too tight. A horse has to breath, you know.

Pull the end of the latigo through the D-ring on the saddle and back down towards the cinch ring as shown above. Lace the end of the latigo through the cinch ring again and pull back up towards the saddle.

Almost finished. We’re going to tie off the latigo with a “Texas T” knot, as shown below.

To tie a Texas T knot, pull the end of the latigo through the D-ring from the outside and in. Pull it towards the shoulder of the horse. Then bring the end of the latigo across and towards the rear of the horse. Bring the end of the latigo behind the D-ring and through the ring to the front. You should have a horizontal loop right beneath the D-ring. Pull the end of the latigo through the loop and tighten.
Here’s a video of the Texas T knot getting tied by the folks at 5 Minute Horse Lessons . It’s super easy to follow:

That’s it! You’ve saddled a horse. Let’s ride! Heeyah!
________________________________________________________________
Special thanks to Tom for taking the time to show me how to throw a tomahawk. If you’re ever in Oklahoma, I definitely recommend planning a weekend at Meadowlake Ranch. It’s pretty much a playground for men–tomahawk throwing, long bow shooting, horse riding, fishing, hunting. You name it, you can probably do it at Tom’s ranch.