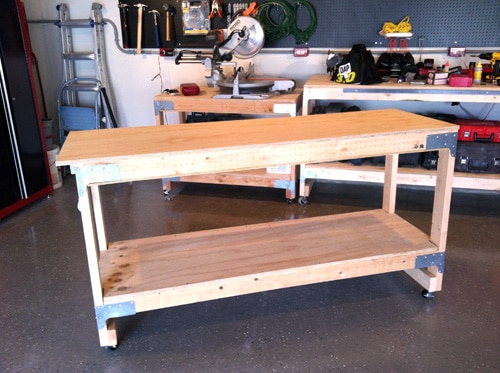
Editors note: This is a guest post by Ethan Hagan from One Project Closer. If you missed it, check out Ethan’s last contribution about building an all-purpose workbench.
How to repair drywall is one of the most common questions on a home improvement website, and here’s the reason why. It’s tough to successfully patch a wall so that you can’t even tell it was ever damaged. With drywall covering just about every square inch of your house, condo, or apartment, it’s bound to get messed up so take my advice. Learn the right way to repair holes in your drywall or make friends with someone who can.
This article is going to walk you through the process of repairing a medium-sized hole in drywall. Once you master this skill, it’ll serve you well for the rest of your life (or until people quit hanging drywall in their homes).
Materials List
Here are the materials you’ll need before you get started.
- Drywall (see below)
- Mesh tape (see below)
- Setting compound (see below)
- Backer boards (see below)
- 1-1/4″ Drywall screws
Drywall: A typical sheet of drywall measures 4′ x 8′, and that’s way more than we need for this project. Most home improvement centers sell smaller 2′ x 2′ sections which are great for making repairs. Plus, you can save the “leftovers” for the next time. Drywall is available in several thicknesses. Most interior walls utilize 1/2″ drywall, and ceilings are usually 1/2″ or 5/8″.
Mesh tape: If you look around online, you’ll see lots of debate over paper tape vs. mesh tape. I think mesh is easier to work with, and I have total confidence using it for repairs. If you talk to enough contractors, you’ll learn that it really comes down to personal preference more than anything else.

We need to screw the new piece of drywall into something, and a backer board gives us that surface. Size your backer board so that you can finagle it inside the hole.
Setting Compound: Setting compound (a.k.a. hot mud) is a powder that you mix with water. Unlike joint compound which dries through evaporation, setting compound dries through a chemical reaction, shrinks very little and dries very hard. Setting compound is differentiated by setting time (in minutes), and you’ll find 5, 20, 45, 90, etc. Pick a setting compound based on your skill level. For instance, if you’re new to patching drywall, 45 gives you a nice window in which to work.
Tip: It’s important to understand that mud that has “set up” isn’t completely dry. Once the mud has set up, it’s safe to apply another coat. Let the mud fully dry overnight before you attempt to sand it.
Backer Boards: To repair a medium-size hole, you’ll need some sort of backer board, and I used a small piece of 1/4″ plywood.
Tools
- Drywall saw
- 6″ Drywall knife
- Drill / driver or screwdriver
- 100 grit Sandpaper
Tip: A good drywall knife is made from stainless steel, and has a metal heel for pushing defects into the surface of the drywall.
Step 1: Square the Hole
The first thing you need to do is cut the hole into a square or rectangle. It may seem counterintuitive to make the hole bigger, but cutting a circular (or other oddly-shaped) piece of drywall is more work than it’s worth. Grab your drywall saw and square up the hole.


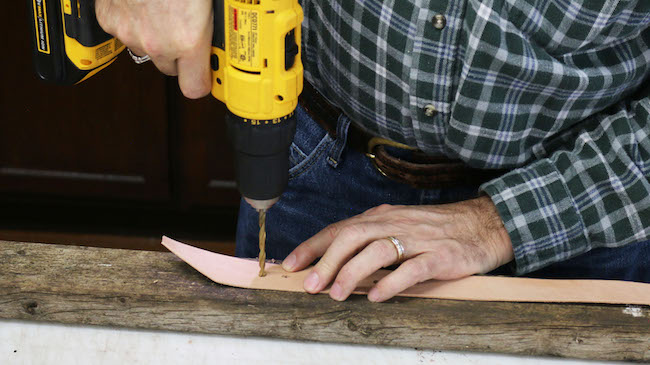
Step 2: Add the Backer Board


I like to fit the backer board inside the hole and then start a screw to give me something to hold onto.
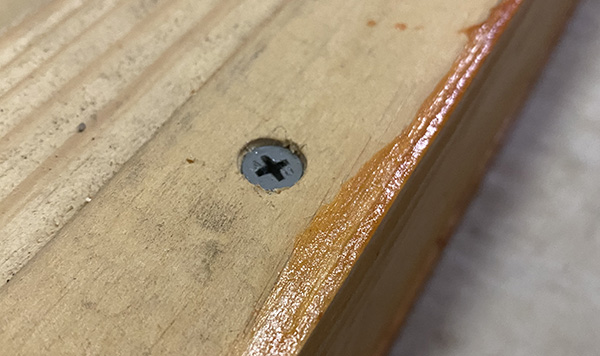
Put four screws in to hold the backer board in place, and be sure to countersink the screws just below the surface of the drywall. See below.


Step 3: Cut a New Piece of Drywall

Use your drywall saw to cut a new piece of drywall that fits into the hole.
Step 4: Cover the Joints with Tape

Mesh tape has adhesive on one side which makes it easier to position. Use the tape to cover all the edges.
Step 5: Mix Compound and Apply First Coat
Mix up your first batch of compound. You’re looking for thick, “mashed-potato” consistency so keep adding powder/water until you find the right proportions.

Grab your 6″ drywall knife and apply your first coat.

Make sure you embed all the mesh tape, and try to eliminate any air pockets. Smooth it out as best you can, but remember that this is only the first coat.
Step 6: Second Coat

While the first coat set up, I mixed another small batch of compound. The goal for your second coat is to feather out the edges so that the drywall makes a smooth transition over the repair, and if you’re really good, you can achieve this with two coats of mud.
Step 7: Final Coat

For the final coat, feather out the edges even further, and try to make it as smooth as possible. It’ll save you from having do a lot of sanding.
Step 8: Sand Smooth

Use the sandpaper to smooth over all the edges and remove any dimples or ridges. Feel everything with your hand to make sure it’s all even.
Step 9: Prime

It’s a rookie mistake to skip priming the repair because compound will absorb paint differently, and without the primer you’ll be able to see the difference.
Step 10: Paint

Break out the paint you’ve been saving or head to the local DIY center with a sample that they can color-match. I like to roll the paint on because it matches the texture of the rest of the wall.
____________________________________
Ethan Hagan is the primary editor at One Project Closer. Ethan spends most of his days shadowing real contractors on actual job sites and most of his nights writing about the experience. To see what I mean, check out their expert guides like How to Install Beadboard Wainscoting and How to Install Radiant Heated Flooring. If learning and interacting with pro contractors sounds like something you’d enjoy, sign up for OPC email updates.