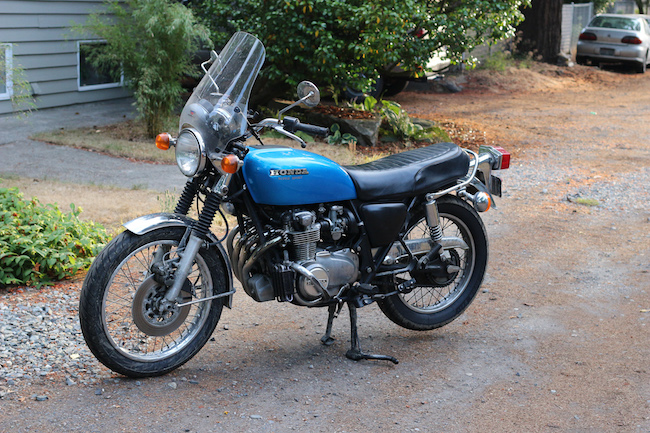
Motorcycles take a lot of punishment out on the open road. Even models that have fairings and other protective coverings over some of their most sensitive components have to endure salt, oil, dust, and dirt while they blast along at highway speeds. All that filth is not only hard to look at when it’s covering up the beautiful paint job of your favorite ride, it’s also damaging. Corrosion from road salts and other grime can wreak havoc on your bike’s inner workings, especially rubber gaskets and wiring connections. That means washing your bike is as necessary for maintenance as it is for the pure joy of having a bright and shiny bike.
If that’s not enough, washing your bike carries another great benefit: it offers an excuse to give your bike an up-close visual inspection that can do wonders as a practice of preventative maintenance. While you’re scrubbing, you can check the chain for signs of wear, make sure the tread on your tires is still good, or look for any oil leaks that might need attention. For all these reasons, washing your motorcycle is a great idea for any regular rider. Plus, who doesn’t love the look of a gleaming bike?
What Not to Do
The first thing to understand is that washing your motorcycle and your car are very different things. Cars have a lot more protection when it comes to high-pressure hoses and powerful detergents. Motorcycles are more sensitive. So, before you grab your car wash bucket and go to town, here’s a list of things not to do:
- Don’t use the same detergent you use on your car. Get a motorcycle-specific cleaner.
- Don’t wash your bike when it’s hot. Only wash it when the engine is cool.
- Don’t wash your bike in direct sunlight. The heat will cause soap to dry quicker and make it more difficult to rinse off.
- Don’t use a high-pressure hose. Water forced into engine components can cause problems down the road.
With those warnings in mind, below is our guide to washing your motorcycle the right way.
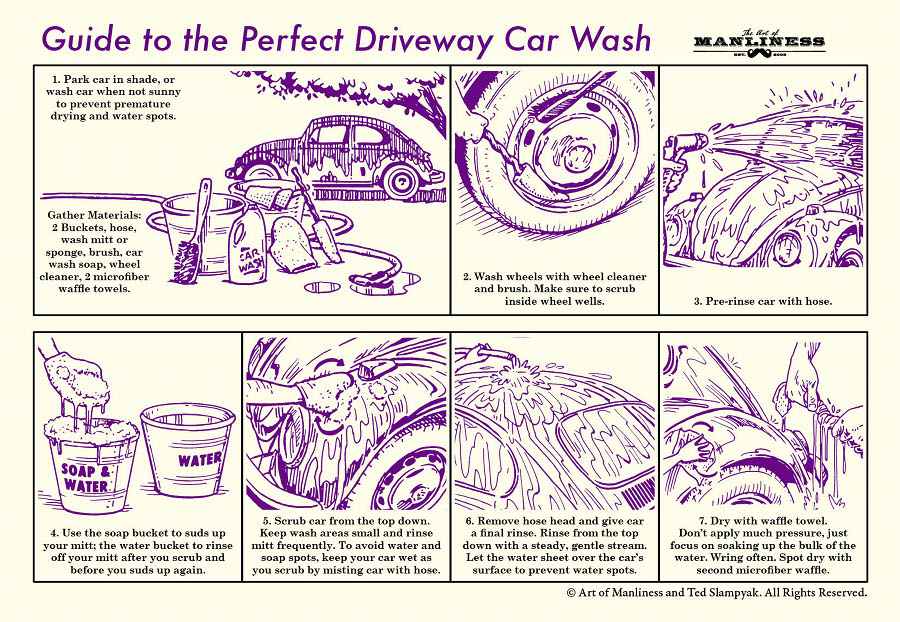
What You’ll Need
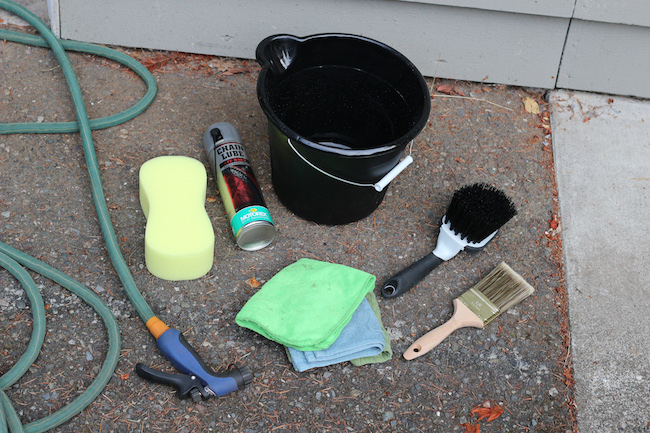
- Motorcycle-specific cleaner (found online, at motorcycle shops, and at most auto parts stores)
- Hose with an adjustable spray nozzle
- Sponge
- Brushes (stiff and soft versions)
- Rags
- Chamois or microfiber cloth
- Chain lube
Step 1: Prep Your Motorcycle
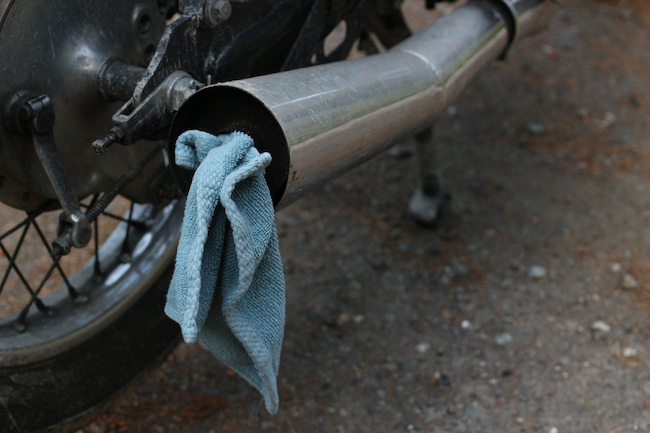
Before you get started, check over your motorcycle, check to make sure all electrical connections, spark plug wires, and other components are secured. Take a rag and plug the hole of your exhaust pipe to prevent excess water from getting into your exhaust system. Remove any bags or other accessories that you don’t want to get wet, or that prevent you from getting to dirty areas of the bike.
Step 2: Start With a Rinse
With your hose on a low setting, give your bike a rinse. Feel free to turn up the pressure when you get to less sensitive, and often dirtier, areas like the wheels and fenders.
Step 3: Apply Cleaner
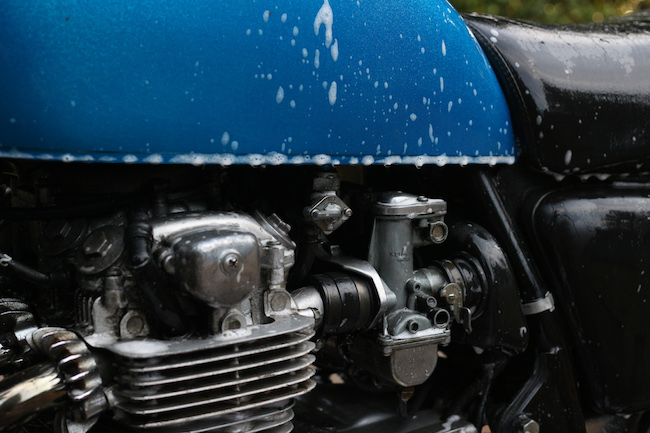
Some motorcycle cleaners don’t require scrubbing. Just spray them on, let it sit, and rinse away. If that’s the type of cleaner you bought and you’re feeling less than ambitious, this part will be easy. If that’s not the type of cleaner you have, or your bike needs the extra elbow grease, use a sponge to suds up your bike. Always start from the top down, working on the cleanest areas first. Typically, you’ll want to start with painted surfaces that scratch easily. Make sure to rinse your sponge regularly to keep it free from debris as you scrub. If you’re using a bucket for your suds, consider getting a second bucket that’s reserved just for rinsing.
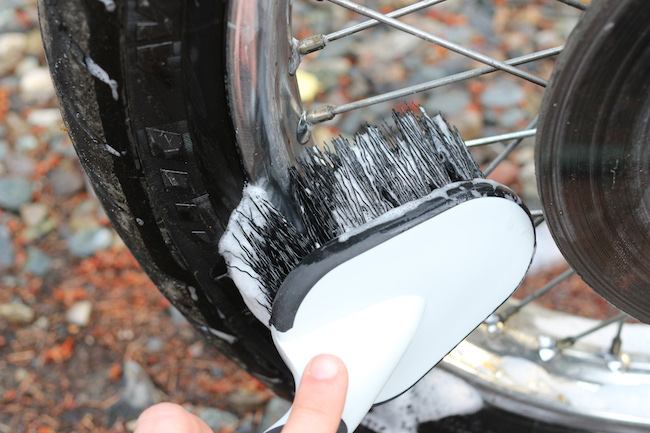
Step 4: Get Hard-to-Reach Areas
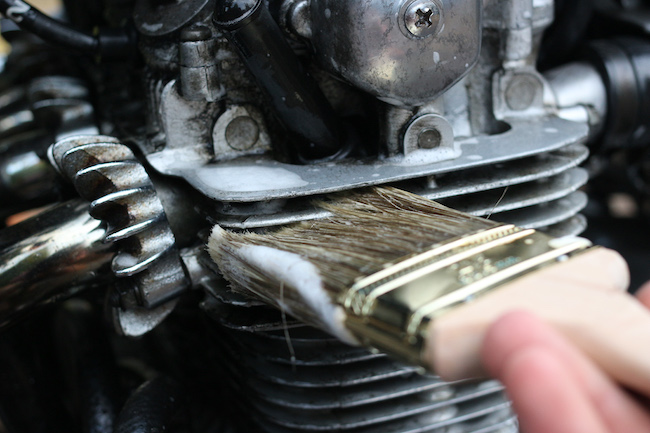
Use brushes to get those areas that are harder to reach, or require extra scrubbing. Plain old paintbrushes, like the kind you’d use to paint your house, are great for cleaning more sensitive engine components. Stiff brushes are better for getting grime off your wheels and tires.
Step 5: Rinse
Starting from the top, give your motorcycle a thorough rinse on a low-pressure setting. Once again, don’t be afraid to turn up the pressure for less-sensitive areas.
Step 6: Dry
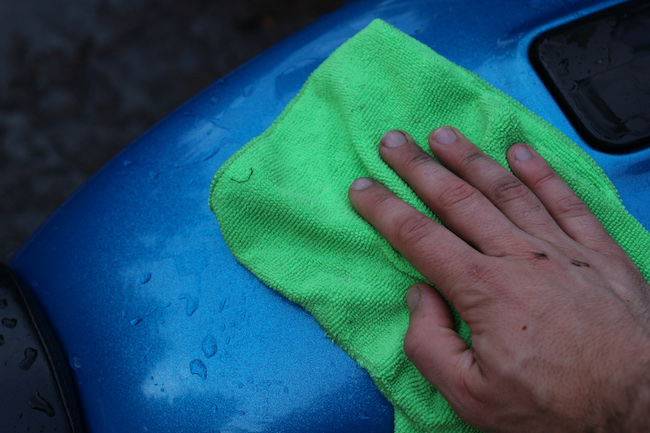
Use a chamois or microfiber cloth to dry your entire bike carefully. Start with painted surfaces like the gas tank, and then work your way to the seat, wheels, engine, and exhaust. Change your cloth regularly to avoid wiping bits of remaining dust and dirt around. If available, a chamois is great for a first pass since it absorbs water and then easily wrings out for another pass of drying.
Step 7: Re-Lube the Chain 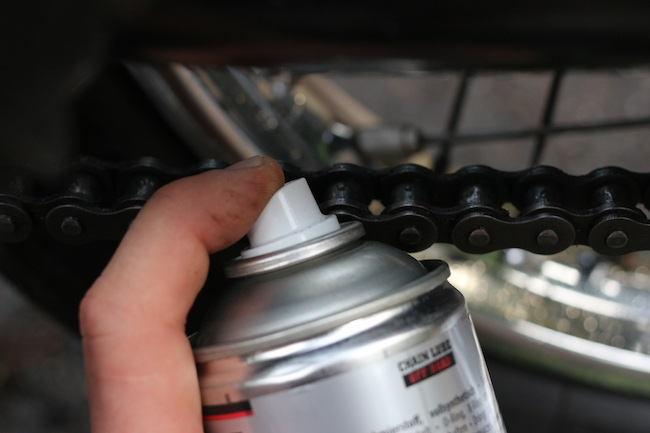
Your motorcycle cleaner’s job is to get rid of grease and grime, but there’s an area of your bike where you want that grease to stay on: your chain. After you’re done drying your bike, make sure to apply lubricant to your entire chain.
Step 8: Go for a Ride
Once it’s as dry as you can get it with a cloth, take the rag out of the exhaust and take your bike for a ride to help get rid of water that pooled up in areas where it shouldn’t be. Keep in mind that your wet brakes will take some time to dry out and feel normal, so start with slower speeds before you move onto the highway.
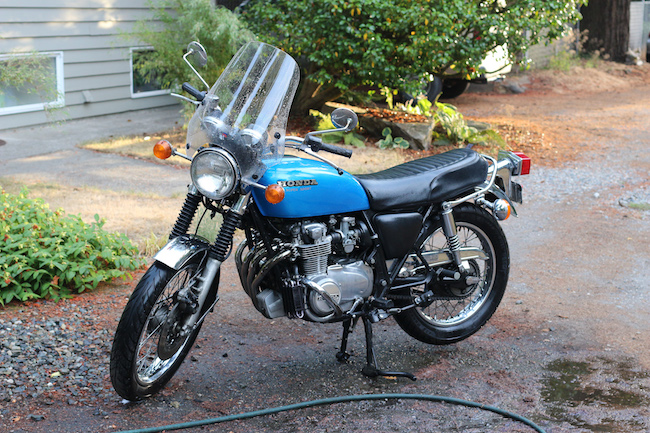
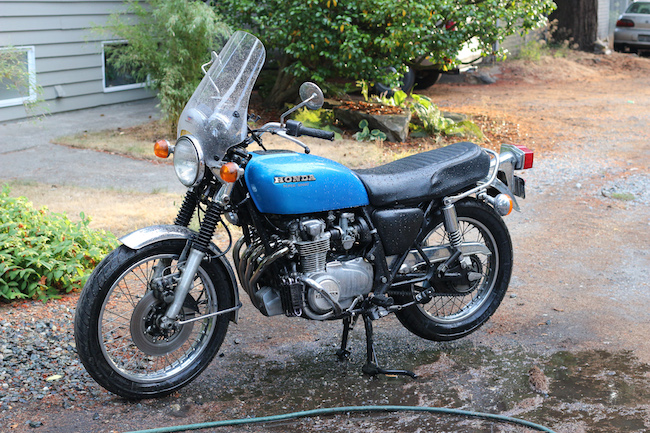
A shines-like-new motorcycle.