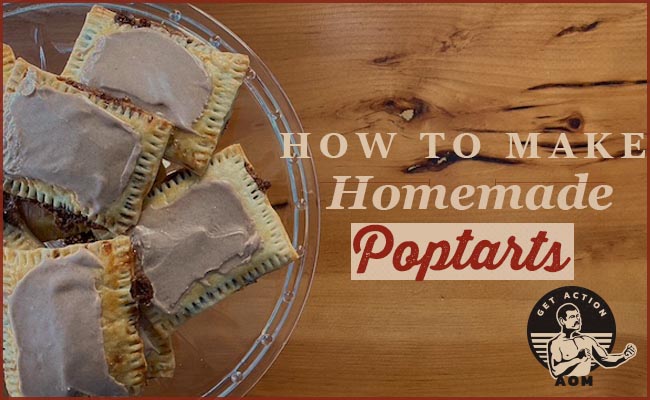
As a kid, few breakfasts were as yummy as a freshly toasted Pop-Tart. To the brain of a child, treats like Pop-Tarts (and basically any Little Debbie snack) always come from a box — always have and always will. But if you’re looking for a weekend or holiday baking project (this would be an undeniably crowd-pleasing breakfast on Christmas morning), Pop-Tart-esque pastries can indeed be made from scratch.
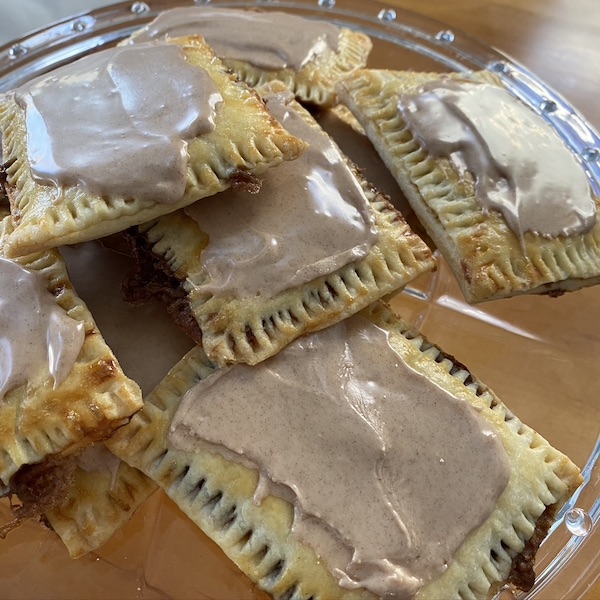
Homemade “pop tarts” are a different — infinitely better — experience than that of the boxed variety. While the crumbly, dry exterior of the latter undeniably has its charm, flaky layers of real pie crust create a truly delectable pocket which can be filled with flavor combinations that aren’t limited to what you can find on grocery shelves. I wanted to do something “classic” here though, and since growing up my favorite flavor of the boxed variety was brown sugar cinnamon, that’s the flavor I decided to recreate, complete with brown sugar glaze on top.
While this isn’t really a beginner’s recipe, it can be done with minimal baking experience. The first time I did these, about a year ago, was in fact the first time I ever made a pie crust. Have no fear, fellow bakers.
For planning purposes, give yourself at least a half a day to whip up these DIY pastries (total time; active time is probably half that). The process can be split up into three distinct sections. Let’s jump in.
First: Making the Pie Crust Dough
If you’ve never made a pie dough, it’s time to learn. It’s far easier than I thought it would be and tastes way better than store-bought. You could use a store-bought pie dough and save some time — no shame there. But if you’re going to do the work of homemade pop tarts, it’s worth the homemade crust.
There are a number of methods used for making pie dough — electric mixer, by hand, and my personal favorite, the food processor. This method is incredibly easy and doable even for a beginner.
The recipe below is my preferred pie crust and is known as an all-butter recipe because it doesn’t use any shortening (who ever has shortening in their house anymore?).
Ingredients
- 2 1/2 cups all-purpose flour
- 1 teaspoon salt
- 1 cup butter (two sticks); cold and cut into small pieces — about 1/4 tbsp size
- 1/2 cup of ice water (you’ll use a tablespoon at a time, so just get a measuring cup of water with some ice in it)
Directions
1. Add 1 1/2 cup flour and the salt to the food processor; pulse a few times until well combined.
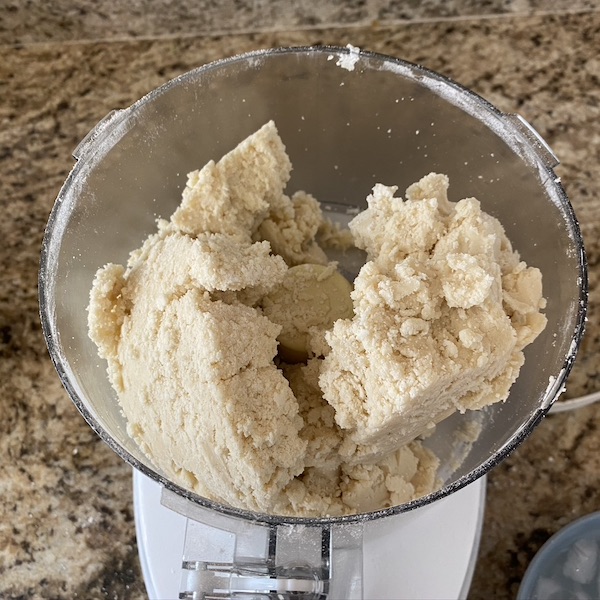
2. Add butter and process for ~15 seconds. There should be no large butter chunks remaining and it should look like tiny balls of butter/flour.
3. Scrape the bowl of the processor and add the remaining 1 cup of flour. Pulse a handful of times; again, it should be a crumbly mixture at this point and won’t be coming together into a dough yet.
4. Add 4 tablespoons of ice cold water, to start, and pulse 10 times. If the dough is starting to come together, give it a few more pulses until big chunks start coming together. If it’s not coming together yet, add another tablespoon of water and pulse 10 times. That should do the trick, but you may need to add another tablespoon.
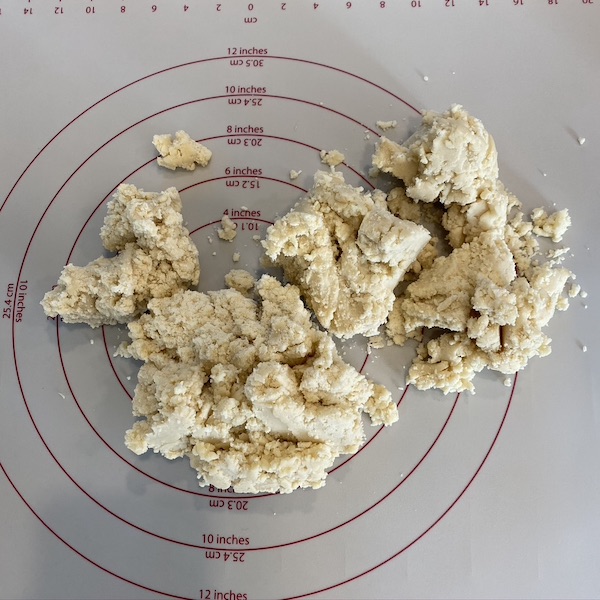
5. Plop the crumbly and chunky dough onto the counter and mold it all together, just like you would Play-Doh. Get it all into a nice round ball.
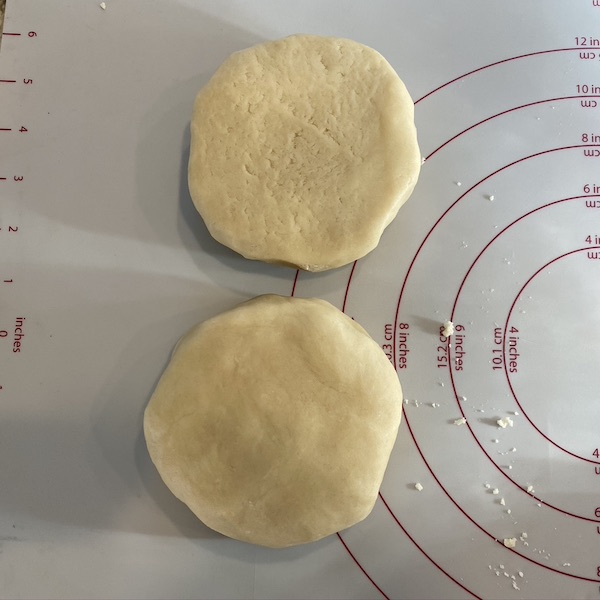
6. Split the ball in half and form two discs of dough, circular and about an inch thick. Wrap the discs in plastic wrap and refrigerate for at least a couple hours, up to a few days. Know that you’ll want to pull them back out of the fridge 15-20 minutes before you plan on working with them — they need to be pliable for rolling.
Second: Cutting, Filling, Cooking
This second chunk of work is the most labor intensive. You’ll shape the crust, add the filling, and bake.
Ingredients for Filling
- 1/2 cup light or dark brown sugar
- 2 tsp cinnamon
- 1 tbsp all-purpose flour
- Egg wash: 1 large egg + 2 tsp milk
Directions
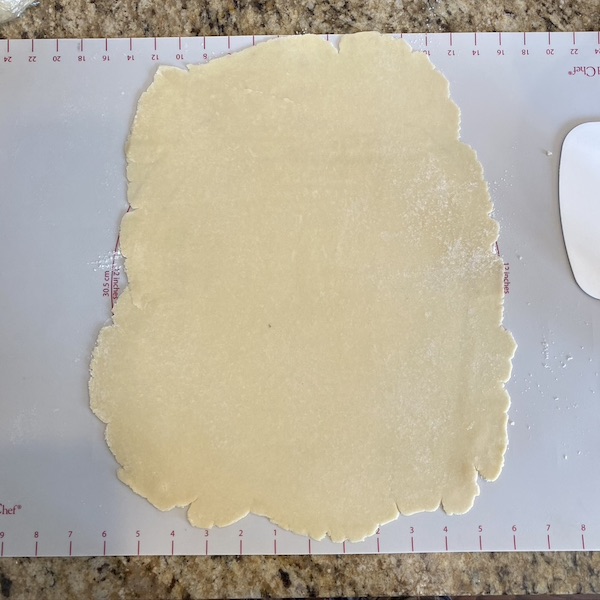
1. Working on a flour-dusted counter or baking mat, with one disc of pliable dough (that is, it’s been out of the fridge for at least 15 minutes; it may need a little longer) at a time, use a rolling pin to gently roll out the dough into what is roughly a 9″x12″ rectangle. Be sure that the dough doesn’t crack; when/if it does, use your fingers to mold it back together and/or re-roll it.
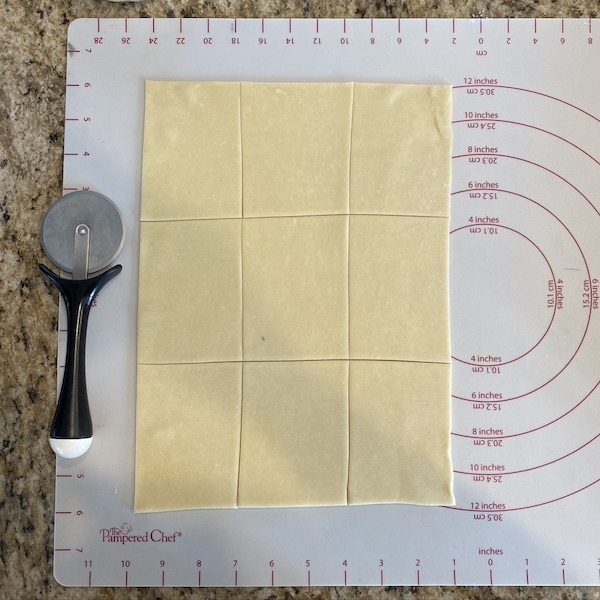
2. Trim the sides with a pizza cutter to make neat, straight edges. Then use the pizza cutter again to cut 9 3″x4″ rectangles into the dough. Place these rectangles on a baking sheet (they can be close together) and into the fridge.
Repeat steps 1 and 2 with the other disc of dough (again placing it in the fridge when you’re done).
Pro tip: Don’t discard the trimmings. Keep them, and bake them on their own (more on how later).
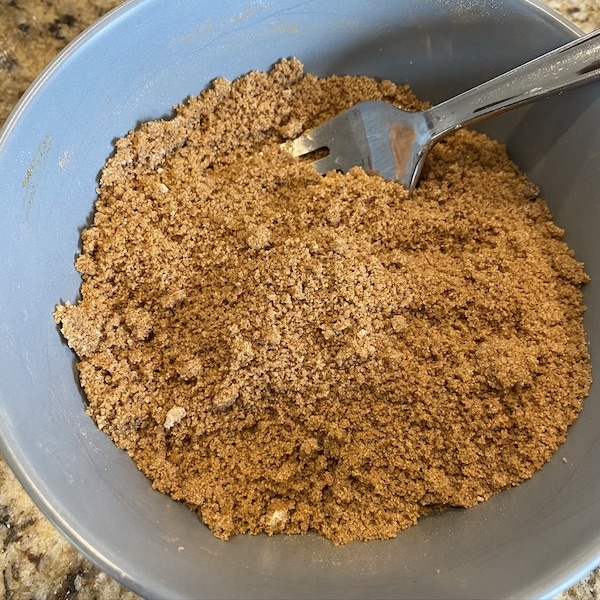
3. Make the filling by combining brown sugar, cinnamon, and flour in a bowl.
4. Make an egg wash by mixing together 1 large egg and two teaspoons milk in a small dish. If you’ve never used an egg wash, it does a couple things: it seals the bottom so that the brown sugar filling doesn’t melt into the crust, and it also gives the crust a nice golden-brown sheen. You’ll use a pastry brush to apply the wash.

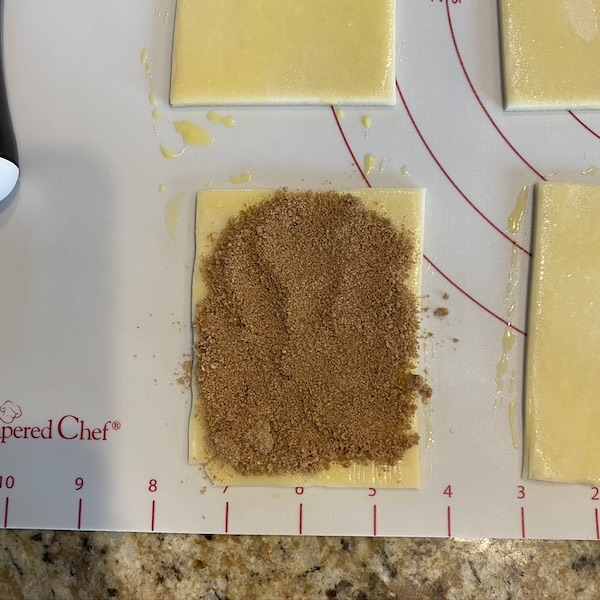
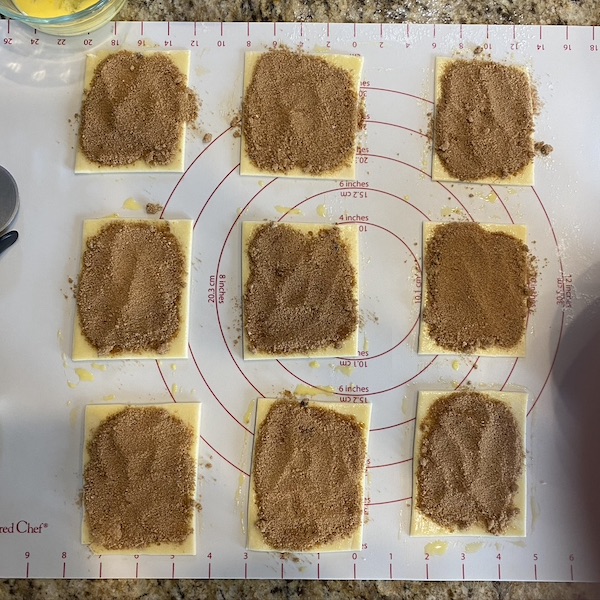
5. Remove the first baking sheet of pop tart crusts from the fridge. Using a pastry brush, generously apply the egg wash over the entire surface of each rectangle. Place a tablespoon of filling onto each crust and spread it around, as evenly as you can, leaving a small space around the edges.
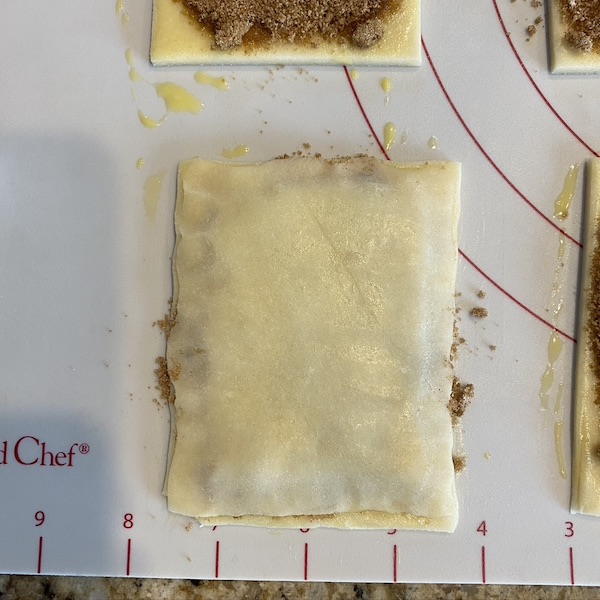
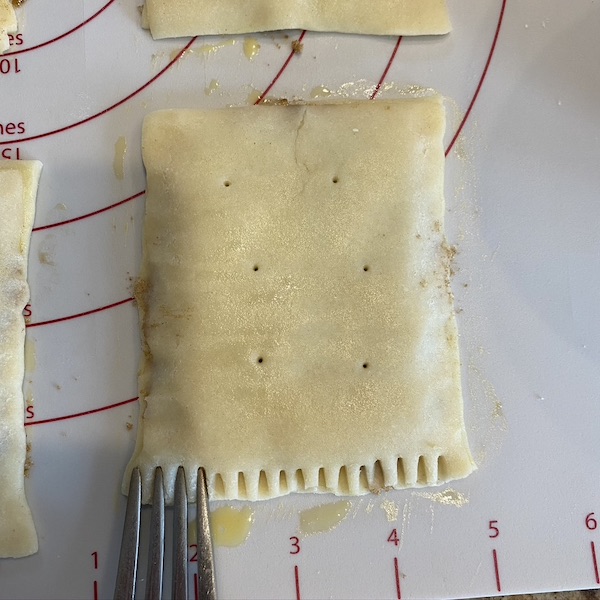
6. Get the second baking sheet out of the fridge — your pop tart tops — and brush those with egg wash as well. Place them on top of the filled bottoms — egg wash side down — and use your fingers to seal the dough all around the pastry. Then use a fork to crimp the edges and fully seal the top and bottom together.
7. Place the raw pop tarts into the fridge for at least 20 minutes, up to an hour. You want the pastry cold and firm when it bakes.
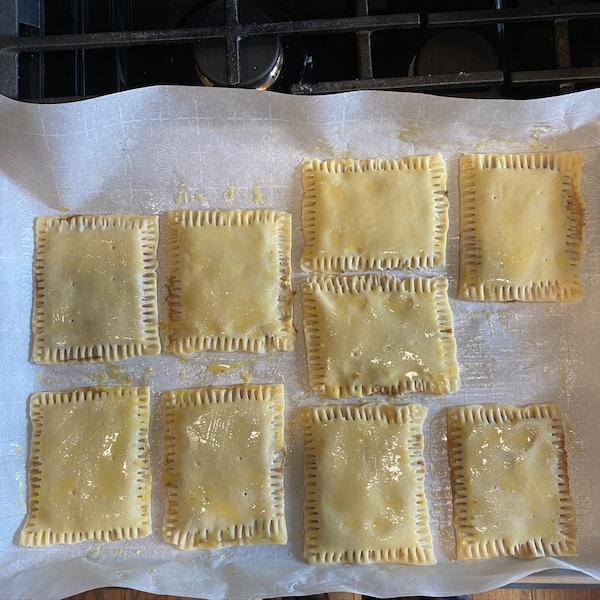
8. Preheat the oven to 350 F. After they’ve been in the fridge at least 20 minutes, pull the pop tarts out and apply one final layer of egg wash to the top, fully coating each pastry. Then, using a toothpick, poke 6 holes into the tops of each tart — this helps steam escape while baking. (In the pictures, I did this step earlier, but then the egg wash sort of covered those holes. Better, I think, to do it as the last step before baking.)
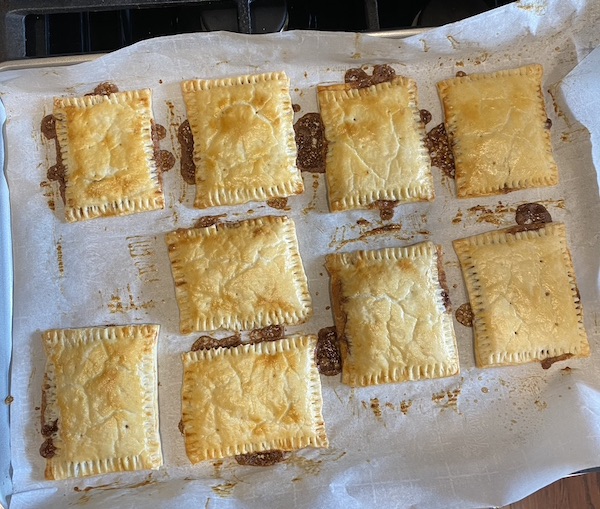
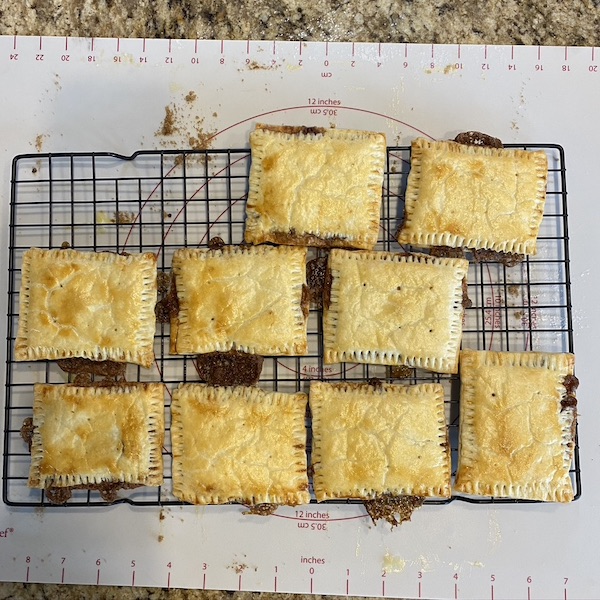
Those bits of brown sugar filling that escaped are easy to break off, and they taste awesome.
9. Bake for 24 minutes, rotating the baking sheet at 12 minutes. If they aren’t nicely golden-brown yet, give it a few more minutes. After pulling them out of the oven, let them cool on the baking sheet for 5 minutes before transferring to a wire rack. Let them fully cool before topping with the glaze — about an hour.
10. Bake the trimmings! Pie crust trimmings taste amazing when baked and enjoyed on their own as a snack. Place them all on a baking sheet, sprinkle the brown sugar filling over it, and bake for about 12 minutes. You’re welcome.
Third: Glazing
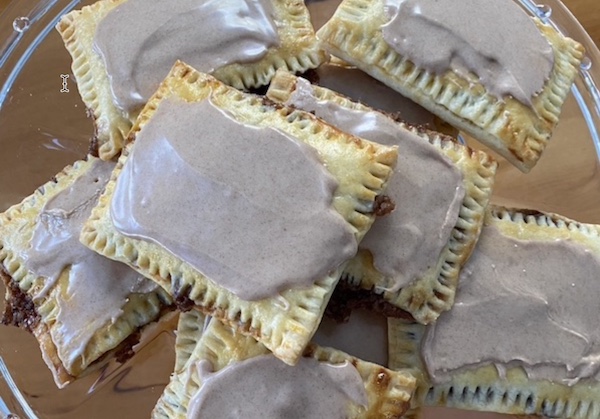
After the pop tarts have fully cooled, we’ll add an easy-to-whip-up glaze.
Ingredients
- 3/4 cup powdered sugar
- 1/2 tsp cinnamon
- 1/2 tsp vanilla extract
- 1 tablespoon milk (perhaps more, as needed)
Directions
1. Simply whisk all the ingredients together in a small mixing bowl until no dry ingredients remain. If you need more milk, add it in very small amounts — a teaspoon at a time — until it reaches a smooth consistency that’s easy to spread, but not so thin that it runs off the pastry.
2. Using a spoon or butter knife, apply the glaze to each pop tart. It’ll harden in about an hour (though you might understandably not want to wait that long).
3. Enjoy the pop tarts! They taste great at room temp, but a heated pop tart is probably what you’re used to. These won’t hold up well in a toaster, but you can microwave ’em for like 10 seconds, or re-heat them in the oven at 350 for 10 minutes or so.
If you can somehow restrain you and yours from eating them all at once, they’ll keep for a few days, just like traditional pie.