With our archives now 3,500+ articles deep, we’ve decided to republish a classic piece each Sunday to help our newer readers discover some of the best, evergreen gems from the past. This article was originally published in September 2021.
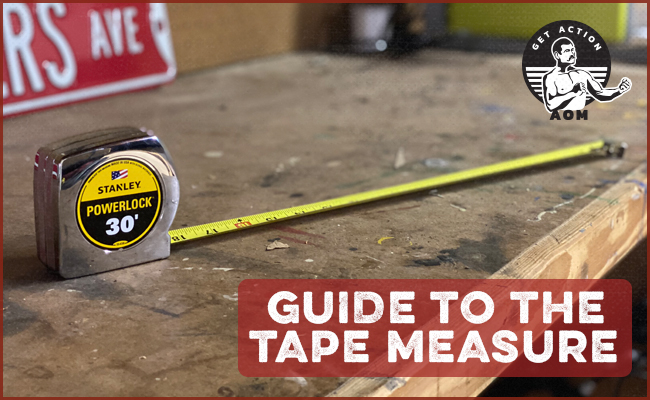
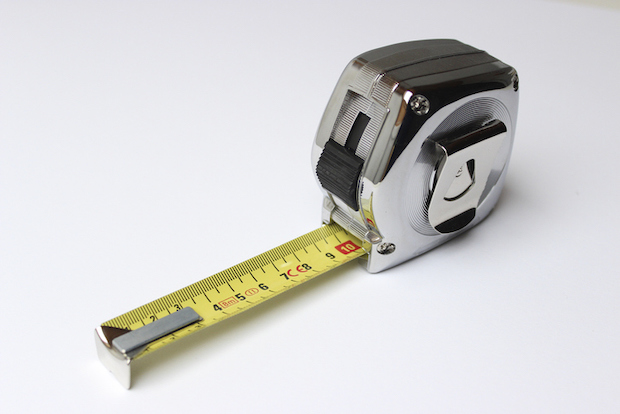
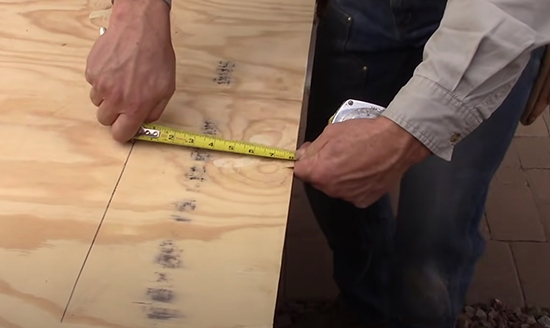
Even if you’re not a master carpenter, you likely have a tape measure on hand. It’s one of the 12 essential tools to keep in your toolbox. I’ve had my trusty Stanley 25 ft. PowerLock Tape Measure for over a decade now, and it seems like not a week goes by that I don’t use it for one thing or another: measuring wood; measuring my kid’s height; measuring the dimensions of a room to see if a certain couch will fit within it.
The tape measure is such an ubiquitous household fixture, you probably haven’t thought all that much about it. But there’s more to this tool than meets the eye. Especially the eye of the untrained amateur.
Below we highlight a few things you might not have known about your tape measure, as well as a few tricks from the pros on how to get even more use out of it.
Answers to Questions About the Tape Measure You Hadn’t Thought to Ask
Why does my tape measure’s hook slide up and down?
You may have noticed that the metal hook at the end of your tape measure slides up and down a bit. No, the hook hasn’t inadvertently come loose. It’s actually made to do this.
The first inch of the tape is short by 1/16 of an inch. Yes, that’s right. The first inch of your tape measure isn’t actually an inch.
The tape’s sliding hook and 1/16-of-an-inch truncation create a simple but ingenious way to ensure you get a “true zero” measurement whether you’re measuring the outside or inside of a surface.
Here’s how it works:
Measuring inside/outside a surface
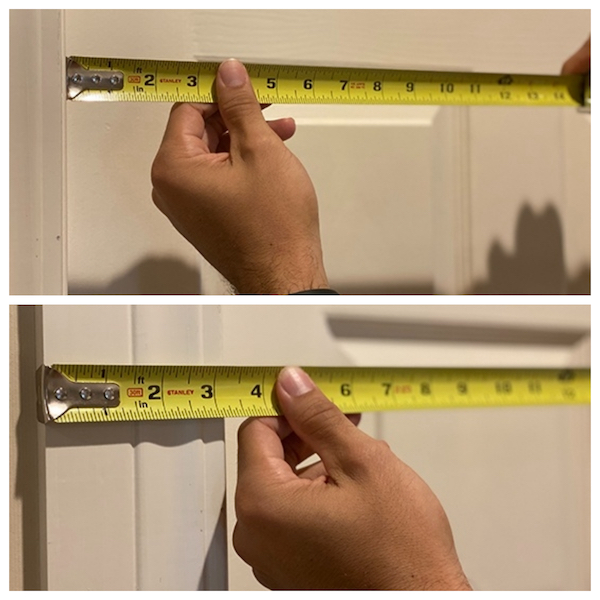
The metal hook is exactly 1/16 of an inch thick. If you’re measuring the outside of a surface and hook your metal end on the edge, that metal hook will shift out and create a gap that equals the space the hook takes up.
If you need to measure the inside of a surface — like in a window frame or inside a drawer — you want to count the thickness of the metal piece in your calculations. So as you push the tip against something, the hook is included in the measurement.
If this idea seems a little hard to wrap your mind around, this video by Tom Silva from This Old House will help it click.
Take Care of Your Hook — Don’t Let It Slam Into the Case
The slide in the tape measure’s metal hook has been calibrated so that it moves just enough to give you a “true zero” measurement, whether you are measuring inside or outside an object.
But if you don’t take care of your tape measure, that calibration can get thrown off, resulting in inaccurate measurements.
One of the most common ways to ruin the slide on your hook is by letting the tape recoil quickly, resulting in the hook slamming into the tape measure’s case.
To prevent that from happening, as the tape slides back into the case, place your finger in between the case and the hook to stop the tape’s momentum before letting its remainder retract. This is less jarring on the hook and will ensure years of true zero measurements.
If your kids are like mine, not only do they like to play with your tape measure in general, they like to extend the tape all the way out to 25′ and then let it roll back in as quickly as it can. If this didn’t already annoy you, now you have a legitimate reason to tell them to knock it off.
What’s the divot in your tape measure’s hook for?
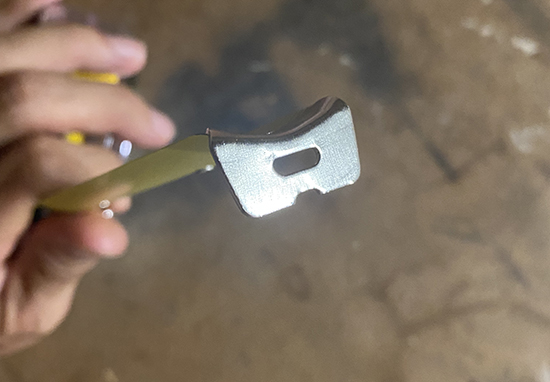
You might have noticed that your tape measure’s hook has a small divot, and you might have never thought that the divot was there for a reason. But, dear reader, it is.
That little divot fits perfectly over the head of a nail or screw. Why would you need to place that divot on a nail or screw?
Allows you to take measurements when you’re by yourself. If you’re alone and need to take a long measurement but don’t have a way to anchor the end of your tape, you can drive a nail or screw into the wall/floor/piece of lumber and hook the tape onto it. Bam! Instant second hand!
Allows you to use your tape measure as a compass. You can also hook that divot onto a nail and turn your tape measure into a compass to measure out circles or arches.
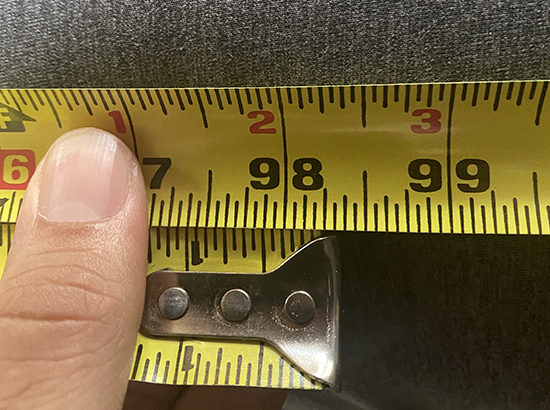
Why do some numbers have red squares around them?

You might have noticed that your tape measure has red squares around the numbers every 16″. So you’ll see that 16, 32, 48, 64, 80, etc., all bear this marker.
What’s so special about 16″?
Well, in the United States, framing studs and floor joists are usually spaced with 16-inch-on-center spacing. That means the center of one stud to the center of the next stud over is 16″.
The red squares just allow you to see that 16-inch-on-center spacing quickly.
While this feature is vital to framers and drywallers, it can also come in handy for the average dude trying to mount a TV or bike rack on the wall. If you know where the center of one joist is, you can quickly find the center of the next one by glancing at your tape measure.
What are those small black diamonds on my tape measure?
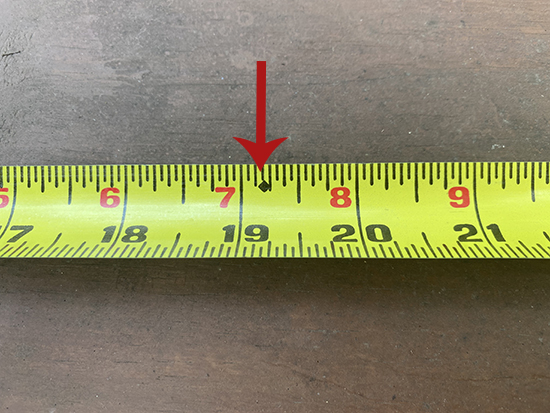
This marking on your tape measure is a bit esoteric, and likely won’t be used by the average DIYer, but it’s cool to know.
On most tape measures, you’ll see a small diamond every 19.2″.
If you want to achieve equal spacing for 5 framing members within a 8’ span (some carpenters like to put five trusses per 8 feet, so the sheathing over the framing is stiffer), these are handy markings: 8 feet = 96 inches, so that if you want to place 5 studs equally distanced apart, you will place them every 19.2″.
As I said, the average DIYer probably won’t use these markings, but it’s a cool thing to know.
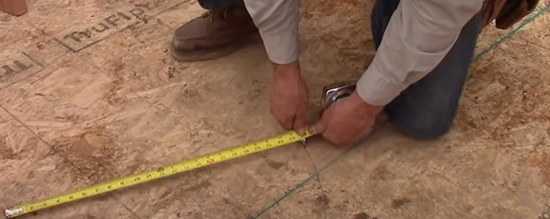
Measuring Tape Tricks From the Pros
Know how far your tape measure can extend before it collapses. When you were a kid, you likely tried to extend your dad’s tape measure as far as it could go before the tape bent and fell over. On most 25-foot long tape measures, the tape will collapse past 7 feet.
That’s good to know if you’re trying to measure long distances between gaps. If the gap is wider than 7 feet, you’ll want a second hand to keep the tape measure taut.
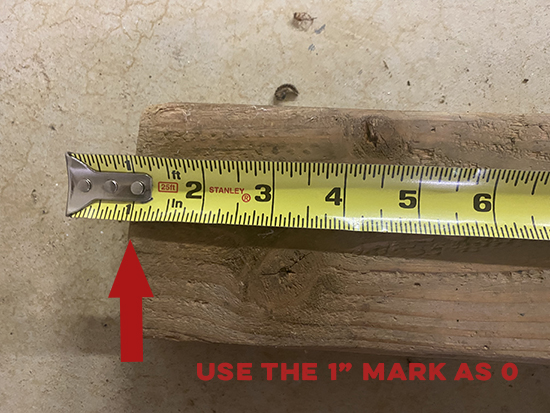
Burn an inch when measuring. Some carpenters don’t trust the “true zero” feature on tape measures. If the hook doesn’t slide appropriately, all of their measurements will be off. So to ensure they get an accurate measurement, some contractors will hold the tape at the 1-inch mark and make their mark exactly 1-inch beyond the desired measurement.
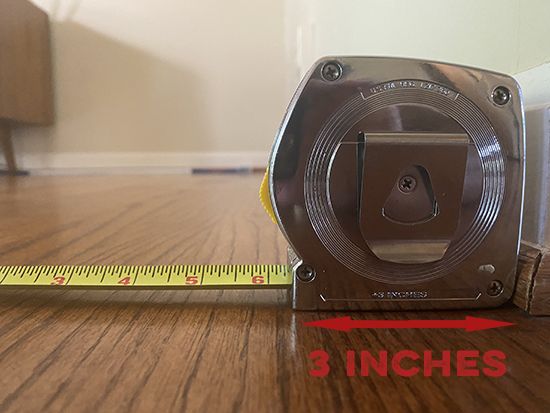

Take into account your tape measure’s case when measuring. Let’s say you’re measuring between the dimensions of your room. You’ve got the metal hook pressed against one end of the room, but then you have your tape measure’s case pressed against the other side.
How do you factor in the width of your tape measure case in that measurement?
If you look at the back of your tape measure near the bottom, you’ll see some engraved lettering that says something like “+3 inches.” That’s how long the case of your tape measure is.
So going back to our room-measuring example, if you have the tape measure case butted against one side of the wall and your tape measure is showing 93″, add 3″ to take into account the case of the tape measure. So the width of your room is 96” or 8 feet.
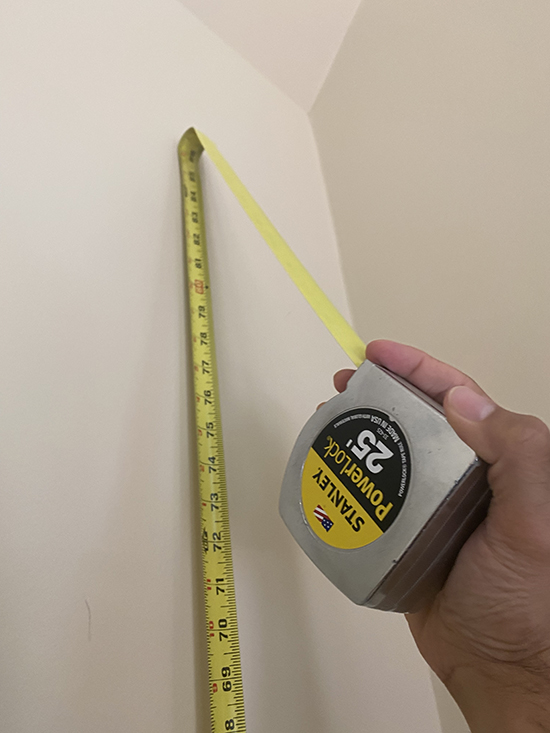
Measure Up, Not Down. If you’re measuring the height of the wall, it’s easier to place the hook on the floor and press it against the wall with your toe. Extend the tape measure up and then eyeball the measurement.
Use your tape measure as a rough and ready straight edge. If you need to draw a straight line for saw marking, you can use the edge of your tape measure as a rough and ready straight edge. It won’t be as accurate or straight as using an actual straight edge, but it works in a pinch.
Use your tape measure as a scribe. Drywallers use this tactic to draw quick, straight cut lines. Let’s say you need to take 4″ off the bottom of some drywall. Mark off 4″ with your right hand and hold it against the bottom of the drywall you’re going to cut. Hold a pencil tight against the hook with your other hand, and then run your hands down the bottom of the board. You should be left with a straight line 4″ above the bottom of your drywall.
Use your tape measure as a slide rule. If you need to do some quick fraction calculations, you can use your tape measure as a slide rule.
Let’s say you have to subtract 5 feet, 1 ⅛ inches from 8 feet, 2 ¼ inches.
Measure out 8 feet, 2 ¼ inches. Fold your tape measure so that it doubles back, and the metal hook lines up with 8 feet, 2 ¼ inches.
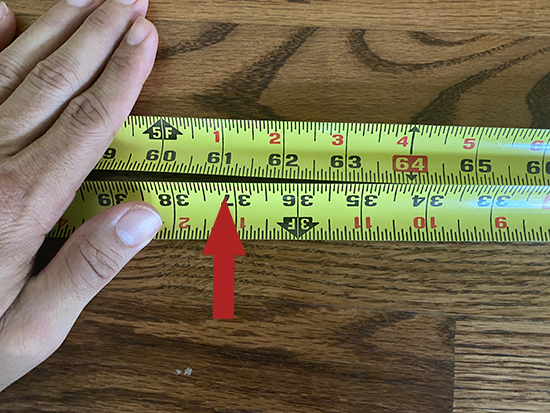
Holding that in place, move the tape measure back up until you find 5 feet, 1 ⅛ inches and see where it intersects with the other side of the tape.
It just so happens to intersect with 3 feet, 1 ⅛ inches, which is the difference between 8 feet, 2 ¼ inches and 5 feet, 1 ⅛ inches.
Who knew the humble tape measure was capable of such cool calculations, and a lot more?