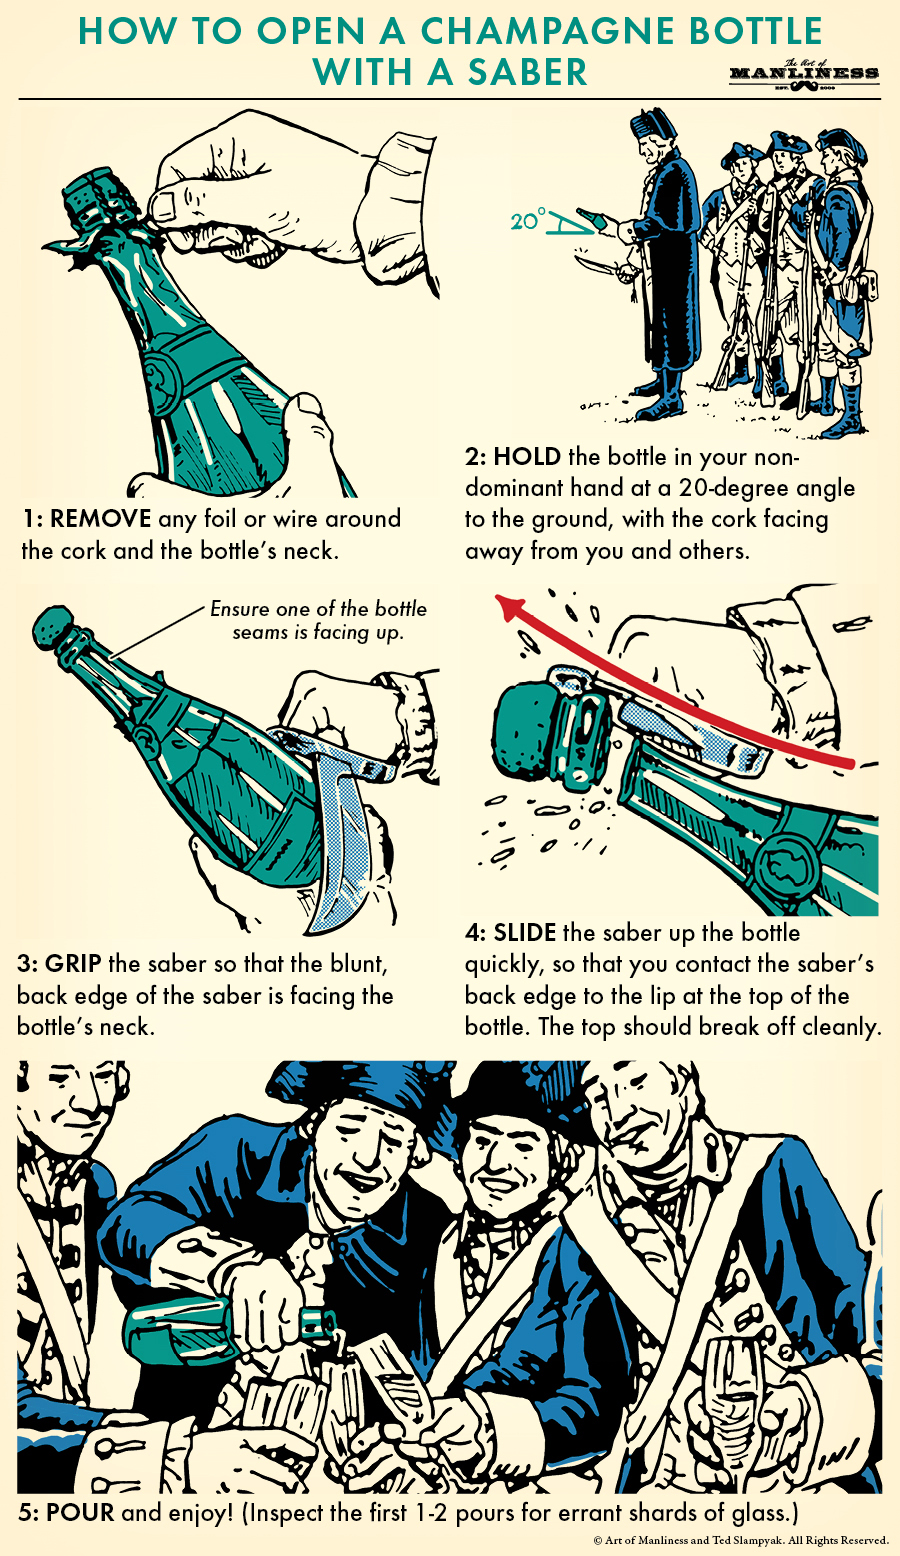
Last week I took part in the GoRuck Constellation here in Tulsa. Unlike the GoRuck Challenge with its hefting of heavy logs and doing lots of push-ups and squats, Constellation is a scenario-based event in which you learn urban survival skills and the techniques of escape and evasion from former U.S. military special operators. The emphasis is on skill acquisition instead of beating you down.
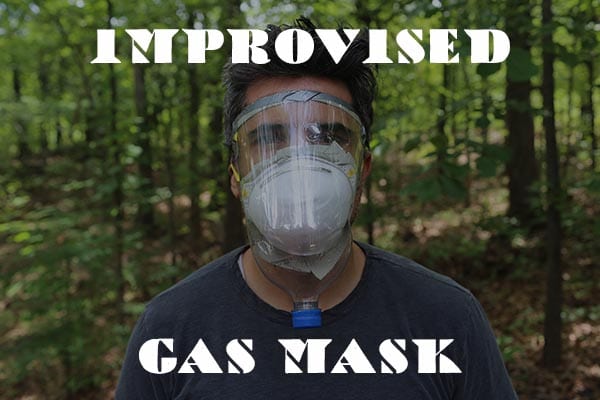
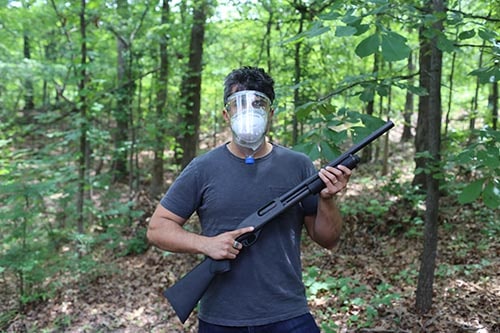
I had a great time and learned a lot during the event. One of the most interesting skills I learned was how to make an improvised gas mask from a 2-liter bottle and dust mask in the event tear gas or pepper spray is being used during civil unrest. After making it, we actually had to put it to the test by getting pepper sprayed in the face by our cadres.
And it worked. At least for me. Some folks still got some spray in their eyes. It looked really unpleasant. When creating an apparatus like this, you’ve got to be sure you put it together just right!
I thought it was fun skill to have and it could actually come in handy one day. So below I walk you through how to make an improvised gas mask in under 10 minutes.
Now is this thing anywhere close to a perfect gas mask? Far from it. But if you ever need it, it’s better than nothing.
How to Make an Improvised Gas Mask
Gas masks work by intaking “polluted” air through the “snout” of the mask, and then allowing that gas to pass through a filter before you inhale it. Professional gas masks have filters that can absorb and neutralize very fine particulate.
This jerry-rigged version is only designed to protect your eyes, mouth, and nose, while creating a physical barrier between larger particles in the air and your face. It’s obviously not going to protect you from truly toxic chemicals.
Materials
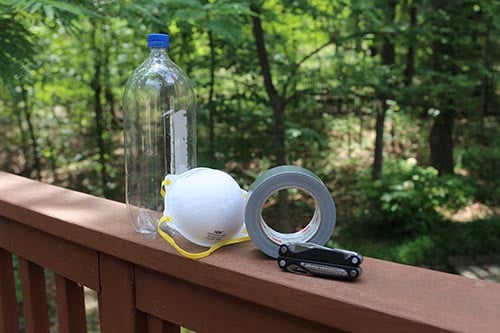
- 2-liter soda bottle
- Dust mask
- Duct tape
- Knife
1. Cut Off the Bottom of the 2-Liter Bottle
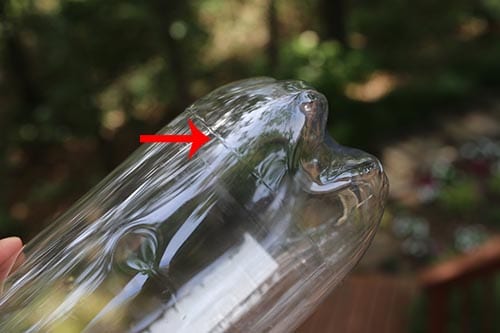
At the bottom of the bottle, you’ll find a seam. Using your knife, cut along the seam until you completely cut off the bottom of the bottle.

2. Cut a U-Shape on the Side of the Bottle
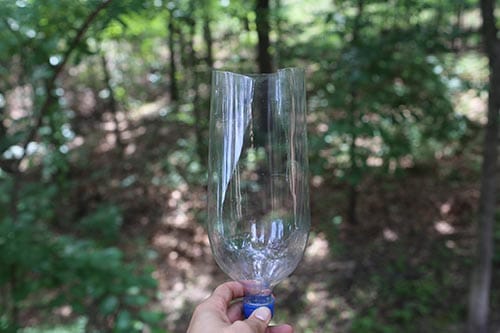
Remember to remove the plastic label that surrounds the bottle. Some of it will still be left on the bottle after you’ve taken it off. Cut your U-shape so it removes that remaining label. The U’s bottom should be about 2 inches above the bottle cap. The width of your U should be just large enough to fit your face into it. You don’t want to make it too big, as that would allow gas or pepper spray to enter your mask more easily.
3. Remove Bands From Dust Mask
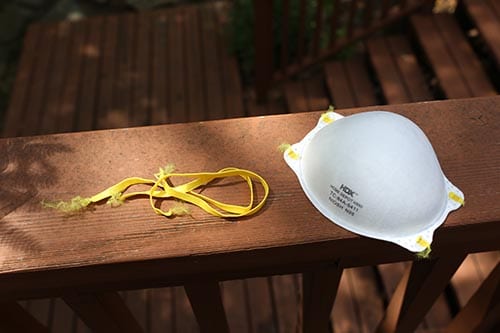
Grab your dust mask and remove the bands from it. Put them in a safe place; we’ll be using them here in a bit.
4. Place Dust Mask Inside the Bottom of the U
Place your mask inside the bottom of the U-shape you just cut. You want the mask to tilt a bit downwards towards the bottle cap. As you see, this creates a small chamber between the bottle cap and the mask.
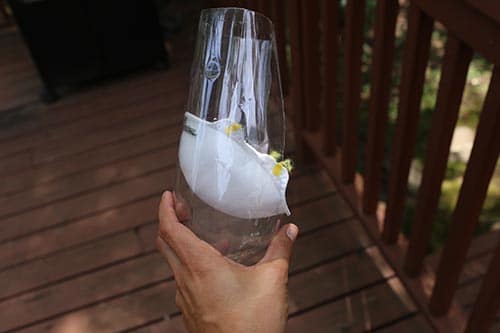
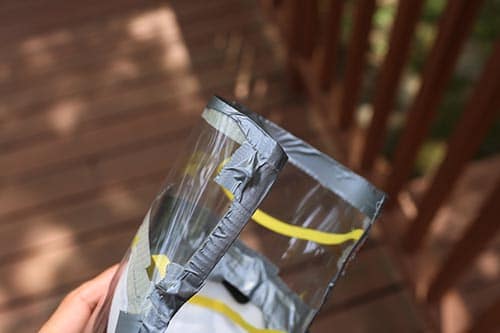
5. Duct Tape Mask to Bottle
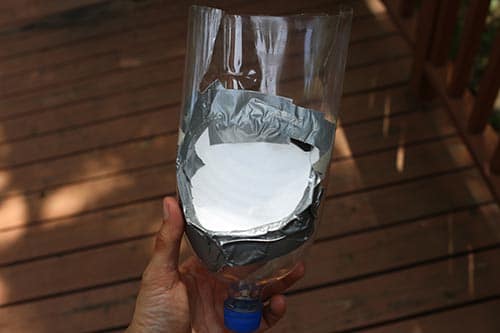
Get your duct tape and secure the mask to the bottle. You want to make sure you have a solid seal around the mask area and no gaps where bad air can sneak in. Err on the side of too much duct tape.
Another view of the taped dust mask.
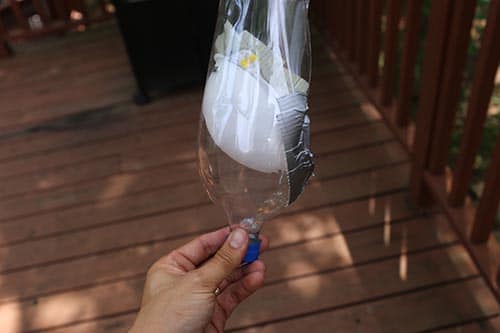
6. Duct Tape the Edges of Your Mask
You’ll likely have some jagged edges where you’ve cut the bottle. To make the mask a bit more comfortable, place some duct tape along those edges. The added benefit of the duct taped edges is that it allows you to get a better seal around your face — which is crucial in its effectiveness.
7. Cut Four Slits Near the Sides

We need to cut some slits into which to place our mask’s bands. Cut two slits near the top of the mask — one on each side — and another two four inches below — again, one on each side.
8. Thread Bands Through Slits and Tie Off
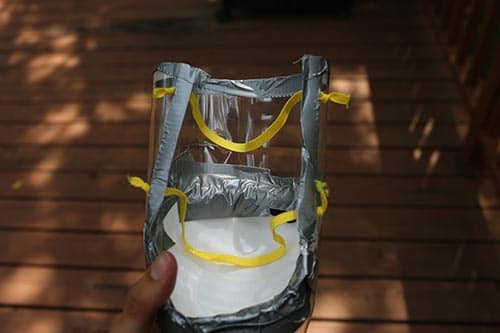
Thread your bands through the slits. Start from inside the bottle and thread out. Tie off the ends with an overhand knot so they don’t come out.
9. Duct Tape the Slits
To prevent air from entering your mask and as added security for your bands, place some duct tape over the slits.
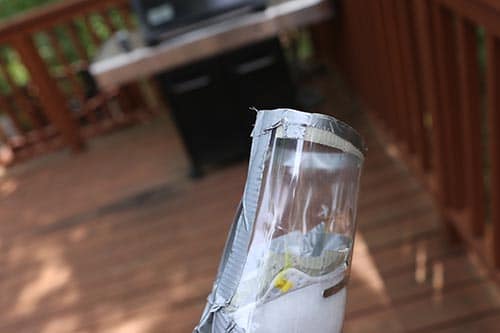
10. Punch Some Holes in the Bottle Cap
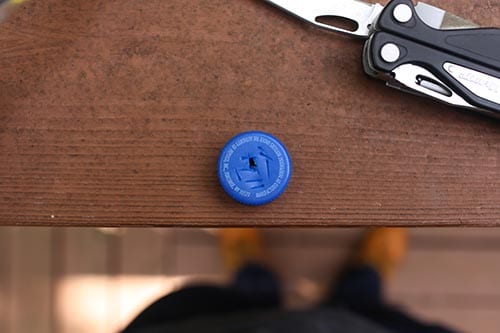
Use your knife and punch a few holes or slits into your bottle cap. This will allow you get a bit of air when you have the gas mask on. Based on my experience from Constellation, the slits weren’t enough to get adequate air intake. I’d recommend cutting a small square to let in a bit more air.

Cap screwed back on after slitting holes.
You’re Ready to Face a Post-Apocalyptic World
There you go. How to make an improvised gas mask in under 10 minutes. Now you’re ready to face a Cormac McCarthy-esque post-apocalyptic world in which the fabric of society is torn apart and all hell has broken loose.
Thanks to the cadre Mickey for showing me how to make this bad boy.