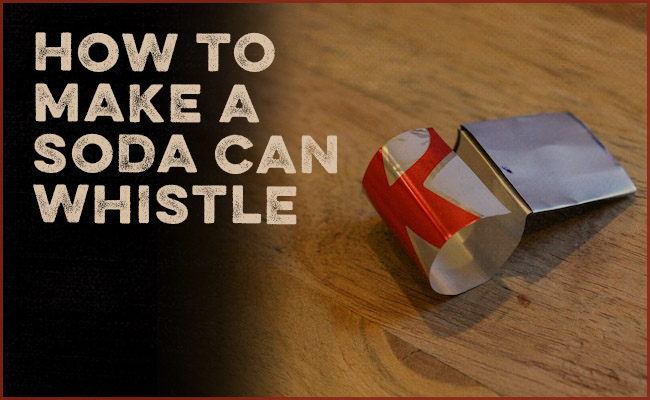
One of the most common items included in a basic survival kit is a whistle. This essential tool can mean the difference between life and death if lost in the wilderness. Along with signal fires, the call of a whistle is just about the only way for search crews to locate you when you’re in a dense forest or hilly terrain. Whistles are so useful that many pieces of outdoor gear integrate them into their design, including headlamps and backpack straps.
But, despite how common they are, plenty of people hit the trail without one. If you’re adventuring this weekend and don’t have a whistle, you can whip one up in your house in just a few minutes and for literally no cost at all (unless you happen to be fully without beer/soda). Knowing how to make one on the fly could also come in handy in a survival scenario (discarded cans can often be scavenged even in the woods); while I use things like a ruler and marker below, a rough version could be accomplished with just a pocket knife and can.
Note: Be careful when working with aluminum. Jagged edges can be razor sharp, and it can be easy to cut yourself when completing this project.
Supplies
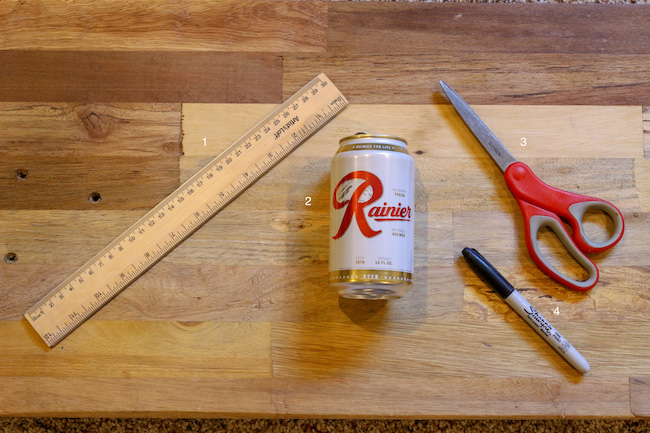
- Ruler
- Aluminum can
- Scissors (or knife)
- Marker
Step 1: Cut off the top and bottom of the can.
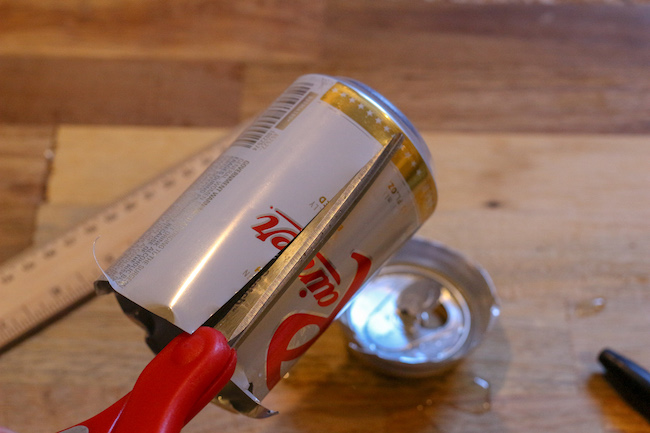
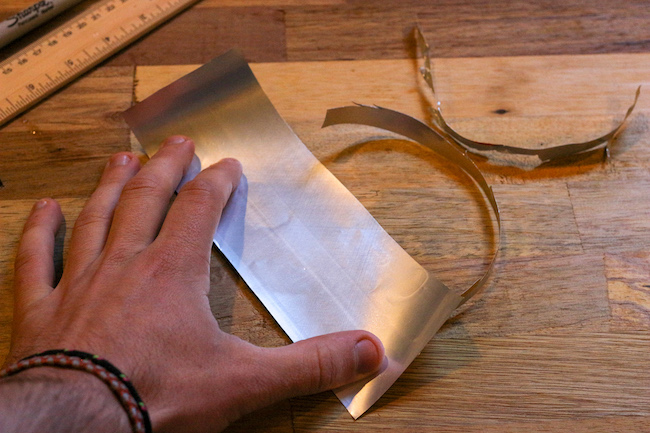
Step 2: Trim the resulting cylinder so that you get one long sheet when laid flat.
Step 3: Mark out a rectangle.
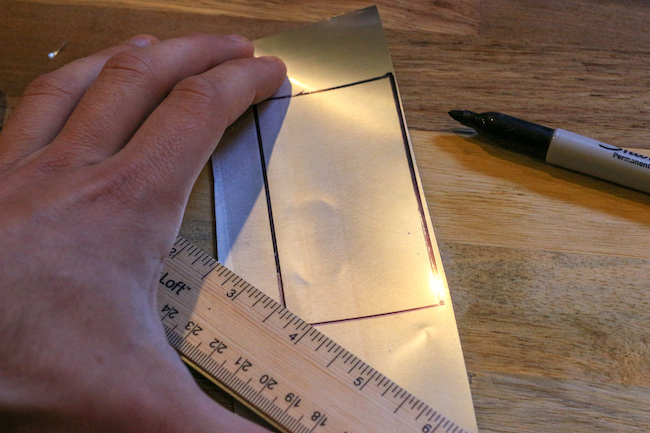
Mark out an area about 3.5 inches long and 2 inches wide — the size of a standard business card. The exact dimensions aren’t critical here; what’s important is that you make a rectangle at least a few inches wide.
Step 4: Cut rectangle.
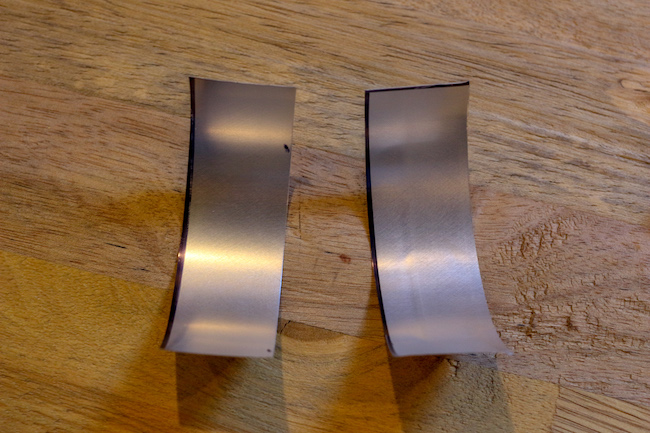
Cut out the rectangle, and then cut in half lengthwise so that you end up with two strips of equal length.
Step 5: Cut again.
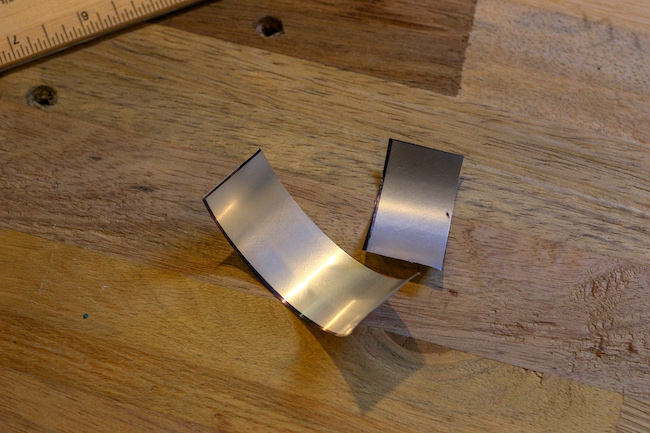
You’ll notice the pieces are curled a bit. That’s alright. No need to try to flatten them.
Take one of your strips and cut it in half the short way. Discard one half. At this point, you should have two strips of aluminum of equal width. One should be twice as long as the other.
Step 6: Overlap the shorter strip on top of the longer to form a cross.
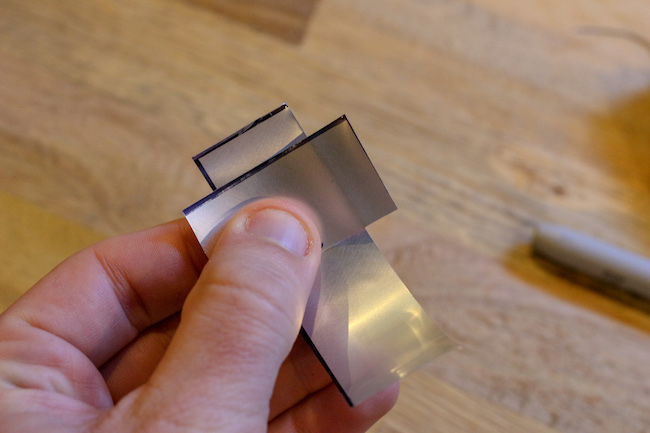
Step 7: Fold.
Fold the sides of the shorter strip behind the longer strip.
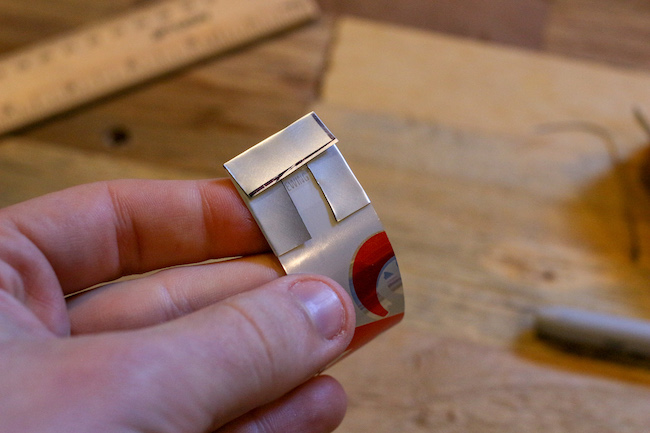
Then fold the top of the cross back as well.
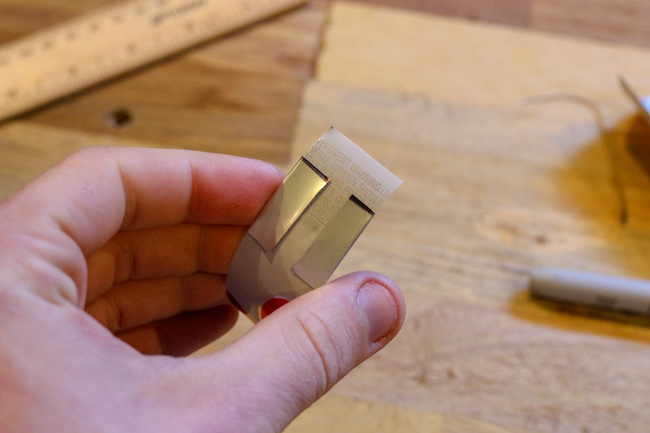
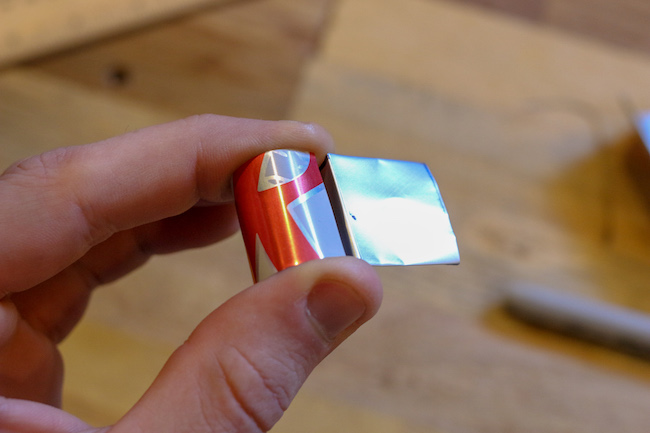
Step 8: Curl the opposite side of your whistle into a P-shape.

Curl it so that the loop is on the same side of the whistle as the folded parts from the previous step.
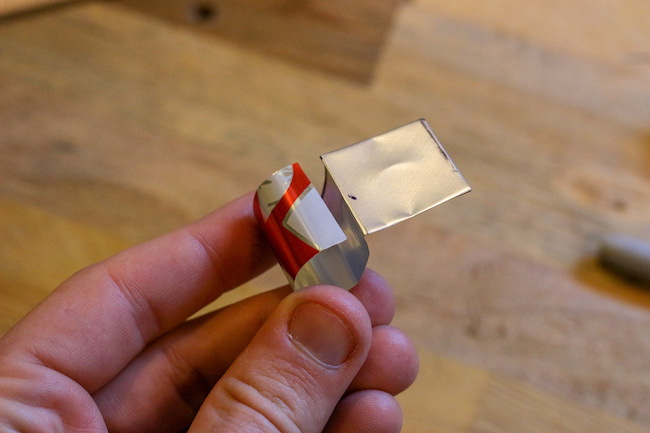
Step 9: Open up the mouthpiece.
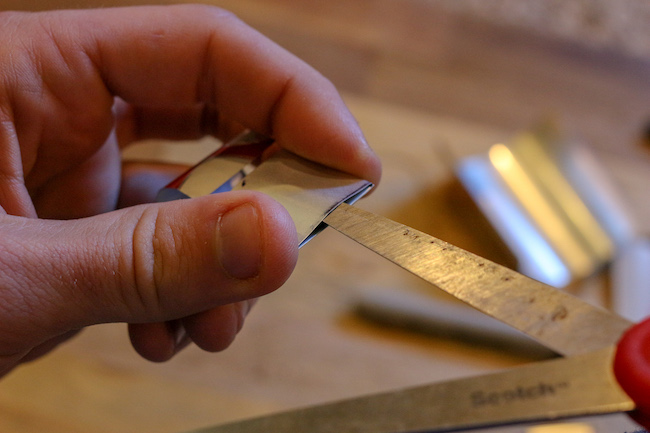
Use your scissors (or a knife tip) to expand the opening on top of the whistle. This is the mouthpiece where you’ll blow.
Step 10: Whistle!
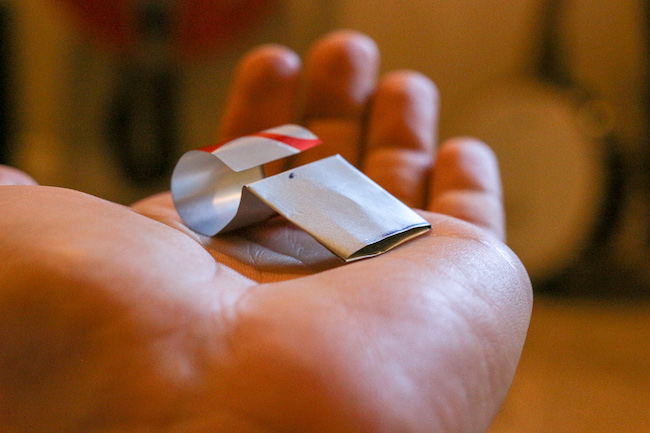
Hold the whistle, at the loop, with your thumb and forefinger sealing off the sides, leaving only the slit in the top of the whistle. Now, give it a blow! If you don’t get a solid sound, adjust the position of your thumb and forefinger. The whistle won’t work well unless you make a perfect seal on the sides.