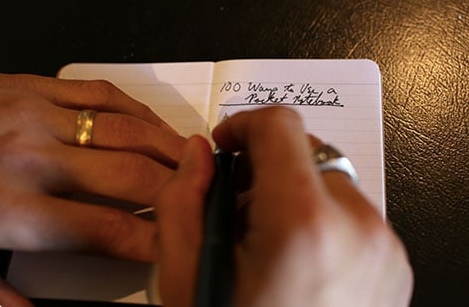
Of all the tools in your arsenal, without a doubt the most important is your pocket notebook. Notebooks are the obvious precursor to PDA’s and computers, and still have the upper hand on these gadgets in that they are quickly accessible, absolutely customizable and completely unique. No other technology will allow you to easily compile lists, sketches, calendars, notes, plans, links – exactly the way you want them.
Selecting Your Pocket Notebook
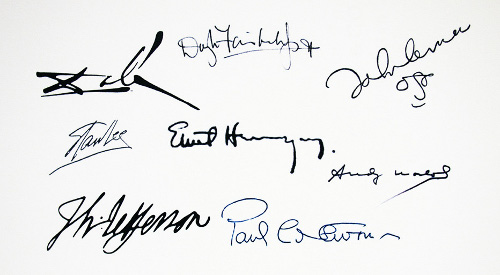
One of the most popular notebooks available is the moleskine. Why? Because it’s the classic – the notebook of Van Gogh, Hemingway and Picasso. It’s popularity makes it very easy to find, though as far as notebooks go, it is pricey (both because of the quality of construction and the desirability of the brand). Of course Moleskine is not the only notebook out there, so shop around and pick what is best for you. Here are some other options to check out:
Art of Manliness Pocket Notebook.
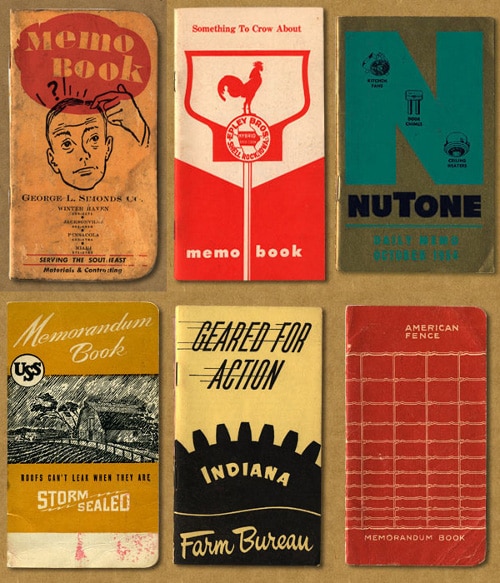
Field Notes. Field Notes offers a less slick verison of the Moleskine, with notebooks inspired by old agricultural memo books.
Rite in the Rain Tactical Field Books. These books are made with all-weather writing paper to allow you do just what the name of the company suggests.
Jas Townsend and Sons Brass and Ivory Pocket Notebook. If moleskines are a throwback to a time before PDA’s, these are a throw way way back. Based off of the design of the most OG pocket notebook carrier of them all-Thomas Jefferson-the ivory plates can be written on with pencil, smudged off with your finger, and used over and over again.
The Hipster PDA. Of course, why plunk down some dough for something you can make yourself? The hipster PDA consists of some notecards and a clip to hold them together. And there are plenty of variations out there on this theme.
My suggestion: If you’re going to buy a pocket notebook, buy your journal from an independent bookstore and support your local vendors. If you can, get something locally made or fair trade – and of course, the notebook has to feel right for you.
Picking a Style of Notebook

My moleskine is a pocket-size blank notebook. I prefer the blankness, because it is versatile for including drawings, and for writing more haphazardly, which consequently maps better my scatterbrained ideas. They also offer ruled and squared notebooks, in regular style or journalist flip-style. The total listing of their products can be found here. It’s a good idea to look them over in the store, and then take time to browse the rest of the store while you think over what suits your needs best.
Building Your Notebook into a GTD System
GTD: Getting Things Done. This is a popular trend in Moleskine usage, and what are referred to as Moleskine Hacks [Hack: Method of making something perform a different/extra function or act more according to one’s personal style.]
The entirety of a GTD system is based around either tabs or an index. In these, the user can categorize notebook sections, allowing space for different types of content. I prefer the visual feel of tabs, but there are many equally great tutorials on how to index your notebook.
For the sake of this article, I’m going to discuss tabbed notebooking. You may click on the link above to learn more about other ways to organize your notebook.

Image by Walker Cleavelands
Though some tab systems for the moleskine are elaborate, this will walk you through the easiest setup to prepare. First of all you’ll need some supplies:
Supplies:
Moleskine / other notebook
Ink Pen
Rubber Band
Sticky note page markers
Building Your System
First
I suggest you number your pages. To preserve space, I numbered only the odd pages in my moleskine. But find whatever works best for you. Numbered pages allow you to make a note of important page numbers as you write, so the important stuff doesn’t get lost.
Second
The last column in the table tells you which page to start your new section at (so you don’t have to count out your pages). Once you’re happy with the layout you’ve prepared, check to be sure you didn’t use too many pages (an amount is at the bottom, based on the number of pages inserted near the top of the screen). Then start tabbing! Write section titles onto the ends of your tabs, and place them sticking out the side. To avoid them being torn out, try to have most of the body of your sticky markers inside the notebook. When applying your tabs, be sure to leave a half-inch gap near the middle of the notebook; we’ll discuss that in a moment. Also, be sure to apply the sticky side of your tabs to the near side of the page (if the notebook is open, the tab should be sticking to the left-hand page), so that when they are pulled towards you, they pull the weight of the pages, instead of just detaching.
Third

Image by Walker Cleavelands
Your pen. Every good writer needs a good pen – and if you’re putting out money for a notebook, you don’t want a pen that dies halfway through writing your first sentence (if you’re anything like me, it would result in the first page being scratched to oblivion in an attempt to draw out some ink). Invest in a quality pen. I use an ink roller pen, which bleeds a little bit through the pages, but in a non-distracting manner – use whatever you feel comfortable with.
To be sure you always have a pen with your notebook, put a rubber band around the body of the notebook, in the gap you left in step two. The rubber band should be perpendicular to the one that comes built into the moleskine (or if yours doesn’t have one, the band should stretch from the spine to the opening.) Place your pen along the spine of the notebook, underneath the rubber band – and now you’ll never need to fumble for a pen when you really need one.
Utilizing Your Notebook’s Pocket
Now that you’ve got a good looking, organized notebook, you’ll notice one extra feature of many notebooks – made popular by moleskine. The back cover of the notebook has an expandable pocket. This is a great place to store some of the important things you’ll need with your notebook. Currently I keep the following in my notebook pocket:
- Library Card
- University Printing Card
- $5 bill (takes up less space than a gift card for a coffee shop, and it’s more versatile)
- Small stack of sticky notes
Other ideas: cheat sheets, letters, business cards, calling cards, bus passes, photographs, leaves, lucky pennies, flat rocks for skipping, bookmarks, fishing line, matches, twine, tylenol, hand wipes, camera memory cards, ad infinitum
Make It Your Own

There are a ton of creative things you can do with your moleskine to give it some character and make it more useful. My moleskine is pictured above. You’ll notice the white boxes; they’re a new addition, a sort of twitter for the moleskine – short quips, reminders, sayings, easily accessible and simplistic, as well as easily removable. When one becomes obsolete, I’ve got piles more of the stickers to replace them (I’m toying with the idea of not removing any, just stacking them when it gets full).
Now start writing
Your notebook is just missing one thing now – content. Start learning your system and getting used to finding things. Develop shorthand methods for notes and discover your style of organization with your new, cheap PDA.