It’s so satisfying to create something out of nothing — to add value and purpose to something once considered worthless. This project will show you the hidden treasures in your weed or brush pile.
The crotch between a trunk and a branch is a very strong part of a tree. This strength makes a hook created from this section of the tree functional as well as aesthetic. These rustic hooks are simple to make and suitable for use in a barn, garage, or in this case, near the back door. The best part of this project is that the raw materials will cost you nothing aside from the little time it will take to scrounge them.
You could quickly make a whole bunch of these and use them to line the wall in your coatroom or closet. A friend of mine did just that in his sauna. The natural wooden hooks are the perfect accent to the all-cedar hot-room, where metal or plastic hooks would look horribly out of place.
Materials
- Piece of tree limb (1″-3″ in diameter) with smaller branch (1/4″-1/2″ in diameter) forking off at 45-degree angle
- Loping shears or small pruning saw
- Woodworking vise
- Standard compass
- Pencil
- Japanese pull saw
- Small block plane
- Back saw (optional)
- Drill
- Drywall screw
- Pocketknife (optional)
Selecting Raw Materials
After you make a few of these hooks, you’ll find that every brush pile or weed tree will start to look like a pile of hooks. “Weed” trees are great for this project—silver maples, box elders, or buckthorn are exceptional. After the leaves drop and people thin out their trees, you’ll find a lot of material even on the curbside. Avoid conifers; their sticky sap will gum up your tools, and get pine pitch on anything you hang on them.
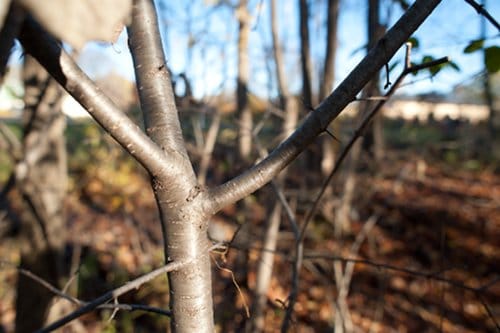
To choose good stock, look for wood that is 1-3 inches in diameter, with branches that are about a third to a quarter of the diameter of the main piece. Most of the branches will fork off about 45 degrees upward, which is perfect for your hook.
How to Make the Coat Hook
Step 1
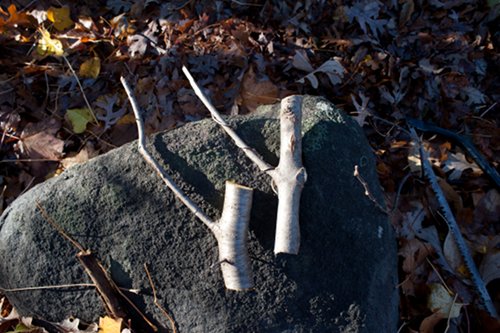
Step 1: Harvest wood for the hook. Use a good pair of loping shears or a small pruning saw to harvest the wood for the hooks. Cut everything too long; it’s much easier to trim rather than trying to add wood later. The finished dimensions of the hook vary, but to give you an idea, the one I’m building here is about 4 inches long and the hooked branch is about 1.5 inches. If the finished size is going to be 4 to 5 inches long, cut an 8-10-inch section of wood. If you come across a good bunch of branches, keep cutting blanks until you run out of arms to carry them.
Step 2
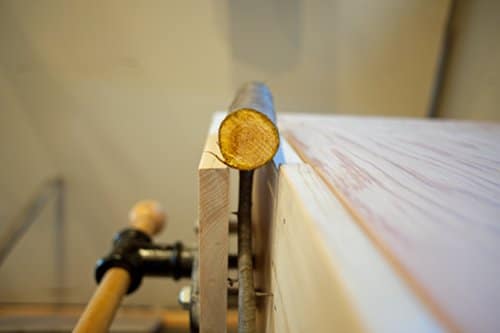
Step 2: Secure blank in vise. Put your blank tree branch in a vise with the prong of the hook pointing straight down. A woodworking vise like this one allows you to get a good view of your work so you can make sure the branch that will be the hook is pointing straight down.
Step 3
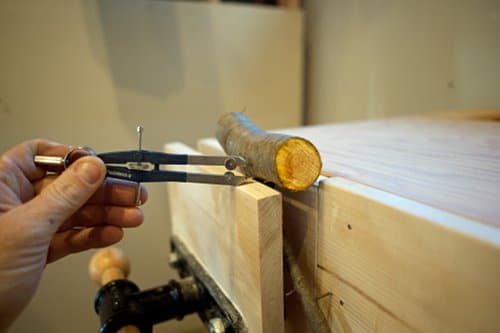
Step 3: Mark off the backside to be cut away. A standard compass will work well to mark off a line to cut in order to create a flat back for your hook. Your vise provides a level surface, which you can use as a reference to ensure an even, level mark. Scribe the line using a compass, as shown in the photo. You want to scribe both sides to make sure the back of your hook will be flat against the wall with your coat-hook pointing out 45 degrees from the surface of the wall.
Step 4
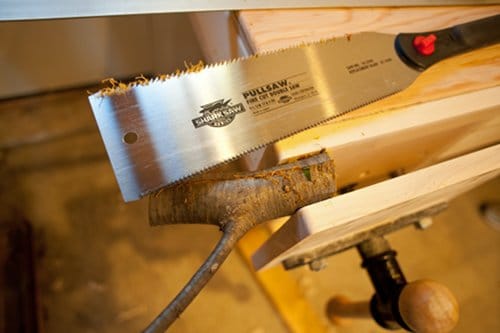
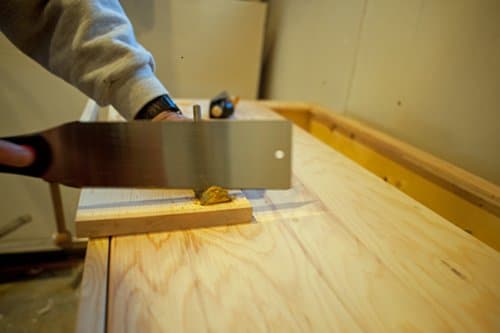
Step 4: Cut away back of blank. Reposition the blank in the vise with the end facing up. Then start cutting slowly, making sure that the blade of the saw is cutting straight down your line. I prefer to use a Japanese pull saw, which has a very thin blade and cuts smoothly. Your cut doesn’t have to be perfect, but the more perfect it is, the less planing or sanding you will have to do in the next step. It should look something like this.
Step 5
Step 5: Plane the back if needed. The back of the hook needs to be flat so it will not rock or move after it’s fastened to the wall. In this case, I intentionally made a little mistake as I cut so I could do a little planing. A small block plane will take off any high spots, and easy does it. A few swipes should do the job. If your cut was straight, you can skip this step altogether.
Step 6
Step 6: Finish the hook. Trim the top and bottom of the hook with your pull saw or back saw. I like to angle the saw so a little of the end grain shows when looking forward at the hook. To achieve this, angle your saw away from the end of your hook, maybe 20 degrees or so. The angle creates a cut that looks cleaner and more finished.
Step 7
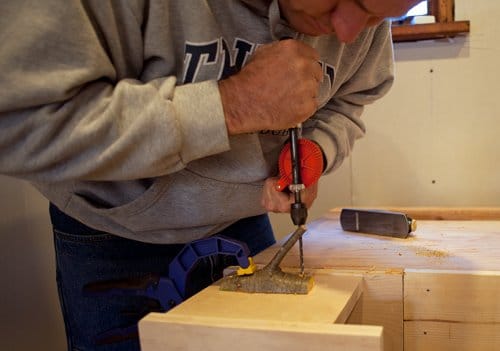
Step 7: Mount the hook. Drill a small hole, big enough for whatever size screw you’re going to use (I just use a drywall screw), and use a small countersink to hide the head of your screw.
The bottom screw is always easier to place, as there’s no hook to get in the way. For the top hole, you may have to angle the drill slightly to one side or another. Don’t fret about the angle too much, just get as close as you can to 90 degrees from the back.
Here I’m drilling the top hole, missing the hook while keeping the drill as vertical as possible.
Your hook is done. Almost.
Barked or Naked?
You have a choice of leaving or removing the bark. I usually prefer to leave the bark on the hooks I craft. Depending on the type of wood you use, the bark might add a rustic touch, which is nice if that’s a style you prefer. In our house, rustic is the word of the day, so we leave the bark.
You can use a pocketknife to peel off the bark if you wish. Bark peels off easiest in the spring, but it shouldn’t take more than ten minutes to remove no matter what time of year you gather the wood. If you wanted to add these hooks to a child’s tree house, closet or toy room, you could easily paint them bright colors.
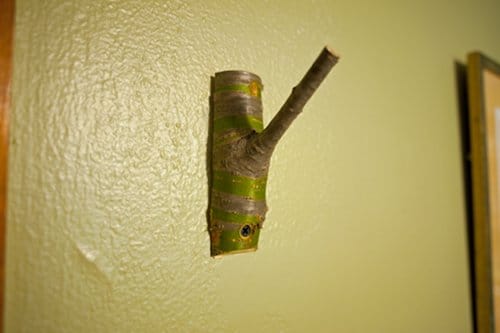
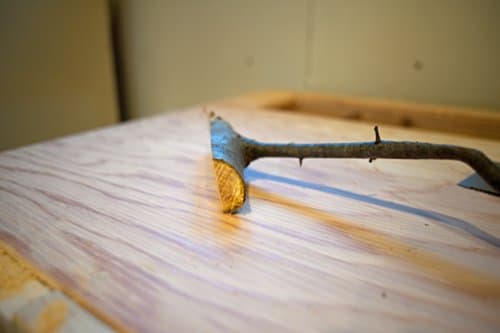
This is a piece of buckthorn, a weed tree I culled from the small, dry streambed near my home. I left the bark on this one because I really like its papery quality, much like birch but with a little color. It looks like it’s not flush with the wall; it’s not. I hadn’t screwed the top to the wall yet.
The next time you pass a brush pile, you may find yourself seeing a giant pile of gifts in the rough. For me, that’s the best thing about these hooks. I’ve never given one of these to a person without them grinning like a kid.