Editor’s note: This guest post (including its illustrations) is from Eddy Baller.
Cars are incredibly complex machines nowadays; with computers and difficult-to-understand, interconnected systems, doing work on them is increasingly the job of a professional.
Motorcycles, however, are much simpler. With smaller engines and fewer parts, these systems are much easier to work on and maintain. Working on your own bike is a great way to develop your mechanical aptitude, and changing the oil is a great place to start.
Before you get going, find your owner’s manual. It’s full of useful information. Specifically read the section on changing your oil. It will tell you the filter you need, which oil to buy, and how often to change it.
Supplies
- A stand to keep your bike upright and steady while you work
- A drain pan
- Gloves and rags
- Funnel
- Strap wrench
- Torque wrench
Additionally, you’ll need the right oil and oil filter for your motorcycle (which again is found in the manual). If you’re doing this somewhere you don’t want to spill oil on the ground, put down some cardboard and/or an old towel to catch anything that your drain pan doesn’t.
Step 1: Warm Up Your Engine
It’s much easier to change your oil when your engine is a little warm, so plan to get started after the engine has been running.
Some service manuals will tell you to warm the bike up to “operating temperature” which means you need to actually ride it for a good 30 minutes before changing the oil.
Warning: On air-cooled bikes, do not start it up and let it sit there idling for 30 minutes. You run the risk of damaging your bike.
Step 2: Clean Up
Set your bike up on a stand so it stays steady while you work. Then, take a rag and wipe down the engine area around the oil filter and drain plug.
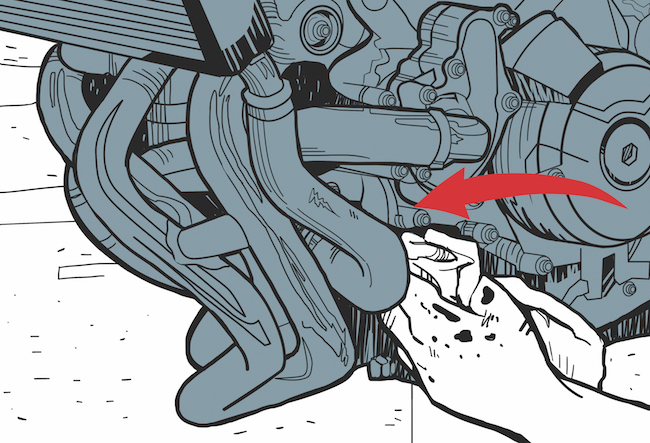
Step 3: Drain Old Oil
Place the drain pan under the drain plug, and crack open the plug. Hold your arm so you don’t spill oil all over yourself, and unscrew the plug by hand. Wait until all the oil has drained into the drain pan.
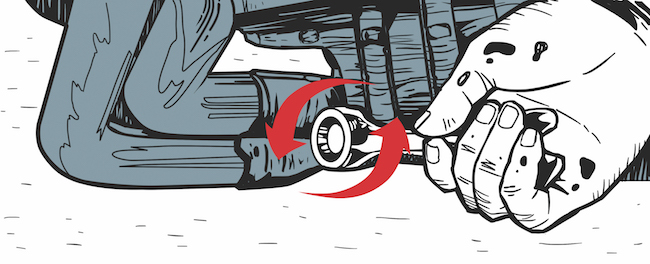
Step 4: Remove Old Filter
Once the flow of oil has stopped, you can change the filter. Use the strap wrench (another option is an oil filter wrench) to loosen the filter until you can unscrew it by hand. Pour the oil in the filter into the drain pan.
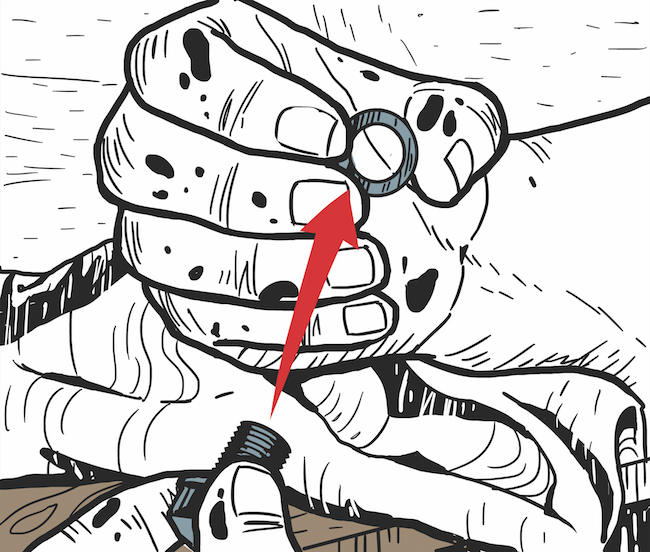
Step 5: Install New Filter

Apply a little oil from the drain pan to the O-ring on your new filter. The oil helps the filter slip smoothly into place and ensures a good seal. Also add a little oil directly into the filter so your engine doesn’t run dry when you start it.
Install the filter by hand, and turn it until you feel some resistance. Then, turn the filter about a half turn more. Be careful here — if you over-tighten your oil filter, you could damage the seal.
Step 6: Replace Sealing Washer
Wipe off the drain plug, and inspect the sealing washer. Most owners’ manuals will tell you to replace the sealing washer every time you change the oil, but this isn’t always necessary.
If the washer isn’t damaged, you can probably reuse it. Just flip it over and put it back on the drain plug.
Some bikes, like my Harley Davidson Ultra Limited, will use an O-ring instead of a washer, so be sure to get an O-ring kit from your dealer before you start the whole process. O-rings should be replaced every time.
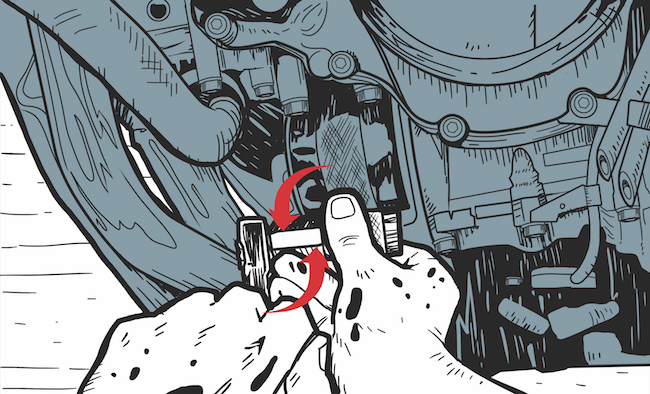
Step 7: Install Drain Plug
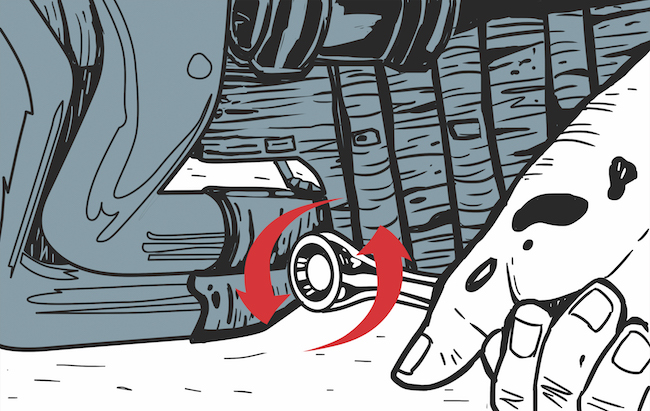
Put the drain plug back into place by hand. Snugging bolts in by hand first is important because you will avoid cross-threading, which damages the threads. Once it’s snug, tighten the plug with your wrench.
Again, if you over-tighten the drain plug, you can strip the threads on your engine. A very expensive mistake.
The safest way to tighten your drain plug is with a torque wrench using 14 to 16 foot-pounds of torque, or whatever is specified in your service manual.
Step 8: Add Oil
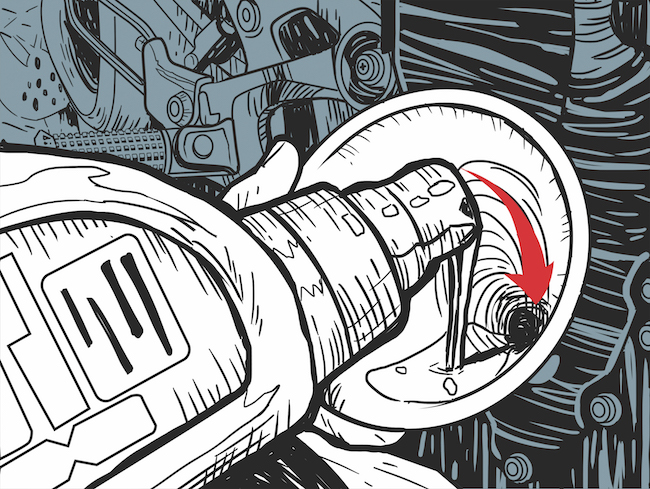
Pour in the oil. Your owner’s manual will tell you what kind of oil and how much to use.
Step 9: Check Your Work
Start the engine, and let it idle for a few minutes. Check the oil levels. Visually inspect the oil filter and the drain plug to see if there are any leaks.
Take the used oil and oil filter to an auto parts store, and they’ll recycle it for you.
That’s it! You’re done. Bask in the glow of a job well done.
Related Articles
- How to Wash a Motorcycle
- How to Change the Spark Plugs on a Motorcycle
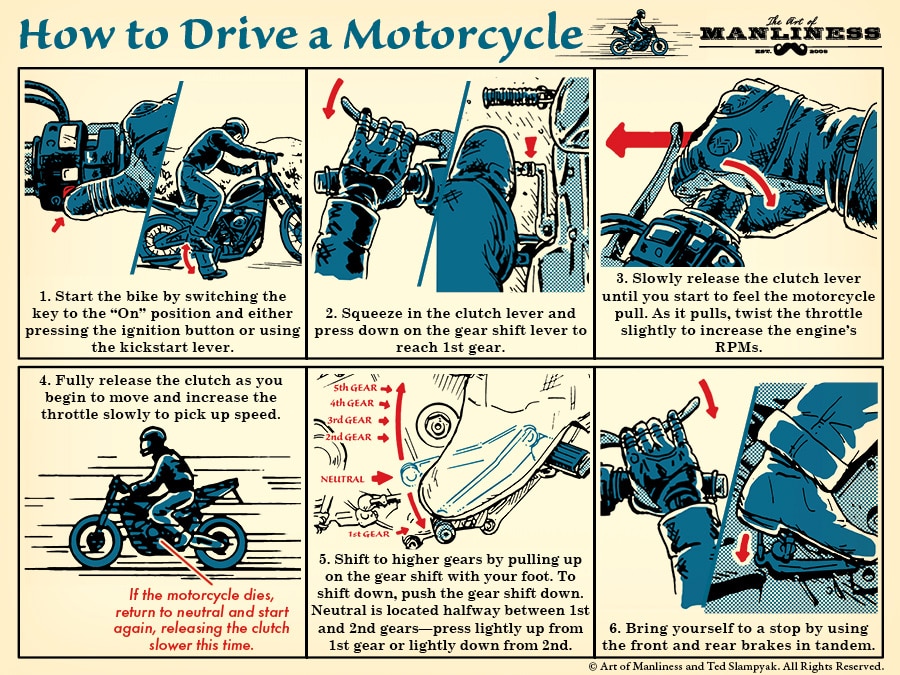
- How to Drive a Motorcycle
- Famous Men and Their Motorcycles
___________________
Eddy Baller is a dating & confidence coach who specializes in social skills and overcoming shyness. Read more on conquerandwin.com or contact Eddy directly with questions, thoughts, or coaching inquiries.