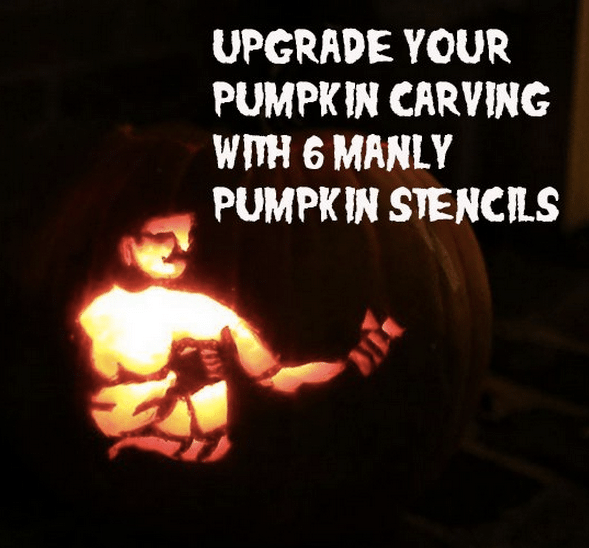
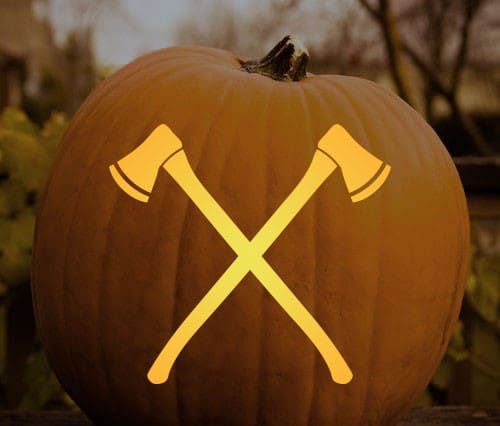
Jack-o’-lanterns with triangle eyes, a triangle nose, and a jagged mouth? Kid’s stuff.
This year, it’s time to inject some virility into your pumpkin carving and create the manliest gourd on the block. To help you upgrade your Halloween pumpkin carving, we’ve provided the following guide with tips to make it a bit more festive, as well as six — count ‘em, six! — one-of-a-kind, manly stencils that you’ll find nowhere else.
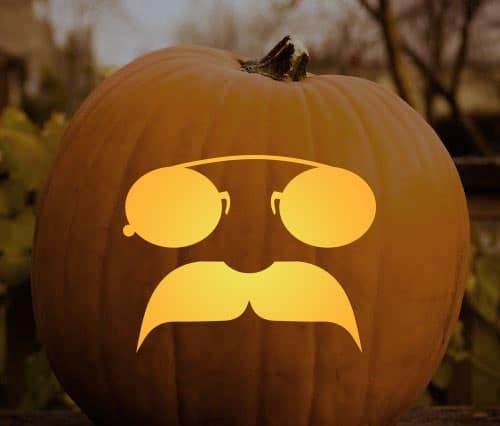
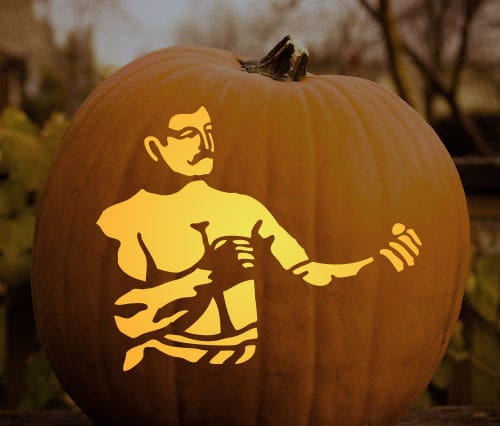
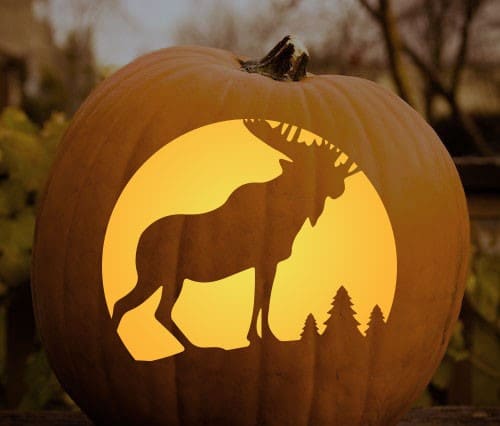
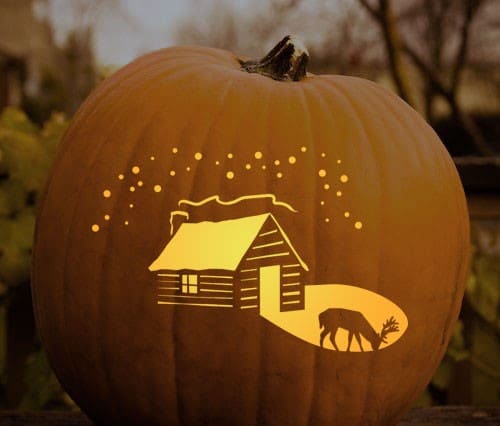
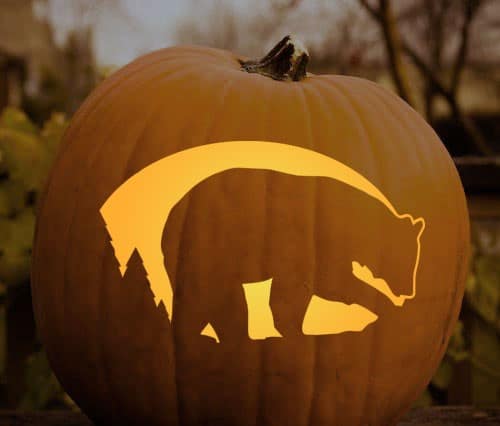
Pick your stencil. The first step in creating the manliest pumpkin on the block, is to pick your favorite stencil from the options below. Click the links to download a handy dandy PDF, and print it off.
Buy your pumpkin. Now that you’ve got your stencil picked out, it’s time to select the pumpkin on which it’ll be emblazoned. Visiting a pumpkin patch makes for a great fall date. Hay rides, corn mazes, cider donuts. Your lady friend will likely want to take an obligatory pumpkin patch Instagram pic. #pumpkinpatch! Humor her, but stay focused on your mission — to find the perfect pumpkin for carving.
Your two main criteria for pumpkin selection should be shape and smoothness. You want a pumpkin that sits up straight. Larger pumpkins are usually lopsided from having tipped over and grown on their side while out in the ol’ patch. Most medium-sized pumpkins will have that nice shape you’re looking for.
After shape, next consider the pumpkin’s surface. Find one with nice smooth “skin.” Avoid those with dents, scratches, and rough skin growth. First off, they’re just not aesthetically pleasing. Second, and more importantly, those imperfections make carving more difficult.
And of course, the pumpkin should be large enough to accommodate your stencil, so consider bringing it along to make sure.
Get your tools. You might have used kitchen knives to carve your pumpkins growing up, but these days there are pumpkin carving sets available that cut better, and are safer to use than the blade you also cut your steak with. Pumpkin carving blades have serrations of varying sizes that can be used for rough or more detailed cuts. You can buy a cheap carving set at your local drugstore, but they usually break after just one carving session. If you’re looking for something that will provide years of service, check out the Warren Cutlery’s Pro Pumpkin Kit.
If you want to speed up the pumpkin carving process without sacrificing detail, consider investing in a Dremel pumpkin tool. Yes, such a thing exists.
You’ll also want to have a scoop of some sort to clean out the pumpkin guts. A big kitchen spoon will work in a pinch.
Set the mood. Listen to some old-time spooky radio shows while you’re pumpkin carving. The Thing On the Fourble Board is a good one.
Be sure to have plenty of drinks and snacks on hand. Cider donuts are a great fall treat, and can be ordered fresh online from the Cold Hollow Cider Mill in Vermont. They’re fall-tastic, though be prepared to eat at least a half-dozen in a single setting. The donuts go great with a warm mug of Winter Jack — a blend of apple cider liqueur and Jack Daniel’s Tennessee Whiskey. (Drink responsibly!)
Prepare the pumpkin. Take the pumpkin carving saw with the largest serrations and start cutting a circle around the stem. You should make the hole wide enough for you to easily get your giant meat hook in the pumpkin and scoop out the seeds and goo.
As you cut, make sure to angle the knife so you create a cone-shaped lid. This will keep it from falling through the hole when you put it back on.
To ensure you’ll be able to easily put the lid back on later, cut a small triangular notch as you create the circle around the stem. When you place the lid back on the pumpkin, just align the notch on the lid with the corresponding cut on the pumpkin.
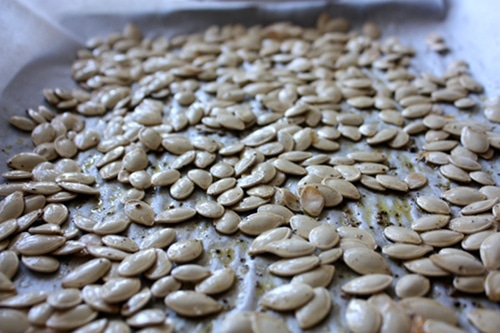
Scoop out the guts and seeds and set them to the side. You can roast the pumpkin seeds later.
Transfer the stencil. There are two ways to transfer your stencil to the pumpkin. The first is to simply tape your stencil to the gourd and then use a nail to poke holes (just enough to pierce the paper and pumpkin skin) along the lines of the pattern. This can be time-consuming and tedious, but it gets the job done.
If you want to save time, transfer the stencil to the pumpkin with some Seral Transfer Paper. It works like carbon paper. You simply place the transfer paper between the printed-off stencil and the pumpkin, and you trace over the stencil with a pencil. When you remove the stencil and the transfer paper, your cutting lines will be on the pumpkin.
Carve! For big cuts, use the large serrated saws; for detailed cuts, use the smaller ones. Take your time. It’s tempting to rush this, but you’ll just mess something up if you do. For intricate designs, look to spend 45 minutes to an hour carving. I’d also have a copy of the stencil on hand so you can check to see how your work is going. I sometimes forget that I should only be cutting out the pieces shaded in black on the stencil.
Preserve your pumpkin. There’s nothing sadder than a shriveled up jack-o’-lantern on your doorstep come Halloween night. Pumpkins wilt when they lose moisture. Once you cut open a pumpkin, you break the protective barrier that keeps it nice and moist.
To ensure your pumpkin is in tip-top condition for trick-or-treaters, I recommend waiting to carve your jack-o’-lantern until the night before Halloween. A pumpkin can hold up for at least 24 hours before you see noticeable shriveling.
If you’d like to have your lantern displayed on your porch longer than just a day, slather your pumpkin’s insides with Vaseline or some other petroleum jelly product. This will lock in moisture and keep your precious artwork from wilting.
Light ‘er up and enjoy! Small white votive or tea candles work well for the illumination.
If you use one of our stencils, please share with us on Instagram by tagging your pic @artofmanliness!