In January of 2015, two Canadian hikers set off on a hike in the Eastern High Peaks Wilderness of the Adirondacks. There was snow around, but it seemed like the trail was clear enough so they opted to stick with their boots and leave the snowshoes behind as they made their way toward the top of Mount Marcy. By the time they reached the summit, the weather had turned and reduced visibility to almost nothing. Heading back down, they quickly lost the trail and ended up struggling through deep snow, exhausting their legs until they were forced to make shelter under a tree and ride out the night. The next day, they struggled on and were eventually found by rangers.
While this story ended okay (if uncomfortably) for the hikers, it could have turned out tragically. It’s easy for hikers looking to bag a few late season days in the wilds to forego snowshoes when the path near the trailhead is clear. But weather and trail conditions can change quickly. If you’re unprepared and you encounter snow on the trail without proper equipment, like snowshoes, it’s best to turn back and try again another day when you’ve got the right gear. But, if you find yourself stranded in the wild and battling deep snow, an improvised set of snowshoes might be the thing that helps get you out alive.
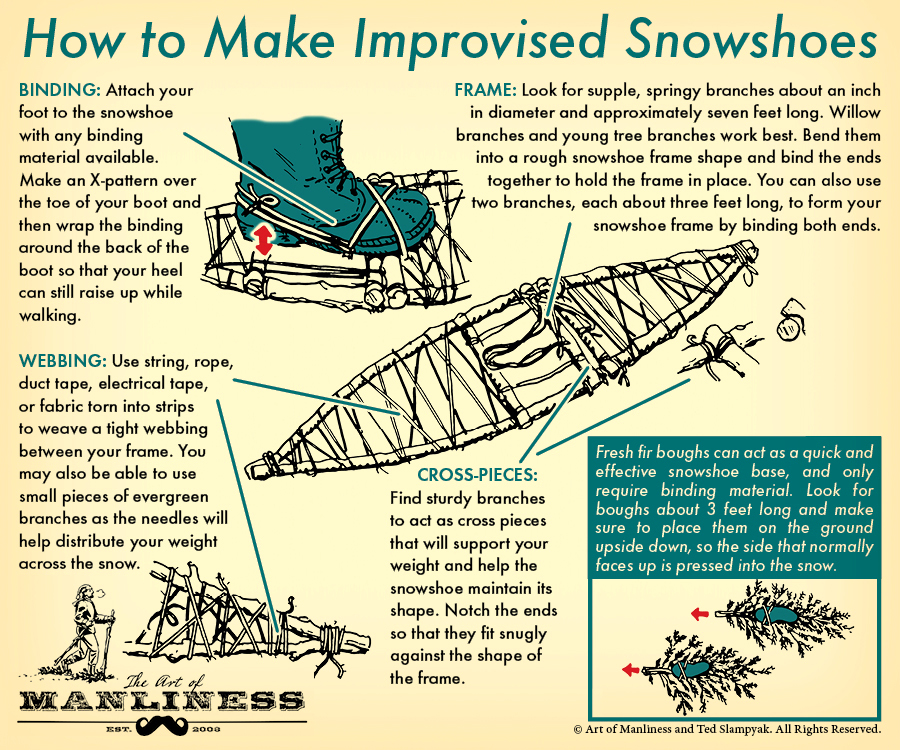
Binding: Attach your foot to the snowshoe with any binding material available. Make an X-pattern over the toe of your boot and then wrap the binding around the back of the boot so that your heel can still raise up while walking.
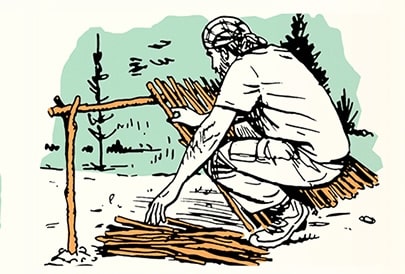
Frame: Look for supple, springy branches about an inch in diameter and approximately seven feet long. Willow branches and young tree branches work best. Bend them into a rough snowshoe frame shape and bind the ends together to hold the frame in place. You can also use two branches, each about three feet long, to form your snowshoe frame by binding both ends.
Webbing: Use string, rope, duct tape, electrical tape, or fabric torn into strips to weave a tight webbing between your frame. You may also be able to use small pieces of evergreen branches as the needles will help distribute your weight across the snow.
Cross-pieces: Find sturdy branches to act as cross pieces that will support your weight and help the snowshoe maintain its shape. Notch the ends so that they fit snugly against the shape of the frame.
Like this illustrated guide? Then you’re going to love our book The Illustrated Art of Manliness! Pick up a copy on Amazon.