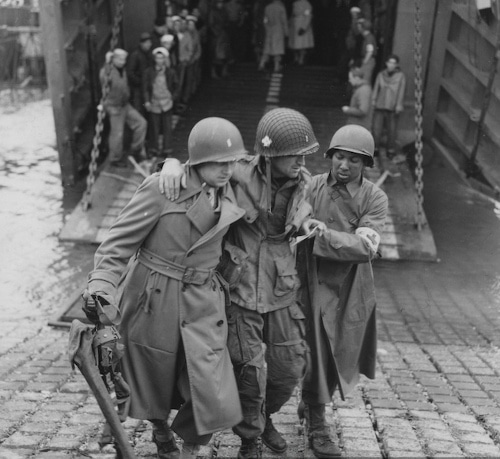
Editor’s note: This is a guest post from Bruce A. West. Mr. West served as an Army medic in the Iraq war. He taught over 500 soldiers how to save lives in a class called Combat Lifesaver, and will be sharing his knowledge here on AoM in a series on important first aid/first responder skills every man should have.
You’re hiking along a trail with your buddy when a mountain lion darts out from the bushes, leaps onto your friend, and sinks its teeth into his leg. You grab your pocket knife and stab the cat with it, causing the animal to run off. Your buddy’s leg is a chewed up mess, and it’s bleeding profusely. You’re miles from civilization…do you know what to do?
Basic emergency medical skills are a must-have to survive the perils you encounter in the wilderness–or even in your own backyard. There are many schools of teaching in first aid, but few know how to keep it SIMPLE quite like the Combat Medic. Sure, modern medics carry bags full of fancy gear, and they use it too–but what they can do in lieu of these tools is what a man should know for survival.
In the woods, along a road, or in the aftermath of a natural or man-made disaster, you won’t have major trauma equipment. At most you’ll have a first aid kit, the clothes on your back, and whatever is available in the environment around you. But when you know how to improvise, these are all the tools you need. These techniques aren’t in textbooks. They don’t follow all the rules. They’re the battle-tested survival skills that have been passed down through generations of line medics. They’re fast. They’re simple. And they save lives.
One of those skills is knowing how to control major blood loss without dedicated gear. And it’s something every man—whether soldier or civilian–should be well-versed in. Today I’ll be providing a primer on this lifesaving piece of knowhow.
Your Blood Loss Control Battle Plan
If there’s someone else with you besides the victim, have them call 911. If it’s just you and the victim, stop the victim’s blood loss first, and then call 911. To stop the blood loss, follow these steps:
Step 1: Make sure your surroundings are safe, and keep yourself safe by wearing gloves.
Protect yourself from immunodeficiency diseases (and all other diseases) by putting on some rubber gloves. Because of people’s potential allergies, I would suggest spending a couple dollars more and investing in powder-free, latex-free gloves for your car or first aid kit. The common gloves used in today’s EMS are made of nitrile. They’re cheap, and they fit nicely in your car’s…glove box (finally it will live up to its name!). Your use of gloves doesn’t commonly anger people you’re saving, so do it for ALL victims.
Step 2: Expose the open wound.
We have a saying in emergency medicine: “A happy trauma patient is a naked trauma patient.” You just don’t know what’s wrong with them if you can’t see it.
Remove the clothing over the injury. Nothing fancy to it: tear the pant leg or shirtsleeve out of your way. If their clothes are too tough to rip by hand, carefully start the cut with your knife.
Step 3: Apply firm, direct pressure to the wound site.
Use gauze on the wound during this step if it’s available. If there is no gauze, use a towel or washcloth or a rag torn from a shirt. Try to avoid having to use this homemade dressing unless it’s an emergency situation, i.e., the patient is bleeding excessively, or you are far from civilization. Non-sterile bandages can cause further unnecessary infection–but keep in mind that if you’re five miles from nowhere it is better to contain the wound with only a few germs than leave it exposed to all germs.
If the pressure does not stop the bleeding, and the dressing becomes soaked with blood, you will need to apply a tourniquet.
Wait! Are tourniquets safe?
Before we move on to the next step, I think a word about the safety of tourniquets is necessary, as much of what you think you know about bleeding control is probably based on outdated knowledge. For decades, standard emergency medical services (EMS) controlled bleeding using a series of six tedious steps. The tourniquet was seen as the nuclear option and was used only in a last ditch effort to stop bleeding. The aversion to the tourniquet was based on the belief that by completely stopping blood flow to a limb, tissue around the limb would start to die, which would result in the patient having to undergo amputation. Unfortunately, by following traditional bleeding control steps and leaving tourniquets as a procedure of last resort, people lost more blood, and even their lives, than was necessary.

Unlike civilian EMS, military medicine practices have long called for tourniquet application much earlier in the treatment for blood loss. Recent research in military hospitals in Iraq and Afghanistan has shown that, contrary to popular belief, using a tourniquet doesn’t guarantee limb amputation or even nerve loss. In fact, researchers found that among patients who had a tourniquet applied to a limb before arriving to the hospital, only 0.4% of them underwent an amputation and usually the reason they got an amputation had nothing to do with the tourniquet. On the nerve damage front, only 1.5% of tourniquetted patients suffered any kind of permanent nerve damage. Based on this newfound knowledge, many civilian EMS teachers and practitioners are starting to encourage tourniquet use much sooner.
Necrosis of muscle tissue doesn’t onset until after 2 hours without blood flow, and can even last 5-8 hours without consequences resulting in amputation; so you can keep the tourniquet on for awhile–but you want to get the victim help as soon as possible.
Now with that FYI under your belt, let’s move on to choosing and applying that tourniquet.
Step 4: Choose a tourniquet.
In today’s military, all soldiers are issued tourniquets to accompany their armor and weapons, and every soldier is trained and proficient at applying his tourniquet–even one-handed on his own arm. The common tourniquet used by the army, the Combat Action Tourniquet (CAT tourniquet), is made for single-handed application; they run around $30 and aren’t practical for a civilian to carry around in his pocket every day.
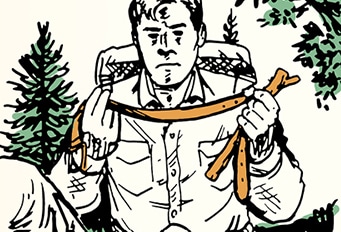
Luckily you don’t need a dedicated tourniquet to save a life. Look around you; there are tourniquets everywhere. Are you wearing a belt? Tourniquet! Have laces on your shoes? Tourniquet! Long sleeve shirt, bicycle inner tube, backpack strap, or a female observer’s brassiere? All tourniquets! You can fashion this lifesaving device out of anything your mind can conceive as a tourniquet. (You might consider rope or a survival bracelet first if you have them handy.)
In order to tighten your tourniquet, you’ll also need a torsion device. This can be anything long and stick-like. If you’re in the woods I recommend using, well, a stick. If there are absolutely no sticks or stick-like objects around you, then close your knife’s blade, or put the sheet on it, and give it up for a good cause. It’s now your torsion device.
Step 5: Apply the tourniquet.
First, so we’re all on the same page: Tourniquets are ONLY applied on limbs! Never on a neck! (If you did this, you wouldn’t be the first.) Major bleeding control practices in areas not accessible by tourniquets (like the stomach and back) will be covered further at another time. With that out of the way, here are the steps of applying a tourniquet:

Wrap the limb with a rope/belt/bra at least two inches closer to the body than the wound. Do not apply a tourniquet over a joint–blood passageways are protected in joints, and you’ll never put pressure on the arteries. Place it closer to the body than the joint. Then tie the tourniquet in place once using an overhand knot.

Place your desired torsion device on top of the overhand knot. Tie another overhand knot, then another (or tie a square knot if you’re knot savvy) to secure the torsion device onto the tourniquet.

Twist the torsion device in one direction until bleeding stops.

Secure the tourniquet in place. This can often be accomplished by using the loose ends from your last knot to tie one end of the torsion device to the tightened tourniquet, or to the limb.
Step 6: Assess for shock.
So you’ve saved this person from bleeding out with a handy-dandy tourniquet. They’re not home free yet. Make sure they’re still breathing. Seems obvious, but if you fail to do so you’ve wasted a tourniquet. You’ve probably heard the adage: Look, listen, and feel! Put your ear near their mouth and listen and feel for breathing while looking at their chest to make sure it rises and falls. If it doesn’t, make it. Here is where you apply CPR. But that’s another lesson for another day.
After you’ve made sure your patient is indeed still breathing, check for signs of shock. If you’ve placed a tourniquet on the patient, it’s very likely they’ll suffer hypovolemic shock. Don’t freak out–it’s a big sounding word, but it basically means: “too little volume.” They’ve just given up a lot of blood volume, so it’s kind of a given–though not a guarantee. Signs of hypovolemic shock include:
- Cool, clammy skin (moist, cool, and pale skin)
- Cyanosis (big word, but it means blue skin)
- Weakness
- Confusion
- Rapid breathing
- Unconsciousness
To treat shock, first lay the patient down flat on his back. You may have once learned to elevate their feet–dismiss this practice! Research has shown this can cause pooling of blood in the organs and brain and other damage. Next cover the person to keep them warm: employ blankets, coats, and clothes, whatever you can offer–just keep them warm! (That old hypothermia technique of huddling for heat can come in handy here too.)
Step 7: If 911 has not been called yet, do so now.
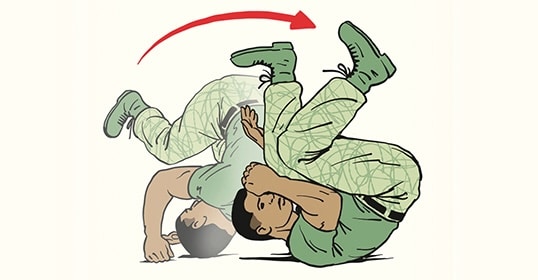
If rescue workers cannot get to you where you are, or there is no phone service, never leave the victim alone to look for help–grab them and go. Be prepared to do the fireman’s carry.
Congratulations! You now know how to save a life! Go out unto the world knowing you can help make it a safer place.
Disclaimer: This lesson, while informative, far from replaces the invaluable experience of taking an American Red Cross first aid course. It is strongly recommended you contact your local Red Cross representative to set up a class and become certified. While you’re at it, take CPR as well! You’ll rarely regret your decision to be educated in lifesaving when you’ve had the opportunity to apply it.