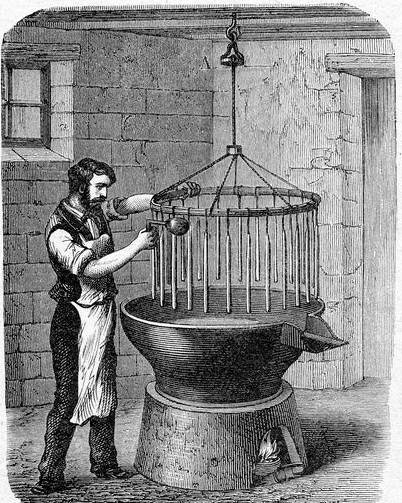
While an interest in candles seems to be more common amongst ladies than men in our modern age, the making of candles itself is a rather masculine skill that traces back thousands of years. Especially in medieval times, the trade of chandlery (candle making) was vitally important to kingdoms and villages. Light was obviously a necessity, and that light came from wax or tallow (animal fat) candles. Businesses, homes, parishes, etc. all relied on chandlers, making it a rather lucrative profession for the medieval craftsman.
Today, while candles aren’t a practical necessity, they can add a masculine or romantic ambiance (depending on what you’re going for) to any room. I’ve been a candle user myself for many years, enjoying the steady, but flickering flame on my desk, along with the scents of bourbon and brown sugar, sandalwood, custard, and more. Candles can truly be very meditative and thought-provoking.
But, they’re also expensive.
Turns out homemade candles cost just a few bucks each, smell and burn just as well as the expensive ones, and make for a fairly easy project that won’t take you more than a couple hours. They make for great additions to your workspace or den, as well as excellent and inexpensive DIY gifts for your loved ones.
While there a few different types of candles you can make, we’re going to focus on container candles. Rather than free-standing wax, these are the candles that you find housed in jars or other containers (hence the name). These are the simplest to make, as they don’t requires molds or any other specialized tools. You simply find an old mug, or buy some cheap mason jars, and you’re set.
Let’s get going!
Supplies
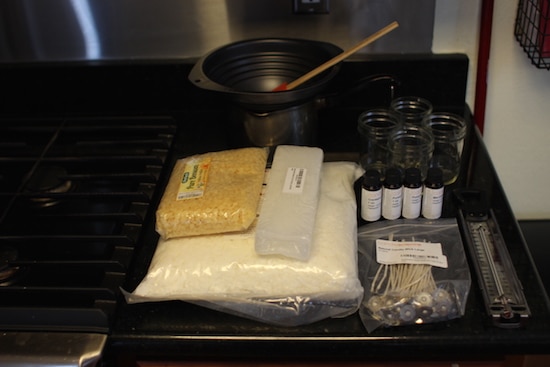
To get started making candles, you’ll need a few supplies and tools. The startup cost is still relatively low though, and once you have your supplies in place, you’ll be able to create numerous inexpensive candles.
Wax. This is obviously the heart of the candle. There are three primary types to choose from in the candle-making world. Let’s take a quick look at each:
- Paraffin. The traditional wax used in standard candles for hundreds of years, and is still the most popular ingredient for candles on the shelves today. It’s cheap, and you can easily add colors and scents. The primary concern with paraffin is its potentially toxic nature. Paraffin is a petroleum byproduct, which automatically gives it a bad name for some folks. If all-natural products are your thing, it’s probably best to seek an alternative wax. Price: $2-$10 per lb.
- Soy. The newcomer on the block, and becoming more and more popular. It was created in the ’90s when the “natural” movement started to gain steam. It’s generally made with soybean oil, but also sometimes blended with paraffin and other waxes (palm, bees, etc.). It also easily accepts colors and scents. Price: $2-$10 per lb.
- Beeswax. The oldest candle-making ingredient; in fact, beeswax candles have been found in the great pyramids of Egypt. As the name implies, it’s produced by bees, and is a byproduct of the honey-making process. Because of that, it has a naturally golden color, as well as a subtle, sweet scent. It’s obviously a completely natural product, but you won’t be able to add other fragrances to it very effectively; the natural scent will interfere with any that you try to artificially add. It’s also the most expensive option. Price: $10+ per lb.
Most waxes you buy for candle-making will come in pellet form, making it much easier to work with, and much quicker to melt. If it does come in a block (my paraffin did), use a sharp knife to chop it into smaller chunks.
In my experiments, beeswax performed the worst of the waxes. It just didn’t burn as well as the others. And with no scent (I couldn’t detect much of the supposed natural scent), it sort of defeats one of the purposes of having a candle anyway. I didn’t notice too much of a difference between the soy and paraffin candles; user preference wins out there.
Wicks. The wrong wick can ruin your homemade candle. Your primary concern is size, which is really width. For the container candles that I’m guiding you through, you’ll almost always want a large wick (most are simply sized “small,” “medium,” or “large”). Since your candle likely has a diameter of a few inches, the larger wick is the way to go. Length of wick doesn’t matter much; you’ll probably be trimming it down no matter what.
Fragrance Oils. Without fragrance, you just have burning wax. While it looks nice, it doesn’t create the pleasing aroma that today’s candles are largely made for. There are thousands of scents to choose from that are just a google search away. I used candlescience.com to buy specially formulated candle fragrances. You can use essential oils, but from what I’ve researched, the final product doesn’t end up as nice. Choose from such masculine scents as Fireside (a blend of clove, amber, and sandalwood), Apples & Maple Bourbon, Blue Spruce, Buttered Rum, Coffee, Whiskey, and more.
Double Boiler. You can use a true double boiler if you’d like, but I went with a universal model that just sits on top of any pot you already have, and it’s worked great. Best of all, it’s cheap, and easily storable in a cupboard. This is definitely a must for candle-making; melting the wax directly over the flame in a normal pot is too hot.
Container(s). Coffee mugs, glassware, mason jars — anything that can withstand heat can be used as a container for a candle. I bought some 8oz mason jars, and they’ve been just right (cheap, too!). Having a lid makes them a breeze to transport/ship as well, so you can easily give them as gifts.
Accessories: Thermometer, Spatula, Old Pen(s), etc. Having a thermometer on hand is nice so you can quickly take the temperature of the wax. When you buy wax, especially some that’s designed for candle-making, it comes with instructions as to which temperature to add fragrance, when to pour into the container, etc. Use a spatula or spoon to stir the wax and break up larger chunks. Later, you’ll find out why old pens/pencils come in handy. As you go along, you may also find some little things you need; just be prepared for wax to end up on everything.
Note: The majority of the images below are from making the beeswax candle; the color of the wax makes it easier to see what’s going in images rather than the perfectly clear wax (until it sets and hardens, of course) of paraffin and soy. The process is literally exactly the same for all the wax types.
How to Make Candles at Home
1. Prepare the Work Area
Dealing with wax is a rather messy affair. Especially as it melts, droplets can get anywhere and everywhere, and you won’t even know it until the wax dries. Set up newspaper or paper towels around your work area. Use those to set your thermometer, spatula, etc. on; beware, they’ll probably stick a little bit. Thankfully, wax isn’t that hard to clean (even though it may be a bit laborious), and you can usually just scrape it off with a fingernail. Also have your jars (or other containers) and wicks at the ready; once it gets going, the process goes a little quicker than you might initially expect.
2. Melt the Wax
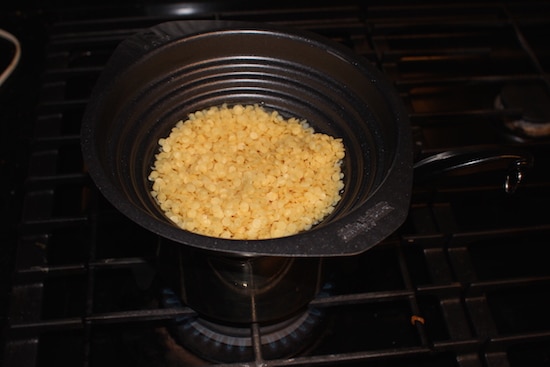
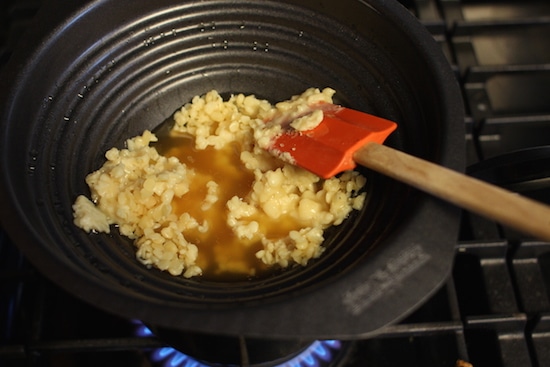
Using your double boiler, melt the wax. Put a good amount of water in the bottom pan, put about half a pound of wax in the double boiler (this makes the perfect amount to fit in an 8oz mason jar), and watch it melt. It’s actually pretty fun to watch. Stir it and break up big chunks with the spatula. It only takes 10-15 minutes for the wax to melt. Be sure to keep an eye on the temperature; you want it to generally be around between 160 and 170 degrees. If it gets higher than that, take it off the heat.
3. Adhere Wick to Container
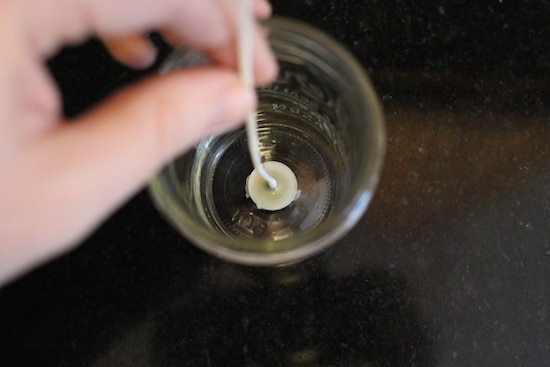
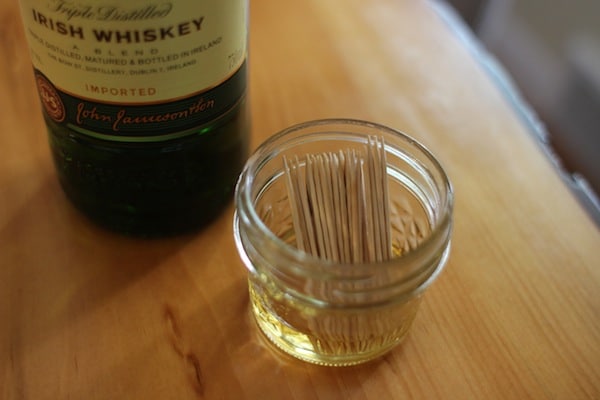
While the wax is melting, adhere the wick to the container. Some wicks have a little sticker built-in on the bottom, but most do not. Super glue is one option, but I actually used an old candlemakers trick with great success: As the wax starts melting, it’ll form a pool of liquid. Dip the metal tab of the wick into that melted wax, then quickly adhere it to the bottom of the container — centered of course. After just a couple minutes when the wax hardens, it’ll be stuck solid to the bottom.
4. Add Fragrance Oils and Stir
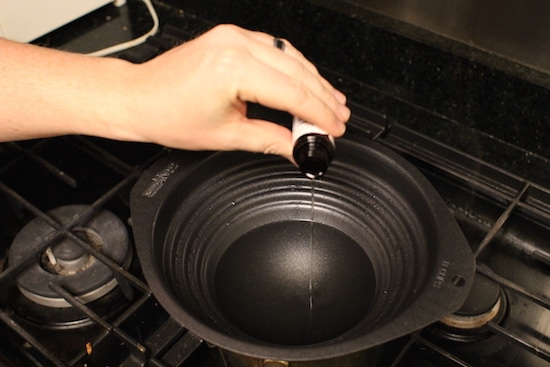
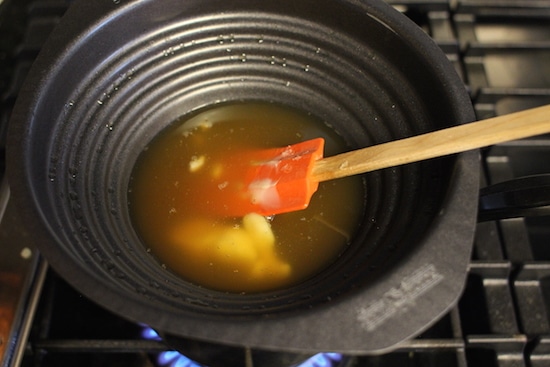
Adding fragrance oil to the paraffin wax.
After all the wax is completely melted, add your desired fragrance oils. Each wax is different and requires different amounts per pound of wax, so follow the instructions that come with it if you’ve purchased candle wax specifically. If you bought a block of wax which isn’t necessarily just for candles, a safe bet would be 1 oz per pound of wax. Pour the fragrance into your double boiler, and stir for 30 seconds or so to ensure it’s evenly distributed.
5. Cool, and Pour Into Container

After you’ve added the fragrance oil, let it cool for a couple minutes. The optimal temp to pour your wax into the container is around 130-140 degrees; it sets better that way than if poured hotter. This doesn’t take very long — just a few minutes — so pay attention to your thermometer.
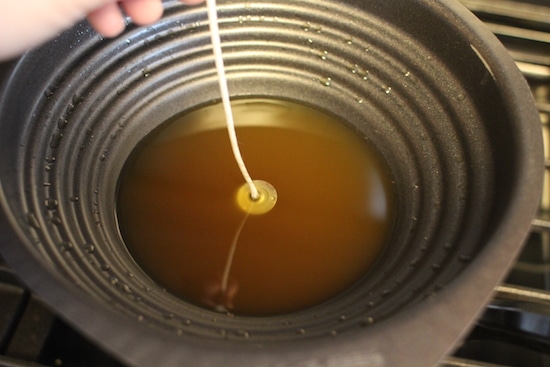
Once the wax is properly cooled, go ahead and pour it into the container. Keep a light hold on the wick so that it stays in the center; don’t tug too hard though or the adhesion to the bottom could be released. Since you’re pouring in hot wax which could melt the wax you used to stick the wick, that could happen anyways. If I gave the wax enough time to harden — 5 minutes or so — it didn’t seem to be a problem for me.
Don’t pour all the wax just yet, though. Save some in your boiler for after the initial pour sets. You’ll notice that it generally gets a nice sinkhole in the center. We’ll come back to that in just a couple steps.
7. Secure Wick
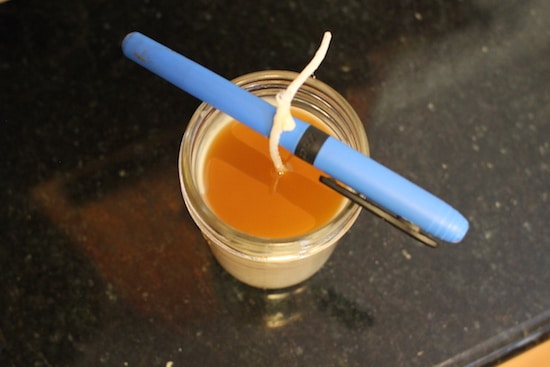
The wick, while attached to the bottom, may at first do some swaying in the liquid wax. You obviously want to ensure it stays nice and centered while the wax sets and hardens. Having an off-center wick means it won’t burn properly, and you don’t want that. Simply place a writing utensil or two (ones you don’t care a whole lot about) on top of the container with the wick in between. The wick doesn’t need to be super secured — it just needs to stay in place for a couple hours.
8. Let Cool, Then Top Off
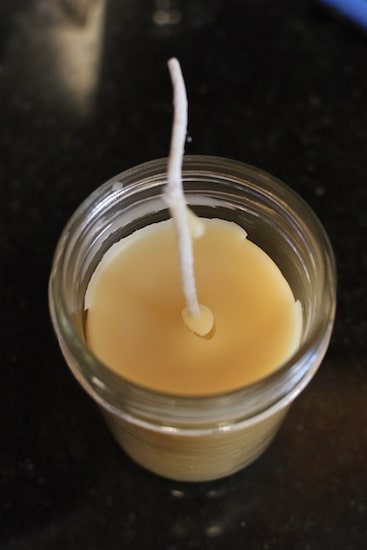
You’ll notice a small sinkhole in the center; the wax is also pulling away from the edges of the jar a little bit. Topping it off cures these problems.
As mentioned above, while the wax sets, it’ll likely form a sinkhole in the middle. You’ll have to let it cool for at least a few hours; it takes that long for the wax to fully set and for you to see how much it needs to be filled in. Re-heat the wax that you left in the boiler and top off the candle. Don’t add too much, or you may end up with another hole; just fill in the depression, adding a touch above what was already there for a smooth surface.
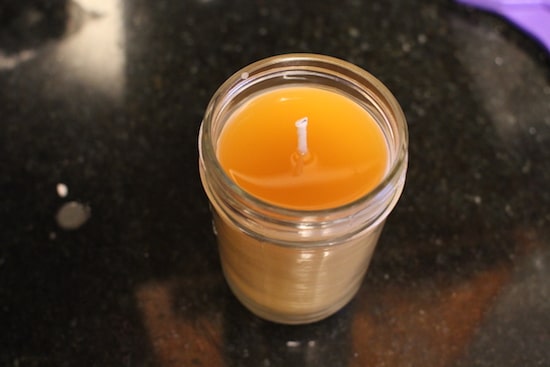
9. Trim Wick
You’ll probably have a few inches of wick sticking up from your candle. You’ll want to trim that down to just about 1/4″. A wick that’s too long will burn too big and hot. The way to know is by looking at the flame once it’s lit: if the flame is more than inch or so high, and flickers a lot, it’s too long. Trim it and light again.
10. Clean Up
You’re probably wondering how to clean up all that wax. Even doing the best you can, you won’t be able to get every drop into the container. There will be some in the boiler, on your tools, probably on your countertops, etc. The best way to clean it is to wipe the wax away with a paper towel while it’s still in liquid form. You don’t want to rinse it down the drain or put the tools in the dishwasher; while the wax will easily melt off, it can harden again and clog up your pipes. That’s why a paper towel or other disposable rag is the way to go. If the wax does harden before you’re able to clean it up, it thankfully scrapes off of just about anything pretty easily, so don’t fret too much.
11. Enjoy Your Candle!
You should end up with a burn time of 6-9 hours. If your wick ever does a cauliflower thing where it gets all lumpy on the end, go ahead and trim it.
FAQs
Is it cheaper to make your own candles?
Yes! Container candles can be expensive — anywhere from $10-$50. Though you’ll pay about that amount upfront for supplies, you’ll be able to use those supplies for a number of candles. Per homemade candle, your cost should be somewhere around $3-$5.
How many candles can you make with one pound of wax?
You can safely assume about 20 ounces of liquid candle wax per pound by weight. I prefer 8oz jars for candles, so that would be about 2.5 candles per pound.
Can you make a candle without wax?
Perhaps surprisingly, you sure can! It does always take some sort of oil or grease, though. Shortening, bacon grease, olive oil, etc. While not the purview of this piece, we do have an article on making a bacon fat candle.
What’s the cheapest candle wax?
Beeswax is more expensive, but all natural. Soy and paraffin wax aren’t too different in terms of price, and can often be had for anywhere from $2 to $10 per pound depending on where you source it from.
Why are some candles (like Yankee candles) so expensive?
You may be wondering why you can make a candle at home for a few bucks, but have to spend $30+ to get a nice one in the store. It mostly has to do with exotic scents and proven burn times. The scents, per ounce, are definitely the most expensive ingredient of candle making. To source those harder-to-find smells takes time and money. Yankees, and other luxury brands, also use special production methods that guarantee long burn times; when you calculate hours of use (which you can think of as price-per-use), the effective cost is actually much lower. Yes, they’re expensive, but they also tend to have unique, stronger scents and they last longer.
How do you make scented candles?
Just add fragrance oils! Easy!
Is candle making profitable?
It can be! A homemade candle can cost $3 to $5 so if you sell your candles for $10, you can make 50% profit!
Related Articles
How to Wax Your Own Clothing and Gear
Wax Seals: A History and How-To
How to Make a Lantern From an Aluminum Can