“What ordinary people once made, they buy; and what they once fixed for themselves, they replace entirely or hire an expert to repair, whose expert fix often involves installing a pre-made replacement part…so perhaps the time is ripe for reconsideration of an ideal that has fallen out of favor: manual competence.”
-Mathew B. Crawford, author of Shop Class as Soul Craft: An Inquiry into the Value of Work
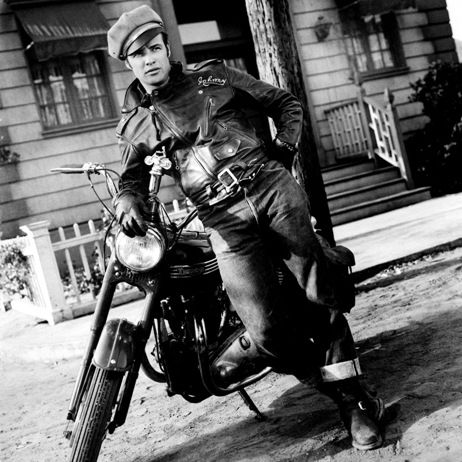
If there is another scent more inherently satisfying than that of well-worn leather, it is unknown to me. And what better a material to craft with? For what else can you throw against a concrete wall, spill beer on, and drag through the dirt for years on end and the only ill effects will be that it looks even more impressive, more rugged. Some have even gone so far as to suggest that leather’s durable nature and aesthetic qualities are the embodiment of masculinity itself. Perhaps they are right.
Leather is magic: capable of being molded, embossed, cut, stitched, and dyed. It is a material that will facilitate the creation of a fine product, a product that endures. And that is the goal with this post–crafting a superior leather wallet that will fit your needs so that hopefully, you won’t ever have to buy one again.
While making a leather wallet may not require manual competence as Mathew B. Crawford hopes of us all, it does provide–in the traditional DIY spirit–the opportunity to create rather than consume. It is the opportunity to construct with your own hands, rather than settling for whatever is cheap at the store.
Why Make a Wallet?
As the sole item responsible for transporting and safeguarding your most important of documents–your cash, credit cards and identification–making your own wallet becomes a wholly practical, and entirely necessary project, one that requires only a few basic tools and the application of patience. It’s a project that’s simple, yet satisfying. The wallet you make will last far longer than many store-bought ones, and every time you take it out of your pocket, you’ll enjoy the satisfaction of knowing you crafted it yourself.
Choose Your Material
This project allows for complete personal choice in terms of design and materials. Leather, of course, comes in many varieties. There is cowhide, deer hide, bison, moose, embossed cowhide, leather that is dyed or metallic; the list can go on nearly forever. Each type will have different qualities. Some leathers are dense and stiff, others soft and flexible, and they all come in various levels of thickness. My advice would be to visit a local leather shop, scope out your options while thinking about the way you like your wallets, and then choose accordingly.
For the wallet we’re making today, we’ll use the following:
- Moose skin for the main body of the wallet: Moose skin is an excellent leather to use for wallets. It is relatively soft yet dense, has a great texture, and is particularly flexible, which is a nice quality for a wallet to have, allowing it to accommodate the cards, cash and receipts that eventually make residence within it.
- Embossed cowhide for the card and change pockets: Using thin embossed cowhide for the card slots will keep the wallet relatively thin when closed. It also looks like snake or alligator skin, which is awesome.
- Waxed string to stitch the pockets onto the body of the wallet.
- Sinew to act as the main stitching for the wallet’s perimeter.
- Button snaps to be able to close the wallet securely (this is completely optional and more aesthetic than anything).
Required Tools/Materials
 In order from left to right as seen in the photo, the tools you need are:
- Metal ruler
- Knife/Razor blade
- Glovers needle
- Dot setter and Bout press (for fixing snaps)
- Rotary punch
- Thick and dense piece of leather (to use in conjunction with the rotary punch)
- Waxed string and sinew
- Mallet
- Cutting board
- Leather
The Process
Begin by sketching a design and size for your wallet. Remember to account for simple things like the size of bills and credit cards. This seems basic, but it is disastrous when overlooked. Also note that if your wallet is too large, you’ll have a hard time fitting it into your back pocket. Decide whether or not you want a change pocket or prefer card pockets on both sides within the wallet.
Note: The dimensions and aesthetic choices herein are suggestions and personal opinion only; however, they can provide you with a functional outline for your own project.
Step One

Mark out your preferred dimensions for your wallet on a cut of leather. Make your cuts with a sharp knife and glide along the ruler’s edge to keep the cut straight. If you will be adding an overlapping tab with a snap button, add no less than two inches to the end of the wallet length to account for it. This wallet is cut to 10¾-inches long, including the extended snap tab, and 7½-inches wide before being folded over.

In the photo above, you can see that I make one large cut twice the width of what the wallet will be in order to fold it over itself for the main (cash) pocket. You can do this or cut it into two pieces to be stitched together later. Either way works fine.
Step Two

Shape your snap tabs at one end of the wallet. When the wallet is folded, they will become one.
Step Three

Cut out the embossed cowhide to make your card and change pockets.

In this case we made three card pockets, each measuring 3¾-inches by 2-inches and one change pocket at 3¼-inches by 3¼-inches.

Lay the card pockets on top of each other evenly spaced out and use tape to secure them, and then tape them to the body of the wallet that will be on the inside.
Step Four

Use the rotary punch (with the thick piece of leather placed underneath the leather that is receiving the holes), to punch holes in the card pockets and in the body of the wallet. Using the thick hide below your wallet will both extend the life of your tool and also make it easier to punch holes.
Step Five

Stitch one side of the card pocket to the body of the wallet using the waxed string. Begin your stitching on the inside of the wallet to hide the knot.
Step Six

Remove the tape and finish stitching the card pockets. Double-back on your stitching for added strength and to be able to tie the end string with the original starting knot. Use a lighter to slightly burn the knot so that the wax melts together.
Step Seven

Repeat steps four through six for a change pocket on the opposing side, or for more card slots.

Step Eight

Determine the location for your snaps. Fold and close the wallet and then flip the snap tab over the closed wallet. Mark the snap placement with the Glovers needle.

Use the rotary tool to punch a hole for both sides of the snap button (the male portion of the snap will be inserted into the snap tab, while the female portion is placed in the rear body of the wallet where the tab makes contact when closed).
Note: Snaps are made up of four pieces: two for the male end and two for the female. To connect them to the leather, you essentially make a leather sandwich with two correlating portions on either side of the leather, and then you pound them together with the dot setter, bout press and a mallet. You can tell which side is which because the male portions have a cupped head, while the female portions are flat.
Step Nine

Insert the outer male end of the snap into the snap tab from the outside. Place the correlating end on the opposite side of the tab. Use the concave side of your bout press (to accommodate the round head of the snap) and, place the dot setter to where the two correlating pieces connect, and then mallet hammer the two pieces together. Repeat this step for the female portion of the snap on the rear body of the wallet.
Step Ten

Fold your leather so that it forms what will eventually be a completed wallet. Use your rotary tool to punch holes in the body of the wallet (both side together!) alongside your card pockets and near the edge.
Step Eleven

Using your Glovers needle and sinew, and making sure that you have enough sinew to stitch the entire perimeter of your wallet twice, which is about three times more than you would think, stitch the side of the wallet that you just punched holes for. Once that portion is stitched up, punch holes around the remaining perimeter of your wallet.
Remember
As you work your way around the wallet with your stitching, make sure you do not stitch the opening of your wallet closed. Stitch along one side and then the other as shown in the following picture:

Step Twelve

Double back on your stitching so that you end up with a cross-stitch pattern. When you have completed the stitching, tie the end to the initial knot and cut the tags.
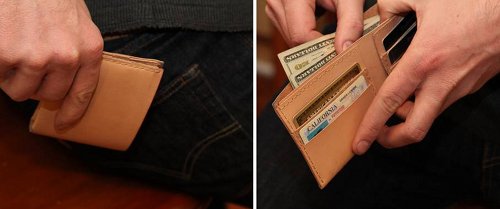
To finish, simply trim any rough edges, throw your cards and two-dollar bills in and kabam! You’ve got yourself a leather wallet.

Now take a nice long whiff of that new, fresh leather smell, and don’t forget to break it in by throwing it in some mud. Leather likes that sort of treatment.
Do you have experience working with leather? Any tips of the trade or other tools that would help a project like this?