The following is an adapted excerpt from The Disaster-Ready Home: A Step-by-Step Emergency Preparedness Manual for Sheltering in Place by Creek Stewart.
Let’s face it, disasters happen. If you’re not actively thinking about (and working toward) long-term food and water preparedness, you should be. There are countless disasters, both natural and man-made, that can interrupt your food and water supply, at least for a short period of time. Having a buffer and plan for both, just in case, is a very smart idea.
In the water category, every home needs a renewable source of this resource, and I would recommend this source come via rain harvesting.
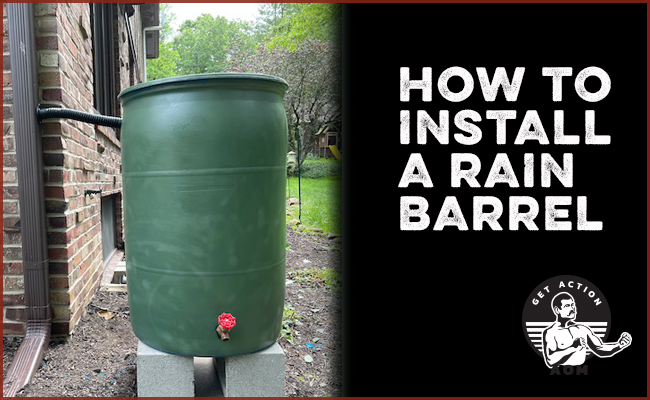
When most people think about rain harvesting, they think of expensive, hard-to-install, and unsightly pipes and tanks. This could not be further from the truth. If you have a roof of any kind with a gutter, I will teach you how to install an unobtrusive 55-gallon rain barrel in under an hour, and for less than $200 total. For every inch of rain that falls on a 1,000-square-foot roof, you can expect to be able to collect 600 gallons of rainwater! Now that is a serious return on investment.
Before you get started with rain harvesting, it is important to understand a few things:
- Rain harvesting makes sense for almost everyone. Unless you live in an extremely arid climate that receives almost zero rainfall, installing a rain barrel is worth doing. For the small amount of time and money you will spend getting one installed, the reward is an almost effortless renewable source of emergency drinking water. This water can also be used for pets, gardening, washing, or bathing.
- Rainwater is safe to drink without filtering or purification. However, as it falls on your roof and makes its way into the rain barrel, it picks up debris. Because of this, rain barrel water should be considered wild water that needs to be properly filtered or purified to make it safe to drink. Every home should have a water filter to handle this. The one I recommend is the Big Berkey.
- Believe it or not, there are laws in some states that prohibit or restrict homeowners from harvesting rainwater from their own roofs. Some homeowners’ associations may also have rules in place that prohibit rain barrels. You will want to check to make sure before you install a rain barrel. Otherwise, a citation of some kind might make its way into your mailbox. (Or you can just move to a place with fewer restrictions on your personal freedoms.)
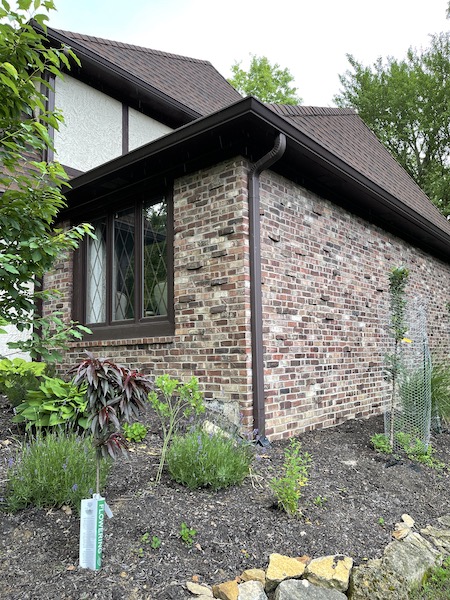
If you have a gutter downspout, then you can install a rain harvester.
I have used numerous types of rain barrels over the years and have been most happy with a 55-gallon plastic drum conversion. They are not necessarily the most aesthetically pleasing of rain barrels, but I have found them to be durable, cost effective, and functional. New “food grade” 55-gallon plastic drums can be found on Amazon, some hardware stores, or ULINE.com.
These standard 55-gallon blue drums can be painted to match your home if desired. The key to doing so is prepping the surface of the drum by roughing it up with some sandpaper. The factory finish of these drums has an almost waxy residue that the sandpaper treatment removes. I suggest a spray paint that is made for outdoor use and that bonds to plastic. Plan on using at least two full cans to coat one 55-gallon drum.

Roughing up the surface of a 55-gallon drum with sandpaper to ready for spray painting.
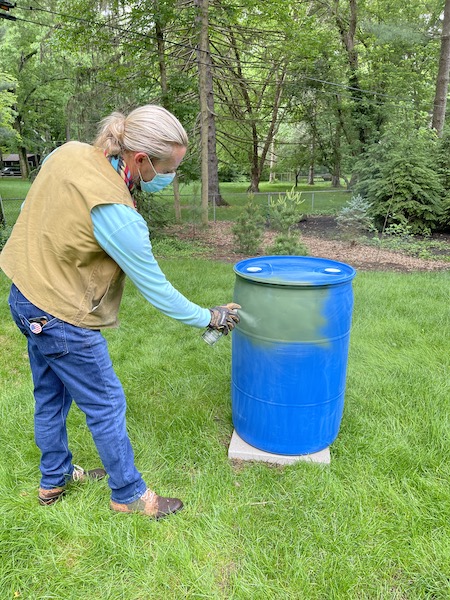
One 55-gallon drum takes about 2 cans of spray paint.
Before starting, you will need to pick up some parts to convert your plastic drum into a rain barrel. The kit I recommend includes everything you need, including the drill bits and hole saws. It’s called the EarthMinded DIY Rain Barrel Diverter and Parts Kit. It’s made to work with the most common rectangular downspouts, which are 2 × 3 inches or 3 × 4 inches, but you can buy extra pieces to make it work with round downspouts. The good news is that you can use this kit with virtually any size drum or container. You do not have to use a full-sized 55-gallon drum; 15- or 30-gallon drums work equally as well.
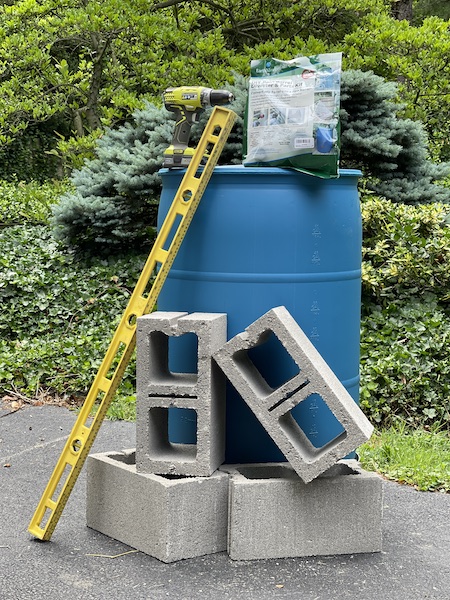
Supplies needed to install a 55-gallon drum rain harvester.
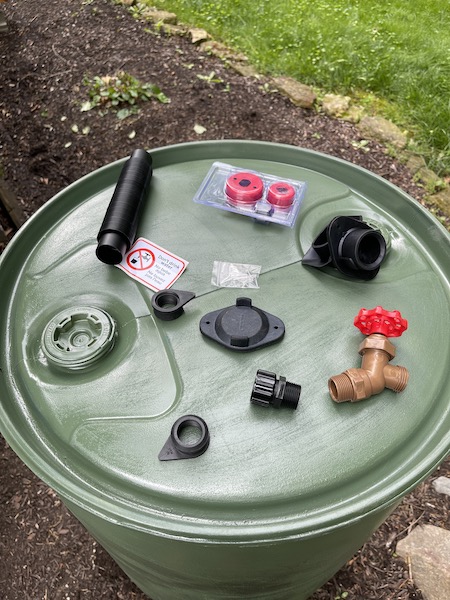
EarthMinded DIY Rain Barrel Diverter and Parts Kit
Installing a Drum Rain Barrel and Gutter Diverter Kit
The instructions included with the kit are very thorough, but here are the basic steps for setting up your own 55-gallon drum rain barrel at home.
Step #1: Planning for the Platform
The inside edge of your rain barrel must be within 6–28 inches from the outside edge of the downspout. This is the minimum and maximum distance the fill hose connecting the barrel to the downspout will shrink and expand. Before prepping your platform, place your drum near the downspout and figure out a nice place for it that meets those dimensions. You may find that uneven ground, plants, rocks, or other obstructions make some downspouts unusable for rain barrels. It is better to discover this before prepping your barrel platform. A solid platform serves two purposes:
- A full 55-gallon drum weighs almost 500 pounds. A well-prepared platform ensures your drum will not tip or fall over.
- A platform should lift your rain barrel off the ground. Most spigots are positioned toward the bottom of the rain barrel, which can be very inconvenient. A low spigot makes filling containers, such as buckets, difficult. Raising your rain barrel at least 8 inches also helps increase water pressure for watering raised beds, planters, or gardens nearby. The higher your rain barrel, the more water pressure you will have.
Step #2: Building the Platform
I build my rain barrel platform in three stages:
- I prep the ground under where the rain barrel will be with a thick layer of mulch. Mulch helps absorb any excess water that might come from the barrel or spigot during use.
- I put a layer of solid concrete pavers on the mulch to create a nice level platform. This platform needs to be a minimum of 24 inches square and as level as you can get it.
- I use two concrete 8 × 16-inch cinder blocks to create a platform that is at least 8 inches off the ground. I find this height provides decent water pressure and allows me to fill most small containers.
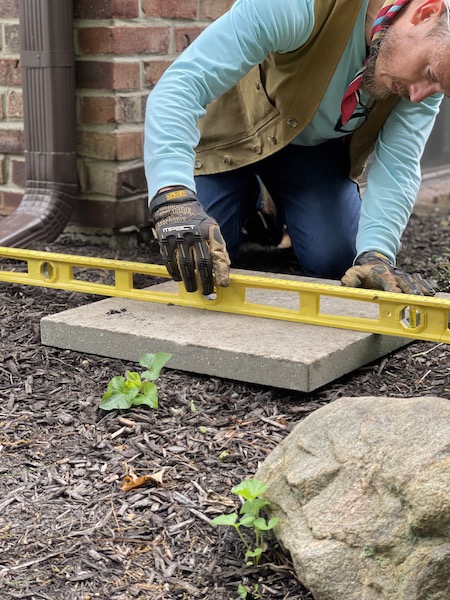
Leveling concrete pavers as the base for the rain barrel platform.
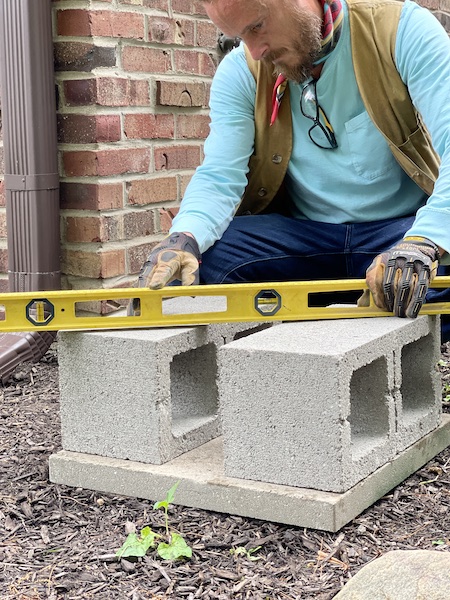
Using 2 cinder blocks to elevate the drum for increased water pressure and spigot access.
Step #3: Installing the Spigot
The front spigot is what you will use to drain the water from your drum. The kit includes everything you will need to install it: a 11⁄4-inch hole saw, a rubber gasket, and the spigot itself. Installing the spigot 3–5 inches from the bottom is the perfect height. This is just above the curve of the drum’s bottom edge along the flat face. You don’t want to install the spigot too high because you won’t be able to access the water below it without tipping the drum, which is a real hassle. The few inches below the spigot allows space in the drum for sediment and ensures you’ll be draining relatively clean water without clogging your spigot. Installation is as simple as drilling a hole, inserting the rubber gasket, and screwing in the spigot.
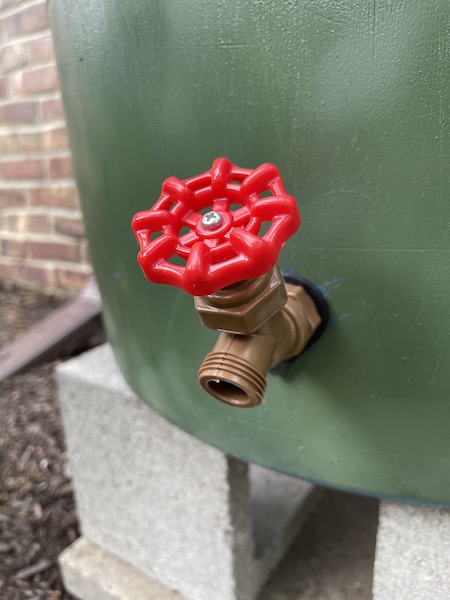
Spigot installed.
Step #4: Installing the Fill Hose Gasket
The fill hose gasket is where the fill hose connects to the top of the drum. With your spigot facing the direction you need it, you want the center of your fill hose gasket to be 3–5 inches down from the top of the barrel and located in a place that allows the fill hose to have a nice straight, horizontal path from the downspout. To install it, simply drill a hole using the included 11⁄2-inch hole saw and insert the rubber seal.
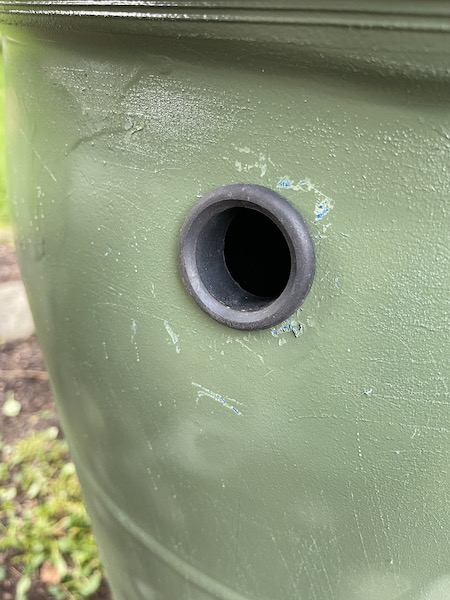
Fill hose gasket installed.
Step #5: Installing the FlexiFit Diverter
The FlexiFit diverter is a specially shaped rubber piece that inserts into the gutter downspout to divert water into the fill hose. But when the rain barrel is full, the FlexiFit diverter allows water to pass through and out the downspout like normal. It is a pretty nifty little invention, but placement on the downspout is key. For closed 55-gallon drums like the one shown here, you want to drill a hole in the downspout at the same level as the top rim of your drum, or slightly higher. I typically lay a level across the top of my barrel and make a mark on the underside on the downspout.
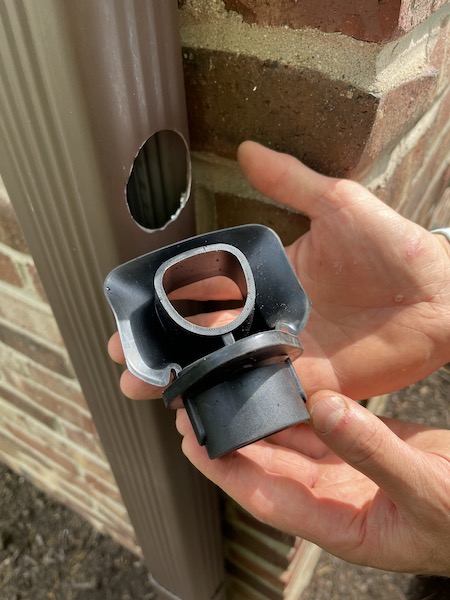
FlexiFit Diverter
Next, measure and mark the center of the downspout at this spot to drill your 2 1⁄8-inch hole using the included hole saw. For 2 × 3-inch gutters, you will drill this hole on the wider 3-inch side. But for 3 × 4-inch gutters, you will drill this hole on the narrower 3-inch side. Once the hole is drilled, the FlexiFit diverter is simply inserted and secured to the downspout using two self-tapping screws.
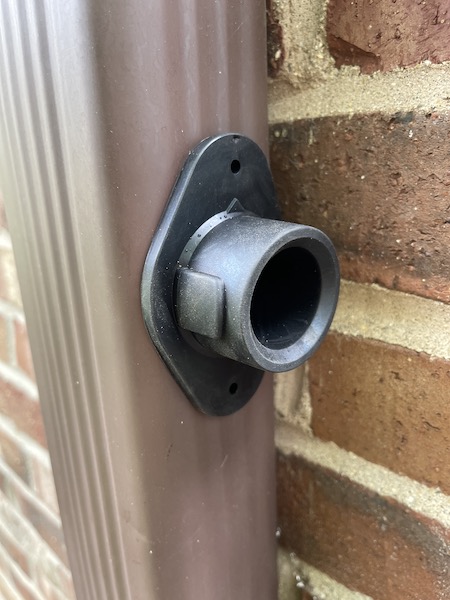
FlexiFit Diverter installed and secured with self-tapping screws.
Step #6: Connecting the Drum
The last step is to insert the fill hose at each end — one into the FlexiFit diverter on the downspout and the other into the fill hose gasket on the upper rim of the drum.
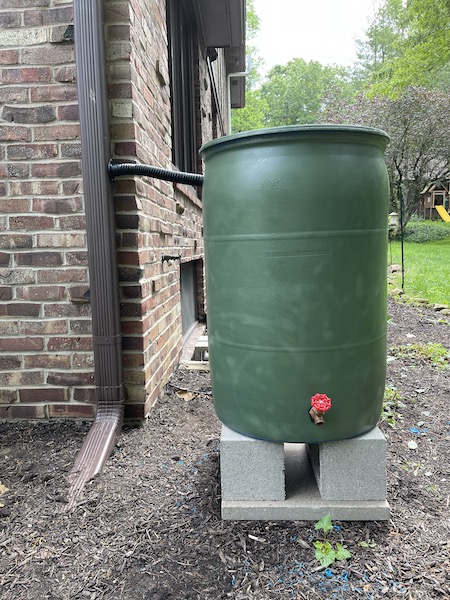
Drum is now connected to the FlexiFit Diverter and ready to harvest rainfall.
Now you will be ready for rain to passively provide a renewable source of survival water for bathing, washing, gardening, or drinking. Note that multiple 55-gallon drums can be daisy-chained together using more fill hose seals and fill hoses. Multiple passive rain harvesting drums could be a very interesting source of survival water if you have the space. These extra parts are available directly from EarthMinded.
Don’t forget that even though rainwater is perfectly safe to drink without filtering or purification, what is on your roof and in your gutters may not be. Any water you intend to drink from your rain barrel will need to be filtered and/or purified. Water for pets, bathing, and gardening is good to go as is.
Especially for those in areas with regular rainfall, a quick and easy rain harvester install like this one can give you and your family peace of mind that you’ll have a renewable and safe source of survival water if the grid goes down.
Remember, it’s not IF but WHEN.
_____________________________
Creek Stewart is the author of The Disaster-Ready Home which shares practical, affordable, and achievable disaster preparedness projects for the average household. Learn more about Creek at https://www.creekstewart.com.