Editor’s note: This is a guest article from Alexander Franz.
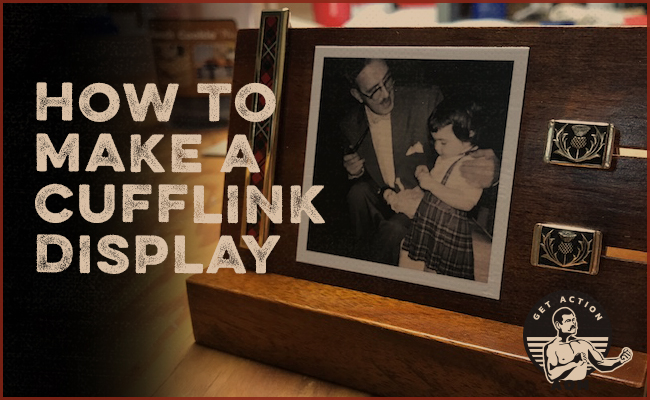
Several years ago, after my great-grandmother passed away, my mom was going through items left in the house and found a box filled with my great-grandfather’s belongings. He had emigrated from Scotland as a teenager, and proudly wore his heritage on special occasions with a pair of Scottish thistle cufflinks and a plaid tie clip. My mom wanted me to have them, but as honored as I was to receive such unique and personal artifacts, my opportunities for wearing a French cuff shirt as a twenty-something were slim to none. The cufflinks and clip ended up in another box alongside a few other pairs of cufflinks I had accumulated.
Then, earlier this year, I was working on the Ancestry Badge as part of The Strenuous Life, for which one of the requirements is to “obtain a family heirloom, learn the story behind it, and display it in a place where you can see it regularly.” With a sudden stroke of inspiration, I knew what to do!
Whether you have a pair of cufflinks inherited from a relative, a set you wore at your wedding, or a pair you just want to admire more often, this project will give you a display that’s easy to construct, looks regal, and gives those cufflinks a place of prominence. Now you’ll be able to appreciate their style and meaning even when they’re not on your cuffs.
Supplies and Tools Needed
Supplies
- 3/4” x 3” mahogany (about a foot long, just to be safe)
- 1/8” x 3” mahogany (about a foot long)
- 2.5” x 2.5” photo
- Set of cufflinks (and another heirloom, like a tie clip, if desired)
- Wood grain filler
- Shellac and varnish
- Matte finish Mod Podge
- Wood glue
Tools
- Table saw, radial arm saw, or miter saw (preferably with 1/8” kerf blade — the thickness of the slot it will cut)
- Small handsaw
- Vise
- Filing board
- Sandpaper
- Foam brushes
- Rags
Step 1: Choose the Wood
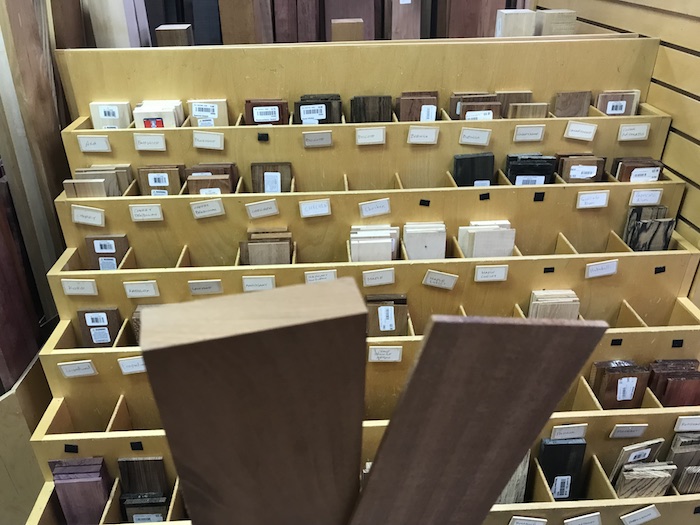
With a 2.5” square photo, I knew that 3” wide mahogany would give me the space I needed to fit everything. I went to a local woodworking store that sells 3” boards in a variety of thicknesses and types of wood. I chose mahogany because it has a reddish-brown finish that contrasts well with the yellow gold of the links/tie clip, and because I want my apartment to have many leather-bound books and smell of rich mahogany.
The 3/4″ thick board will be used for the base, and the 1/8” thick board will slot into the base and hold the cufflinks, tie clip, and photo.
Step 2: Lay Out Your Design
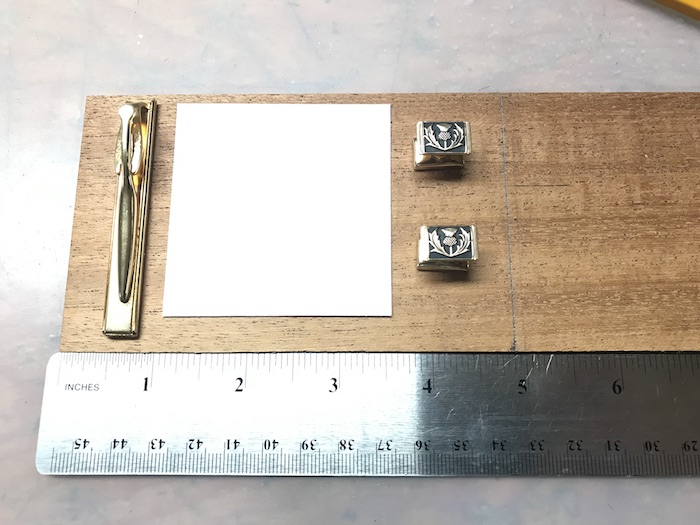
I wanted the display to have a photo of my great-grandfather with my mom in the center, with the cufflinks on one side and the tie clip on the other. Depending on what you have, you can customize the design here to hold a pair of cufflinks on both sides, one link on each side, etc. Use this step to determine the board length you’ll need to fit everything in. When I laid all the pieces out, I decided to go with 5”.
Step 3: Cut the Base and Display to Length
Use a table saw, radial arm saw, or miter saw to cut the base and display boards to length.
Step 4: Cut Bevel Into Base
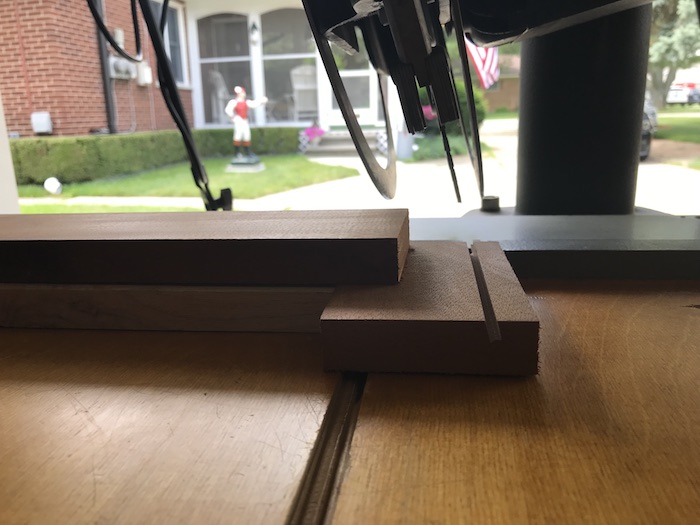
Adjust the angle on your saw (you could also use a router here) to cut into the base at an angle of 15 degrees. Align the blade so that it will cut into the board lengthwise about 1/2” from the edge. The blade should be angled away from that edge.
Use a scrap piece to practice making a smooth cut, and to get the blade depth correct: you want the bevel to be about 1/4” deep. When you’ve got everything set, cut the bevel.
Step 5: Cut the Cufflink Grooves
On the display board, I marked out two lines for my cufflink grooves. To center them vertically, I took the 3” width, subtracted the 1/4” of board that will sit in the base bevel, and divided by three. To determine how far into the side I needed to cut the lines, I looked at where I wanted the cufflinks to sit, and measured from the edge of the board to the center of each cufflink, about 3/4”.
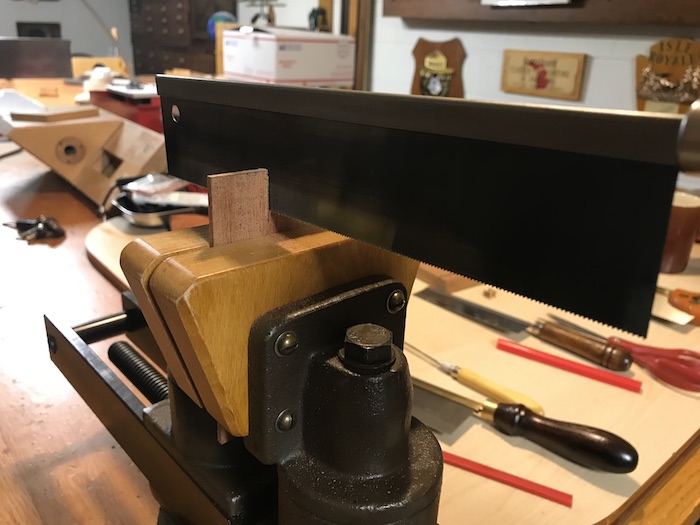
With my cut lines marked, I put the board upright into a vise and used a thin hand saw (no more than 1/16” thick) to cut straight down. Sawing this way helped me keep the blade straight and make more uniform cuts.

I then went back with a filing board to widen out the grooves, using the cufflinks for test fits along the way. The grooves should be wide enough to allow the cufflinks to slide in and out, but not so wide that they tilt up and down when in place. Every pair of cufflinks is different, so test and adapt as you go.
Step 6: Sand and Finish the Wood
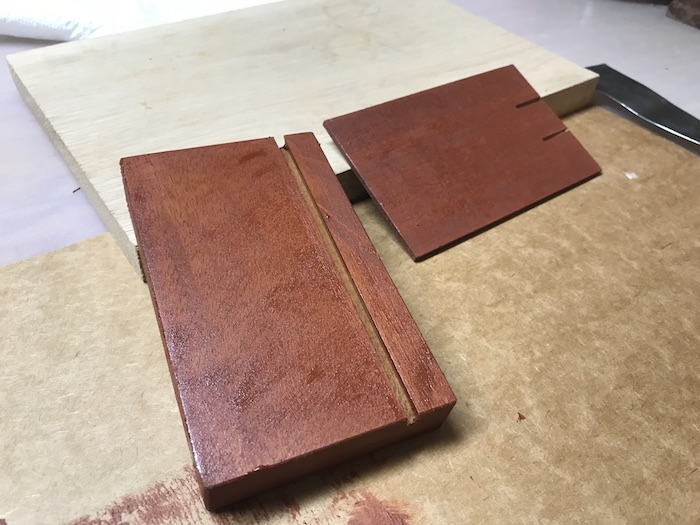
Sand all sides of the base and display with rough and then fine sandpaper, making sure to smooth the corners and edges. Wipe them clean (tacky rags are great for catching sawdust and other small pieces of debris), and then use a rag to apply grain filler. This will fill in the pores of the wood grain, giving the photo a better surface to stick to in the next step, and also add color. Work the filler in, and then wipe off the excess. Follow the instructions on the can for set times.
To finish my rich mahogany, I then applied two coats of orange shellac, and once they were dry, a clear coat of varnish.
Step 7: Apply the Photo
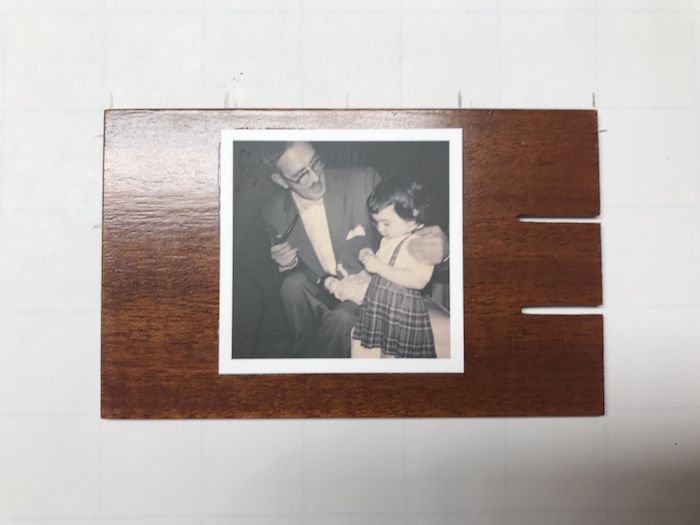
I used an online photo printing service to get a photo of my great-grandfather modified into the 2.5” square that I wanted for this project. It’s just the right size, and balances well with the size of the cufflinks and tie clip. Building a frame would make this display bulky, so the best option is to affix the photo with a clear sealer and glue called Mod Podge.
Use a foam brush to apply a thin coat to the back of the photo, then gently set it in place on your display board (you’ll have some time to reposition). Once in place, smooth the photo out and make sure there are no air bubbles. Use a rag dipped in a little bit of water to wipe excess glue from the edges: this stuff will dry clear but leave a texture on the wood. After thirty minutes, apply another coat over the top of the photo, and wipe away any excess on the board. This will seal the photo and keep it in good condition. In another thirty minutes, the photo should be dry.
Step 8: Final Assembly
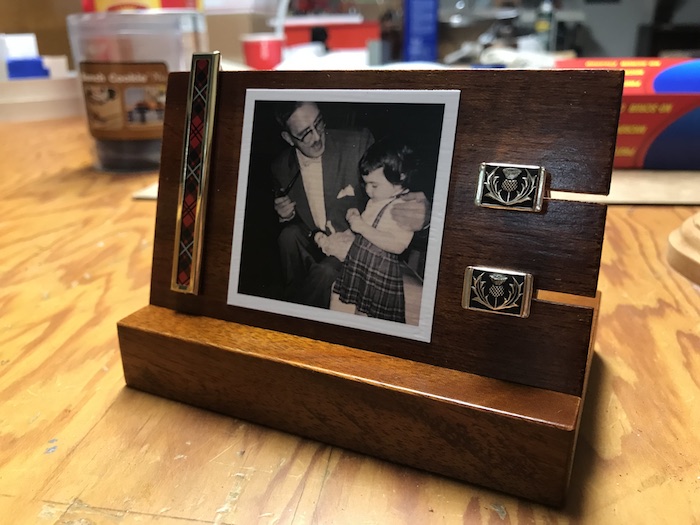
Apply a very small amount of wood glue to the base’s bevel, and set the display board. Slide the cufflinks into place, add the tie clip, and you’re finished. Now you can enjoy your cufflinks, and the people connected with them, in a place of honor — French cuffs not required.
____________________________
Alexander Franz grew up holding wrenches and watching his dad fight every major appliance in the house. Working on projects together taught him practical skills as well as creativity, patience, and commitment. He looks for projects that are functional, fit the AoM aesthetic, and encourage readers to build things themselves.