I believe that the best foods are those born out of necessity.
Looking at that old rooster in the yard, one might conclude that the tough old bird will taste of chewy, tough game. But somewhere along the line, a very hungry person in France decided to braise that old bird in red wine (along with bacon and other goodness), creating the beloved dish now known as coq au vin.
The truth of the matter is most of our favorite comfort foods are not haute cuisine. We learn to make do with what we have, and more likely, what we don’t have.
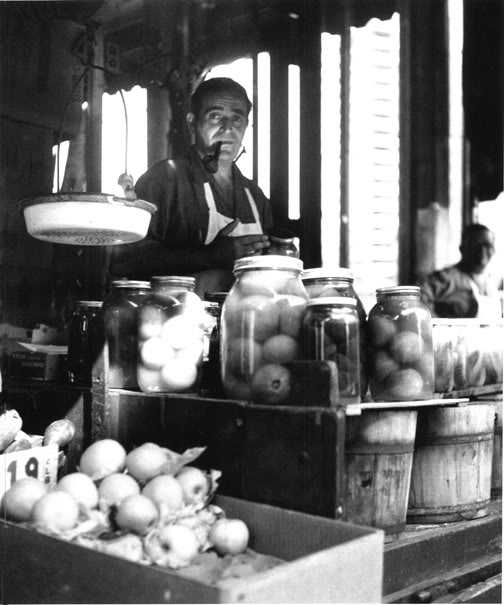
As a southerner, I take comfort in a form of necessity food that comes through pickling and preserving. When I was growing up, my great-grandmother, who lived well past 100, recounted stories of the old days, when folks would “save the season” by pickling and preserving the summer and fall harvest to ensure the food supply would last throughout the year ahead.
Of course pickling is not just a feature of Southern cookery — it’s a global preservation method dating back thousands of years.
On the most basic level, pickling is defined as soaking foods in solutions to prevent spoilage. While many of us tend to associate vinegar as the primary form of pickling, there’s also a common method of using brines that encourage fermentation, or good bacteria growth, to prevent and stave off bad forms of bacteria from affecting the food. If you’ve ever had Korean kimchi, you’ve enjoyed this preservation method.
For Americans, the pickled cucumber, or just pickle, is the most common item we associate with vinegar-based preservation. And rightfully so. There’s rarely ever a road trip that goes by where I don’t search the convenience station for a Van Holten Pickle-In-A-Pouch, perfectly preserved in a plastic bag full of salty, tangy vinegar brine. Darn, that got my mouth watering!
Though the cucumber might be king in America, pickling is used throughout the world in nearly every culture — allowing raw foods like cabbage, pig’s feet, eggs, fish, and corned beef to be transformed into delicacies.
For the home cook, pickling and preserving can be somewhat of a daunting process. But you can actually have a whole lot of fun and pickling success with a quick trip to your local farmers market and less than an hour in the kitchen.
For the purposes of this piece, we’re focusing our efforts on vinegar-based pickling. You can move on to fermentation-based pickling after you learn the fundamentals.
I’ve outlined a few starter recipes below, some of which you can enjoy in just a day’s time.
Icebox Dill Pickles
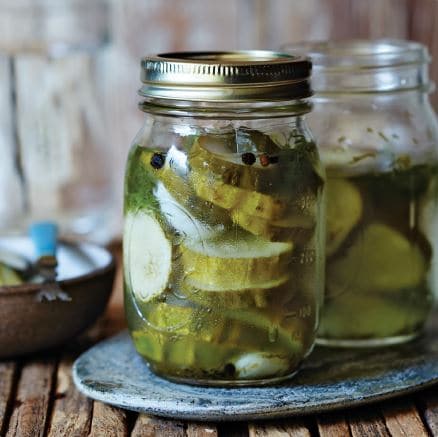
Whenever you open up my refrigerator at home, you will find some sort of pickled concoction. Pickling vegetables is somewhat like a science experiment — once you perfect the brine, it’s just a matter of adding jolts of flavor with fresh herbs, aromatics, and spice. These pickles are prepared quickly and can be stored safely in the fridge for up to a month or so. It’s best to use cucumbers just pulled from the vine (ask the farmer who harvested them) to keep the pickles nice and crisp. Let’s get real, nobody wants a soggy pickle! These make a healthy snack, a nice addition to a crudité or antipasto platter, or a delicious topping for a burger.
Prep Time: 15 mins, plus 3 days for chilling.
Ingredients
- 1 cup white vinegar (5% acidity)
- 1½ tsp. sugar
- 2¼ tsp. kosher salt
- 5 whole black peppercorns
- 6 garlic cloves
- 1¼ lb. Kirby cucumbers, cut into ½ -inch-thick slices
- ½ jalapeño pepper, cut in half and seeded
- 2 Tbsp. fresh dill weed, coarsely chopped
- 2 (1-pt.) glass canning jars
Directions
- Bring first 4 ingredients and ¾ cup water to a boil in a small saucepan over medium-high heat. Reduce heat to low, and simmer 5 minutes.
- Meanwhile, smash garlic cloves using flat side of a knife.
- Divide cucumber slices, jalapeño pepper, dill weed, and smashed garlic between the two glass canning jars. Tightly pack ingredients, layering to distribute garlic and dill weed throughout jars, and fill to ½ inch from top.
- Pour hot vinegar mixture over cucumber mixture, ensuring that all ingredients are covered with liquid. Cover at once with lids, and screw on bands.
- Chill 3 days before serving to allow flavors to meld.
Spicy Sweet Pickled Carrots
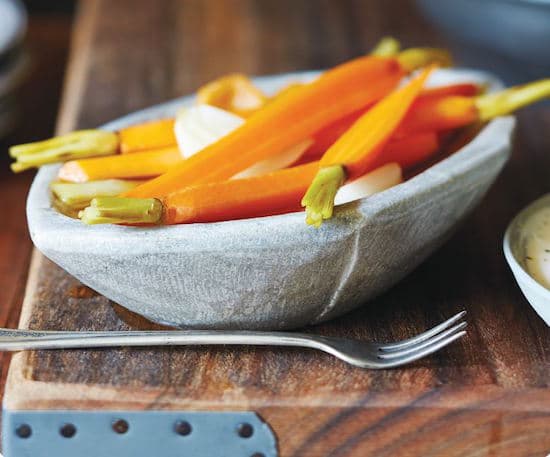
I usually surprise my guests with these sweet, yet very spicy carrots as a way to open up my friends’ palates. Habanero peppers add tons of heat, while also lending their unique flavor to bring out some of the natural sweetness and sugar in the carrots. These carrots tempt you with their crunchy sweet flavors, but there’s almost — and I said almost — enough heat to stop you from eating another. These are surprisingly good when served with hummus or buttermilk ranch dressing — I find that both dips balance out the spice while ramping up the flavor in a way that’s hard to describe. You can refrigerate pickled carrots in an airtight container up to a month.
Prep Time: 15 mins, plus 24 hours for chilling.
Ingredients
- 1¼ cups apple cider vinegar
- ¼ cup sugar
- 1 Tbsp. plus 1½ tsp. kosher salt
- 10 coriander seeds
- 1 lb. carrots, peeled and cut into 3½-inch pieces
- 2 garlic cloves, halved
- 1 habanero pepper, quartered
- 2 (1-pt.) glass canning jars
Directions
- Bring first 4 ingredients and 1¼ cups water to a boil in a small saucepan over medium-high heat. Reduce heat to low, and simmer 5 minutes.
- Pack carrots vertically in 2 layers in the canning jars, filling to ½ inch from top, and placing garlic and habanero between layers.
- Pour hot vinegar mixture into jars, covering all the ingredients. Cover at once with lids, and screw on bands.
- Chill at least 24 hours before serving.
Pickled Radishes
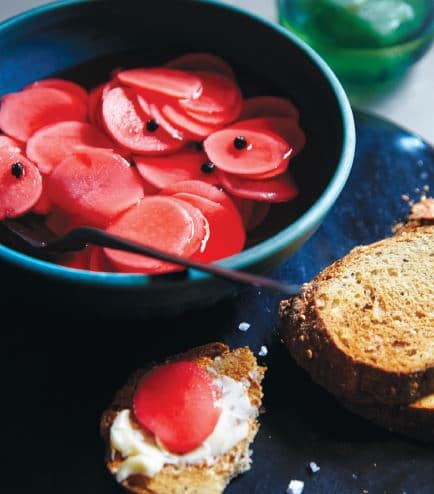
The French might be known for their love and use of radishes, but the vegetable grows quite well in our rich Southern soils. Crunchy, starchy, and bitter, while also slightly sweet, these vegetables are finding their way into salads and entrées throughout the land. I like radishes best when they are pickled. The pickling solution takes out much of the bitterness, while keeping everything crisp and slightly sour to nicely balance fatty proteins or provide a tasty addition to a plate of cheese and charcuterie. Much like the Spicy Sweet Pickled Carrots above, they are ready to eat within 24 hours, and they keep up to a month when stored in the fridge.
Prep Time: hands on — 12 mins, total — 57 mins, plus 24 hours for chilling.
Ingredients
- 1 cup white wine vinegar
- 3 tsp. kosher salt
- 1 Tbsp. sugar
- 2 garlic cloves
- 1 lb. radishes, very thinly sliced (about 3¼ cups)
- 10 whole black peppercorns
- 2 (1-pt.) glass canning jars
Directions
- Combine first 3 ingredients and 1 cup water in a small saucepan, and bring to a boil over medium-high heat. Reduce heat to low, and simmer 5 minutes.
- Meanwhile, smash garlic cloves using flat side of a knife.
- Tightly pack sliced radishes, peppercorns, and smashed garlic into the canning jars, filling to ½ inch from top.
- Pour hot vinegar mixture over radish mixture in jars, covering all the ingredients. Cover at once with lids, and screw on bands.
- Cool to room temperature (about 45 minutes).
- Chill 24 hours before serving.
Pickled Okra
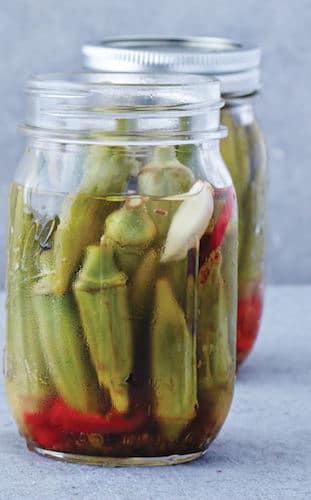
These make for quick, convenient snacks, as well as a great garnish for a Pickled Okra Bloody Mary. Crisp, tangy, and delicious — I love canning a bunch of these early in the season when okra is young and tender. Unlike making the Icebox Dill Pickles, I sterilize everything to ensure that these jars can be stored, without refrigeration, up to one year’s time. Be meticulous about keeping everything clean throughout the process.
Prep Time: hands-on — 38 mins, total — 50 mins, plus 24 hours for standing.
Ingredients
- 3 lb. fresh, young okra, washed
- 16 garlic cloves
- 5 cups white vinegar (5% acidity)
- ½ cup kosher salt
- 8 fresh Fresno hot chile peppers, thinly sliced into rings
- 8 tsp. dill seeds
- 8 (1-pt.) glass canning jars
- Jar lifter (or tongs)
Directions
- Trim stems from okra (do not cut off ends).
- Peel garlic cloves.
- Place canning jars in a large stockpot or canner, and add water to cover. Bring water to a rolling boil over medium-high heat; boil 2 minutes. Meanwhile, place lids (always use new lids) and bands in a large saucepan. Using a ladle, cover lids and bands with hot water from stockpot (to soften gaskets on lids). Remove stockpot from heat. Let jars, lids, and bands stand in hot water 10 minutes.
- Bring vinegar, 1¼ cups water, and salt to a boil in a large saucepan over medium-high heat. Reduce heat to medium-low, and simmer 5 minutes.
- Remove jars from stockpot, 1 at a time, using a jar lifter. Place jars 2 inches apart on a work surface.
- Place 2 peeled garlic cloves and 1 sliced pepper in each jar. Tightly pack okra in jars vertically in 2 layers (first layer packed with stems down, and second with stems up), filling to 1 inch from top. Add 1 tsp. dill seeds to each jar.
- Pour hot vinegar mixture over okra mixture in jars, filling to ½ inch from top. Wipe rims of filled jars. Cover at once with lids, and screw on bands. The heat from the vinegar mixture should seal jars; you will hear a popping noise when jars are sealed.
- Let jars stand at room temperature for 24 hours before confirming seals.
- Test seals of jars by pressing the centers of the lids; if lids do not pop, jars are properly sealed.
- Store in a cool, dark place at room temperature up to 1 year; refrigerate after opening. If lids are not properly sealed, refrigerate and use within 1 month.
________________________________
Matt Moore is a regular contributor to the Art of Manliness and the author of A Southern Gentleman’s Kitchen.